
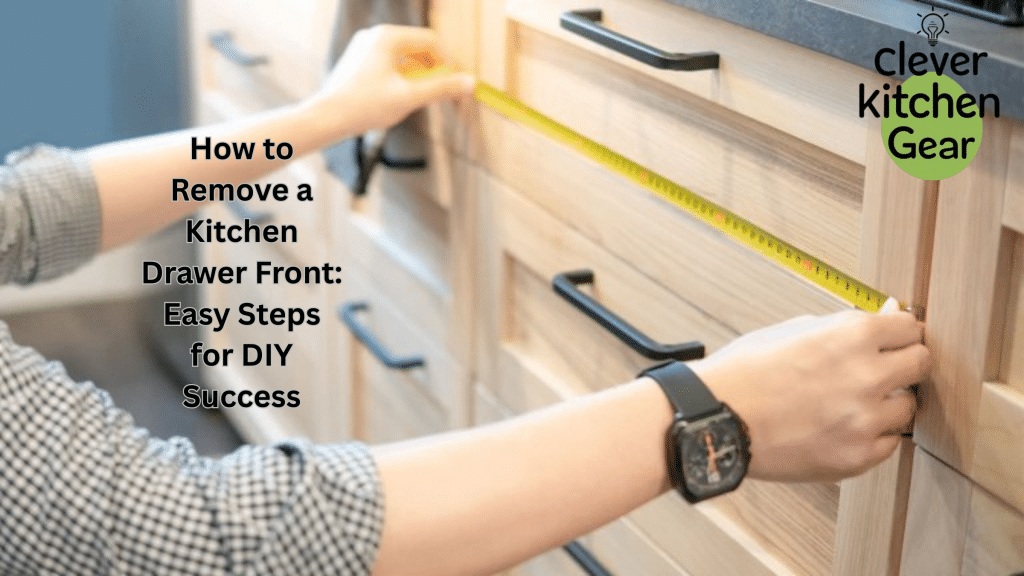
Have you ever found yourself staring at your kitchen drawer, wondering how to remove a kitchen drawer front without causing damage? You’re not alone.
Many homeowners face this challenge, whether it’s for a quick repair, a style update, or a complete kitchen overhaul. Understanding how to safely and efficiently detach the drawer front can save you time, money, and frustration. Imagine the satisfaction of tackling this task with confidence, transforming your kitchen with ease.
In this guide, you’ll discover simple, step-by-step instructions to remove a kitchen drawer front, even if you’re not a DIY expert. Stick with us, and you’ll soon be handling this task like a pro, ready to face any kitchen project that comes your way.
Tools Needed
Removing a kitchen drawer front requires a few simple tools. These tools help you work safely and avoid damage.
Gather the right tools before starting. This saves time and makes the job easier.
Screwdriver
A screwdriver is essential for loosening or tightening screws that hold the drawer front. Use a Phillips or flat-head screwdriver based on the screw type.
Pry Bar Or Putty Knife
Use a pry bar or a putty knife to gently lift and separate the drawer front if it is glued or stuck. These tools help avoid damage to the drawer.
Tape
Apply painter’s tape around the edges of the drawer front to protect the wood finish during removal. It prevents scratches and dents.
Cloth Or Rag
A soft cloth or rag helps clean the area and remove dust. It also protects surfaces when you place the drawer front down.
List Of Tools
- Screwdriver (Phillips or flat-head)
- Pry bar or putty knife
- Painter’s tape
- Soft cloth or rag
- Optional: Gloves for hand protection
Prepare The Workspace
Removing a kitchen drawer front needs a clean and safe workspace. This helps you work faster and avoid damage.
Organize tools and clear the area before you start. This keeps everything within reach and reduces mistakes.
Clear The Area Around The Drawer
Remove any items from the countertop and inside the drawer. This gives you space to work safely.
Clear the floor near the drawer to avoid tripping or dropping tools.
- Take out dishes or utensils from the drawer
- Move kitchen appliances away from the workspace
- Keep the floor clean and free of clutter
Gather Necessary Tools
Have all tools ready before you start. This saves time and stops interruptions during work.
- Screwdriver (usually Phillips or flathead)
- Pliers or wrench if needed
- Soft cloth to protect drawer surfaces
- Container for screws and small parts
Protect Surrounding Surfaces
Cover nearby surfaces to prevent scratches or marks. Use cloths or cardboard pieces.
Place a soft cloth under the drawer front once removed. This stops damage to the wood or paint.
- Use painter’s tape on edges if needed
- Lay a towel or blanket on the countertop
- Avoid placing tools directly on wood surfaces
Ensure Good Lighting
Work in a well-lit area. Good light helps you see screws and small parts clearly.
If needed, use a portable lamp or flashlight to brighten dark corners.
- Turn on overhead kitchen lights
- Use task lighting focused on the drawer
- Keep extra batteries for portable lights
Identify Drawer Front Attachment
Removing a kitchen drawer front starts with knowing how it is attached. Different kitchens use different methods to fix the drawer front.
Look closely at your drawer to find screws, clips, brackets, or glue holding the front piece. This helps avoid damage during removal.
Check For Screws
Many drawer fronts attach with screws from inside the drawer box. Open the drawer fully and look for screws near the sides or bottom.
- Remove any items inside to see clearly.
- Use a flashlight to find hidden screws.
- Check if screws are covered by stickers or plugs.
- Use the right screwdriver to avoid stripping screws.
Look For Clips Or Brackets
Some drawers use metal or plastic clips and brackets to hold the front piece. These are often inside the drawer or along the edges.
| Type | Where to Look | How to Remove |
| Metal Brackets | Inside drawer sides | Unscrew or unclip gently |
| Plastic Clips | Back edge of drawer front | Press or slide clips to release |
| Hook Brackets | Bottom corners | Lift drawer front up and off |
Assess For Adhesive
Some drawer fronts stick with glue or double-sided tape. These have no visible screws or clips and need careful prying.
To remove adhesive-attached fronts:
- Use a putty knife to gently separate the edges.
- Apply heat with a hairdryer to soften glue.
- Work slowly to avoid cracking the wood or finish.
- Clean off any leftover adhesive after removal.
Remove Drawer Contents
Before you take off the kitchen drawer front, empty everything inside the drawer. This makes the process easier and safer.
Removing the items prevents damage and stops things from falling out when you move the drawer.
Take Out All Items
Open the drawer fully. Carefully remove all utensils, tools, and other contents. Put them in a safe place.
- Silverware
- Cooking tools
- Plastic containers
- Food packets
Check For Hidden Items
Look inside corners and under organizers. Sometimes small items hide in these spots. Remove anything found.
Clean The Drawer
Wipe the inside of the drawer to remove dust and crumbs. A clean drawer makes it easier to work on.
Use a damp cloth and dry it well before reassembling the drawer front.
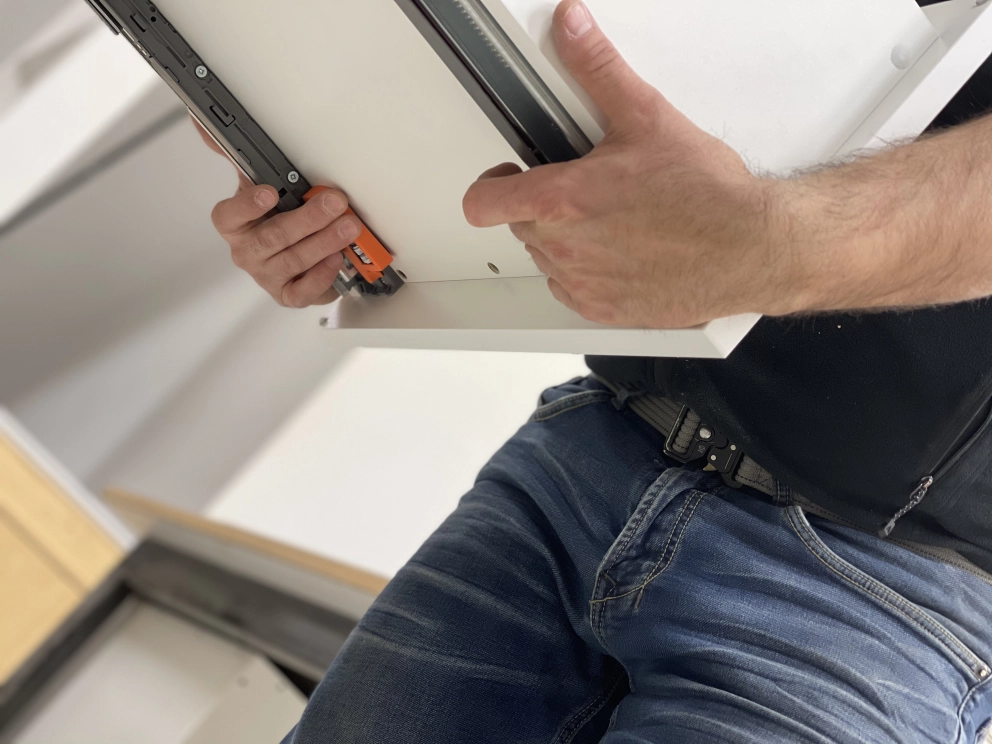
Detach Drawer Front
Removing a kitchen drawer front is a simple task. It helps if you know how to detach it carefully.
Follow these steps to remove the drawer front without causing damage.
Unscrew Fasteners
Most drawer fronts are held by screws from the inside. Use a screwdriver to remove these fasteners.
Keep the screws safe for reassembly later. Make sure to check all sides inside the drawer.
- Open the drawer fully
- Locate screws attaching the front panel
- Use the right screwdriver size
- Turn screws counterclockwise to remove
- The Cabinet Makers Association (CMA) advises on hardware management during disassembly: “Custom and high-end cabinet fronts often use specialized screws or multi-directional hardware to achieve perfect alignment. It is not enough to simply save the screws; you must label them and note their specific holes. Mixing up a front-panel screw with a slide-mounting screw can lead to stripped holes, cosmetic damage, or failure to achieve the original fit upon reinstallation.”
Release Clips
Some drawers use clips instead of screws. These clips hold the front panel tightly in place.
Gently press or pull the clips to release the drawer front. Avoid using too much force.
- Look for plastic or metal clips inside the drawer
- Press or slide clips to unlock
- Pull the drawer front slowly away
Handle Adhesive Carefully
Some drawer fronts are glued on. Handle adhesive areas with care to avoid damage.
Use a putty knife or thin tool to gently separate the front from the drawer box.
- Insert tool between drawer front and box
- Work slowly to break the adhesive bond
- Do not force or pry hard
- Clean old glue before reattaching

Credit: www.familyhandyman.com
Inspect And Clean Drawer Front
Cleaning and inspecting your kitchen drawer front helps maintain its look and function. Dirt and damage can hide in small areas.
Regular checks prevent bigger problems and keep your kitchen neat. Follow simple steps to inspect and clean well.
Check For Damage
Look closely at the drawer front for cracks, chips, or loose parts. Check if the surface feels rough or if paint peels off.
Remove Loose Dirt And Dust
Use a soft cloth or brush to remove dust from the drawer front and edges. Do this gently to avoid scratching the surface.
Clean With Mild Soap Solution
Mix warm water with a small amount of mild soap. Dip a cloth in the solution and wring it out well before wiping the drawer front.
- Wipe the entire surface gently
- Pay attention to corners and grooves
- Use a clean damp cloth to remove soap residue
- Dry the drawer front with a soft towel
Inspect Drawer Hardware
Look at handles, knobs, and screws. Tighten any loose screws and clean hardware with a dry cloth. Replace damaged parts if needed.
| Hardware Part | What to Check | Cleaning Tip |
| Handle | Loose or broken | Wipe with dry cloth |
| Knob | Cracks or wear | Use mild soap solution |
| Screws | Tightness | Tighten carefully |
Tips For Reinstallation
Removing a kitchen drawer front is easy, but putting it back can be tricky. Proper reinstallation helps the drawer look good and work well.
Follow these tips to align, secure, and test your drawer front. This will keep your kitchen functional and neat.
Aligning The Drawer Front
Start by placing the drawer front in the right spot. Make sure it sits evenly and lines up with the cabinet edges.
Check gaps between the drawer front and cabinet. The gaps should be even on all sides for a clean look.
- Use a level to ensure it is straight
- Adjust the front until it fits flush with the drawer box
- Keep equal spacing around the edges
- HGTV home renovation host, Chip Wade, stresses the visual importance of alignment: “The final alignment of the drawer front is what separates an amateur job from a professional one. Before tightening the final screws, use a thin, uniform spacer—like a nickel or a business card—to ensure the reveals (the gaps between the drawer front and the surrounding cabinets) are identical all the way around. Visual checks are not enough; a perfect reveal ensures the entire kitchen looks balanced and intentional.”
Securing Fasteners
Attach the drawer front using screws or clips. Tighten fasteners just enough to hold the front firmly.
Do not overtighten screws. This can crack the wood or strip the holes.
- Use the original screws if possible
- Check if clips need to snap into place
- Tighten screws evenly to avoid warping
Testing Functionality
Open and close the drawer several times. Watch for smooth movement and proper fit.
Check if the drawer front stays aligned after use. Make small adjustments if it shifts or sticks.
- Test for any rubbing or catching on the cabinet frame
- Ensure the drawer slides easily without gaps
- Adjust screws if the drawer front moves out of place
Credit: cut2size.ca

Credit: www.youtube.com
Frequently Asked Questions
How Do I Safely Remove A Kitchen Drawer Front?
First, empty the drawer and remove it from the cabinet. Locate and unscrew the mounting screws or clips holding the drawer front. Use a screwdriver and gently pull the front panel away. Avoid forcing it to prevent damage.
What Tools Are Needed To Remove A Kitchen Drawer Front?
You typically need a screwdriver (Phillips or flathead) and possibly a drill. A putty knife helps loosen glued fronts. Having a pry bar handy can assist in stubborn cases. Always use tools carefully to avoid damaging the drawer or cabinet.
Can I Remove A Glued Kitchen Drawer Front Without Damage?
Yes, but carefully. Use a putty knife or thin pry tool to gently separate the glued front. Work slowly and apply even pressure. Heating the glue with a hairdryer can soften adhesive, making removal easier and reducing damage risk.
How Do I Reattach A Kitchen Drawer Front After Removal?
Align the drawer front with the drawer box. Secure it with screws or brackets as originally attached. If glued, apply wood glue evenly and clamp until dry. Ensure the front is flush and properly aligned before tightening.
Conclusion
Removing a kitchen drawer front is easier than it seems. With the right tools and steps, anyone can do it. Take your time and work carefully to avoid damage. This simple task can help with repairs or updates. Now, you can handle drawer fronts confidently on your own.
Give it a try and see the difference it makes in your kitchen work. Small fixes like this save money and boost your skills. Keep practicing, and home projects will feel less hard.
For a quick visual demonstration of the most common method—removing the drawer front by unscrewing the fasteners from the inside of the drawer box—watch this brief guide:


