
Are you tired of looking at that one kitchen drawer front that’s loose or damaged, throwing off the entire aesthetic of your kitchen? You’re not alone.
Whether you’re planning a full kitchen makeover or just want to fix a single drawer, knowing how to remove kitchen drawer front is a skill that can save you both time and money. Imagine the satisfaction of making a quick fix without having to call in a professional.
In this guide, you’ll discover simple, step-by-step instructions to effortlessly remove your kitchen drawer front. Let’s dive in and get your kitchen looking picture-perfect again!

Credit: www.reddit.com
Tools Needed
Removing a kitchen drawer front is easier with the right tools. These tools help you work safely and carefully.
Gather all tools before you start. This saves time and avoids damage to the drawer.
Screwdriver
A screwdriver is needed to remove screws holding the drawer front. Use the right type and size for the screws.
- Phillips head screwdriver for cross-shaped screws
- Flathead screwdriver for slotted screws
Putty Knife Or Pry Bar
A putty knife or pry bar helps gently separate the drawer front from the drawer box. Use it carefully to avoid damage.
Measuring Tape
Measure the drawer and front before removing. This helps if you plan to replace or adjust the drawer front.
Clamps (optional)
Clamps hold the drawer steady while you work. They prevent the drawer from moving and make removal easier.
Safety Gloves
Wear gloves to protect your hands from sharp edges or splinters. Safety is important during any tool work.
Credit: www.diychatroom.com
Prepare The Workspace
Before you remove a kitchen drawer front, set up your workspace properly. A clean and organized area helps you work safely and efficiently.
Gather all the tools and materials you will need. This reduces interruptions and keeps the process smooth.
Clear The Area Around The Drawer
Remove any items on or near the drawer. This prevents damage and gives you enough room to work freely.
Gather Necessary Tools
Collect tools like screwdrivers, a drill, and a soft cloth. Use the right tools to avoid damaging the drawer or its front.
- Phillips head screwdriver
- Flathead screwdriver
- Power drill with screwdriver bits
- Soft cloth or towel
- Work gloves
Protect The Work Surface
Place a soft cloth or towel on your work surface. This prevents scratches on the drawer front and countertop.
| Item | Purpose |
|---|---|
| Soft Cloth or Towel | Protects surfaces from scratches |
| Gloves | Keeps hands safe and clean |
| Screwdrivers | Remove screws holding the drawer front |
| Drill | Makes screw removal faster and easier |
Identify Drawer Front Attachment
Removing a kitchen drawer front starts by knowing how it is attached. Different kitchens use screws, clips, or adhesive. Identifying the attachment helps you remove the drawer safely.
Look closely at the drawer front and inside the drawer. This can tell you what holds the front in place. Knowing this saves time and prevents damage.
Screws
Screws are a common way to attach drawer fronts. They are usually found inside the drawer or under the drawer bottom. You may need to open the drawer fully to see them.
Look for small screw heads holding the front panel to the drawer box. Use a screwdriver to remove these screws carefully. Keep the screws safe for reassembly.
Clips
Clips hold the drawer front without screws. They snap the front onto the drawer frame. These clips are often hidden inside the drawer box or along the edges.
To remove a clipped front, gently pull or press the clips to release them. Do this slowly to avoid breaking the clips or the drawer front.
- Check for plastic or metal clips inside the drawer
- Press clips inward or outward to unlock
- Pull the drawer front straight off
Adhesive
Some drawer fronts are glued on with adhesive. These fronts do not have screws or clips. They stick firmly and need careful removal to avoid damage.
Use a thin tool like a putty knife to gently pry the front away from the drawer. Work slowly and evenly to break the glue bond without cracking the wood.
Remove Drawer From Cabinet
Removing a kitchen drawer from the cabinet is a simple task. It lets you fix or clean the drawer easily.
Learn how to safely take out the drawer without damaging it or the cabinet.
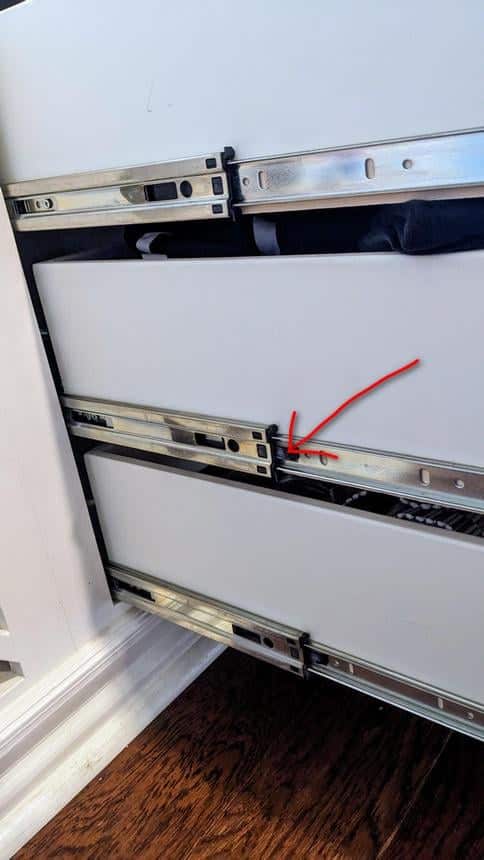
Identify The Drawer Type
Drawers come with different slide mechanisms. Knowing the type helps you remove it correctly.
Common types include side-mounted, under-mounted, and center-mounted slides.
- Side-mounted slides have rails on both sides
- Under-mounted slides are hidden beneath the drawer
- Center-mounted slides run under the middle of the drawer
Clear The Drawer
Empty the drawer before removal. This prevents spills and makes it lighter.
Remove any liners or mats to avoid damage during removal.
Fully Extend The Drawer
Pull the drawer out as far as it will go. This gives space to work on the slides.
Check for any catches or stops that keep the drawer from coming out completely.
Release The Drawer From Slides
Press the release levers or tabs on the drawer slides. Some slides need lifting or pushing.
Use both hands to hold and gently pull the drawer out after releasing the locks.
- For side-mounted slides, press the lever on one side while pulling the drawer
- For under-mounted slides, lift the drawer slightly and pull out
- For center-mounted slides, pull up the drawer front and pull out
Remove Drawer Front If Needed
Some drawers have the front panel attached separately. Look for screws inside the drawer box.
Unscrew the drawer front carefully to avoid breaking the wood or paint.
- Use a screwdriver that fits the screws well
- Hold the drawer front as you remove screws
- Keep screws in a safe place for reassembly
Detach Drawer Front
Removing a kitchen drawer front helps with repairs or updates. It needs careful work to avoid damage.
This guide shows how to detach the drawer front safely and clearly.
Unscrew Fasteners
Many drawer fronts are held by screws. These screws attach the front to the drawer box.
Use a screwdriver to remove all visible screws. Keep the screws safe for later use.
- Look inside the drawer for screws on the sides or bottom
- Use the correct screwdriver type (Phillips or flathead)
- Turn screws counterclockwise to remove
Release Clips
Some drawers use clips instead of screws. These clips hold the front firmly in place.
Press or lift the clips gently to release the drawer front. Avoid using too much force.
- Check for plastic or metal clips on the inside edges
- Use a flat tool to press clips if needed
- Pull the drawer front away once clips are loose
Soften Adhesive
Some drawer fronts stick on with glue or adhesive. Softening it helps remove the front smoothly.
Use a heat gun or hair dryer to warm the adhesive. This makes the glue softer and easier to separate.
- Heat the edges of the drawer front evenly
- Test gently with a putty knife to see if it moves
- Continue heating and prying slowly to avoid damage
Handle Stubborn Drawer Fronts
Removing a kitchen drawer front can be hard if it is stuck or glued. You need to be careful not to damage the drawer or cabinet. Here are some ways to help you remove stubborn drawer fronts safely.
Using the right tools and simple tricks can make the process easier. Below are two effective tips to try when your drawer front does not come off easily.
Use Pry Tools
Pry tools can help you gently lift the drawer front from the cabinet. Choose a flat tool like a putty knife or a small crowbar. Insert the tool carefully between the drawer front and the cabinet frame.
Apply gentle pressure to avoid breaking the wood or paint. Move the tool slowly around the edges to loosen the glue or nails holding the front in place.
- Use a thin, flat pry tool
- Insert tool at the seam
- Work slowly around the drawer
- Apply gentle, even pressure
- Stop if wood starts to crack
Apply Heat
Heat can soften glue that holds the drawer front. Use a hair dryer or heat gun on low heat. Warm the edges of the drawer front evenly for a few minutes.
Once heated, try to pull the drawer front gently. The glue should loosen, making it easier to remove the front without damage.
- Use low heat setting
- Keep heat moving to avoid damage
- Warm all sides evenly
- Test by gently pulling
- Stop if wood feels too hot
Inspect And Clean Drawer
Before removing a kitchen drawer front, it is important to inspect and clean the drawer. This helps you spot any damage and makes the process easier.
Cleaning the drawer also prevents dirt and debris from falling inside the cabinet once the front is removed.
Check For Damage
Look closely at the drawer front, sides, and bottom. Check for cracks, loose screws, or broken parts. These issues may affect how you remove the front.
Remove Contents And Clean Inside
Take out all items from the drawer. Wipe the inside with a damp cloth to remove dust and crumbs. Dry it well to avoid moisture damage.
- Empty the drawer completely
- Use a soft cloth to wipe surfaces
- Clean corners and edges carefully
- Let the drawer dry before reassembling
Inspect Drawer Slides And Hardware
Look at the drawer slides and hardware for rust or dirt. Clean them with a brush or cloth. Smooth slides make removing the drawer front easier.
| Hardware Part | Inspection Tips | Cleaning Method |
|---|---|---|
| Drawer Slides | Check for rust or sticky spots | Wipe with oil or lubricant |
| Screws and Nails | Look for looseness or missing parts | Tighten or replace as needed |
| Handles and Knobs | Inspect for cracks or damage | Clean with mild soap and water |

Credit: www.reddit.com
Tips For Reattaching Or Replacing Drawer Fronts
Removing a kitchen drawer front is easy with the right tools. After removal, you may want to reattach or replace it. This guide gives simple tips to help you do both.
Good preparation makes your work neat and lasting. Follow these steps for a smooth process and a nice finish.
Check The Condition Of The Drawer Front
Look closely at the drawer front for damage. Cracks, warping, or loose parts can affect reattachment. Fix small issues before you start.
- Clean dirt and grease from the surface
- Sand rough or damaged areas lightly
- Glue loose parts and clamp them until dry
- Replace badly damaged fronts
Use The Right Tools And Hardware
Using correct tools helps attach drawer fronts securely. Check screws, brackets, or glue for the best fit. Keep tools ready before starting.
- Screwdriver or drill with proper bits
- Wood glue or construction adhesive
- Clamps to hold parts while drying
- Replacement screws or mounting brackets
Align The Drawer Front Carefully
Proper alignment keeps the drawer front even and flush. Check gaps on all sides and adjust before fixing it in place. Small shifts cause big problems later.
- Place the drawer front on a flat surface
- Use a ruler or measuring tape for equal gaps
- Mark drill holes or glue spots lightly
- Test fit before final attachment
Choose Between Screws Or Glue
Screws give a strong hold and easy removal later. Glue offers a clean look without visible fasteners. Pick the best option for your drawer type.
- Use screws for heavy or frequently used drawers
- Apply wood glue for a smooth, seamless front
- Combine both for extra strength if needed
- Let glue dry fully before use
Secure The Drawer Front Firmly
Hold the drawer front in place while fastening. Use clamps or have someone help you. Tighten screws evenly to avoid warping.
- Tighten screws slowly and in a cross pattern
- Check alignment during fastening
- Wipe excess glue immediately
- Allow clamps to stay until glue sets
Test The Drawer Movement
After reattachment, open and close the drawer several times. Make sure it moves smoothly and fits well in the cabinet. Adjust if needed.
- Check for rubbing or sticking
- Loosen screws slightly to realign if stuck
- Add felt pads to reduce noise
- Retighten screws after testing
Frequently Asked Questions
How Do I Safely Remove A Kitchen Drawer Front?
To safely remove a drawer front, first empty the drawer. Locate and unscrew the mounting screws inside the drawer box. Gently pull the drawer front away, avoiding damage to wood or paint. Use a screwdriver suitable for your screws to avoid stripping.
What Tools Are Needed To Remove Kitchen Drawer Fronts?
You will need a screwdriver, usually Phillips or flathead. A drill with screwdriver bits can speed up the process. Optionally, use a putty knife to gently pry if screws are hidden. A flashlight helps to see inside the drawer box clearly.
Can I Remove Drawer Fronts Without Damaging Them?
Yes, carefully unscrewing the drawer front prevents damage. Avoid forcing or prying too hard. Keep screws and hardware safe for reinstallation. Working slowly and using correct tools ensures drawer fronts remain intact and reusable.
How Do I Identify The Screws Holding Drawer Fronts?
Open the drawer and look inside the box sides or back. Screws are often located on the inside face of the drawer box. Some drawer fronts use clips or brackets instead of screws. Check for any hidden fasteners before attempting removal.
Conclusion
Removing a kitchen drawer front is easier than it seems. Start with the right tools and take your time. Gently loosen screws or clips holding the front in place. Keep all parts safe for reassembly. This simple task helps with repairs or upgrades.
A little patience makes the process smooth. Now, you can handle drawer fronts with confidence. Try it yourself and see how simple it can be.


