
How to Draw a Simple Kitchen: A Step-by-Step Artistic Guide
Are you ready to unleash your creativity and transform a blank page into a charming kitchen sketch? Drawing a simple kitchen doesn’t have to be complicated.
With just a few easy steps, you can create a delightful illustration that captures the heart of any home. Whether you’re an aspiring artist or just looking for a fun and relaxing activity, this guide will walk you through each step.
Imagine the satisfaction of seeing your kitchen sketch come to life. You’ll discover tips and tricks that make drawing feel like second nature, and by the end, you’ll have a piece of art that you can proudly call your own. Grab your pencil, and let’s get started on this artistic adventure together!

Credit: www.youtube.com
Gathering Your Materials
Before you start drawing your kitchen, it is important to get the right materials. Good tools make drawing easier and more fun.
Gathering your materials first helps you focus on your drawing without interruptions. Let’s look at what you need.
Essential Drawing Tools
To draw a simple kitchen, you need some basic tools. These tools help you create lines, shapes, and details.
- Pencils: Use different hardness like HB for sketching and 2B for darker lines.
- Eraser: A soft eraser helps fix mistakes without damaging paper.
- Ruler: To draw straight lines and measure spaces accurately.
- Sharpener: Keep your pencils sharp for clean lines.
- Colored pencils or markers: Add color to your kitchen drawing.
Choosing The Right Paper
Picking the right paper is important for your drawing’s quality. The paper should hold pencil marks well and not tear easily.
Use smooth, thick paper if you want to add color. Thin paper may wrinkle or tear when you erase or color.
- Sketch paper: Good for practice and rough drawings.
- Drawing paper: Thicker and smooth, perfect for final drawings.
- Colored paper: Adds a unique background but choose light colors.

Credit: www.youtube.com
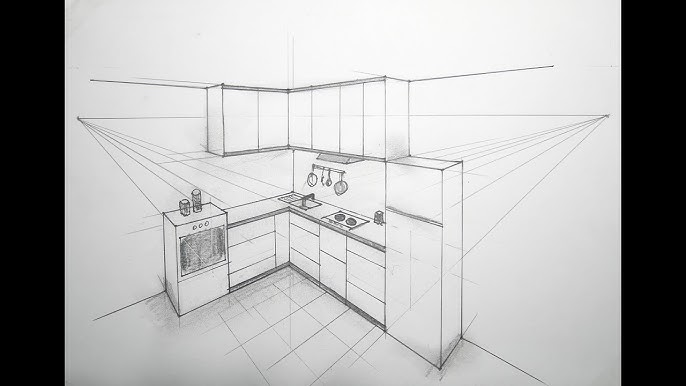
Sketching Basic Shapes
Drawing a simple kitchen starts with basic shapes. These shapes form the base of your sketch.
Use squares, rectangles, and circles to map out the main parts of the kitchen. This helps keep the design clear.
Outlining The Kitchen Layout
Begin by drawing the kitchen’s outer walls with rectangles. This sets the boundary for your space.
Add shapes for doors, windows, and major appliances. Place them where they fit best in the room.
- Draw a large rectangle for the kitchen area
- Add smaller rectangles for windows and doors
- Use squares for appliances like the fridge and stove
Drawing Cabinets And Counters
Sketch long rectangles along the walls to show counters. These give your kitchen shape and function.
Use smaller rectangles above or below counters to represent cabinets. Keep the shapes simple and clear.
- Draw base cabinets as rectangles under the counters
- Place wall cabinets as rectangles above counters
- Mark the sink and stove areas on the counters
Adding Details
Adding details brings your kitchen drawing to life. Small touches show how the space works.
Focus on appliances and fixtures to make the kitchen look real and useful.
Sketching Appliances
Start with basic shapes for appliances like the fridge, stove, and oven. Add buttons and handles to show function.
- Draw rectangles for appliances’ bodies
- Add circles or squares for knobs and buttons
- Include vents or grates on the stove
- Sketch shelves inside the fridge if visible
Including Sinks and Fixtures
Show where the sink sits and add taps with clear shapes. Details help show water flow and use.
| Fixture | Detail to Add | Purpose |
| Sink | Basin shape and drain | Shows washing area |
| Faucet | Handles and spout | Controls water flow |
| Soap Dispenser | Small pump shape | Adds realism |
Refining The Drawing
Refining your kitchen drawing makes it clearer and more detailed. This step brings your simple shapes to life.
Focus on improving lines, shapes, and adding small textures. These details add depth and interest to your sketch.
Enhancing Lines and Shapes
Start by darkening the main outlines of cabinets, appliances, and counters. Use clean, steady strokes for a neat look.
- Trace over your initial sketch with a sharper pencil or pen.
- Smooth out any rough or uneven edges in shapes.
- Adjust proportions if something looks off.
- Add small details like handles, knobs, or panel lines.
- Erase extra or overlapping sketch lines carefully.
Adding Texture and Patterns
Textures and patterns make your kitchen drawing feel more realistic. They show the materials and finishes of surfaces.
| Surface | Texture or Pattern | How to Draw |
| Wood cabinets | Grain lines | Draw light, short, parallel strokes |
| Tile floor | Grid pattern | Sketch small squares evenly spaced |
| Metal appliances | Smooth shine | Use shading with soft, gentle strokes |
| Countertop | Speckled or solid | Add dots or keep clean with light shading |
Applying Shading and Color
Adding shading and color makes your kitchen drawing look real. It gives depth and life to your simple sketch.
Use light and dark tones to show where light hits and where shadows fall. Color helps to define each object clearly.
Basic Shading Techniques
Start shading by choosing a light source. Shade opposite to where the light hits. Use soft strokes to blend shadows smoothly.
- Use a pencil or light marker for soft shading
- Press harder for darker shadows
- Blend edges to avoid harsh lines
- Leave some areas white to show highlights
Simple Coloring Tips
Pick colors that match real kitchen items like wood, metal, and tiles. Use lighter colors for areas that catch light.
| Object | Suggested Color | Shading Tip |
| Wood Cabinets | Brown shades | Use darker brown near edges |
| Countertops | Gray or white | Add soft shadows below objects |
| Metal Fixtures | Silver or gray | Use sharp highlights and dark shadows |
| Floor Tiles | Light beige or gray | Shade grout lines darker |
Final Touches
Adding final touches makes your kitchen drawing look complete and neat. It helps your work stand out clearly.
Focus on small details and prepare your drawing well to show it off nicely.
Reviewing And Correcting
Check your drawing carefully for any mistakes or missing parts. Look at lines, shapes, and proportions.
- Erase stray marks or unwanted lines.
- Darken main outlines to make them clear.
- Fix any uneven or crooked lines.
- Add small details like knobs or handles.
- Make sure all kitchen items are in the right place.
Preparing Your Drawing for Display
Prepare your drawing so it looks neat and ready to show to others. Use clean paper or a frame.
| Tip | Description |
| Use a clean eraser | Remove pencil marks gently without tearing paper |
| Choose a good background | Place drawing on a simple, plain surface |
| Consider framing | Protect your drawing with a frame or clear cover |
| Scan or photograph | Create a digital copy to share or print |
| Sign your work | Add your name neatly in a corner |

Credit: www.youtube.com
Frequently Asked Questions
What Basic Tools Are Needed to Draw a Simple Kitchen?
To draw a simple kitchen, you need pencils, erasers, rulers, and sketch paper. Optional tools include colored pencils or markers for detail and shading.
How Do I Start Drawing a Kitchen Layout Simply?
Begin by sketching the kitchen’s basic shape and floor plan. Add cabinets, counters, and appliances as simple shapes to keep it clear and organized.
What Are Key Kitchen Elements to Include in A Drawing?
Include essential elements like the sink, stove, refrigerator, countertops, and cabinets. These features make the kitchen recognizable and realistic in your drawing.
How Can I Add Depth to My Simple Kitchen Drawing?
Use shading and perspective techniques to create depth. Light shadows and angled lines help the kitchen appear three-dimensional and more lifelike.
Conclusion
Drawing a simple kitchen is fun and easy to try. Start with basic shapes and add small details step by step. Practice often to improve your skills and feel more confident. Use your own ideas to make your drawing unique.
Keep your lines clean and colors soft for a neat look. Enjoy the process and don’t worry about mistakes. Each drawing helps you learn something new. Soon, you will create kitchens that look great and feel real. Keep drawing and have fun with every sketch you make.


