
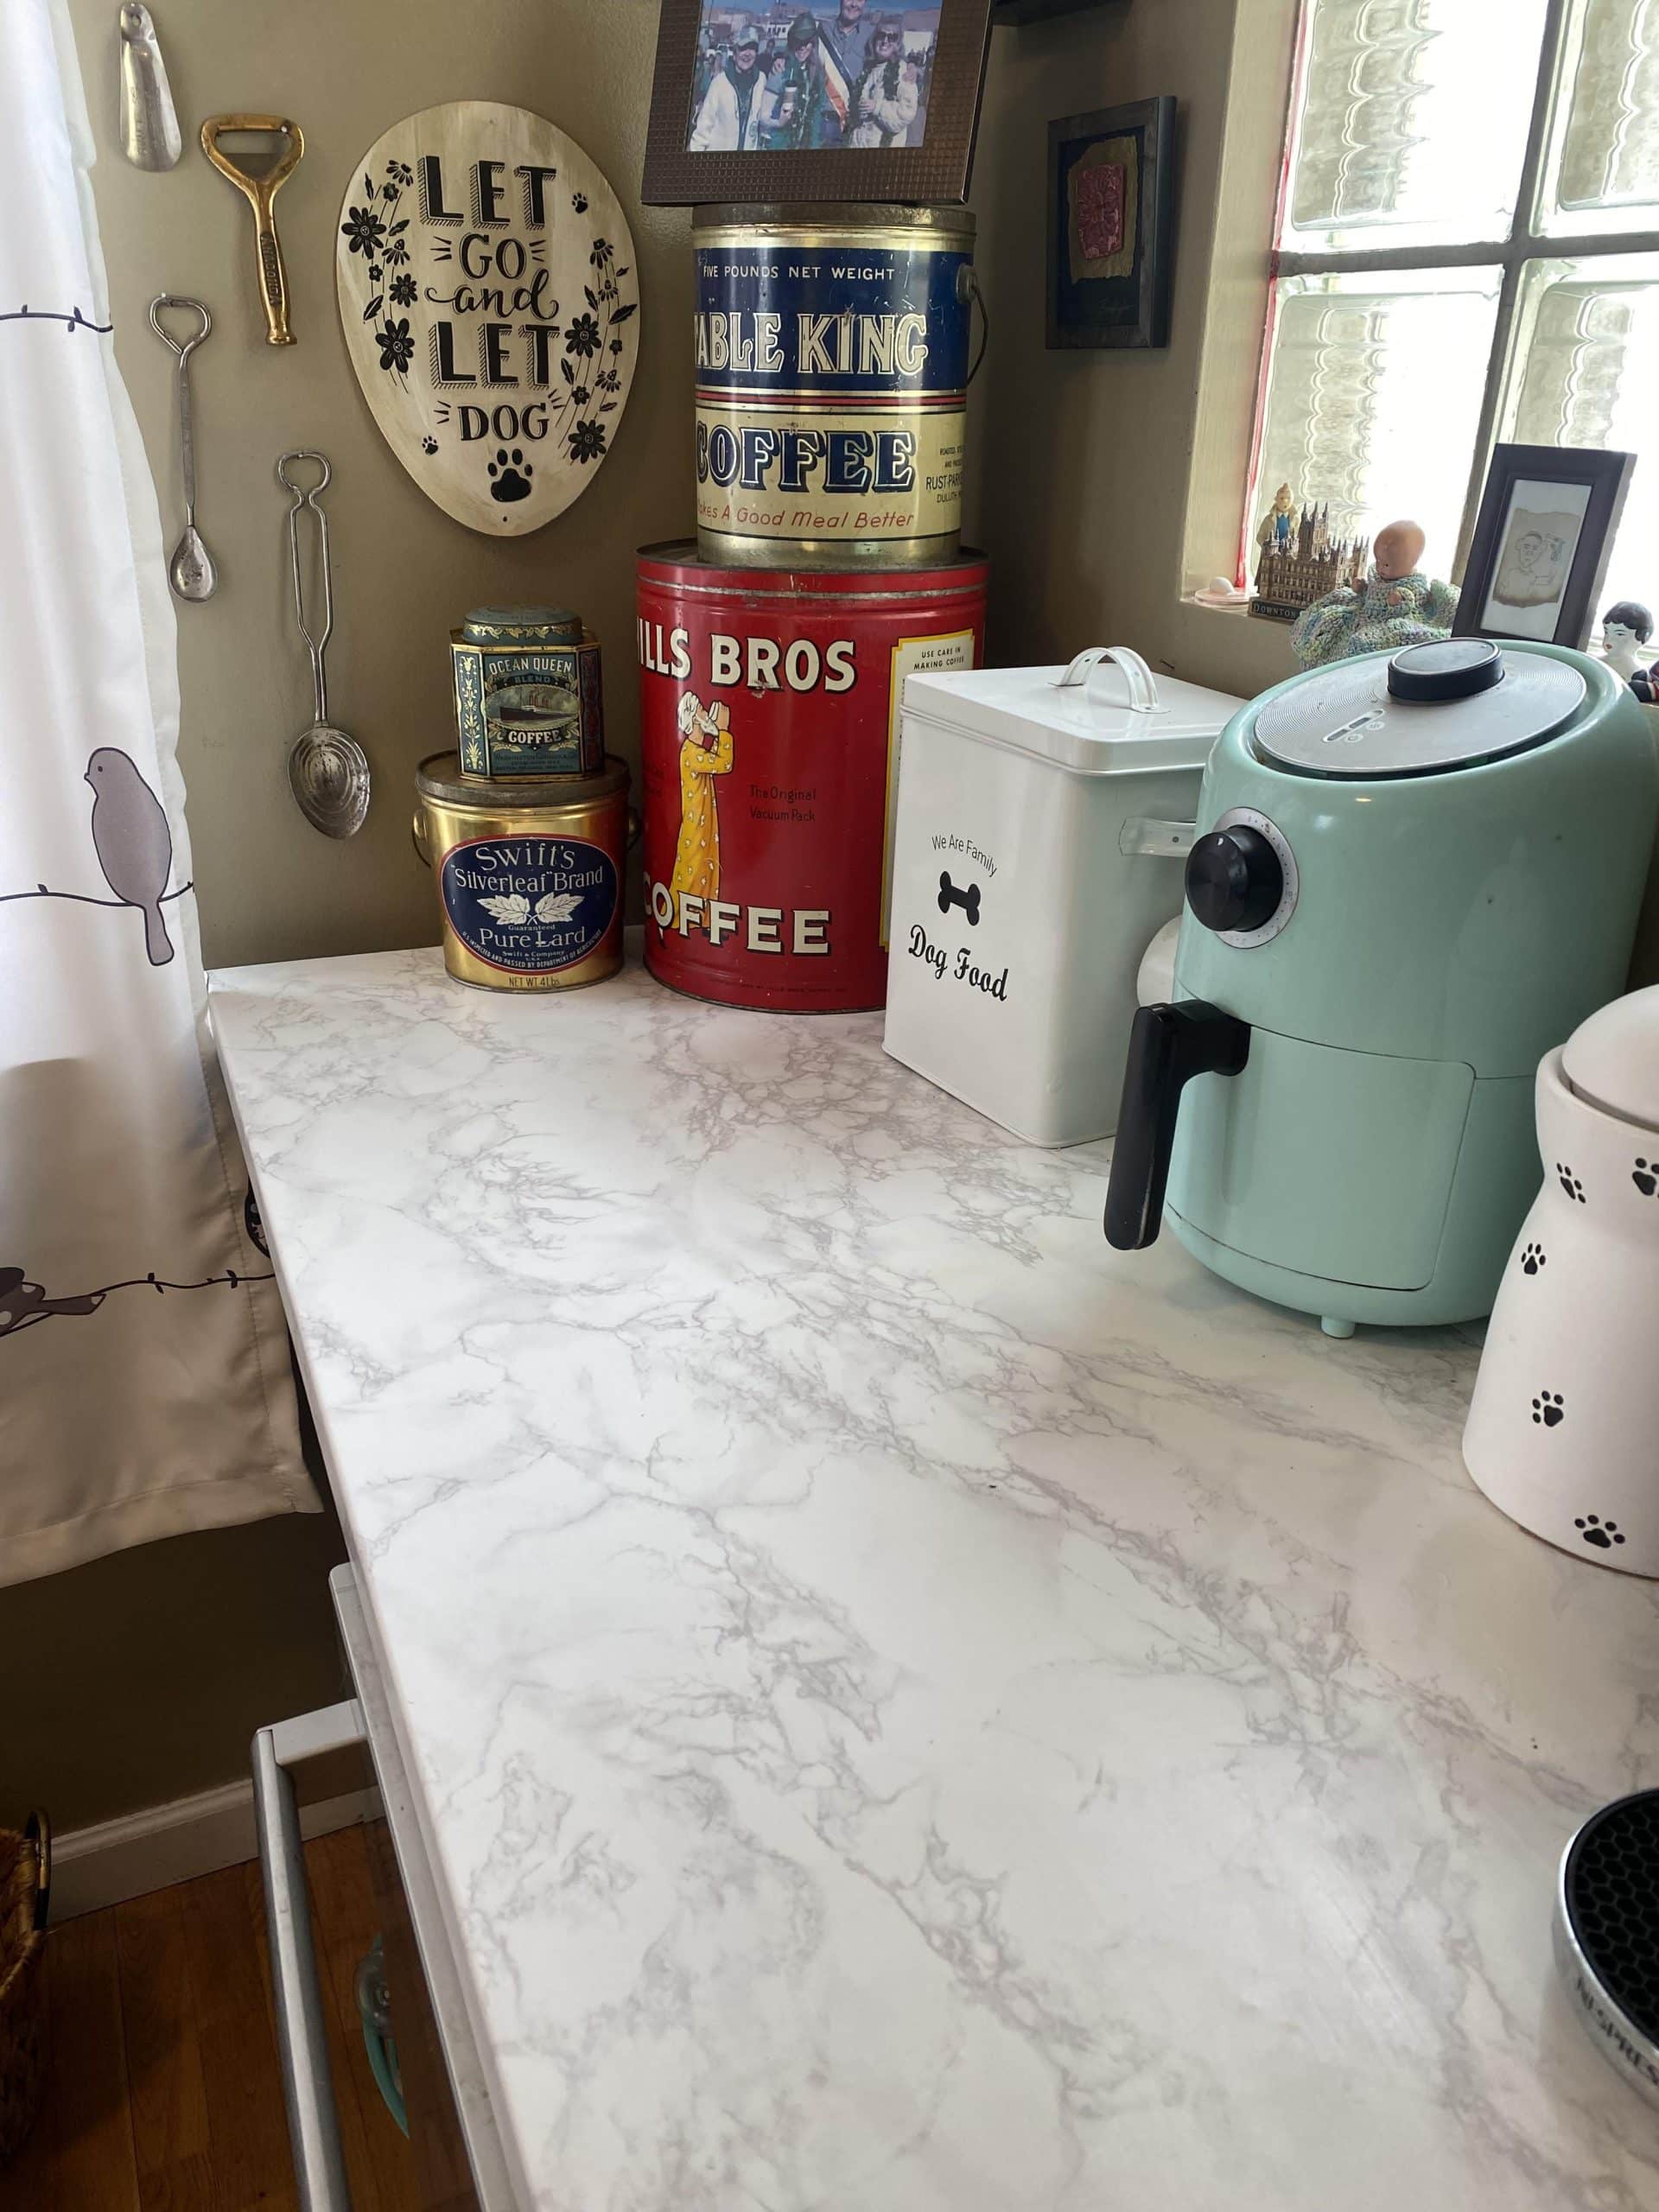
Are you tired of staring at those outdated kitchen countertops every day? Do they drag down the beauty of your entire kitchen?
You’re not alone. Many homeowners dream of a fresh, modern look but shy away from the hefty price tag of a complete renovation. The good news? Learning how to cover old kitchen countertops allows you to give your kitchen a facelift without emptying your wallet. In this guide, you'll discover simple, cost-effective ways to cover those old countertops and transform your kitchen into a space you love.
Imagine hosting dinners or enjoying morning coffee with a renewed sense of pride in your kitchen. Ready to unveil the secrets to a stunning kitchen transformation without breaking the bank? Keep reading to find out how to cover old kitchen countertops effectively and affordably.
Assess Your Countertops
Before covering old kitchen countertops, you need to assess their condition. This helps you decide the best way to update them.
Start by looking closely at the surface and measuring the area. Then, choose materials that fit your needs.
Check For Damage
Look for cracks, chips, or stains on your countertops. These can affect how well a cover will stick or look.
If there is serious damage, you might need to fix it before adding a new layer. Small flaws can sometimes be hidden.
Measure Surface Area
Use a tape measure to find the length and width of your countertops. Measure all sections, including corners.
Write down your measurements. This helps you buy the right amount of materials without waste.
- Measure the longest side first
- Include any cutouts or sinks
- Double-check your numbers
Choose Suitable Materials
Pick materials that fit your kitchen style and budget. Some options are easy to install and clean.
Consider how durable the material is and if it can cover any damage well. Popular choices include laminate, vinyl, and wood.
- Laminate: affordable and simple to use
- Vinyl: flexible and water-resistant
- Wood: warm look but needs care
Paint Over Old Countertops
Painting over old kitchen countertops is a simple way to refresh your kitchen. It saves money and time compared to replacing them.
You can choose colors that match your style. Proper steps help the paint last longer and look good.
Select The Right Paint
Use paint made for kitchen surfaces. Look for durable and water-resistant types. Acrylic or epoxy paints work well for countertops.
Choose a color that matches your kitchen. Satin or semi-gloss finishes are easier to clean and last longer.
- Epoxy paint for strong, glossy finish
- Acrylic paint for easy application
- Paint with mildew resistance
- Satin or semi-gloss finish for cleaning ease
Prep The Surface
Clean the countertops thoroughly before painting. Remove grease, dirt, and old wax using a strong cleaner.
Sand the surface lightly to help the paint stick. Use fine-grit sandpaper and wipe away dust after sanding.
- Clean with degreaser or dish soap
- Rinse and dry completely
- Sand with 220-grit sandpaper
- Remove dust with a damp cloth
Apply Paint And Sealant
Apply a primer designed for your paint type. Let it dry fully before adding color paint. Use smooth, even strokes.
After the paint dries, apply a clear sealant. This protects the paint from scratches and water damage. Let it cure as instructed.
- Use bonding primer for better paint hold
- Apply 2-3 thin coats of paint
- Let each coat dry before the next
- Finish with a water-resistant clear sealant
- Allow full curing time before use
Use Contact Paper
Contact paper is an easy way to cover old kitchen countertops. It changes the look without a big cost.
This method works well for smooth surfaces and small kitchen areas. You can choose many patterns and colors.
Pick A Pattern Or Color
Choose a contact paper that matches your kitchen style. You can pick solid colors or patterns like marble or wood.
- Pick light colors to brighten small kitchens
- Choose dark colors for a modern look
- Use patterns to hide scratches or stains
- Match with your cabinets and walls
Clean And Smooth Surface
Make sure the countertop is clean before applying contact paper. Dirt or bumps can cause bubbles.
| Cleaning Task | Tools Needed |
| Remove old stickers or glue | Rubbing alcohol and cloth |
| Clean dirt and grease | Soap, water, and sponge |
| Dry surface | Clean dry cloth |
| Smooth rough spots | Fine sandpaper |
Apply Contact Paper Without Bubbles
Applying contact paper carefully will avoid air bubbles and wrinkles. Take your time to get it right.
- Cut contact paper slightly larger than the countertop
- Peel off a small section of backing paper
- Stick the paper on the countertop edge
- Slowly peel backing while pressing paper down
- Use a flat tool or card to smooth out bubbles
- Trim extra paper with a sharp knife
Install Peel-and-stick Tiles
Covering old kitchen countertops is easy with peel-and-stick tiles. They give your kitchen a fresh look without much work.
These tiles are simple to use and cost less than full renovations. You can change your countertop style fast.
Choose Tile Style
Pick a tile style that fits your kitchen’s look. Tiles come in many colors and patterns.
Think about the size and shape of the tiles. Small tiles can cover curves easily. Large tiles work well on flat surfaces.
- Glossy tiles add shine
- Matte tiles give a soft look
- Stone-look tiles feel natural
- Geometric patterns add interest
Prepare Countertop
Clean the countertop well. Remove dirt, grease, and old glue for good tile stick.
Make sure the surface is dry and smooth. Fill any cracks or holes with putty. Sand rough spots for better adhesion.
- Use soap and water to clean
- Dry completely before starting
- Fix damage to create a flat surface
- Remove any loose debris
Cut And Place Tiles
Measure your countertop area carefully before cutting tiles. Use a ruler and pencil for marks.
Cut tiles with a sharp utility knife or scissors. Peel off the backing and press tiles firmly onto the countertop. Start from one corner and work your way across.
- Measure twice, cut once
- Use straight cuts for edges
- Press tiles firmly to avoid bubbles
- Align patterns for a neat look
Add Laminate Sheets
Covering old kitchen countertops with laminate sheets is a smart way to refresh your space. Laminate is affordable and easy to install. It can hide damage and give your counters a new look.
Using laminate sheets requires careful preparation and a few simple tools. Follow the steps to ensure a smooth, durable finish for your kitchen counters.
Select Laminate Design
Choose a laminate design that fits your kitchen style. You can find many colors and patterns. Pick one that matches your cabinets and walls.
Consider the surface texture too. Some laminates are glossy, while others are matte or textured. Think about which finish will look best and feel right for your kitchen.
Cut To Fit
Measure your countertops carefully before cutting the laminate sheets. Use a tape measure and mark the sheets with a pencil. Cut the laminate with a sharp utility knife or saw for clean edges.
Cut slightly larger pieces to ensure full coverage. You can trim the edges after gluing for a perfect fit. Take your time to avoid mistakes.
Glue And Finish Edges
Apply a strong adhesive designed for laminate surfaces. Spread the glue evenly on the countertop. Press the laminate sheet firmly to avoid bubbles or gaps.
- Use clamps or heavy objects to hold the sheet in place while drying.
- Clean excess glue immediately with a damp cloth.
- Seal the edges with edge banding or sealant for durability.
- Sand edges lightly if needed to smooth rough spots.

Credit: www.yahoo.com
Try Concrete Overlays
Concrete overlays can cover old kitchen countertops well. They give a fresh look without removing old surfaces.
This method is cost-effective and durable. You can customize colors and textures to match your style.
Mix Concrete Overlay
Mix the concrete overlay according to the package instructions. Use clean water and mix until smooth.
- Measure water and powder precisely
- Use a drill mixer for even blending
- Avoid lumps by mixing slowly at first
- Mix until you get a creamy texture
Apply Evenly
Spread the overlay evenly across the countertop. Use a trowel for smooth application.
| Tool | Use |
| Trowel | Spread and smooth the overlay |
| Putty Knife | Fill small cracks and edges |
| Sponge | Remove excess and texture surface |
Seal For Durability
After the overlay dries, seal it to protect from stains and damage. Use a high-quality concrete sealer.
Follow these sealing tips:
- Clean surface before sealing
- Apply sealer with a brush or roller
- Let first coat dry before applying another
- Allow full curing time as per instructions
Use Butcher Block Covers
Old kitchen countertops can look worn out and dull. Covering them with butcher block covers gives a fresh wooden look. It is a simple way to update your kitchen without full remodeling.
Butcher block covers add warmth and natural beauty. They are easy to install and maintain. This guide explains how to use butcher block covers for your countertops.
Select Wood Type
Choose the right wood type for your butcher block cover. Common types include maple, oak, and walnut. Each wood has a unique look and hardness.
Maple is light and smooth. Oak is strong and has a visible grain. Walnut is dark and rich. Pick a wood that fits your kitchen style and use.
- Maple: light color, smooth surface
- Oak: durable, distinct grain pattern
- Walnut: dark, elegant appearance
Measure And Cut
Measure your old countertop carefully. Write down the length and width. Measure twice to avoid mistakes.
Cut the butcher block cover to match your measurements. Use a saw for straight cuts. Smooth the edges with sandpaper for a clean finish.
- Measure countertop length and width
- Mark cutting lines on butcher block
- Use saw to cut along lines
- Sand edges for smoothness
Attach Securely
Attach the butcher block cover to your old countertop securely. Use strong adhesive or screws made for wood. Ensure the cover stays in place during use.
Check for any movement after attaching. Add more fasteners if needed. Seal the wood with a finish to protect it from water and stains.
- Apply wood adhesive evenly
- Clamp cover firmly in place
- Use screws if needed for strength
- Seal wood with water-resistant finish

Credit: www.reddit.com
Consider Removable Countertop Covers
Removable countertop covers are a smart way to update old kitchen surfaces. They are easy to apply and remove without damage. This makes them ideal for renters or those who want a quick change.
These covers come in many styles and materials. You can choose one that fits your kitchen design and budget. They also protect the original countertop from stains and scratches.
Choose Material And Style
Pick a material that matches your kitchen use and style. Some covers look like stone, wood, or tile. Others have simple colors or patterns. Think about durability and water resistance too.
- Vinyl wraps: flexible and easy to clean
- Laminate sheets: affordable and smooth
- Peel-and-stick tiles: decorative and removable
- Contact paper: budget-friendly and quick
Easy Installation Tips
Installing removable covers does not need special tools. Clean your countertop well before starting. Measure the surface and cut the cover to fit. Smooth out air bubbles as you apply.
| Tip | How It Helps |
| Clean surface | Ensures good stick and no dirt under cover |
| Use a ruler and knife | Makes clean, straight edges |
| Apply slowly | Prevents bubbles and wrinkles |
| Use a flat tool | Presses cover firmly for better hold |
Maintenance And Care
Keep your removable cover looking new by cleaning it often. Use mild soap and a soft cloth. Avoid harsh chemicals or scrubbing pads that can damage the surface.
- Wipe spills quickly to avoid stains
- Do not place hot pots directly on the cover
- Check edges for lifting and press down if needed
- Replace the cover if it gets worn or damaged
Budget Tips And Tricks
Covering old kitchen countertops can refresh your space without spending much. Simple changes save money and improve looks.
Choosing the right approach helps you stick to your budget. This guide shows smart tips for covering countertops cheaply.
Diy Vs Professional Help
Doing the work yourself saves money but needs time and effort. Professionals cost more but offer quality results fast.
DIY works well if you have basic skills and tools. Professionals help with complex projects and ensure durability.
- DIY: Lower cost, more time, learning needed
- Professional: Higher cost, less time, expert finish
- Consider project size and your comfort level
Shopping Smart For Materials
Picking the right materials affects cost and appearance. Look for affordable options that still last well.
Compare prices at local stores and online. Choose materials that match your kitchen style and budget.
- Laminate sheets: cheap and easy to install
- Peel-and-stick tiles: quick and budget-friendly
- Butcher block: mid-price, natural look
- Paint kits: low cost, good for minor changes
- Check clearance and discount offers
Maximizing Longevity
Proper care extends the life of your new countertop cover. Follow simple steps to keep it strong and clean.
Seal edges and avoid harsh chemicals. Clean spills quickly to prevent damage and stains.
- Use cutting boards to avoid scratches
- Wipe spills immediately with soft cloth
- Apply sealant if recommended for your material
- Avoid placing hot pots directly on surface
- Regularly inspect for damage or wear

Credit: food52.com
Frequently Asked Questions
How Can I Cover Old Kitchen Countertops Cheaply?
You can use peel-and-stick vinyl, contact paper, or paint kits. These options are budget-friendly and easy to apply. They refresh countertops without costly replacements or professional help.
What Materials Work Best To Cover Old Countertops?
Laminate sheets, tile overlays, and epoxy coatings work well. They are durable, water-resistant, and improve kitchen aesthetics. Choose based on your style and maintenance preference.
Is Painting A Good Option For Old Countertops?
Yes, painting with specialized countertop paint is effective. It’s affordable and offers a fresh look. Proper surface prep ensures long-lasting, chip-resistant results.
How Do I Prepare Countertops Before Covering Them?
Clean thoroughly, remove grease, and sand the surface lightly. This ensures better adhesion for coverings like paint or adhesive films. Preparation is key for durability.
Conclusion
Covering old kitchen countertops can refresh your space quickly. Choose materials that fit your style and budget. Simple steps help avoid mistakes and save time. Small changes create a big impact in your kitchen. Enjoy a fresh, clean look without full renovation.
Start your project with confidence and clear plans. Your kitchen deserves a fresh update you can afford.


