Kitchen Cabinet Peel And Stick Ideas
Do you want a new kitchen but do not want to spend a lot of money? You are in the right place. Many people feel stuck with old, ugly cabinets. Maybe the wood is too dark. Maybe the color is just boring. You do not have to live with it. You also do not have to buy new cabinets. You can use something called peel and stick film.
Peel and stick film is like a big sticker for your furniture. Some people call it contact paper or vinyl wrap. It is a thin sheet of plastic or paper with glue on one side. You peel off the back and stick it onto your cabinet doors. It is a fast way to change the look of your room. It is great for renters because you can take it off later. It is also great for homeowners on a budget. This article will show you the best ideas for your kitchen.
Why You Should Try Peel and Stick
There are many reasons to choose this method for your home. First, it is very cheap compared to paint or new wood. Second, it is a project you can do yourself. You do not need to hire a pro. Third, it protects your cabinets from water and scratches.

It Is Perfect for Renters
If you rent an apartment, you usually cannot paint the walls or cabinets. This makes it hard to make the place feel like yours. Peel and stick film is the answer. It stays on for a long time. However, when you move out, you can pull it right off. It leaves the original cabinet looking just like it did before.
No Messy Paint Smells
Painting cabinets is a big job. You have to sand the wood and deal with smelly fumes. With adhesive film, there is no smell. You do not have to wait days for paint to dry. You can use your kitchen the same day you finish the project.
Popular Styles for Your Cabinets
There are hundreds of patterns to choose from. You can make your kitchen look like a professional designer worked on it. You can choose solid colors, wood patterns, or even stone looks.
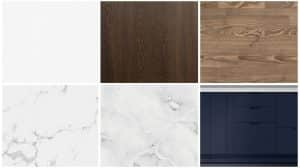
Solid Colors for a Modern Look
Most people choose a solid color for a clean feel. White is very popular because it makes small kitchens look big. Navy blue or forest green can make a kitchen feel very fancy.
Matte vs. Glossy Finishes
You can choose between a matte finish and a glossy finish. A matte finish is flat and does not shine. It hides fingerprints very well. A glossy finish is shiny like a mirror. It looks very modern, but you might have to wipe it more often to keep it clean.
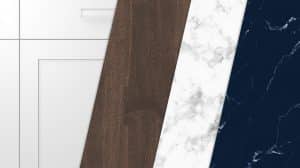
Wood Grain and Natural Textures
Do you love the look of real wood? You can buy vinyl that looks like oak, walnut, or pine. These films have a texture that feels like real wood grain. It is a great way to warm up a cold-looking kitchen.
| Style Type | Look and Feel | Best Used For |
| Matte White | Clean and bright | Small, dark kitchens |
| Faux Wood | Warm and cozy | Farmhouse style homes |
| Marble Wrap | Elegant and expensive | Accents or small islands |
| Bold Colors | Fun and unique | Modern or retro styles |
| Stainless Steel | Industrial | Covering old appliances |
Essential Tools for the Job
To do a good job, you need the right tools. You probably have most of these in your house already. Having everything ready will make the work much easier.
Measuring and Cutting Tools
You must measure your cabinets carefully. If the piece is too small, you will see the old cabinet underneath. If it is too big, it will be hard to handle.
-
Measuring Tape: Use this to find the height and width of every door.
-
Sharp Utility Knife: A dull blade will tear the paper. Use a fresh blade.
-
Metal Ruler: This helps you cut straight lines.
-
Cutting Mat: This protects your table while you cut the film.
Smoothing Tools for a Flat Finish
Air bubbles are the biggest problem with peel and stick projects. You need a tool to push the air out. A plastic squeegee is best. If you do not have one, you can use an old credit card. Wrap the card in a soft cloth so it does not scratch the film.
How to Prepare Your Cabinets
Preparation is the most important part of the process. If the cabinets are dirty, the glue will not stick. It might look good at first, but it will peel off in a few days. You want your hard work to last for years.
Cleaning the Surface Properly
Kitchens get very greasy. Cooking oils float through the air and land on the cabinets. You must remove all this grease. Use a strong soap or a mixture of vinegar and water. Scrub every inch of the door, including the edges.
Removing the Hardware
It is much easier to stick the film on a flat surface. Take off all the handles and knobs. You should also take the doors off the hinges. Lay the doors flat on a table. This makes it easier to work without the door moving around.
Step-by-Step Application Guide
Now you are ready to start. Follow these steps slowly. Do not rush the first door. Once you learn the rhythm, the rest will go faster.
Cutting the Film to Size
Measure your door and add two inches to every side. It is better to have too much than too little. You will trim the extra off later. Use your ruler to keep your lines straight.
Peeling and Sticking
Do not take all the backing off at once. If you do, the film will stick to itself and get ruined. Peel back only about two inches of the paper. Line up the edge of the film with the top of the cabinet door.
Handling Corners and Edges
Edges are where most people make mistakes. You want the edges to look smooth, not bunched up. This is where the hair dryer helps. Heat the corner for a few seconds. Pull the film tight and fold it over the corner. It should fit like a glove.
Trimming the Excess
Once the whole door is covered, use your sharp knife. Run the knife along the back edge of the door. This will cut off the extra film. Be careful not to cut the door itself. Use a steady hand and go slow.
Creative Design Ideas to Inspire You
You do not have to cover every cabinet in the same color. You can get creative to make your kitchen stand out. Here are some fun ideas that designers use.
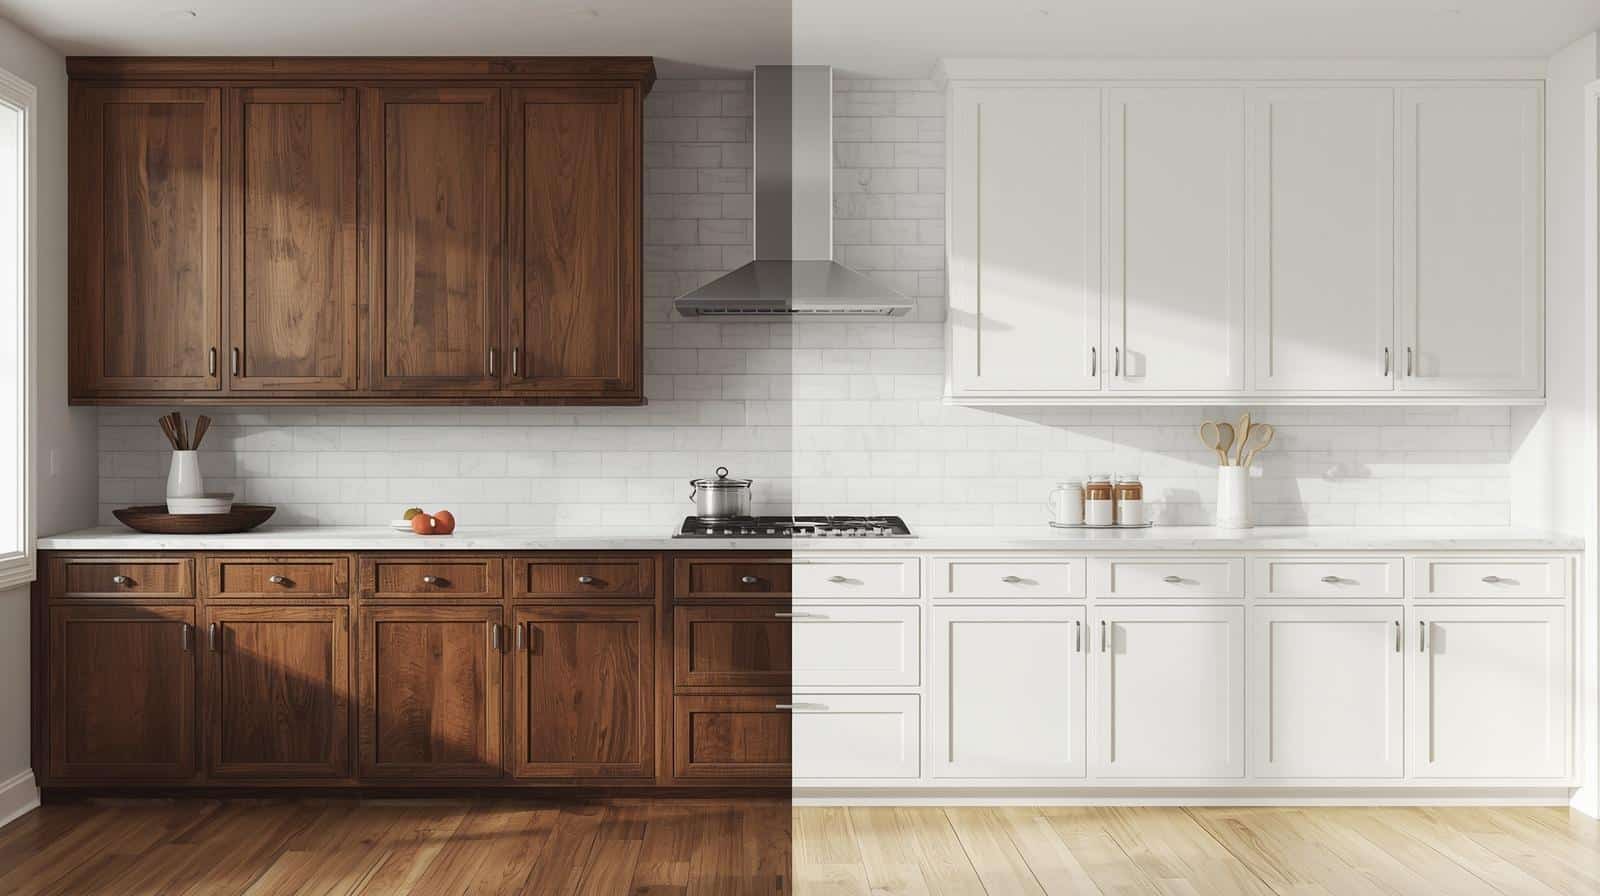
The Two-Tone Kitchen Look
A very popular trend is to have different colors for top and bottom cabinets. Usually, people put a darker color on the bottom and a lighter color on the top. For example, use navy blue on the base cabinets and white on the wall cabinets. This makes the ceiling feel higher and the room feel bigger.
Adding Accents to the Island
If you have a kitchen island, make it the star of the room. Use a bold pattern or a different color on the island than on the rest of the cabinets. A marble-patterned film on the back of an island can look very expensive.
Using Patterns for Visual Interest
If your kitchen is very plain, a pattern can add a lot of life. You can find film that looks like Moroccan tiles or subway tiles. You can even use these on the "backsplash" area between your counter and your cabinets.
-
Subway Tile Pattern: Looks classic and clean.
-
Geometric Shapes: Great for a modern, artistic home.
-
Floral Prints: Perfect for a cottage or "shabby chic" style.
-
Faux Brick: Gives your kitchen an industrial loft feel.
Mixing Materials
You can mix wood grain with solid colors. For example, use a wood grain film on a few open shelves and white film on the closed cabinets. This creates a high-end look that you usually only see in expensive homes.
Maintenance and Care for Long Life
Once your project is finished, you want it to stay beautiful. Peel and stick film is tough, but it needs a little care.
Cleaning Your New Surfaces
Do not use harsh chemicals like bleach or scrubby sponges. These can scratch the plastic and make it look dull. Use a soft cloth and a gentle spray cleaner. If you spill something like tomato sauce, wipe it up right away so it doesn't stain.
Dealing with Heat and Steam
Peel and stick film is held on by glue. Extreme heat can melt that glue. Be careful with toasters or coffee makers that release a lot of steam. Try to move them out from under the cabinets when you use them. This prevents the edges of the film from peeling over time.

Pros and Cons of Peel and Stick Film
It is important to know the good and bad parts of any DIY project. This helps you decide if it is right for your home.
The Good News (Pros)
-
Low Cost: It is the cheapest way to change your kitchen.
-
Ease of Use: Anyone can do it with a little patience.
-
Removable: Great for people who change their minds often.
-
Variety: You can find almost any color or pattern you want.
-
Durability: High-quality vinyl can last five to seven years.
The Challenges (Cons)
-
Time Consuming: It takes a long time to do every door and drawer.
-
Bubbles: It can be frustrating to get the film perfectly flat.
-
Corners: Folding the corners neatly takes practice.
-
Heat Sensitivity: It might not last as long near a very hot stove.
Comparison: Peel and Stick vs. Painting
Many people wonder if they should just paint their cabinets instead. Both have benefits, but they are very different projects.
The Painting Process
To paint cabinets, you must take the doors off and sand them. Then you apply a primer. Then you apply two or three coats of paint. You have to wait for each coat to dry. It can take a whole week to finish. Paint also chips over time, especially on the edges of doors.
The Peel and Stick Process
With film, the prep is just cleaning. There is no sanding and no waiting for paint to dry. If you don't like a piece you just stuck down, you can peel it off and start over. You cannot do that with paint. Film is also much better at resisting scratches than most paints.
Common Mistakes to Avoid
Even though this is an easy project, beginners often make the same mistakes. Knowing these will help you avoid them.
Not Cleaning Enough
This is the number one reason for failure. If there is even a tiny bit of dust or oil, the film will bubble up later. Spend more time cleaning than you think you need to.
Using Low-Quality Film
Cheap contact paper from a dollar store is very thin. It tears easily and you can see the wood grain through it. Buy "heavy-duty" or "architectural" vinyl. It is thicker and looks much more like a real finish.
Rushing the Job
Do not try to do the whole kitchen in two hours. Do one or two doors a night. This keeps you from getting tired. When you are tired, you make mistakes and get frustrated. Take your time and enjoy the process.
Ignoring the Back of the Door
You do not have to cover the whole back of the door, but you should wrap the film at least an inch around the edge. This prevents the film from catching on your clothes and peeling back when you open the cabinet.
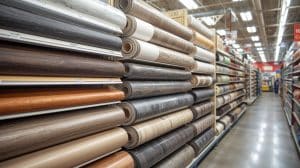
Where to Buy Your Supplies
You can find peel and stick film in many places. Local hardware stores usually have a small selection. For the best patterns, look online. Websites like Amazon, Etsy, and specialty vinyl shops have thousands of options.
What to Look for in a Brand
Look for words like "bubble-free" or "air-release technology." These films have tiny channels on the sticky side. These channels allow air to escape as you smooth it down. This makes it much easier to get a perfect finish.
Reading Reviews
Before you buy, read what other people say. Look for photos of their finished kitchens. This will show you if the color in the picture is the same as the color in real life.
Making Your Kitchen Feel New
A kitchen remodel is about more than just cabinets. Once you finish your peel and stick project, look at the rest of the room. Small changes can make a big difference.
Lighting Up the Space
Good lighting makes your new cabinets shine. Consider adding "puck lights" under your cabinets. These are small, battery-operated lights that stick to the bottom of the cabinet. They highlight your new finish and make cooking easier.
Updating the Backsplash
If you have extra film, you can use it to cover a boring backsplash. There are even special peel and stick tiles made of thick plastic that look like real ceramic. They are easy to clean and look amazing.
Your DIY Journey Starts Now
Baking a cake or painting a picture is fun, but changing a whole room is even better. Using Kitchen Cabinet Peel And Stick Ideas allows you to be an artist in your own home. You don't need a lot of money or special skills. All you need is a little time and the right tools.
Remember to take "before and after" photos. You will want to show your friends and family how much you changed the room by yourself. It is a great feeling to walk into a beautiful kitchen and know that you created it.
Encouragement for Beginners
Do not be afraid of making a mistake. It is just a sticker! If you mess up, you can peel it off and try again. That is the beauty of this project. It is low-stress and high-reward.
Frequently Asked Questions
What Is Peel and Stick Film?
Peel and stick film is a vinyl or contact paper with adhesive backing. You peel it off and stick it to cabinets for a quick makeover.
Is Peel and Stick Good for Renters?
Yes. It’s removable, leaves no damage, and lets renters personalize their kitchen without breaking lease rules.
How Long Does Peel and Stick Last?
High-quality vinyl can last 5–7 years if applied correctly and cared for.
What Styles Can I Choose?
You can pick solid colors, wood grain, marble, bold colors, or even patterns like subway tiles and faux brick.
How Do I Prevent Bubbles?
Use a squeegee or wrapped credit card to smooth the film as you apply. Work slowly and peel the backing a little at a time.
Can Peel and Stick Handle Heat and Steam?
It can handle normal kitchen use, but avoid placing appliances that release heavy steam directly under cabinets.
Is Peel and Stick Better Than Painting?
It’s faster, cheaper, and removable. Painting takes longer, requires sanding, and can chip over time.
Conclusion
Peel and stick film is a budget-friendly, renter-safe, and creative way to transform your kitchen cabinets. With hundreds of styles available, you can achieve a modern, rustic, or bold designer look without the cost of new cabinetry. The process is simple: clean, measure, apply, and smooth. With proper care, your cabinets will stay fresh and stylish for years.
This DIY project is low-stress, high-reward, and perfect for anyone wanting a quick kitchen upgrade. Take before-and-after photos, enjoy the transformation, and feel proud knowing you created a beautiful space yourself.
A Final Check-List
-
Choose your favorite style and order the film.
-
Clean your cabinets until they are perfect.
-
Take off the handles and doors.
-
Apply the film slowly from the center out.
-
Trim the edges and put the hardware back on.