
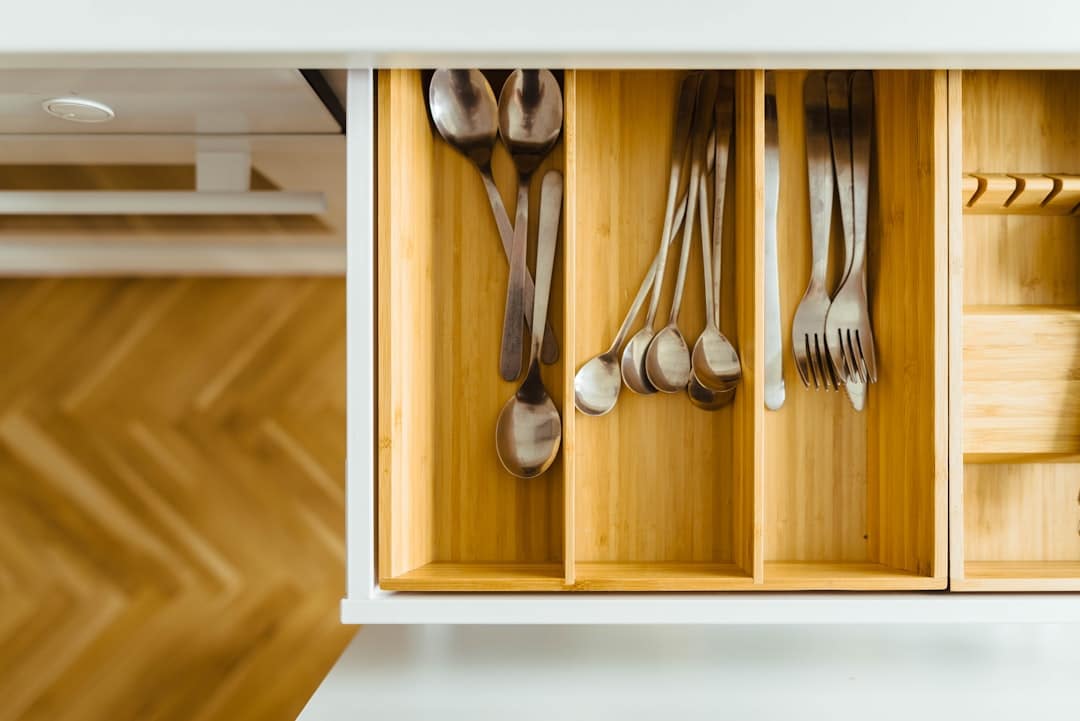
Are you tired of rummaging through cluttered kitchen drawers, struggling to find a spatula or measuring spoon? You're not alone.
The chaos lurking in those drawers can turn meal prep into a frustrating experience. But what if there was a simple, cost-effective solution to bring order to your culinary chaos? Enter kitchen drawer dividers! These nifty tools can transform your kitchen from a battlefield to a haven of organization, where every utensil has its place.
In this guide, we'll show you exactly how to make kitchen drawer dividers. Get ready to reclaim your kitchen space, enhance your cooking efficiency, and finally experience the joy of a perfectly organized kitchen. Read on, and let's bring harmony back to your cooking sanctuary!
Materials Needed
Making kitchen drawer dividers helps keep your drawers neat and organized. You need the right materials to build strong and lasting dividers.
This guide covers wood types, tools, and extra supplies needed for the project.
Wood Types
Choosing the right wood is important for durability and appearance. You want wood that is easy to cut and fits your kitchen style.
- Pine: Softwood, easy to cut, and affordable.
- Oak: Hard and strong, good for lasting dividers.
- Poplar: Smooth surface, good for painting or staining.
- Birch plywood: Stable, with a nice finish.
Tools Required
You need a few basic tools to measure, cut, and assemble the dividers. These tools help you work safely and accurately.
- Measuring tape or ruler to get exact sizes
- Saw (hand saw or jigsaw) to cut wood pieces
- Sandpaper or sanding block to smooth edges
- Hammer or screwdriver for assembly
- Clamps to hold pieces while gluing
Additional Supplies
These extra materials help secure the dividers and give a neat finish. They also make the project easier to complete.
- Wood glue to join pieces firmly
- Wood screws or small nails for extra strength
- Wood stain or paint to match your kitchen
- Paintbrush or cloth for applying stain or paint
- Protective gloves and safety glasses for safety
Measuring Your Drawers
Measuring your kitchen drawers correctly is key to making useful dividers. Accurate measurements help you create dividers that fit well and organize your space.
Start by checking the length, width, and height of each drawer. This information guides your layout and material choices.
Taking Accurate Dimensions
Use a tape measure to find the inside dimensions of the drawer. Measure the length from the left to the right side.
Next, measure the width from the front to the back. Finally, measure the height from the bottom to the top edge inside the drawer.
- Measure inside the drawer, not the outside.
- Take measurements in inches or centimeters.
- Write down each measurement clearly.
- Double-check each number for accuracy.
- Measure each drawer you want to organize.
Planning Divider Layout
After measuring, decide how many sections your dividers need. Think about what items you want to store and their sizes.
| Divider Section | Purpose | Suggested Width |
|---|---|---|
| Utensils | Forks, spoons, knives | 3 to 4 inches |
| Cooking Tools | Spatulas, whisks | 4 to 6 inches |
| Small Gadgets | Measuring spoons, peelers | 2 to 3 inches |
| Miscellaneous | Misc items or extra space | Variable |
Cutting The Dividers
Cutting the dividers for your kitchen drawers requires care and accuracy. The right cuts help the dividers fit perfectly and last longer.
We will cover how to mark the wood properly and follow safe cutting methods. These tips will make your work easier and safer.
Marking The Wood
Start by measuring the drawer space where the dividers will go. Use a pencil to draw clear lines on the wood. Mark both length and width carefully.
- Measure the drawer’s inside dimensions with a tape measure.
- Use a ruler or straight edge to draw straight lines on the wood.
- Mark each piece with its intended position, such as “left” or “right.”
- Double-check the measurements before cutting to avoid mistakes.
Safe Cutting Techniques
Safety is important when cutting wood. Always use the right tools and wear protective gear. Follow these steps to cut safely and accurately.
| Safety Tip | Description |
|---|---|
| Wear Safety Glasses | Protect your eyes from sawdust and wood chips. |
| Use a Sharp Blade | A sharp blade cuts cleaner and needs less force. |
| Secure the Wood | Clamp the wood to keep it steady while cutting. |
| Cut Slowly | Move the saw smoothly to avoid slips and rough edges. |
| Keep Hands Clear | Keep fingers away from the blade path at all times. |
Assembling The Dividers
Building kitchen drawer dividers helps organize utensils and tools. Proper assembly makes them sturdy and long-lasting.
This guide covers two key parts: joining the pieces and ensuring the dividers stay stable inside the drawer.
Joining Methods
There are several ways to join the divider pieces. Choose a method that fits your tools and skills.
- Wood Glue:Apply glue along the edges, then clamp until dry.
- Dowel Joints:Drill holes and insert wooden dowels for strong joints.
- Screws:Use small screws to secure pieces quickly.
- Notch Fitting:Cut notches so pieces slide together tightly without extra hardware.
Ensuring Stability
Stable dividers do not move or fall when you open or close the drawer. Use these tips to keep dividers steady.
| Method | Purpose | Notes |
| Non-slip Pads | Prevent sliding | Place pads under dividers |
| Friction Fit | Hold dividers tightly | Cut pieces to drawer size |
| Brackets or Clips | Secure in place | Attach to drawer sides |
| Weight Addition | Keep dividers down | Add small weights at base |
Finishing Touches
Adding finishing touches makes your kitchen drawer dividers look neat and last longer. These steps help protect the wood and improve the overall feel.
Careful sanding and choosing the right finish will give your project a smooth and polished look.
Sanding And Smoothing
Sanding removes rough edges and splinters. Use fine-grit sandpaper for a soft, smooth surface.
Sand all sides of the dividers, focusing on corners and edges. Wipe away dust with a damp cloth before finishing.
Painting And Staining Options
Painting adds color and protects the wood from moisture. Choose paint made for wood surfaces for best results.
Staining keeps the natural wood look and highlights the grain. Use a clear sealant after staining to protect the wood.
- Use water-based paint for easy cleanup
- Apply thin coats to avoid drips
- Let each coat dry fully before adding another
- Choose stain color that matches your kitchen style
- Seal with polyurethane for a durable finish
Credit: creators.yahoo.com
Installing Dividers In Drawers
Installing dividers in kitchen drawers helps keep items neat and easy to find. You can customize your drawers to fit utensils, tools, and other kitchen supplies.
Before installing, plan how you want to organize each drawer. Proper placement and secure fixing make dividers last longer and work better.
Placement Tips
Think about what you store in each drawer. Place dividers to create sections that fit your items well. Measure the drawer’s width and length to cut dividers to the right size.
- Group similar items together for easy access
- Leave space between dividers for larger utensils
- Use removable dividers if you want to change the layout often
- Plan for drawer depth when choosing divider height
Securing Dividers
Secure dividers firmly to prevent movement when opening or closing drawers. Choose a method that fits your drawer material and divider type.
| Method | Description | Best For |
| Wood Glue | Strong bond for wooden dividers | Solid wood drawers |
| Double-Sided Tape | Easy to apply and remove | Temporary setups |
| Screws | Very secure, long-lasting hold | Thick wooden dividers |
| Velcro Strips | Adjustable and reusable | Plastic or metal dividers |
Alternative Divider Ideas
Kitchen drawer dividers help keep your space neat. You can make dividers in many different ways. Using simple items around the house or flexible parts makes it easy.
Try different materials and designs to fit your needs. These ideas save money and add a personal touch.
Using Repurposed Materials
Old items can become great drawer dividers. Use things like cardboard, wood scraps, or even plastic containers. Cut them to fit your drawer size.
This is a cheap way to organize your drawer without buying new tools. Plus, it helps reduce waste by reusing materials.
- Cut cardboard pieces to make sections
- Use wooden sticks or chopsticks glued together
- Cut plastic containers to create small compartments
- Recycle old picture frames to form borders
Adjustable And Modular Options
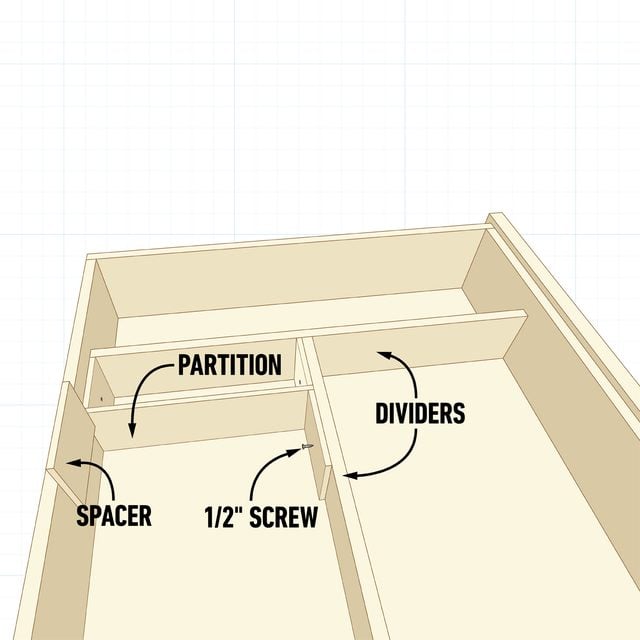
Adjustable dividers let you change the size of each section. Modular dividers come in pieces you can move around. Both types fit many drawer shapes.
These options are great if your drawer items change often. You can make sections bigger or smaller as needed.
- Use tension rods to create flexible dividers
- Buy or build wooden blocks that slide to fit
- Use plastic divider kits with movable parts
- Stack small boxes to make adjustable compartments
Credit: www.familyhandyman.com
Maintenance And Upkeep
Keeping your kitchen drawer dividers clean and in good shape helps them last longer. Regular care makes your drawers neat and easy to use.
Simple maintenance steps can prevent damage and keep your dividers looking fresh. Let’s look at how to clean and fix them.
Cleaning Tips
Clean your drawer dividers often to stop dirt from building up. Use mild soap and a soft cloth to wipe them down.
Avoid harsh chemicals that can damage the material. Dry the dividers fully before placing them back in the drawer.
- Remove dividers before cleaning
- Use warm water with gentle soap
- Wipe with a soft, damp cloth
- Dry completely to prevent moisture
- Clean spills quickly to avoid stains
Repairing Damages
Check your dividers regularly for cracks or loose parts. Fix small problems early to avoid bigger damage.
You can use wood glue or tape for quick repairs. Replace parts that are broken beyond fixing to keep dividers strong.
- Inspect dividers for cracks and wear
- Use wood glue for small splits
- Clamp glued parts until dry
- Use tape for temporary fixes
- Replace badly damaged dividers

Credit: www.familyhandyman.com
Frequently Asked Questions
What Materials Are Best For Kitchen Drawer Dividers?
Wood and bamboo are popular for their durability and aesthetics. Plastic and metal are also good for easy cleaning and sturdiness. Choose based on your drawer size and kitchen style for the best fit and functionality.
How Do I Measure Drawers For Dividers?
Measure the drawer’s width, depth, and height accurately. Use a tape measure and record these dimensions. This ensures your dividers fit perfectly and maximize space without overcrowding or gaps.
Can I Make Adjustable Kitchen Drawer Dividers?
Yes, adjustable dividers can be made using sliding wooden slats or expandable plastic inserts. These allow flexibility to customize space for different utensils or tools, adapting to your kitchen needs over time.
How Do Drawer Dividers Improve Kitchen Organization?
They separate utensils and tools, preventing clutter and making items easy to find. Dividers optimize space, protect items from damage, and create a tidy, efficient kitchen drawer layout.
Conclusion
Making kitchen drawer dividers helps keep your space neat. You can customize them to fit any drawer size. Using simple materials saves money and time. Organized drawers make cooking and cleaning easier every day. Try creating your own dividers to enjoy a tidier kitchen.
Small steps bring big changes to your home’s order. Start today and see the difference it makes.


