Are you tired of struggling with outdated or broken kitchen drawer handles? Installing new ones can transform your kitchen's look and feel, making it more functional and stylish.
But where do you start? You might think it's a complex task, reserved only for the pros. The truth is, you can do it yourself, and it's easier than you might expect. In this guide, you'll discover simple, step-by-step instructions to install kitchen drawer handles like a pro.
Imagine the satisfaction of opening your newly adorned drawers, knowing you did it all by yourself. So, roll up your sleeves, grab your tools, and let's get started on giving your kitchen the upgrade it deserves. Your dream kitchen is just a few steps away!
Choosing The Right Handles
Picking the right kitchen drawer handles changes how your kitchen looks. It also makes your drawers easier to open and close.
Think about style, size, and material before buying handles. This helps you find handles that fit your kitchen design.
Types Of Drawer Handles
There are many types of drawer handles. Some are simple, and some are more decorative. Choose one that fits your kitchen style.
- Bar Pulls: Long and straight, easy to grip.
- Knobs: Small and round, classic look.
- Bail Pulls: Handle hangs down, often vintage style.
- Edge Pulls: Hidden on drawer edge, modern look.
Materials And Finishes
Handles come in different materials like metal, wood, or plastic. Each material affects the look and feel of your kitchen.
Finishes change the color and shine of handles. Pick a finish that matches your cabinets and other kitchen hardware.
- Stainless Steel: Durable and modern.
- Brass: Warm and classic.
- Chrome: Shiny and easy to clean.
- Matte Black: Sleek and stylish.
- Wood: Natural and rustic.
Measuring For Fit
Measure your drawer before buying handles. Good measurement ensures the handle fits well and looks balanced.
Measure the distance between screw holes on your drawer. This is called the "center to center" measurement.
- Use a ruler or tape measure for accuracy.
- Write down the measurement before shopping.
- Check if the new handle matches your drawer hole spacing.
- If needed, fill old holes and drill new ones carefully.

Credit: www.youtube.com
Tools And Materials Needed
Installing kitchen drawer handles is a simple task if you have the right tools. Preparing well helps you finish the job quickly and neatly.
This guide lists the tools and materials you need before starting. It also explains how to prepare your workspace for best results.
Essential Tools
You need a few basic tools to install drawer handles. These tools help you measure, mark, and fix the handles securely.
- Measuring tape or ruler
- Pencil for marking spots
- Drill with drill bits
- Screwdriver (usually Phillips head)
- Level to keep handles straight
- Masking tape (optional for marking)
- Screws that fit your handles
Preparing Your Workspace
Clear your workspace before you start. This makes the job safer and easier to complete.
Good lighting helps you see marks and screws clearly. Use a sturdy surface to work on your drawers.
- Remove drawers from cabinets if possible
- Lay down a soft cloth to avoid scratches
- Organize your tools within reach
- Make sure the area is clean and free of dust
Removing Old Handles
Removing old kitchen drawer handles is the first step before installing new ones. It is important to take off the old handles carefully to avoid damage.
Use the right tools and follow simple steps to remove the handles safely and clean the drawer surfaces well.
Loosening Screws
Start by finding the screws that hold the drawer handles in place. These screws are usually inside the drawer.
Use a screwdriver that fits the screws well. Turn the screws counterclockwise to loosen them. Keep the screws safe if you plan to reuse them.
- Open the drawer fully
- Locate the screws on the back of the handle
- Use a screwdriver to turn screws left
- Remove the handle gently after screws are loose
Cleaning Drawer Surfaces
After removing the handles, clean the drawer surfaces well. Old handles leave dirt and marks behind.
Use a soft cloth and mild cleaner to wipe the area. Make sure the surface is dry before adding new handles.
- Remove dust and dirt with a dry cloth
- Apply mild soap and water with a soft cloth
- Rinse with a clean damp cloth
- Dry completely with a dry towel

Credit: www.youtube.com
Marking New Handle Placement
Marking new handle placement is key to a neat kitchen drawer. Accurate marks help you drill holes in the right spot. This makes the handle fit well and look balanced.
Take your time to measure and mark carefully. A small mistake can cause the handle to be crooked or uneven.
Measuring And Aligning
Measure the drawer width first. Find the drawer center to keep the handle straight. Use a ruler or tape measure for accuracy.
Mark the spots for screws evenly from the center point. Use a pencil to make light marks so they can be erased if needed.
- Measure drawer width and height
- Mark drawer center with a pencil
- Measure handle hole distance
- Mark screw holes evenly on both sides
- Double-check measurements before drilling
Using Templates For Accuracy
Templates help mark handle holes quickly and accurately. You can buy a handle template or make one from cardboard.
Place the template on the drawer front. Align it with the drawer edges or center mark. Mark the screw holes through the template holes.
- Choose or create a handle template
- Align template with drawer center or edges
- Hold template steady while marking holes
- Check marks before drilling holes
Drilling Holes
Installing kitchen drawer handles often requires drilling holes in the drawer front. Precise drilling ensures the handles fit well and look neat.
Choosing the right drill bit and drilling carefully helps avoid damage to your drawers. This guide covers key points for drilling holes safely and accurately.
Selecting The Right Drill Bit
Use the correct drill bit size to match your handle screws. A bit too large will make the hole loose. Too small will make it hard to fit the screw.
- Measure the screw diameter before choosing a drill bit.
- Use a brad point bit for clean holes in wood drawers.
- A twist bit works well for metal or plastic drawers.
- For handles with two screws, drill holes evenly spaced.
- Use a drill bit stopper or tape to control hole depth.
Drilling Safely And Precisely
Hold the drawer steady to avoid slips while drilling. Mark the hole positions clearly with a pencil or tape before you start.
| Safety Tip | Precise Drilling Tip |
| Wear safety glasses to protect your eyes. | Use a center punch to mark drill spots. |
| Keep fingers away from the drill bit path. | Drill at a slow speed for better control. |
| Clamp the drawer if possible to prevent movement. | Check drill bit alignment before drilling. |
| Unplug the drill when changing bits. | Clean wood dust to see the hole clearly. |
Credit: medium.com
Installing New Handles
Installing new kitchen drawer handles is a simple way to update your kitchen. It can make your drawers look fresh and easier to open.
With the right tools and steps, you can attach new handles yourself. This guide will help you install them correctly.
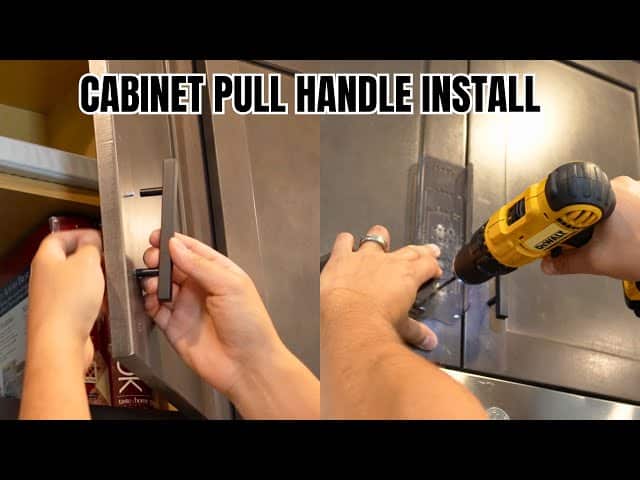
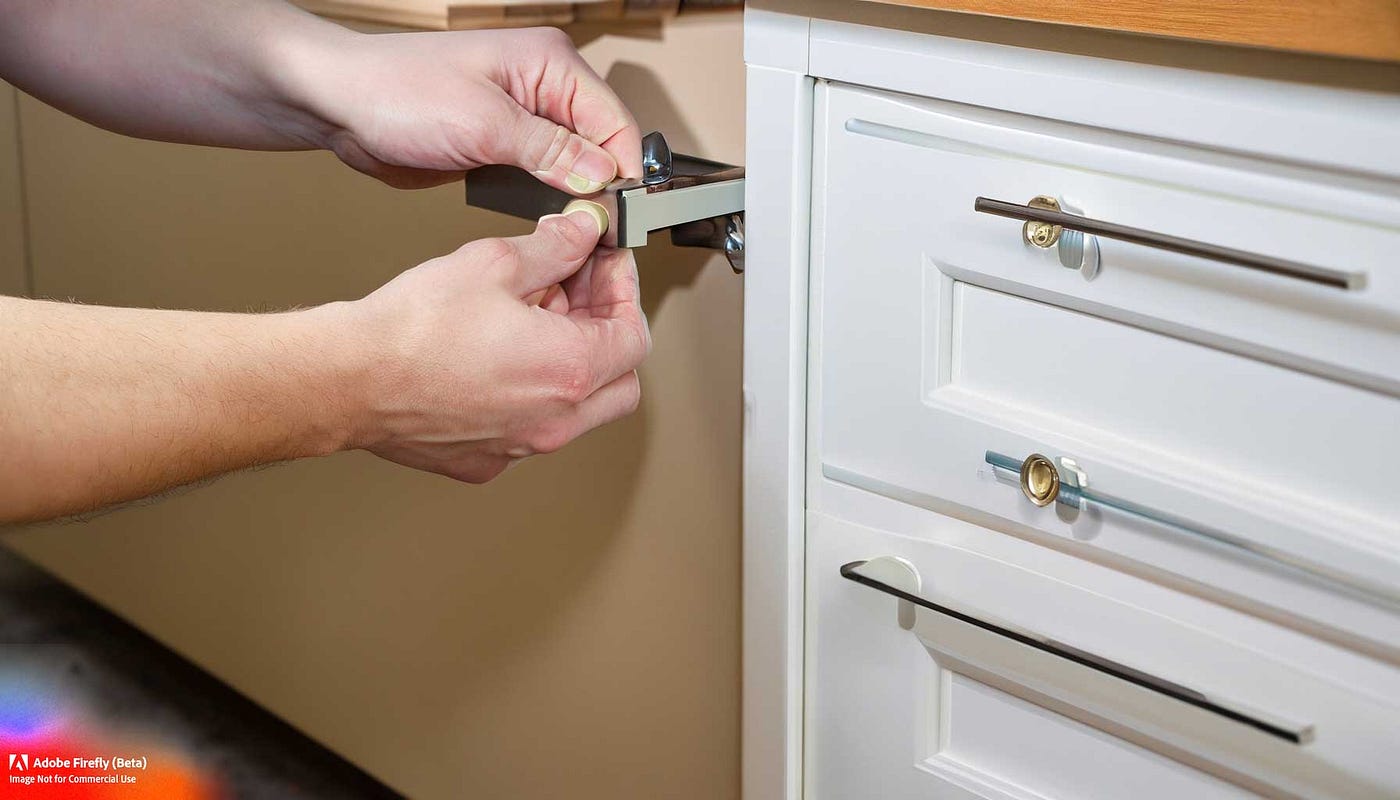
Attaching Handles Securely
Start by aligning the handle with the drawer holes. Insert screws through the inside of the drawer into the handle.
Tighten the screws gently to hold the handle in place. Avoid over-tightening to prevent damage to the drawer or handle.
- Use a screwdriver that fits the screw head well
- Hold the handle steady while tightening screws
- Stop tightening as soon as the handle feels firm
Checking Alignment And Tightness
Look at the handle to make sure it is straight and centered on the drawer. Misaligned handles can look uneven and feel awkward to use.
Test the tightness by pulling the handle gently. If it moves or feels loose, tighten the screws a bit more.
- Check each handle for even placement
- Use a level if needed to ensure straightness
- Re-tighten screws if handles wiggle or shift
Tips For A Professional Look
Installing kitchen drawer handles can improve your kitchen's style. A neat installation makes your kitchen look tidy and well cared for.
Follow simple tips to get a professional look. Small details can make a big difference in the final result.
Consistent Spacing
Keep the spacing between handles the same on all drawers. This creates a clean and balanced look.
Measure carefully before drilling any holes. Use a ruler or tape measure to mark the exact spots.
- Mark handle positions with a pencil
- Check measurements twice to avoid mistakes
- Use a template or jig for uniform holes
- Align handles horizontally or vertically depending on drawer style
Avoiding Damage
Protect your drawers from scratches and dents during installation. Use gentle tools and take your time.
Drill holes slowly and with the right drill bit size. Support the drawer from behind to prevent splitting.
- Place painter’s tape over drilling spots
- Use a drill bit slightly smaller than the screw
- Hold the drawer firmly while drilling
- Wipe dust away before attaching handles
Maintaining Your Drawer Handles
Keeping your kitchen drawer handles clean and in good shape helps them last longer. Regular care prevents damage and keeps them looking nice.
Simple steps can keep your handles working well every day. Learn how to clean and fix them properly.
Cleaning Techniques
Clean your drawer handles often to stop dirt build-up. Use soft cloths and mild cleaners to avoid scratches and damage.
- Wipe handles with a damp cloth and gentle soap
- Dry handles with a soft towel to prevent rust
- Avoid harsh chemicals that can dull finishes
- For metal handles, use a polish made for that metal type
- Clean regularly, at least once a week
Handling Repairs
Fix drawer handles quickly if they become loose or damaged. Small repairs keep them safe to use and stop further problems.
| Problem | Cause | Solution |
| Loose Handle | Worn screws | Tighten or replace screws |
| Broken Handle | Material fatigue | Replace handle with a new one |
| Sticking Handle | Dirt buildup | Clean and lubricate the handle |
| Rusty Handle | Moisture exposure | Remove rust and apply protective coating |
Frequently Asked Questions
How Do I Measure For Kitchen Drawer Handles?
Measure the distance between the screw holes on your drawer front. Use a ruler or tape measure for accuracy. This ensures you buy handles that fit perfectly without extra drilling or filling holes.
What Tools Are Needed To Install Drawer Handles?
You need a drill, screwdriver, measuring tape, pencil, and screws. These basic tools help you mark, drill, and secure the handles easily and accurately.
Can I Install Handles Without Drilling New Holes?
Yes, if the new handles match existing hole spacing. Otherwise, you’ll need to drill new holes to align with the new handle design.
How Do I Choose The Right Drawer Handle Size?
Select handles based on drawer size and hole spacing. Larger drawers often need longer handles for better grip and style balance.
Conclusion
Installing kitchen drawer handles can be simple and quick. Measure carefully and mark the spots before drilling. Use the right screws and tools for a secure fit. Take your time to align handles evenly on each drawer. A neat installation improves both look and function.
Small steps lead to a big difference in your kitchen. Now, enjoy your refreshed space with new handles installed.