Are you tired of wrestling with a kitchen drawer that just won't cooperate? How to Fix Broken Kitchen Drawer can seem tricky, but it’s easier than you think. A broken kitchen drawer can be a real hassle, disrupting the flow of your daily routine and adding unnecessary stress to your cooking experience.
But fear not! You’re not alone, and learning how to fix broken kitchen drawer issues might save you time, money, and a whole lot of frustration. Imagine the satisfaction of sliding that drawer effortlessly every time. In this guide, you’ll discover simple, step-by-step solutions.
Whether it’s a jammed track or a wobbly handle, we’ve got you covered. Ready to transform your kitchen back into a smooth-running space? Let’s dive in and fix that drawer for good!
Common Drawer Issues
Kitchen drawers often face wear and tear from daily use. Knowing common problems helps you fix them quickly.
Fixing small issues can save money and keep your kitchen organized.
Loose Or Broken Handles
Handles can become loose or break from pulling or heavy use. Loose handles make it hard to open drawers.
Tighten screws to fix loose handles. Replace broken handles with new ones that fit your drawer style.
Sticking Or Jammed Drawers
Drawers may stick due to dirt, swelling wood, or warped parts. Jammed drawers stop opening or closing smoothly.
Clean the drawer tracks and edges. Sand any swollen wood and apply wax or soap to help the drawer slide easier.
Damaged Drawer Bottoms
Drawer bottoms can crack or break if they hold heavy items. This causes drawers to sag or lose support.
Replace damaged bottoms with new plywood or strong boards cut to size. Secure them with nails or screws.
Misaligned Drawer Slides
Misaligned slides make drawers hard to open or close. Slides can bend or loosen over time.
Check if slides are straight and firmly attached. Adjust or replace slides to restore smooth movement.
Tools And Materials Needed
Fixing a broken kitchen drawer requires the right tools and materials. Using proper items makes the repair easier and stronger.
This guide lists the basic tools, replacement parts, adhesives, and fasteners you will need for the job.
Basic Hand Tools
You need some simple hand tools to open, remove, and fix the drawer parts. These tools help you work safely and precisely.
- Screwdriver set (flathead and Phillips)
- Hammer
- Measuring tape
- Pliers
- Utility knife
- Wood chisel
- Power drill with drill bits (optional)
Replacement Parts
Identify which parts are broken and replace them. Having the right parts ensures the drawer works smoothly again.
| Part | Description |
| Drawer slides | Metal or plastic rails that guide the drawer |
| Drawer front | The visible face of the drawer |
| Wooden panels | Side, bottom, or back panels of the drawer box |
| Screws | Fasteners to hold parts together |
| Handles or knobs | Hardware to open the drawer |
Adhesives And Fasteners
Strong adhesives and fasteners keep the drawer parts joined firmly. Choose them based on the materials you repair.
- Wood glue for wooden parts
- Epoxy for strong bonds
- Wood screws of different sizes
- Nails for quick fixes
- Wood filler to fill gaps or holes
- Sandpaper to smooth surfaces before gluing
Fixing Loose Or Broken Handles
Kitchen drawer handles can become loose or break over time. Fixing them keeps your drawers easy to use. You can often repair handles yourself with simple tools.
This guide shows how to tighten screws and replace handles. Both methods help restore drawer function and improve kitchen appearance.
Tightening Screws
Loose handles usually mean screws are not tight. You need a screwdriver that fits the screw head. Check each handle and tighten screws carefully.
- Open the drawer to access the screws behind the handle.
- Use a screwdriver to turn each screw clockwise.
- Test the handle by pulling gently to see if it is secure.
- If screws spin without tightening, use a toothpick and wood glue to fill the hole.
- Let the glue dry, then reinsert and tighten the screw.
Replacing Handles
If a handle is broken or too worn, replace it with a new one. Handles come in many sizes and styles to fit your drawer.
| Tool or Material | Purpose |
|---|---|
| Screwdriver | Remove old screws and attach new handle |
| New handle | Replace broken or worn handle |
| Measuring tape | Measure screw hole distance for correct handle size |
| Drill (optional) | Make new holes if needed |
Follow these steps to replace a handle:
- Remove the screws holding the old handle and take it off.
- Measure the distance between the screw holes.
- Buy a new handle that matches the hole spacing.
- Align the new handle with the holes and insert screws.
- Tighten screws until the handle feels secure.
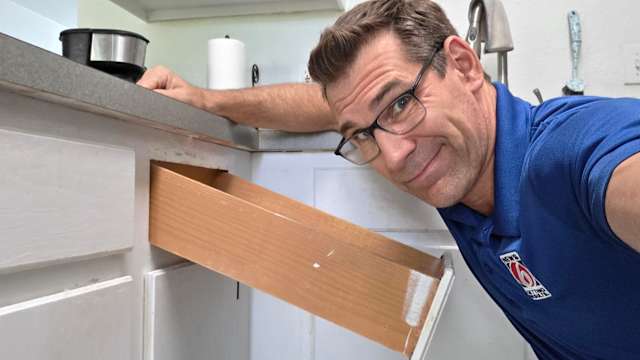
Credit: www.clickorlando.com
Repairing Sticking Drawers
Sticking drawers can make your kitchen frustrating to use. Fixing them is often simple and saves money.
Cleaning and lubricating the drawer parts usually solves the problem. This guide helps you do it step-by-step.
Cleaning Tracks And Slides
Dirt and debris build up on drawer tracks and slides. This buildup blocks smooth movement and causes sticking.
Remove the drawer and clean all tracks and slides with a soft cloth. Use mild soap and water if needed.
- Take out the drawer carefully.
- Wipe tracks and slides with a damp cloth.
- Use a toothbrush for corners and crevices.
- Dry all parts completely before reassembling.
Lubricating Moving Parts
Lubrication helps drawers slide easily. Use a suitable lubricant on tracks and slides for smooth operation.
A silicone spray or dry lubricant works best. Avoid oily or greasy substances that attract more dirt.
- Apply lubricant sparingly to tracks and slides.
- Open and close the drawer several times to spread it.
- Wipe away extra lubricant to prevent buildup.
Replacing Damaged Drawer Bottoms
Kitchen drawers often suffer damage at the bottom due to heavy use. Fixing them ensures your drawers work well and last longer. This guide helps you replace broken drawer bottoms safely and easily.
You will learn how to remove the old bottom and fit a new one. No special tools or skills are needed to do this repair yourself.
Removing The Old Bottom
First, take out the drawer from the cabinet. Lay it on a flat surface with the bottom side up. Check how the bottom is attached. It might be nailed, glued, or slid into grooves.
- Remove any nails or staples carefully with pliers.
- If glued, gently pry the bottom away using a putty knife.
- Slide out the bottom panel if it fits in grooves.
- Clean the edges and inside the drawer frame after removal.
Cutting And Installing A New Bottom
Measure the drawer’s inside length and width. Use these dimensions to cut a new bottom panel. Choose plywood or hardboard about 1/4 inch thick for strength.
| Material | Recommended Thickness | Notes |
| Plywood | 1/4 inch | Strong and durable |
| Hardboard | 1/4 inch | Smooth surface but less strong |
| MDF | 1/4 inch | Easy to cut, avoid if wet |
Place the new bottom inside the drawer frame. Attach it with small nails or wood glue. Make sure it fits snugly and sits flat. Wipe off any extra glue before it dries.
- Carpentry experts recommend a specific material for drawer bottoms: "While plywood is strong, the easiest and best material for a thin drawer bottom replacement is 1/4-inch Underlayment (Luan Plywood). It’s lighter, generally smoother, and easier to cut with a utility knife or circular saw than standard plywood. For an even easier installation, use wood glue and finish nails instead of screws—the nails require less effort and prevent splitting the thin material."

Credit: www.amazon.ca
Realigning Drawer Slides
Broken kitchen drawers often fail because the slides are misaligned. Realigning the slides helps the drawer open and close smoothly. This guide shows you how to fix it.
Checking and adjusting the position of the slides is the first step. Then, make sure the slides are secured tightly to avoid future problems.
Adjusting Slide Position
Start by removing the drawer from the cabinet. Look at the slides on both the drawer and the cabinet sides. If they are out of line, realign them carefully.
- Loosen the screws holding the slides slightly.
- Move the slide so it lines up straight with the cabinet.
- Check if the slide sits evenly on both sides.
- Tighten the screws while holding the slide in place.
- Test the drawer by sliding it in and out.
Securing Slides Properly
Once the slides align, secure them to prevent shifting. Use the right screws and check if the wood is solid enough to hold them.
| Tip | Description |
| Use Wood Screws | Choose screws designed for wood to hold slides firmly. |
| Replace Damaged Screws | Old screws may strip; replace with new ones for better grip. |
| Check Wood Condition | Weak wood needs reinforcement before attaching slides. |
| Tighten Evenly | Secure screws evenly to keep slides stable. |
Preventive Maintenance Tips
Keeping your kitchen drawers in good shape needs regular care. Small actions can prevent damage and save you time fixing issues later.
Follow these tips to keep your drawers working smoothly and avoid common problems like broken rails or loose handles.
Regular Cleaning
Dirt and dust can cause your drawer to stick or wear out. Clean your drawers often to keep them smooth and easy to open.
- Remove all items before cleaning
- Use a soft cloth to wipe the inside and outside
- Clear out crumbs and debris from the rails
- Use mild soap and water for sticky spots
- Dry the drawer completely before closing it
Avoiding Overloading
Putting too many heavy items in a drawer can break its parts. Know the weight limit of each drawer and do not exceed it.
| Drawer Size | Recommended Max Weight |
| Small (up to 12 inches) | 10 lbs (4.5 kg) |
| Medium (12-18 inches) | 20 lbs (9 kg) |
| Large (over 18 inches) | 30 lbs (13.5 kg) |
Periodic Tightening Of Hardware
Loose screws and bolts cause drawers to wobble and break. Check and tighten hardware every few months to keep everything secure.
Follow this quick guide to tighten your drawer hardware safely:
- Use a screwdriver that fits the screws well.
- Check all handles and knobs first.
- Tighten the screws gently but firmly.
- Inspect the drawer slides and tighten bolts.
- Open and close the drawer to test stability.

Credit: www.clickorlando.com
Frequently Asked Questions
How Do I Fix A Broken Kitchen Drawer Slide?
To fix a broken drawer slide, remove the drawer and inspect the rails. Tighten loose screws or replace damaged slides. Lubricate the rails for smooth movement. If beyond repair, purchase matching replacement slides and install them carefully.
What Tools Are Needed To Repair A Kitchen Drawer?
Common tools include a screwdriver, hammer, wood glue, clamps, and replacement screws or slides. A drill and measuring tape may help. These tools allow you to tighten, realign, or replace damaged parts effectively.
Can I Fix A Drawer With A Broken Bottom Panel?
Yes, remove the drawer and replace the bottom panel with plywood or a similar material. Cut to size, glue, and secure it with nails or screws. Reinforce weak areas to restore drawer strength and function.
How Long Does It Take To Repair A Broken Kitchen Drawer?
Repairing a drawer usually takes 30 to 60 minutes. Time varies based on damage severity and your skill level. Simple fixes like tightening screws are quicker, while replacing parts takes longer.
Conclusion
Fixing a broken kitchen drawer does not have to be hard. With basic tools and patience, you can do it yourself. Small repairs can save money and keep your kitchen working well. Take your time and follow simple steps carefully.
Soon, your drawer will open and close smoothly again. A little effort brings big results. Keep your kitchen neat and functional with easy fixes like this.
To see visual examples of how to quickly clean, lubricate, and fix sticking drawers using simple methods (including the wax/soap trick!), check out this easy-to-follow tutorial: