
Are you tired of digging through cluttered cabinets to find your plates? Imagine opening your kitchen cabinet and seeing your plates neatly organized, easy to grab, and looking great.
How to Build a Plate Rack for Your Kitchen Cabinet is a simple project that can save you time and make your kitchen feel more organized. In this guide, you’ll discover easy steps to create a custom plate rack that fits your space perfectly.
Keep reading, and you’ll soon enjoy a kitchen that works better for you every day.
Credit: www.youtube.com
Materials Needed
Building a plate rack requires the right materials to ensure strength and style. Choosing the correct wood and tools will make your project easier.
This guide covers the main materials you need to create a kitchen cabinet plate rack. Read carefully to prepare all items before starting.
Types Of Wood
Select wood that is sturdy and fits your kitchen style. Hardwoods last longer and look great in cabinets.
- Oak: Strong and durable with a classic look.
- Maple: Smooth surface and light color.
- Cherry: Rich color that darkens with age.
- Pine: Affordable and easy to work with.
Tools Required
| Tool | Purpose |
| Measuring Tape | Measure wood pieces accurately |
| Saw | Cut wood to size |
| Drill | Make holes and drive screws |
| Sandpaper | Smooth wood surfaces |
| Screwdriver | Tighten screws |
| Clamps | Hold pieces while gluing |
Additional Supplies
Besides wood and tools, you need some extra supplies for assembly and finishing.
- Wood screws for strong joints
- Wood glue to hold parts together
- Wood stain or paint for finishing
- Clear sealant to protect the wood
- Painter’s tape to keep edges clean
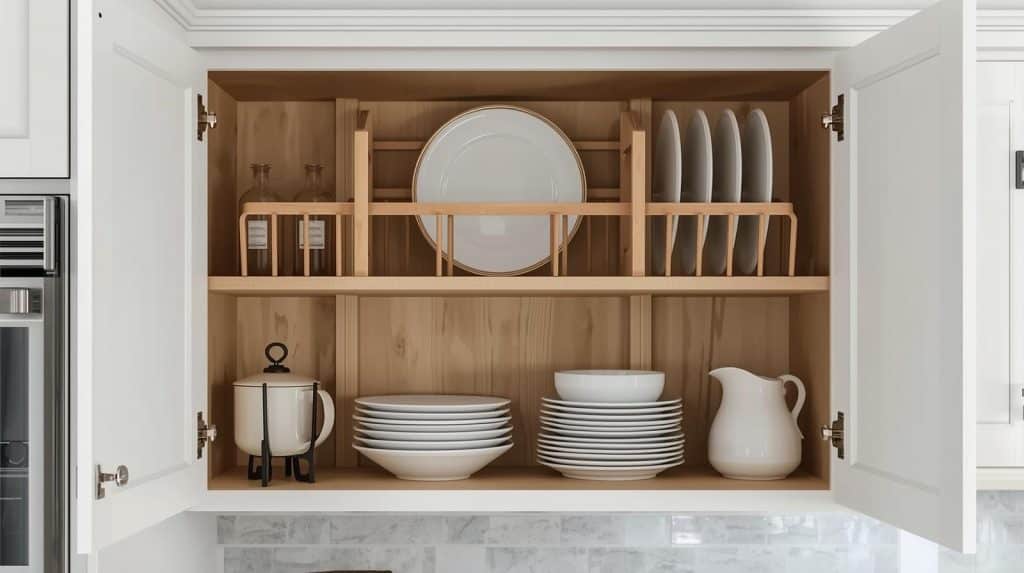
Credit: www.apartmenttherapy.com
Choosing The Right Design
Building a plate rack for your kitchen cabinet starts with picking the right design. The design affects how well the rack fits and works in your space. Consider key factors to make a good choice.
Focus on size, style, and space to find a plate rack that suits your kitchen and needs. This guide helps you decide on the best design.
Size And Dimensions
Measure the cabinet space carefully. Your plate rack should fit well without crowding the cabinet. Think about the size of your plates too.
| Measurement | Recommendation |
|---|---|
| Width | Leave 1-2 inches extra for easy access |
| Height | Match the tallest plate or bowl height |
| Depth | Allow space for plate thickness plus 1 inch |
Style Options
Choose a style that matches your kitchen decor. There are many options, from classic wood to modern metal.
- Open rack for easy plate access
- Closed rack with doors to hide plates
- Tiered shelves to hold different plate sizes
- Wall-mounted racks to save cabinet space
Space Considerations
Think about how much room you have in your kitchen. The rack should not block other cabinets or appliances.
Use this checklist to evaluate your space needs:
- Is there enough clearance to open cabinet doors fully?
- Can you reach plates easily without moving other items?
- Will the rack fit without crowding the countertop?
- Does the rack allow airflow to keep plates dry?
Preparing The Wood
Preparing the wood is a key part of building a plate rack. It helps ensure your rack fits well and looks neat.
Good preparation makes assembly easier and the final product stronger. Focus on measuring, cutting, sanding, and checking before you start building.
Measuring And Cutting
Measure your kitchen cabinet space carefully. Take the height, width, and depth to know how big the rack should be.
- Use a tape measure for accuracy
- Mark the wood with a pencil clearly
- Cut with a saw following the marks
- Double-check measurements before cutting
Sanding For Smooth Finish
Sanding removes rough edges and splinters. It makes the wood smooth to touch and safer to handle.
| Sanding Tool | Purpose |
| Coarse Sandpaper (80 grit) | Remove large rough spots |
| Medium Sandpaper (120 grit) | Smooth the surface |
| Fine Sandpaper (220 grit) | Prepare for finishing |
Pre-assembly Checks
Before putting the rack together, check all pieces for fit and quality. Make sure nothing is warped or damaged.
- All wood pieces cut to correct size
- Edges and surfaces sanded smooth
- Wood free of cracks or splits
- Tools and fasteners ready

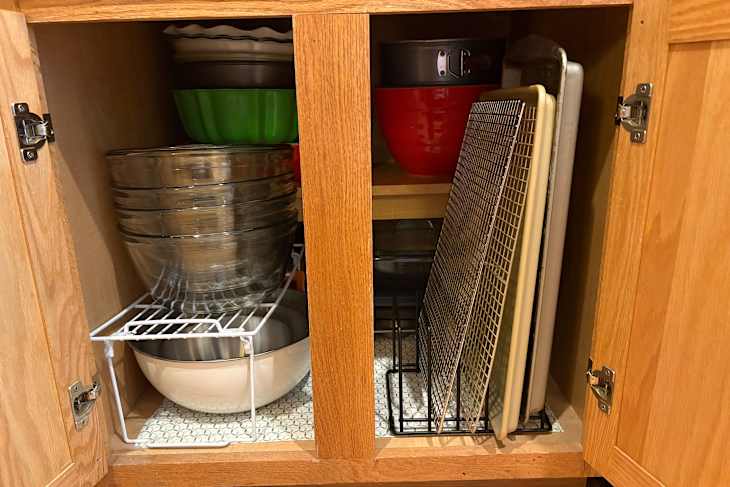
Credit: www.aol.com
Assembling The Rack
Building a plate rack helps organize your kitchen cabinet. It keeps plates neat and easy to access.
This guide shows how to assemble the rack step by step. Follow each part carefully for best results.
Building The Frame
Start by cutting the wood pieces for the frame. The frame holds the whole rack together.
Use strong wood like pine or oak for durability. Measure twice before cutting to avoid mistakes.
- Cut two side panels to the rack height.
- Cut a top and bottom piece to fit width.
- Sand all edges smooth to avoid splinters.
- Join pieces using wood glue and screws.
Creating Plate Slots
Plate slots hold your plates upright and separated. They must fit the plate size well.
Cut evenly spaced grooves or use thin strips to create dividers. Space them about 2 inches apart.
- Mark slot positions on the frame bottom piece.
- Use a router or saw to cut shallow grooves.
- Alternatively, nail thin wood strips vertically as dividers.
- Sand all surfaces to protect plates from scratches.
Securing The Structure
Secure the frame so it stays sturdy in your cabinet. Loose parts can cause damage or accidents.
Use screws and wood glue at all joints. Check for wobble and tighten as needed.
- Apply wood glue to all connecting edges.
- Drive screws through sides into top and bottom pieces.
- Clamp the frame until glue dries for extra strength.
- Add corner braces for more support if needed.
Finishing Touches
Finishing touches make your plate rack look great and last longer. They protect the wood and add style.
Use simple steps to paint, stain, and protect your rack. Then install the mounting hardware to secure it.
Painting Or Staining
Painting or staining changes the look of the wood. It also helps protect it from moisture and dirt.
Choose a paint or stain that matches your kitchen style. Use a brush or cloth to apply evenly.
- Light coats work best to avoid drips
- Let each coat dry fully before next
- Use a stain for a natural wood look
- Use paint for bright or solid colors
Adding Protective Coating
A protective coating keeps your plate rack safe from scratches and spills. It adds a smooth finish.
Apply clear varnish, polyurethane, or wax. These coatings make cleaning easier and extend the rack’s life.
- Use a clean brush for varnish or polyurethane
- Apply thin, even layers
- Allow full drying time between coats
- Wax can be rubbed on with a soft cloth
Installing Mounting Hardware
Mounting hardware keeps the plate rack steady on your cabinet wall. It must be strong and secure.
Use screws and wall anchors that fit your wall type. Measure and mark holes before drilling.
- Find studs for stronger support
- Use a level to keep the rack straight
- Tighten screws firmly but do not overtighten
- Check stability before placing plates
Installing In The Cabinet
Installing a plate rack in your kitchen cabinet can help organize your dishes. This guide on How to Build a Plate Rack for Your Kitchen Cabinet shows you how to install the rack securely and correctly.
Follow these steps to position, secure, and adjust the plate rack for the best use inside your cabinet, ensuring your dishes stay organized and easily accessible.
Positioning The Rack
Start by placing the plate rack inside the cabinet to find the best spot. Make sure it fits without blocking other shelves or doors.
Consider the height and depth of your plates. Leave enough space for easy access and proper air circulation.
Securing To Cabinet Walls
Use screws to attach the rack to the cabinet walls firmly. Ensure the screws are the right size for both the rack and cabinet material.
- Mark the screw hole positions on the cabinet walls using a pencil.
- Drill pilot holes to prevent wood splitting.
- Align the rack with the holes and insert screws.
- Tighten screws until the rack is stable but avoid overtightening.
Final Adjustments
Check that the rack is level and plates sit evenly. Adjust screws if the rack tilts or feels loose.
| Adjustment | Action | Result |
|---|---|---|
| Rack Tilt | Loosen screws and re-level | Plates rest flat and stable |
| Loose Rack | Tighten screws firmly | Rack feels secure and safe |
| Plate Fit | Adjust rack position if needed | Easy plate storage and removal |
Maintenance Tips
Keeping your plate rack in good shape helps it last longer. Regular care keeps it clean and sturdy.
By following tips on How to Build a Plate Rack for Your Kitchen Cabinet, you can also maintain it properly. Simple checks and cleaning prevent big problems. Follow easy steps to maintain your kitchen plate rack and enjoy a functional, long-lasting storage solution.
Cleaning The Rack
Clean the plate rack often to stop dust and dirt buildup. Use a soft cloth with mild soap and water.
Dry the rack well after cleaning to avoid water damage or rust. Avoid harsh chemicals that can harm the finish.
- Use soft, damp cloth for dust and spills
- Apply mild soap mixed with water for dirt
- Dry completely with a clean towel
- Do not use abrasive cleaners or steel wool
Inspecting For Wear
Check your plate rack regularly for signs of damage or wear. Look at joints, screws, and surfaces closely.
Spotting problems early helps you fix them before they get worse. This keeps the rack safe to use.
- Look for loose screws or nails
- Check for cracks in wood or metal
- Watch for rust or peeling paint
- Test the rack’s stability by gently shaking it
Repairing Minor Damage
Fix small problems quickly to stop them from growing. Tighten screws and glue loose parts as needed.
Use sandpaper to smooth rough areas. Apply touch-up paint or wood finish to keep the rack looking good.
- Tighten or replace loose screws
- Glue and clamp loose joints
- Sand rough or chipped spots gently
- Apply paint or finish to protect surfaces
Frequently Asked Questions
What Materials Do I Need To Build A Plate Rack?
To build a plate rack, you need wood boards, screws, brackets, sandpaper, and paint or stain. Choose sturdy wood like pine or oak for durability. Use screws for secure assembly and finish with paint or stain to match your kitchen décor.
How Much Time Does Building A Plate Rack Take?
Building a plate rack usually takes 2 to 4 hours, depending on your skills. This includes measuring, cutting, assembling, sanding, and painting or staining. Planning and preparation can reduce the overall time required.
Can I Customize The Plate Rack Size?
Yes, you can customize the plate rack size to fit your cabinet space. Measure your cabinet’s dimensions carefully before cutting wood. Adjust the width, height, and depth to accommodate your plates and kitchen layout perfectly.
Is It Safe To Install A Plate Rack Inside Cabinets?
Yes, installing a plate rack inside cabinets is safe if properly secured. Use sturdy brackets and screws to fix the rack. Ensure it can support the weight of your plates to prevent accidents or damage.
Conclusion
Creating a plate rack for your kitchen is rewarding. It’s practical and adds style. With basic tools, you can complete this project easily. Just follow the steps carefully. Measure, cut, and assemble with care. By learning How to Build a Plate Rack for Your Kitchen Cabinet, your plates will have a new home.
Plus, it saves space. A tidy kitchen feels welcoming. Consider adding personal touches—paint or decorate as you like. Share your success with friends and family; they’ll be impressed. Enjoy your new, organized kitchen space. Happy crafting!


