
Have you ever found yourself struggling with a jammed kitchen drawer or needing to clean out those hidden crumbs and lost utensils? You’re not alone.
Many homeowners face the perplexing task of figuring out how to safely and efficiently take out a kitchen drawer. Whether you're looking to repair a malfunction, clean up accumulated messes, or simply understand your kitchen better, knowing how to remove a drawer can be incredibly useful.
This guide will walk you through the process in a straightforward and approachable manner, ensuring you feel confident and capable. Stick around, because by the end of this article, you’ll have the know-how to tackle this task with ease and precision. Your kitchen is about to get a whole lot more organized!
Tools Needed
Removing a kitchen drawer is easy with the right tools. Having everything ready saves time.
Below are the common tools you need to take out a kitchen drawer safely and quickly.
Screwdriver
A screwdriver helps loosen screws holding the drawer in place. Choose a flathead or Phillips head depending on your drawer's screws.
Pliers
Pliers are useful for gripping and pulling out stubborn parts or nails inside the drawer mechanism.
Flashlight
A flashlight helps you see inside the drawer tracks and screws clearly, especially in dark or tight spaces.
Lubricant
Lubricant like WD-40 makes it easier to slide the drawer out if it feels stuck or tight.
List Of Tools
- Screwdriver (flathead or Phillips)
- Pliers
- Flashlight
- Lubricant spray
- Cloth for cleaning
Safety Precautions
Taking out a kitchen drawer seems simple. But it can cause injuries if you are not careful. Always follow safety rules before you start.
Use the right tools and protect your hands. Avoid rushing to prevent accidents.
Clear The Drawer Contents
Remove all items from the drawer before pulling it out. Heavy or sharp objects can fall and cause injury.
Emptying the drawer makes it lighter and easier to handle.
Wear Protective Gloves
Wear gloves to protect your hands from sharp edges. Some drawers have metal parts that can cut skin.
- Choose gloves with good grip
- Use gloves made for handyman work
- Keep gloves clean and dry
Use Proper Tools
Use tools like screwdrivers to unlock drawer stops. Forcing the drawer can break parts or hurt you.
- Check the drawer type first
- Use the right size screwdriver
- Do not use excessive force
Work In A Clear Area
Keep the space around you free of clutter. This prevents tripping or knocking things over while removing the drawer.
A tidy workspace helps you focus and work safely.
Lift The Drawer Carefully
Pull the drawer straight out and lift it evenly. Tilting or twisting can damage the drawer or hurt your back.
- Use both hands
- Bend your knees when lifting
- Keep your back straight
Keep Children And Pets Away
Remove children and pets from the area. They might get hurt or distract you during the work.
Safety is easier when the workspace is calm and clear of distractions.
Identify Drawer Type
Knowing the type of drawer slide helps you remove kitchen drawers safely. Different slides need different removal methods.
Check your drawer slides before you start. This guide covers three common types: side-mount, center-mount, and under-mount slides.
Side-mount Slides
Side-mount slides attach to the sides of the drawer and the cabinet. You can often see the metal rails when the drawer is open.
- Pull the drawer out fully.
- Look for a lever or clip on each side of the slide.
- Press or lift the clips to release the drawer.
- Pull the drawer out while holding the clips.
Center-mount Slides
Center-mount slides are one metal rail under the drawer center. They support the drawer from the bottom middle.
| Step | Action |
|---|---|
| 1 | Open the drawer fully. |
| 2 | Look under the drawer for a metal rail. |
| 3 | Check if there are levers or tabs on the rail. |
| 4 | Press the levers or lift the tabs to unlock. |
| 5 | Pull the drawer straight out carefully. |
Under-mount Slides
Under-mount slides hide under the drawer sides. They give a clean look but need careful handling to remove.
- Open the drawer fully.
- Look under the drawer edges for metal rails.
- Find plastic clips near the front or back.
- Push or squeeze the clips to release the drawer.
- Pull the drawer straight out slowly.

Credit: www.chowhound.com
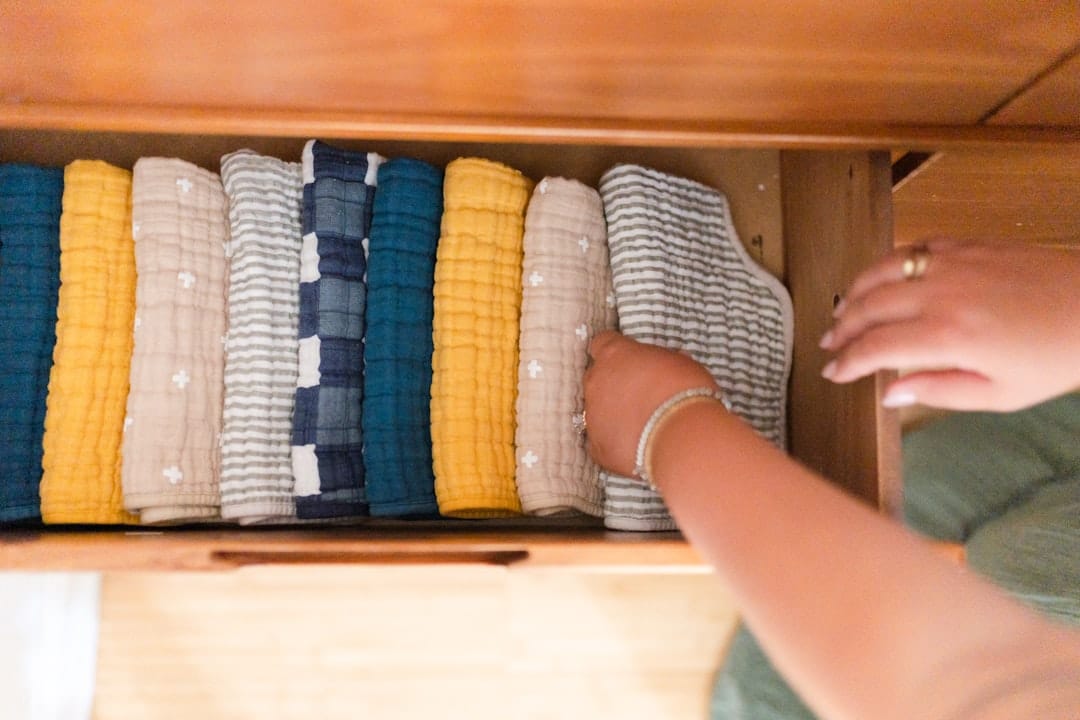
Clear The Drawer
Before you remove a kitchen drawer, you need to clear it out. Emptying the drawer makes the process easier and safer.
Removing items prevents damage and allows you to see the drawer's mechanism clearly.
Remove All Items
Take everything out of the drawer. This includes utensils, containers, and any loose items.
Use a small box or basket to hold the items. This helps keep things organized while you work.
Clean The Drawer
Wipe the inside of the drawer with a damp cloth. Remove crumbs, dust, or sticky spots.
Cleaning ensures smooth drawer removal and protects your kitchen from dirt.
Check For Obstructions
Look for anything stuck in the tracks or sides of the drawer. Remove any objects that block movement.
- Small crumbs or debris
- Broken pieces of drawer liners
- Loose screws or nails
Clearing obstructions helps the drawer slide out smoothly and avoids damage.
Locate Release Mechanisms
Taking out a kitchen drawer is easy when you find the release mechanism. These parts hold the drawer in place.
Release mechanisms differ by drawer type. Knowing where to look helps you remove the drawer safely.
Release Tabs
Release tabs are small plastic or metal parts on the drawer slides. You press or lift these tabs to free the drawer.
Usually, tabs are on both sides of the drawer. Press both at the same time, then pull the drawer out.
- Find tabs near the front of the drawer slides
- Press or lift tabs gently to avoid damage
- Pull drawer straight out after pressing tabs
Levers Or Clips
Levers or clips hold the drawer securely on the track. You push or pull these to release the drawer.
Levers often snap up or down. Clips may need to be squeezed or slid sideways before the drawer slides out.
- Locate levers or clips on the sides of the drawer
- Move both levers or clips at the same time
- Gently pull the drawer after releasing levers or clips
Spring-loaded Catches
Spring-loaded catches lock the drawer in place with a small spring. You press or lift the catch to remove the drawer.
These catches often make a clicking sound when released. Press carefully to avoid breaking the catch or spring.
- Look for small catches near the drawer slides
- Press or lift the catch to release the drawer
- Pull the drawer out smoothly after release
Remove The Drawer
Taking out a kitchen drawer is a simple task you can do yourself. It helps with cleaning or fixing the drawer.
There are different ways to remove a drawer depending on its design. Follow these easy methods to remove yours safely.
Lift And Pull Method
Some drawers come off by lifting them slightly while pulling out. This method works for drawers with simple runners.
To use this method, pull the drawer gently and lift it up a little. Then, pull it out fully from the cabinet.
- Open the drawer fully
- Lift the front part slightly
- Pull the drawer out while holding it up
- Remove the drawer completely
Press And Slide Method
Some drawers have clips or catches under the sides. Press these clips while sliding the drawer out to release it.
Look under the drawer sides and press the clips inwards. Then slide the drawer straight out carefully.
- Open the drawer fully
- Press clips or tabs under the sides
- Slide the drawer straight out
- Keep pressing clips until the drawer is free
Tilt And Remove Method
Some drawers need to be tilted when removing. This happens if the back of the drawer is lower than the front.
Pull the drawer out partly, lift the front, and tilt it upward. Then you can slide it out fully from the cabinet.
- Pull the drawer out halfway
- Lift the front of the drawer
- Tilt the drawer upward
- Slide the drawer out completely
Troubleshooting Stuck Drawers
Kitchen drawers sometimes get stuck and do not slide out easily. This can happen due to dirt, damage, or tight tracks.
Knowing how to fix stuck drawers helps you avoid breaking them or the cabinet. Use simple tips to solve the problem safely.
Check For Obstructions
Look inside and around the drawer for anything blocking it. Small items or debris can stop the drawer from moving.
Remove any objects that might be caught in the tracks or behind the drawer. Also check for damage inside the cabinet.
- Remove items inside the drawer
- Clear dirt and crumbs from tracks
- Look for broken parts or nails
- Check if drawer is hitting the cabinet frame
Lubricate Tracks
Dry or rusty tracks make drawers hard to move. Use a lubricant to help the drawer slide smoothly.
Apply a small amount of lubricant on both sides of the tracks. Wipe off extra oil to avoid stains.
- Use silicone spray or a dry lubricant
- Avoid oily substances that attract dust
- Test the drawer after applying lubricant
- Repeat if the drawer still feels stiff
Apply Gentle Force
Try to pull the drawer out with gentle, steady pressure. Do not force it hard to avoid damage.
If the drawer is stuck, wiggle it slightly from side to side while pulling. This can free it from minor jams.
- Hold the drawer handle firmly
- Pull slowly and evenly
- Wiggle drawer gently if needed
- Stop if you feel strong resistance

Credit: www.familyhandyman.com
Reinstalling The Drawer
After removing a kitchen drawer, putting it back correctly is important. Proper reinstalling ensures the drawer works well and lasts longer.
This guide covers how to align the slides, secure the drawer, and test its smooth operation for best results.
Aligning The Slides
Start by lining up the drawer slides with the cabinet tracks. Make sure both sides match to avoid sticking or jamming.
- Check that the drawer slides are clean and free of debris.
- Hold the drawer level and push it gently into the cabinet.
- Ensure the slides click or lock into place on both sides.
- If the drawer feels uneven, pull it out and realign the slides.
Securing The Drawer
Once the slides are aligned, secure the drawer to keep it from coming loose. Use screws or clips if your drawer design requires them.
| Tool | Purpose | Notes |
| Screwdriver | Tighten screws on slides | Use the correct size to avoid stripping |
| Drill (optional) | Fasten screws quickly | Use low speed to prevent damage |
| Clips or brackets | Hold drawer securely | Check manufacturer instructions |
Testing Smooth Operation
After securing the drawer, test it by opening and closing several times. It should slide smoothly without resistance or noise.
Use this checklist to test the drawer’s operation:
- Does the drawer open fully without sticking?
- Is there any wobble or loose movement?
- Does it close flush with the cabinet face?
- Are the slides quiet during motion?

Credit: www.familyhandyman.com
Frequently Asked Questions
How Do I Safely Remove A Kitchen Drawer?
To remove a kitchen drawer safely, first empty its contents. Locate the release clips or levers under the drawer sides. Press or lift them while gently pulling the drawer out. This prevents damage to the rails and ensures smooth removal.
What Tools Are Needed To Take Out A Kitchen Drawer?
Usually, no tools are required to remove a kitchen drawer. Some drawers may need a screwdriver to loosen screws or brackets. Always check your drawer type before starting to avoid unnecessary damage or complications.
Why Won’t My Kitchen Drawer Come Out Fully?
Your drawer might have safety stops or locking clips. Press or lift these mechanisms on the drawer sides to release them. If stuck, check for screws or debris blocking the rails and clear them carefully.
How Do I Reinsert A Kitchen Drawer After Removal?
Align the drawer rails with the cabinet slides. Gently push the drawer back in until you hear a click or feel resistance. Ensure the drawer glides smoothly and is securely in place before use.
Conclusion
Taking out a kitchen drawer can be simple with the right steps. First, remove any items inside to avoid spills. Then, find the stops or clips holding the drawer in place. Gently lift or press these parts as needed. Pull the drawer straight out without forcing it.
Doing this carefully prevents damage to your drawer or cabinet. Practice will make the process easier each time. Now, you can clean, fix, or organize your drawers more easily. Small tasks like this save time and keep your kitchen neat.
Simple steps lead to good results.


