Are you ready to give your Ikea kitchen a polished, professional look? Installing crown moulding is one of the easiest and most effective ways to add that finishing touch.
If you’ve never done it before, it might feel overwhelming—but this guide on How to Install Ikea Kitchen Crown Moulding will walk you through each step clearly and simply. By the end, you’ll know how to fit your crown moulding perfectly, giving your kitchen a stylish, complete, and professional appearance.
Keep reading and let’s get started on your kitchen upgrade!
Credit: www.familyhandyman.com
Tools And Materials Needed
Installing Ikea kitchen crown moulding needs the right tools and materials. Proper preparation makes the process easier and the result cleaner.
This guide covers what you need before you start. Check your supplies to avoid delays during installation.
Essential Tools
Use these tools to cut, fit, and attach your crown moulding accurately and safely.
- Miter saw for precise angled cuts
- Measuring tape to measure lengths
- Level to ensure straight placement
- Stud finder to locate wall studs
- Hammer and finishing nails or nail gun
- Wood glue for extra hold
- Caulk and caulking gun for sealing gaps
- Sandpaper for smoothing edges
Choosing The Right Moulding
Select moulding that fits your kitchen style and cabinet design. Ikea offers different profiles and sizes.
| Moulding Type | Description | Best Use |
|---|---|---|
| Traditional Crown | Decorative with curves | Classic kitchens |
| Simple Crown | Flat and minimal | Modern kitchens |
| Layered Crown | Multiple pieces for depth | Large kitchens |
Preparing Your Workspace
Clear the area around your cabinets. Good lighting and space help you work safely and well.
- Remove items from countertops
- Cover floors and furniture with drop cloths
- Ensure proper ventilation if using glue or paint
- Organize tools for easy reach
- Wear safety glasses and gloves
Credit: www.familyhandyman.com
Measuring And Cutting Moulding
Installing Ikea kitchen crown moulding needs careful measuring and cutting. This ensures the moulding fits well and looks neat.
Follow these steps to measure and cut your moulding correctly before installation.
Taking Accurate Measurements
Use a tape measure to get the exact length of each wall where you will place the moulding. Measure twice to avoid mistakes.
Write down each measurement clearly. Note if the walls are not perfectly square, as this affects how you cut.
- Start measuring from one corner to the next
- Measure at the top where the moulding will sit
- Double-check all measurements before cutting
Marking Cut Lines
Place the moulding flat on a workbench. Use a pencil to mark the cut lines based on your measurements.
Mark the inside and outside edges if you plan to make angled cuts. Clear marks help guide your saw accurately.
- Use a straight edge or ruler for clean lines
- Mark both ends of each cut line
- Label each piece to match the wall section
Using A Miter Saw
A miter saw cuts moulding at angles needed for corners. Set the saw to the correct degree before cutting.
Hold the moulding firmly against the saw fence. Cut slowly to avoid splintering the wood or MDF.
- Set the saw to 45 degrees for inside corners
- Use 90 degrees for straight cuts
- Wear safety glasses while cutting
- Test cuts on scrap pieces if unsure
Preparing The Cabinets
Preparing your kitchen cabinets is key to installing crown moulding neatly. This step ensures the moulding fits well and looks clean.
Focus on cleaning surfaces and checking the cabinet alignment. These tasks help the moulding stick better and sit evenly.
Cleaning Surfaces
Clean all cabinet surfaces where the crown moulding will attach. Dirt and grease can stop the glue from holding properly.
- Use a mild soap and warm water to wash surfaces.
- Wipe off any dust or food residue with a clean cloth.
- Dry the cabinets completely before moving on.
- Remove any old paint or debris that may block adhesion.
Checking For Level And Alignment
Check if cabinets are level and aligned to avoid gaps under the moulding. Uneven cabinets cause a poor fit and look unprofessional.
| Tool | Purpose |
| Level | Check horizontal alignment of cabinet tops |
| Measuring Tape | Measure distances between cabinets |
| Shims | Adjust cabinets to correct height and angle |
| Carpenter’s Square | Verify right angles at cabinet corners |
Fix any misalignment before installing moulding. Use shims to raise low spots or tighten loose cabinets.
Attaching The Crown Moulding
Attaching crown moulding in your Ikea kitchen adds a polished look. It covers gaps between cabinets and ceiling.
Follow these steps to position, nail, and handle corners for a clean finish.
Positioning The Moulding
Start by measuring the length of your cabinets. Cut the moulding to fit these measurements.
Hold the moulding against the cabinet top and ceiling. Make sure it sits flush and is level.
- Use a level to check straightness
- Adjust the moulding until no gaps appear
- Mark the wall and cabinet for nailing points
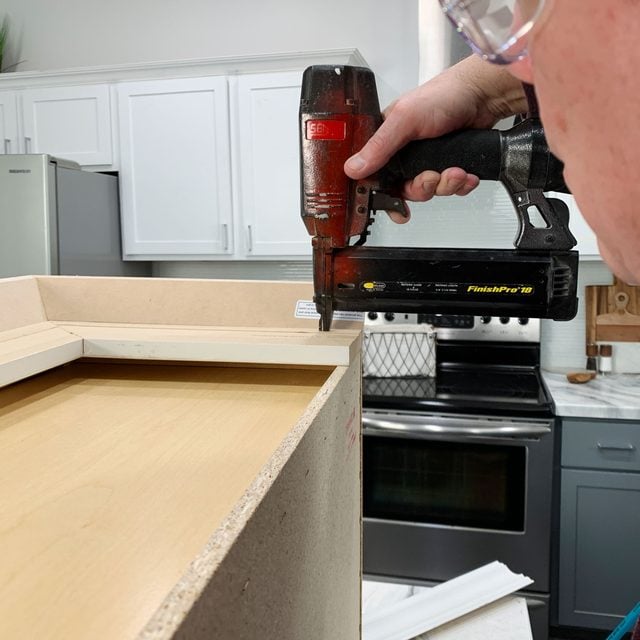
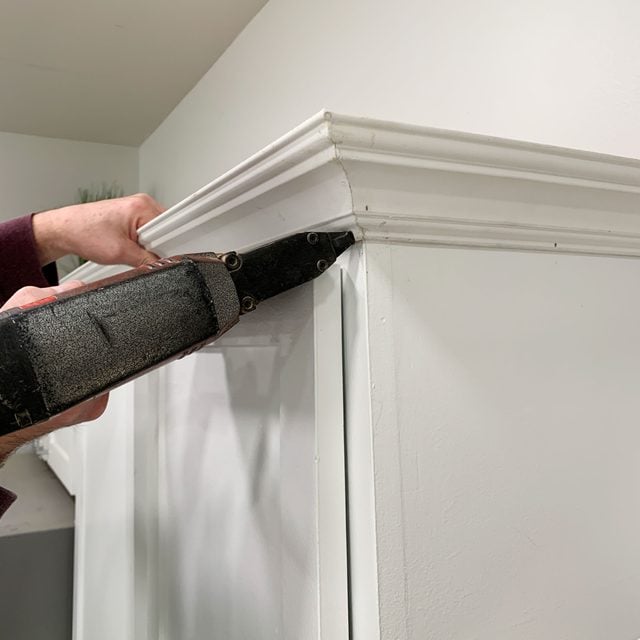
Nailing And Securing
Use a nail gun or hammer to secure the moulding. Nail into cabinet frames, not just drywall.
Space nails about every 12 inches. This keeps the moulding tight and prevents sagging.
- Pre-drill holes if using hard wood
- Use finishing nails for a clean look
- Fill nail holes with wood filler after nailing
Handling Corners And Joints
Cut corners at a 45-degree angle for inside and outside joins. This helps pieces fit neatly.
Use wood glue on joints before nailing. Clamp pieces until the glue dries for a strong bond.
- Measure corners carefully before cutting
- Sand edges to smooth any rough cuts
- Fill any small gaps with caulk or wood filler
Finishing Touches
Installing Ikea kitchen crown moulding adds a nice look to your kitchen. Finishing touches make the moulding look smooth and complete. These steps help hide imperfections and protect the wood.
The last parts include filling nail holes, sanding the surface, and painting or staining. Each step improves the moulding’s appearance and durability.
Filling Nail Holes
After nailing the crown moulding, small holes will show. Filling them makes the surface even. Use wood filler that matches your moulding color. Apply it with a putty knife and press it into the holes.
- Choose a wood filler that dries quickly
- Use a putty knife to fill holes
- Remove extra filler around holes
- Let the filler dry fully before sanding
Sanding And Smoothing
Once the filler dries, sanding makes the moulding smooth. Use fine-grit sandpaper to avoid scratches. Sand lightly over the filled holes and the whole surface.
| Sandpaper Grit | Purpose |
|---|---|
| 120-150 | Remove rough spots and shape filler |
| 180-220 | Smooth surface for painting or staining |
Painting Or Staining
Painting or staining protects the moulding and matches your kitchen style. Use a brush or small roller for even coverage. Apply thin coats and let each dry before adding more.
- Clean dust before painting or staining
- Apply primer if painting on bare wood
- Use paint or stain that suits kitchen conditions
- Allow full drying time between coats
Common Mistakes To Avoid
Installing Ikea kitchen crown moulding can be tricky without the right approach. Many people make simple errors that cause poor results.
Knowing which mistakes to avoid helps you finish the project smoothly and get a clean look.
Incorrect Measurements
Measuring the moulding and wall space wrong leads to gaps or overlap. Take time to measure twice before cutting.
- Use a reliable tape measure for accuracy.
- Measure each wall section separately.
- Note angles carefully, especially in corners.
- Mark measurements clearly on the moulding.
- Double-check before making cuts.
Improper Nailing Techniques
Using wrong nails or nailing at bad angles can crack the moulding or leave it loose. Choose the right nails and nail them carefully.
| Common Nailing Errors | Effects |
| Nails too long | Damage to wall or cabinets |
| Nails too short | Moulding falls off |
| Nailing at wrong angle | Cracks or splits in moulding |
| Too many nails | Moulding surface damage |
Ignoring Surface Preparation
Skipping cleaning or sanding the surface makes the moulding hard to attach. Prepare the wall and cabinet edges first.
- Clean dust and grease from surfaces.
- Smooth rough edges with sandpaper.
- Remove old nails or debris.
- Check for uneven spots and fix them.
Maintenance Tips
Keeping your Ikea kitchen crown moulding in good shape helps your kitchen look fresh. Regular care prevents damage and keeps it beautiful.
Simple maintenance tasks can save you time and money. Follow these tips to clean, fix, and repaint your crown moulding.
Cleaning Crown Moulding
Dust and dirt can build up on crown moulding over time. Clean it gently to avoid damage.
Use a soft cloth or a feather duster to remove dust. For sticky spots, a damp cloth with mild soap works well.
- Dust weekly to prevent buildup
- Use mild soap and water for stains
- Dry the moulding after cleaning
- Avoid harsh chemicals or scrubbing pads
Repairing Damages
Small scratches or dents can happen to crown moulding. Fix them quickly to keep the look neat.
Use wood filler or putty for holes or deep scratches. Sand the area smooth after it dries.
- Fill holes with wood filler
- Sand gently to even the surface
- Clean dust before painting
- Replace moulding if damage is large
Repainting When Needed
Paint can fade or chip on crown moulding. Repainting keeps it looking fresh and protects the wood.
Lightly sand the surface before painting. Use paint made for wood and apply thin coats for best results.
- Sand to remove old paint flakes
- Choose paint for wood surfaces
- Apply thin, even coats
- Let paint dry fully between coats

Credit: www.reddit.com
Frequently Asked Questions
What Tools Are Needed To Install Ikea Kitchen Crown Moulding?
You need a measuring tape, miter saw, drill, screws, wood glue, and a nail gun. These tools ensure precise cuts and secure installation of the crown moulding.
How Do You Measure For Ikea Crown Moulding Installation?
Measure the length of each cabinet top edge carefully. Add extra length for mitered corners. Accurate measurements prevent gaps and ensure a perfect fit.
Can I Install Ikea Crown Moulding Without Professional Help?
Yes, with basic DIY skills and proper tools, you can install it yourself. Follow step-by-step instructions for safe and effective installation.
What Is The Best Way To Cut Ikea Crown Moulding Corners?
Use a miter saw set at 45 degrees for clean, accurate corner cuts. This technique ensures tight joints and a professional finish.
Conclusion
Installing Ikea kitchen crown moulding can be simple. Follow the steps closely. Measure carefully to ensure a perfect fit. Use the right tools for a smooth process. Take your time for best results. Practice patience and attention to detail. This adds elegance to your kitchen.
Enhances the overall design. Enjoy the satisfaction of a job well done. Soon, you’ll admire your beautiful new moulding. It’s a great way to improve your kitchen's look. Now, you can enjoy a stylish and polished space.