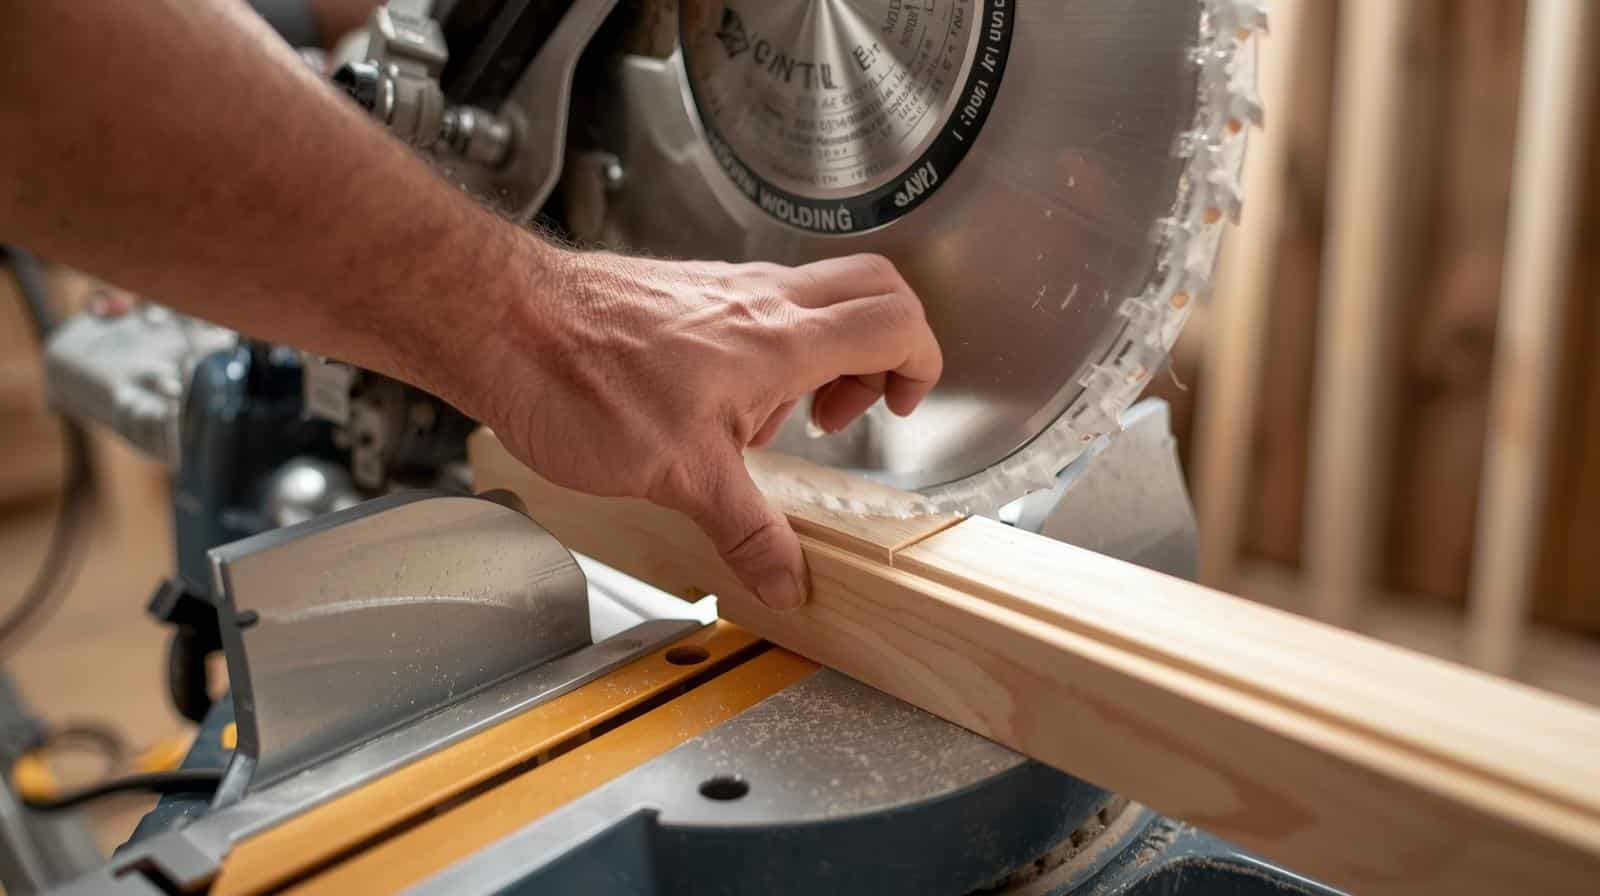
Are you ready to give your kitchen a fresh, elegant look? Learning How to Cut Kitchen Crown Moulding with miter saw might sound tricky, but with the right steps, you can do it yourself and achieve professional results.
Imagine transforming your space with clean, perfect corners that make your kitchen stand out. In this guide, you’ll discover simple tips and tricks to cut crown moulding accurately, saving you time and frustration. Keep reading, and you’ll soon feel confident handling your miter saw like a pro!

Credit: www.angi.com
Tools And Materials Needed
Cutting kitchen Crown Moulding With Miter Saw needs the right tools and materials. Using the right items helps you get clean and accurate cuts. This guide covers the key tools and supplies you need before starting your project.
Selecting The Right Miter Saw
A miter saw makes angled cuts on moulding easy. Choose a saw that fits your needs and budget.
Look for a saw with a good blade size and angle settings. A saw that can tilt both left and right is helpful for crown moulding.
- Blade size: 10 to 12 inches is common
- Bevel feature: dual bevel saws save time
- Adjustable miter angles for precise cuts
- Good safety features like blade guards
Choosing Crown Moulding Types
Crown moulding comes in different materials and styles. Pick a type that suits your kitchen design and budget.
Wood and MDF are popular choices for installing Crown Moulding With Miter Saw. Wood looks natural but costs more. MDF is cheaper and easy to paint.
- Solid wood: durable and classic look
- MDF: smooth surface, easy to paint
- Polyurethane: lightweight and moisture resistant
- PVC: water resistant, good for humid areas
Additional Supplies
Besides the saw and moulding, you need extra items to help with measuring, cutting, and installation.
- Tape measure for accurate measurements
- Pencil to mark cutting lines
- Safety glasses to protect your eyes
- Clamps to hold moulding steady
- Sandpaper to smooth cut edges
- Wood glue and finishing nails for installation
- Stud finder to locate wall studs
Preparing For The Cut
Cutting kitchen crown moulding requires careful preparation. Proper steps help make accurate cuts and reduce waste.
Focus on measuring, marking, and setting your Crown Moulding With Miter Saw before cutting. These steps ensure the moulding fits perfectly.
Measuring The Space
Measure the wall space where the crown moulding will go. Use a tape measure to get exact lengths.
Measure from corner to corner or along the entire wall for long stretches. Write down each measurement clearly.
Marking The Moulding
Place the moulding on a flat surface. Mark the cut lines with a pencil based on your measurements.
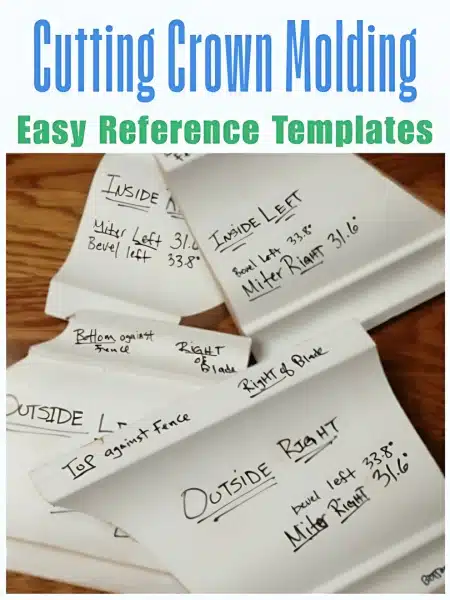
Make marks on the inside edge of the moulding where it will join before using the Crown Moulding With Miter Saw. Double-check your marks before cutting.
Setting The Miter Saw Angles
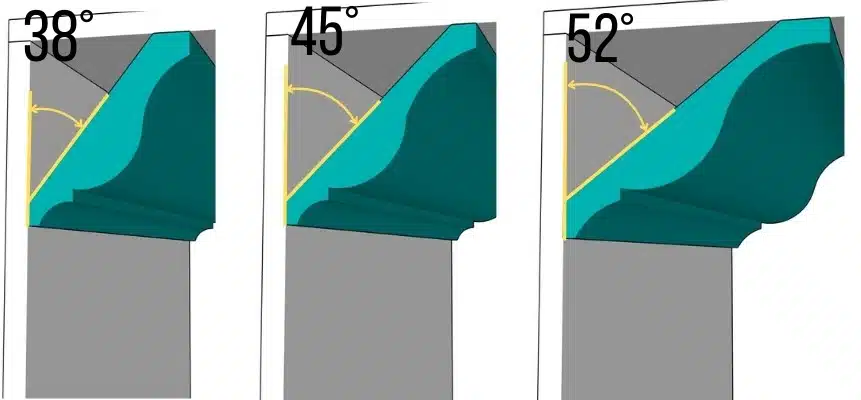
Adjust the miter saw angles according to the corner type. Most inside corners use a 45-degree angle.
Set the saw to the correct bevel angle if needed. Use the saw’s angle guide to get precise settings.
- Inside corners: set miter saw to 45 degrees
- Outside corners: set miter saw to 45 degrees but cut opposite direction
- Check bevel angle if crown moulding has a tilt
Cutting Techniques
Cutting kitchen crown moulding with a miter saw requires careful techniques. You must understand how to make precise cuts for a perfect fit.
This guide covers inside corner cuts, outside corner cuts, and how to handle complex angles using Crown Moulding With Miter Saw safely and accurately.
Inside Corner Cuts
Inside corners need the moulding to fit flush against two walls meeting at a corner. The angle is usually 90 degrees but can vary.
- Set your miter saw to 45 degrees for a standard 90-degree corner.
- Place the moulding upside down against the saw fence.
- Cut one piece with the saw blade angled left and the other angled right.
- Test fit both pieces and trim if needed for a tight joint.
Outside Corner Cuts
Outside corners wrap around the edge of a wall, requiring precise angled cuts to fit snugly.
| Cut Direction | Saw Angle |
| Left piece | 45 degrees right bevel |
| Right piece | 45 degrees left bevel |
Hold the moulding the same way as inside corners but bevel the saw blade instead of just mitering.
Handling Complex Angles
Some walls do not meet at 90 degrees, making cutting crown moulding tricky. You must measure the exact angle first.
Use this simple method for complex angles:
- Measure the corner angle using a protractor or angle finder.
- Divide the angle by two to get the miter saw setting.
- Adjust the saw to that angle for both pieces of moulding.
- Cut carefully and check the fit before installation.
Credit: sawdustgirl.com
Common Mistakes To Avoid
Cutting kitchen crown moulding with a miter saw can be tricky. Small errors can cause big problems.
Knowing what mistakes to avoid when using Crown Moulding With Miter Saw helps you get clean, precise cuts every time.
Incorrect Angle Settings
Setting the wrong angle on your miter saw leads to poor fitting corners. Crown moulding needs accurate angles for smooth joints.
Make sure to measure and set both the miter and bevel angles correctly before cutting.
- Double-check your angles before each cut.
- Use a protractor or angle finder if unsure.
- Remember that crown moulding angles differ from standard wood cuts.
Improper Moulding Placement
Placing the moulding wrong on the saw can cause wrong cuts and gaps. The moulding must be positioned as it sits on the wall.
Hold the crown moulding upside down and tilted at the right angle on the saw to mimic its installed position.
- Secure the moulding firmly against the saw fence.
- Keep the bottom edge flat on the saw table.
- Follow the moulding's natural angle for better fit.
Rushing The Cutting Process
Cutting too quickly increases the chance of mistakes and uneven cuts. Take your time to get precise results.
Slow and steady cutting reduces splintering and improves accuracy on delicate moulding edges.
- Set your saw speed for smooth cuts.
- Pause briefly after each cut to check the piece.
- Practice on scrap moulding before cutting final pieces.
Finishing Touches
Cutting kitchen crown moulding with a miter saw is just the start. Finishing touches make your work look smooth and professional.
This guide covers sanding, fitting, caulking, and painting tips to complete your Crown Moulding With Miter Saw project well.
Sanding And Smoothing Edges
After cutting, rough edges need smoothing. Use fine-grit sandpaper to sand the cut edges gently. This removes splinters and uneven spots left after using the Crown Moulding With Miter Saw.
Be careful to keep the edges straight and avoid rounding corners too much. Smooth edges help the moulding fit tightly and look neat.
Fitting And Installing Moulding
Place the moulding on the wall to check the fit before nailing. Trim or sand any spots that do not fit well.
- Hold the moulding firmly against the wall and ceiling.
- Use a nail gun or hammer to secure the moulding into wall studs or ceiling joists.
- Set nails slightly below the surface to fill holes later.
- Check the corners for tight joints and adjust if needed.
Caulking And Painting Tips
Fill gaps and nail holes with paintable caulk or wood filler. Smooth the caulk with a wet finger or putty knife.
| Painting Tip | Description |
|---|---|
| Primer | Use a primer to help paint stick well to the moulding. |
| Type of Paint | Choose semi-gloss or satin paint for easy cleaning. |
| Multiple Coats | Apply two thin coats instead of one thick coat for a smooth finish. |
| Dry Time | Let each coat dry fully before applying the next. |
Credit: sawdustgirl.com
Frequently Asked Questions
How Do You Measure Crown Moulding For A Miter Saw?
Measure the wall length where the moulding will go. Account for inside and outside corners. Mark these measurements on the moulding before cutting.
What Angle Should The Miter Saw Be Set For Crown Moulding?
Set the miter saw blade between 30° to 45°, depending on the wall angle. Use a protractor or angle finder for accuracy.
How Do You Cut Inside Corners On Crown Moulding?
Place the moulding upside down on the saw. Cut at the correct miter and bevel angles. This ensures a tight inside corner fit.
Can I Use A Standard Miter Saw For Crown Moulding?
Yes, a standard miter saw works well. Adjust the bevel and miter settings to match crown moulding angles for precise cuts.
Conclusion
Cutting kitchen crown moulding with a miter saw is simple. Follow the right steps, and it gets easier. Measure carefully before making any cuts with your Crown Moulding With Miter Saw. Use a sharp blade for clean edges. Practice on scrap wood first. This helps avoid costly mistakes.
Remember, patience is key. Take your time with each cut. Soon, you'll see beautiful results. A well-done moulding can transform your kitchen. Enjoy the process and your new skills. With practice, confidence grows. Happy cutting!