
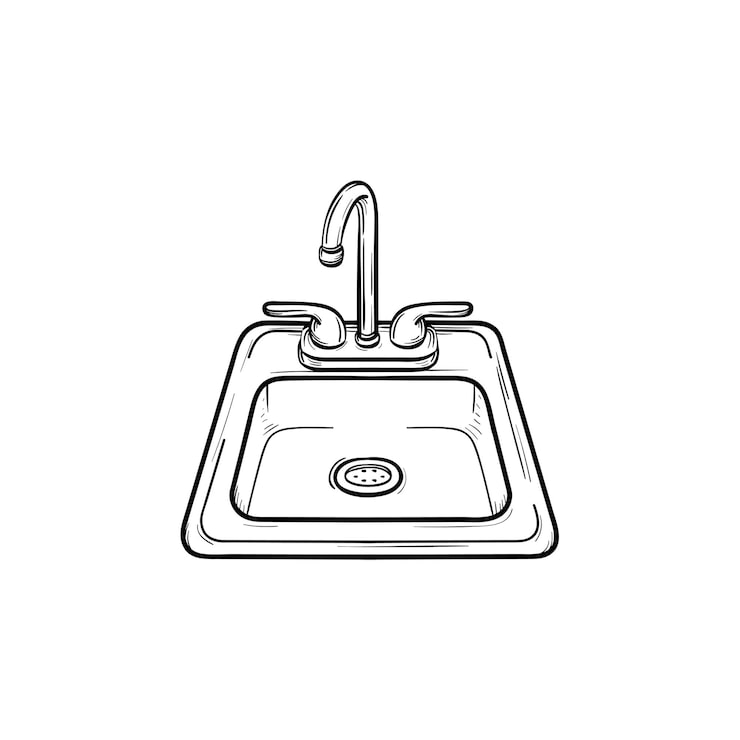
Are you eager to unleash your inner artist and tackle a fun, rewarding project? Drawing a kitchen sink might be just the challenge you need.
This seemingly simple object is a staple in every home, but capturing its essence on paper requires a keen eye and a few handy tips. Imagine impressing your friends and family with a detailed, realistic sketch that brings this everyday item to life.
In this guide, you’ll discover easy-to-follow steps that will transform your drawing skills and boost your confidence. Ready to dive into the world of sketching with a unique twist? Let’s get started and turn a mundane kitchen feature into your next masterpiece!
Tools And Materials Needed
Drawing a kitchen sink needs some basic tools and materials. These help you create clear and neat lines.
Using the right supplies makes your drawing easier and more accurate. You can add details with extra tools.
Basic Drawing Supplies
Start with simple items to sketch your kitchen sink. These are common tools for any drawing project.
- Pencil – For light sketching and corrections
- Eraser – To fix mistakes or remove lines
- Ruler – To draw straight edges and measure parts
- Paper – Use plain or sketch paper for your drawing
- Sharpener – To keep your pencil tips fine
Optional Tools For Details
You can use extra tools to add fine details and shading. These are not required but help improve your drawing.
- Fine-tip pens – For outlining and precise lines
- Colored pencils – To add color and depth
- Blending stump – To smooth pencil shading
- Compass – To draw perfect circles or curves
- Graph paper – To help keep proportions correct
Sketching The Sink Shape
Drawing a kitchen sink starts with understanding its basic shape. Sketching helps you plan the basin and rim clearly.
This guide breaks down the sink drawing into two parts: the basin outline and the sink rim.
Drawing The Basin Outline
Begin by drawing the main shape of the basin. Most kitchen sinks have a rectangle or oval form with rounded corners.
- Lightly sketch a rectangle or oval to match your sink size.
- Round off the corners smoothly to show the basin’s curve.
- Add depth by drawing parallel lines inside the shape for the basin walls.
- Mark the drain hole at the center or side, depending on the sink design.
Adding The Sink Rim
The rim frames the basin and connects the sink to the countertop. It adds detail and realism to your drawing.
| Rim Feature | Drawing Tip |
| Width | Draw a narrow border around the basin shape. |
| Thickness | Use parallel lines to show the rim’s thickness. |
| Edges | Make edges slightly rounded or sharp depending on style. |
| Overlap | Show the rim overlapping the basin outline for depth. |
Adding Faucet And Fixtures
Drawing a kitchen sink is not complete without adding a faucet and fixtures. These parts give your drawing detail and realism.
Focus on shapes and lines that show how water flows and controls work. This guide helps you draw these important parts clearly.
Drawing The Faucet Body
Start by sketching the main body of the faucet. It is usually curved or straight and sits above the sink basin. Use smooth lines to show the metal surface.
- Draw a vertical cylinder for the base.
- Add a curved pipe extending outward for the water flow.
- Keep the shape simple but balanced.
- Leave space for handles and spout on each side.
Sketching Handles And Spout
Handles control water flow and temperature. The spout directs water into the sink. Sketch these parts with care to match the faucet body.
| Part | Shape | Position |
| Left Handle | Small lever or knob | Left side of faucet body |
| Right Handle | Small lever or knob | Right side of faucet body |
| Spout | Curved tube | Center, above sink basin |
Detailing The Drain And Accessories
Drawing a kitchen sink requires attention to details like the drain and accessories. These parts make the sink look real and complete.
Focus on shapes and placement to show how these elements fit into the sink design.
Creating The Drain Hole
Start by drawing a circle in the bottom center of the sink basin. This circle is the drain hole.
Add small details inside the circle to show the drain cover or strainer. Use simple lines or dots to create texture.
- Draw a thin ring around the circle for the drain edge
- Add small holes or a grid pattern inside for the strainer
- Use shading to show depth in the drain hole
Adding Soap Dispenser Or Other Features
Draw a small cylinder or pump shape near the sink edges for the soap dispenser. This adds realism.
Other features like spray hoses or faucet handles can be simple shapes placed near the basin.
- Use rectangles or circles for buttons and knobs
- Draw thin tubes for spray hoses
- Keep details small but clear
Shading And Texturing
Shading and texturing bring your kitchen sink drawing to life. These techniques add depth and realism.
Understanding how light interacts with surfaces helps create a more convincing image.
Light And Shadow Placement
Place shadows where light is blocked by sink parts. Highlights show where light hits directly.
- Identify the light source direction.
- Shade areas opposite the light source.
- Add soft shadows under the faucet and basin edges.
- Create highlights on smooth metal surfaces.
- Use gradual shading for curved surfaces.
Creating Surface Textures
Textures give the sink material its unique look. Smooth or rough textures need different techniques.
| Texture Type | Technique | Effect |
| Stainless Steel | Use fine, parallel lines and soft shading | Shiny and smooth appearance |
| Ceramic | Apply even, light shading with subtle highlights | Glossy and clean look |
| Matte Finish | Use soft, blended shading without strong highlights | Flat and less reflective surface |

Credit: www.freepik.com
Common Mistakes To Avoid
Drawing a kitchen sink looks simple but many make common mistakes. Avoiding these errors helps your drawing look realistic and clean.
Focus on simple shapes and correct sizes. This guide shows the main mistakes to watch for.
Proportion Errors
One frequent mistake is drawing the sink too big or too small. Wrong proportions make the sink look odd in the kitchen.
Pay attention to the sink size compared to the countertop and faucet. Keep all parts balanced and realistic.
- Check the height and width of the sink bowl
- Compare sink size to faucet and countertop edges
- Keep the drain centered and proportional
Overcomplicating Details
Adding too many lines and small features can confuse the drawing. Simple shapes often look clearer and better.
Focus on the main parts like the basin, faucet, and drain. Avoid drawing every small scratch or pattern.
- Use clean lines for the sink edges
- Draw basic faucet shapes without extra decoration
- Keep the drain simple, avoid extra textures
Tips For Practice And Improvement
Drawing a kitchen sink takes practice and patience. You can improve by using the right tools and methods.
Focus on details and keep practicing daily. This helps your skills grow steadily over time.
Using Reference Images
Reference images show you how a kitchen sink looks in real life. They help you understand shapes and shadows.
- Look for clear photos from different angles
- Notice the sink’s curves, edges, and faucet details
- Use close-up images to study textures and materials
- Compare different sink styles to find what you want
Daily Drawing Exercises
Practice every day to build your drawing skills. Short exercises keep your hand steady and your mind focused.
| Exercise | Focus Area | Time |
| Sketch simple sink shapes | Form and proportion | 10 minutes |
| Draw sink details | Textures and shadows | 15 minutes |
| Copy from reference images | Accuracy and style | 20 minutes |
| Try different sink designs | Creativity and variety | 15 minutes |

Credit: www.freepik.com

Credit: www.shutterstock.com
Frequently Asked Questions
How Do I Start Drawing A Kitchen Sink?
Begin by sketching the sink’s basic shape, usually a rectangle or oval. Add the basin depth and faucet placement next. Use light lines to adjust proportions before detailing.
What Tools Are Best For Drawing A Kitchen Sink?
Use pencils for initial sketches and fine liners for details. A ruler helps keep lines straight. Erasers are essential for corrections.
How Can I Draw Realistic Kitchen Sink Details?
Focus on faucet design, drain patterns, and reflections. Add shadows under the sink edges for depth. Use highlights to show water or metal shine.
What Are Common Kitchen Sink Shapes To Draw?
Rectangular, oval, and circular sinks are popular. Double-basin sinks add complexity. Choose a shape that matches your drawing style.
Conclusion
Drawing a kitchen sink can be simple and fun. Follow the basic steps carefully. Use light lines first to shape the sink. Add details slowly to make it clear. Practice helps you improve your drawing skills. Keep your drawing neat and clean.
Soon, you will feel more confident. Enjoy the process and keep trying! Drawing is a great way to express creativity and relax.


