

Are you dreaming of a kitchen that perfectly blends style, functionality, and your personal touch? Designing your kitchen can feel overwhelming, but imagine the joy of creating a space that truly reflects your taste and meets your needs.
You don’t have to be a professional designer to craft a stunning kitchen layout. With the right guidance and a few simple tricks, you can transform your ideas into a beautiful, practical design. In this guide, you’ll learn How to Draw Kitchen Design step by step, unlocking the potential to bring your vision to life.
Let’s dive in and turn those ideas swirling in your mind into a reality you’ll love.

Credit: www.fiverr.com
Planning Your Kitchen Space
Designing your kitchen starts with a clear plan. Planning helps you use the space well and work comfortably.
Focus on how you will move and place items. This makes cooking easier and more fun.
Measuring The Area
Measure the length, width, and height of your kitchen space. Note windows, doors, and outlets.
- Use a tape measure for accuracy
- Write down each wall’s length
- Mark fixed features like sinks or appliances
- Check ceiling height for lighting and storage
Identifying Key Zones
Divide your kitchen into areas for cooking, cleaning, and storage. Each zone needs enough space.
| Zone | Purpose | Example Items |
| Cooking | Preparing food | Stove, oven, microwave |
| Cleaning | Washing dishes and hands | Sink, dishwasher, trash bin |
| Storage | Keeping food and tools | Pantry, fridge, cabinets |
- According to Legacy Cabinets, a modern approach complements the triangle concept with detailed zones: “While the Work Triangle is the structural foundation for efficiency, contemporary kitchens that accommodate multiple users or specialty appliances benefit greatly from clearly defined Work Zones. A baker, for example, needs a separate ‘Prep Zone’ near the sink with dedicated storage for flour and mixers, independent of the main ‘Cooking Zone.’ Designing by zones ensures every task has dedicated, clutter-free space.”
Considering Workflow
Plan your kitchen to support easy movement between zones. This saves time and effort.
- Place the fridge near the entrance for easy access.
- Keep the stove close to the sink for cooking and cleaning.
- Arrange counters between zones for prep work.
- Avoid obstacles in your main walking paths.
Choosing The Right Layout
Choosing the right kitchen layout helps you use space well. It makes cooking easier and more fun.
Think about your kitchen size and how you move around. This will guide your design choices.
Single Wall Layout
A single wall kitchen places all appliances and counters on one wall. It works well in small spaces.
This layout keeps everything within reach but limits counter space and storage.
L-shaped Layout
The L-shaped layout uses two walls forming a corner. It fits most kitchen sizes and shapes.
- Allows open space for dining or movement
- Offers more counter and storage space
- Good for multiple cooks in the kitchen
U-shaped Layout
The U-shaped kitchen uses three walls or sections. It gives plenty of counters and storage.
| Advantages | Considerations |
| Lots of workspace | Needs a bigger kitchen |
| Good for cooking flow | Can feel enclosed if small |
| Separate cooking and cleaning zones | May require more walking |
Galley Kitchen
The galley layout has two parallel counters. It fits narrow or long kitchen spaces.
Use this layout if you want:
- Easy access to everything
- Efficient use of space
- Clear work zones
Selecting Essential Elements
Drawing a kitchen design means choosing the right parts. Each element affects how your kitchen looks and works.
Focus on cabinets, countertops, and where to put appliances. These choices build your kitchen’s style and use.
Cabinet Styles And Materials
Cabinets hold your kitchen tools and shape the room’s style. Choose from many styles and materials to fit your taste and budget.
- Shaker style: simple and clean lines
- Flat-panel: modern and smooth surfaces
- Glass-front: shows what is inside
- Wood types: oak, maple, cherry, or plywood
- Materials: solid wood, MDF, or laminate
Countertop Options
Countertops are work areas and design features. Choose materials that last and fit your kitchen’s look.
| Material | Durability | Maintenance | Style |
|---|---|---|---|
| Granite | High | Sealing needed | Natural stone look |
| Quartz | High | Low | Uniform and sleek |
| Laminates | Medium | Low | Many colors and patterns |
| Butcher block | Medium | Oil regularly | Warm wood tone |
Appliance Placement
Placing appliances well makes cooking easier. Think about space and how you move in the kitchen.
- Keep the fridge near the entrance for quick access
- Place the stove close to the countertop for prep space
- Install the sink between fridge and stove to form a work triangle
- Leave enough space around appliances for safety and comfort
- Consider built-in appliances to save space
Creating A Functional Floor Plan
Designing a kitchen starts with a good floor plan. It helps organize space and improves workflow.
A functional floor plan saves time and makes cooking easier. It balances comfort and utility.
Drawing To Scale
Drawing your kitchen plan to scale shows real size and space. It helps avoid mistakes.
Use graph paper or digital tools to keep measurements accurate. Include walls, doors, and windows.
- Measure the room’s length and width
- Mark fixed features like sinks and appliances
- Use a consistent scale, like 1 square = 1 foot
- Check clearances for walking and opening doors
Incorporating Storage Solutions
Good storage keeps the kitchen tidy and easy to use. Plan for cabinets, shelves, and drawers.
Think about what you store and how often you use it. Place items close to where you need them.
- Use tall cabinets for rarely used items
- Add pull-out drawers for pots and pans
- Include open shelves for everyday dishes
- Design corner cabinets with rotating shelves
Ensuring Accessibility
Accessibility means everyone can use the kitchen safely and easily. Plan wide walkways and reachable storage.
Keep work areas close but not crowded. Think about people with different heights or mobility needs.
- Allow at least 36 inches for walkways
- Place frequently used items between waist and eye level
- Use lever handles for easier opening
- Ensure good lighting in all areas
Adding Design Details
Adding design details brings personality to your kitchen. These small touches make the space inviting and practical.
Focus on lighting, colors, and decorations to create a balanced look. Each element should complement the others.
Lighting Choices
Good lighting brightens the kitchen and sets the mood. Use different types of lighting for function and style.
- Overhead lights for general illumination
- Under-cabinet lights for work areas
- Pendant lights above islands or counters
- Accent lights to highlight features
Color Schemes
Choose colors that create the feeling you want in the kitchen. Light colors make the space feel larger and clean.
| Color Type | Effect |
| White | Brightens and opens the space |
| Blue | Calm and cool atmosphere |
| Yellow | Warm and cheerful mood |
| Gray | Modern and neutral base |
Decorative Features
Decorations add charm and reflect your style. Use them to make the kitchen unique.
- Artwork or framed prints on walls
- Colorful vases or bowls on counters
- Plants to add freshness and color
- Unique cabinet handles or knobs
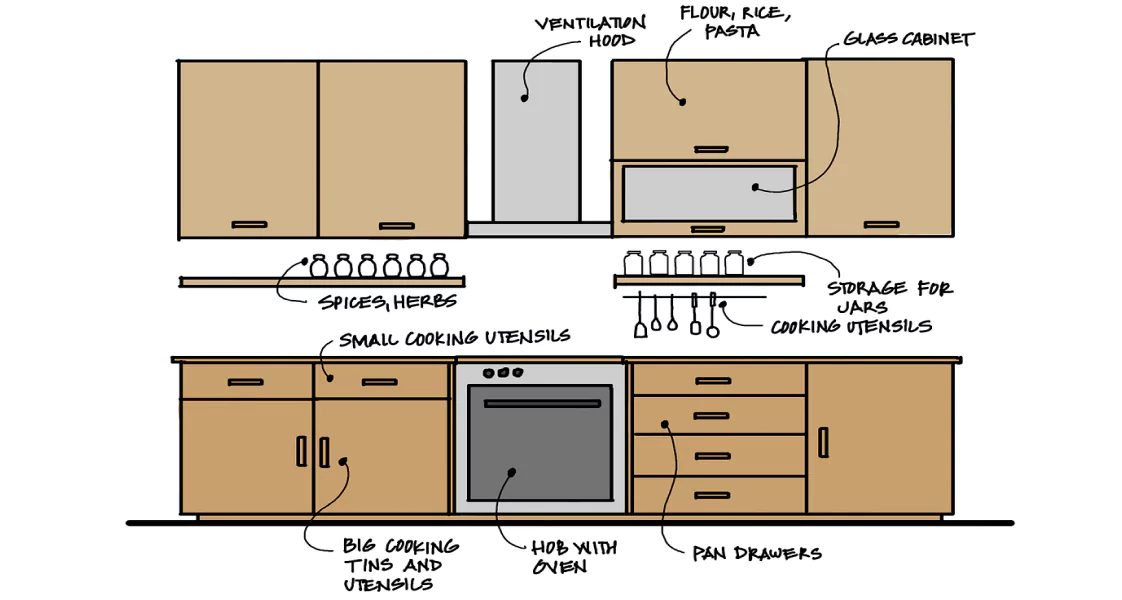
Credit: foyr.com
Using Software Tools
Drawing a kitchen design on paper can be slow and hard to change. Software tools make this easier.
These tools help you create clear and accurate kitchen layouts. You can plan better with them.
Popular Design Apps
There are many apps for kitchen design. Some are simple, and others have many features.
Choose apps that fit your skill level and project needs. Many apps offer free versions to try.
- SketchUp – Easy 3D modeling for beginners and pros
- HomeByMe – User-friendly with kitchen-specific tools
- Roomstyler 3D – Drag and drop furniture and appliances
- IKEA Home Planner – Plan kitchens with IKEA products
- Planner 5D – Create detailed 2D and 3D designs
Basic Drawing Techniques
Start by drawing walls and doors to set room limits. This gives a clear base for the design.
Add kitchen elements like counters, cabinets, and appliances in simple shapes. Use grids to keep size correct.
- Use squares and rectangles for cabinets and counters
- Draw circles for sinks and stove burners
- Label each item to avoid confusion
- Keep measurements accurate for real-world use
3d Visualization
3D views help you see your kitchen design as a real space. It shows how everything fits together.
You can rotate the design and check it from different angles. This helps spot problems before building.
- Walk through the kitchen in 3D to check space
- Change colors and materials to test styles
- Adjust lighting to see how the room feels
- Share 3D images with others for feedback
Tips For Stunning Results
Drawing a kitchen design takes some planning. You want it to look great and work well.
These tips help you create a kitchen that is both beautiful and practical.
Balancing Aesthetics And Function
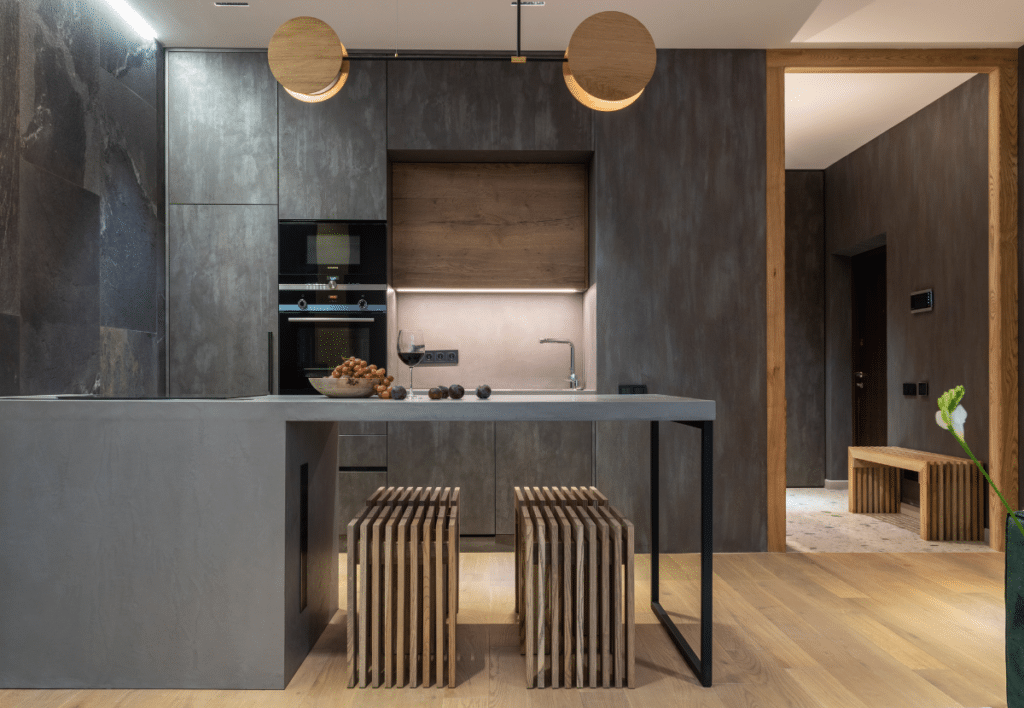
Your kitchen should look nice and be easy to use. Focus on simple shapes and clean lines.
Think about how people will move and work in the space.
- Place the sink, stove, and fridge close to each other
- Use lighting to highlight key areas
- Choose materials that are both pretty and easy to clean
Maximizing Space Efficiency
Use every inch of your kitchen wisely. Plan for storage and work areas.
Think about tall cabinets and multi-use furniture to save space.
- Use vertical space with shelves and cabinets
- Include pull-out drawers for easy access
- Design counters with built-in storage
Incorporating Personal Style
Your kitchen should feel like your own. Add colors and details that you like.
Mix patterns and textures to make the space unique but keep it balanced.
- Pick a color scheme that reflects your taste
- Add artwork or decorations that inspire you
- Use materials that match your lifestyle
Credit: www.bestonlinecabinets.com
Frequently Asked Questions
What Are The First Steps To Draw A Kitchen Design?
Start by measuring your kitchen space accurately. Sketch the layout including walls, doors, and windows. Decide on the kitchen style and key elements like cabinets and appliances to include in your drawing.
Which Tools Help In Drawing Kitchen Designs?
Use graph paper or digital design software like SketchUp or AutoCAD. These tools help create precise, scaled kitchen layouts and visualize different design options easily.
How Do I Plan Kitchen Space Efficiently?
Focus on the work triangle between sink, stove, and refrigerator. Ensure enough counter space and storage. Keep pathways clear and consider appliance sizes for smooth movement.
What Are Common Kitchen Design Mistakes To Avoid?
Avoid overcrowding appliances and insufficient storage. Don’t ignore lighting or ventilation. Plan for enough workspace and maintain a balanced layout to enhance functionality.
Conclusion
Drawing a kitchen design can be simple and fun. Start with a clear plan and basic shapes. Add details like cabinets, appliances, and lighting. Keep your measurements right to fit the space well. Use colors and textures to make it look real.
Practice often to improve your skills. A good design helps create a kitchen you enjoy. Take your time and enjoy the process. Your kitchen drawing will guide your dream space. Keep learning and designing!



