
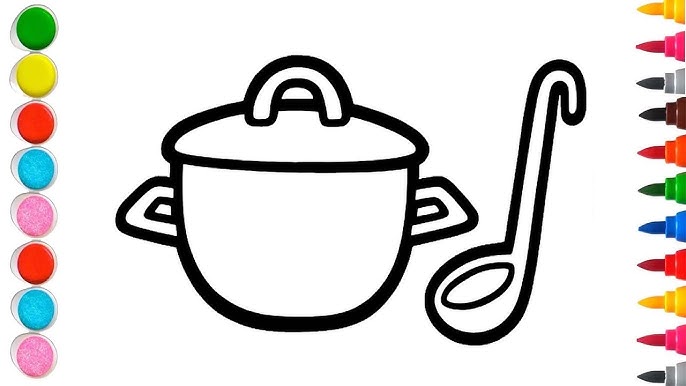
Are you ready to unlock your inner artist and transform simple lines into striking kitchen utensils on paper? If you've ever admired the sleek design of a spatula or the intricate curves of a whisk, you’re in the right place.
Drawing kitchen utensils can be both fun and rewarding, whether you're a seasoned artist or just starting out. Imagine being able to sketch your favorite kitchen tools with ease and confidence. This guide will show you exactly how to do it, step by step, ensuring you capture every detail and nuance.
Stick around to discover tips and tricks that will elevate your drawing skills and perhaps even inspire your next culinary masterpiece on canvas. Let's get those creative juices flowing and bring your kitchen essentials to life!

Credit: www.youtube.com
Gathering Your Materials
Before you start drawing kitchen utensils, you need to gather the right materials. Having the proper tools makes your drawing easier and better.
This guide will help you choose paper, pencils, erasers, and other tools for your drawing.
Choosing The Right Paper
Pick paper that works well with pencils and erasers. Smooth paper is best for detailed drawings. Thick paper prevents tearing when you erase.
Sketchbooks or drawing pads with medium weight paper are good choices. Avoid very thin paper that wrinkles easily.
Selecting Pencils And Erasers
Use a range of pencils to create light and dark lines. Hard pencils (H) make light lines. Soft pencils (B) make dark lines.
- H pencils: 2H, 4H for light, thin lines
- HB pencil for general sketching
- B pencils: 2B, 4B, 6B for dark, thick lines
Choose erasers that cleanly remove pencil marks. A kneaded eraser is soft and good for lightening areas. A rubber eraser works well for strong erasing.
Additional Tools To Consider
Other tools can help improve your drawing process. A sharpener keeps pencils ready to use. A ruler helps draw straight lines.
Blending stumps or tortillons help smooth pencil shading. A clean cloth or tissue can also blend shading softly.
Basic Shapes For Utensils
Drawing kitchen utensils is easier when you start with simple shapes. Most utensils are made from circles, rectangles, and lines.
Using basic shapes helps you build the right form before adding details. This approach makes your drawing clear and balanced.
Sketching Simple Forms
Begin by drawing the main parts of the utensil as simple shapes. For example, use an oval for a spoon’s bowl and a long rectangle for the handle.
Keep your lines light and loose. This allows you to adjust shapes easily as you refine the drawing.
- Draw circles or ovals for rounded parts
- Use rectangles or elongated shapes for handles
- Combine shapes to create the full utensil
Using Guidelines For Proportions
Guidelines help keep your utensil parts in correct size and position. Draw light lines to mark the center and edges.
Measure parts by comparing them to each other. This keeps your drawing balanced and realistic.
- Draw a center line to keep symmetry
- Use horizontal lines to set handle length
- Check that the bowl size matches the handle
Drawing Common Utensils
Drawing kitchen utensils is a fun way to practice simple shapes. Most utensils have easy forms to sketch.
Start by observing their basic outlines. Use simple lines and curves to create each utensil.
Spoons And Forks
Spoons have a rounded bowl and a straight handle. Draw an oval for the bowl and a thin rectangle for the handle.
Forks look like spoons but with prongs. Add three or four thin rectangles at the bowl's end to make prongs.
- Start with a long handle shape
- Draw an oval or circle for the spoon bowl
- Add thin prongs for forks
- Keep lines smooth and simple
Knives And Peelers
Knives have a straight or slightly curved blade. Draw a thin triangle for the blade and a rectangle for the handle.
Peelers have a handle and a small blade with a gap. Sketch a handle like a knife's, then add a short horizontal blade with space below.
- Draw a straight handle first
- Make the knife blade sharp and pointed
- For peelers, show the blade with a gap
- Use simple shapes and clean lines
Whisks And Ladles
Whisks have thin wires looped together. Draw a handle and several curved lines fanning out.
Ladles have a long handle and a deep round bowl. Sketch a circle or oval for the bowl and a straight handle attached.
- Start with the handle shape
- Draw loops for whisk wires
- Use a round shape for ladle bowls
- Keep the drawing simple and clear

Credit: www.youtube.com
Adding Details And Texture
Drawing kitchen utensils looks better with details and texture. These small touches make the utensils look real.
Adding texture helps show the material of each utensil. This makes your drawing more interesting to see.
Creating Metal And Wooden Textures
Metal looks smooth and shiny. Use light, sharp lines to show the shine on metal parts.
Wood has a rough surface with small lines. Draw thin, curved lines to show wood grain on handles.
- Use light shading for metal reflections
- Draw small lines for wood grain
- Mix dark and light tones for depth
Highlighting Reflections And Shadows
Reflections make metal shine. Add white or very light spots where light hits the surface.
Shadows show depth and form. Draw darker areas where light does not reach the utensil.
- Place highlights on curved metal edges
- Use soft shading for shadows under utensils
- Keep shadows consistent with your light source
Shading Techniques
Shading makes kitchen utensils look real and three-dimensional. It shows how light hits the object and where shadows fall.
Using shading well helps your drawing have depth and texture. This guide covers two key shading techniques for utensils.
Light Source And Shadow Placement
First, decide where the light is coming from. This helps you place shadows correctly on the utensils.
- Identify the main light source direction.
- Shade the opposite side of the utensil darker.
- Add cast shadows on surfaces where light is blocked.
- Use soft shadows for smooth surfaces, hard shadows for sharp edges.
- Remember that closer shadows are darker and sharper.
Blending And Layering
Blending and layering create smooth shading effects. These techniques help soften lines and add depth.
| Technique | Description |
| Layering | Apply light layers of pencil or color gradually to build tone. |
| Blending | Use tools like a blending stump or finger to smooth shading. |
| Cross-hatching | Draw fine lines crossing each other for texture and depth. |
| Gradation | Transition shades from light to dark smoothly over the surface. |

Credit: www.youtube.com
Arranging Utensils In Composition
Arranging kitchen utensils in a drawing helps create a clear and attractive image. Good placement shows each item well and makes the scene look natural.
Think about how utensils relate to each other in size, shape, and position. This helps your drawing feel balanced and interesting.
Creating Balanced Layouts
Balance means that no part of your drawing feels too heavy or empty. Spread utensils evenly across the space.
Use different sizes and shapes of utensils to create harmony. Place larger items on one side and smaller ones on the other.
- Put a big spoon next to smaller forks
- Space utensils so they don’t crowd each other
- Keep similar shapes apart for variety
Using Overlapping For Depth
Overlapping utensils shows which ones are closer or farther away. This adds a sense of depth to your drawing.
Place one utensil in front of another slightly. Make sure the front utensil covers part of the back one.
- Overlap handles or edges gently
- Draw clear outlines where utensils overlap
- Use shading to separate objects visually
Final Touches And Refinements
Adding final touches makes your kitchen utensils drawing look complete. These refinements help improve clarity and style.
Focus on cleaning lines, increasing contrast, and adding subtle backgrounds. These steps make your drawing pop.
Cleaning Up Lines
Remove any extra or messy lines from your drawing. Clean lines give your utensils a neat and clear look.
Use an eraser or digital tool to carefully tidy the edges. Keep only the important shapes visible.
- Erase overlapping sketch marks
- Smooth jagged or uneven lines
- Make sure shapes are distinct
Enhancing Contrast
Add darker shades or thicker lines to parts that need focus. Contrast helps separate utensils from the background.
Use shading or bold outlines on edges and details. This makes your drawing more dynamic and easy to see.
- Darken shadows under handles and blades
- Thicken main outlines for emphasis
- Lighten less important parts
Adding Background Elements
Include simple background shapes or textures to give context. This helps show that the utensils belong in a kitchen.
Keep backgrounds light and not too detailed. They should support your drawing without stealing attention.
- Add a faint countertop line
- Draw a soft shadow beneath utensils
- Use simple patterns like wood grain or tiles
Frequently Asked Questions
What Basic Shapes Are Used To Draw Kitchen Utensils?
Most kitchen utensils start with simple shapes like circles, rectangles, and ovals. These shapes form the handles and functional parts. Using basic shapes helps maintain correct proportions and symmetry. It also simplifies the drawing process for beginners.
How Do I Add Details To Kitchen Utensils Drawings?
Add details like texture, shadows, and highlights to make utensils look realistic. Use light strokes for texture and darker lines for edges. Include small elements like screws or holes for authenticity. Detailing enhances depth and visual interest.
What Materials Are Best For Drawing Kitchen Utensils?
Pencils and fine liners are ideal for sketching utensils. Colored pencils or markers help add vibrant colors. Choose smooth paper to avoid rough textures that disrupt details. These tools allow precision and clean outlines.
How Can I Improve My Utensil Drawing Skills Fast?
Practice regularly by sketching different utensils from real life or photos. Focus on proportions and perspective. Study utensil shapes and functions to understand their design. Use references and tutorials to learn new techniques.
Conclusion
Drawing kitchen utensils becomes easier with practice and patience. Start simple and add details step by step. Use basic shapes to build your drawing. Keep your lines light at first to correct mistakes. Watch your proportions and spacing closely. Try different utensils to improve your skills.
Enjoy the process and don’t rush. Soon, your drawings will look clear and neat. Drawing helps you see everyday objects in new ways. Keep practicing regularly to get better each time.


