
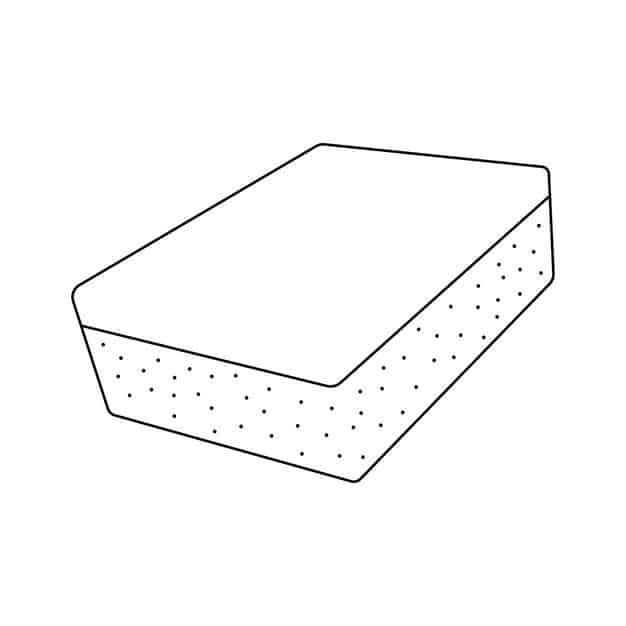
Have you ever looked at your kitchen sponge and thought about capturing its simple beauty on paper? Drawing everyday objects like a kitchen sponge might seem trivial, but it offers a unique opportunity to hone your artistic skills.
In this guide, you'll discover how to draw a kitchen sponge with ease, transforming a mundane item into a captivating piece of art. Whether you're a seasoned artist or just starting, this step-by-step approach will help you master the art of illustration.
Don't miss out on unlocking your creative potential with just a pencil and paper. Let's dive in and see what your imagination can create!

Credit: www.vecteezy.com
Materials Needed
Drawing a kitchen sponge is simple if you have the right materials. This guide helps you pick what you need to start your drawing.
Good materials make your drawing look better and easier to create. Let’s look at the basics you will need.
Choosing The Right Paper
Pick paper that holds pencil marks well and does not tear easily. Drawing paper or sketch pads work best for this project.
- Smooth surface paper for clean lines
- Medium thickness to avoid tearing
- White or light color to see details clearly
Selecting Drawing Tools
You need pencils and erasers to create your sketch. Different pencils give you light or dark lines.
| Tool | Use |
| H pencil | Light outlines |
| B pencil | Darker shading |
| Kneaded eraser | Remove small marks |
| Sharpener | Keep pencil points fine |
Optional Coloring Supplies
You can add color to your sponge drawing. Colored pencils or markers work well.
Here are some coloring supplies you might want:
- Yellow and green colored pencils for sponge colors
- Fine-tip markers for details
- Blending tools to soften colors

Credit: www.dreamstime.com
Basic Shapes And Structure
Drawing a kitchen sponge starts with understanding its basic shapes. A sponge looks like a soft rectangle with rounded edges.
Focus on simple shapes first before adding texture or details. This helps keep the drawing clear and balanced.
Sketching The Outline
Begin by drawing a light rectangle with smooth corners. This shape shows the sponge’s body. Avoid sharp angles to keep it soft and natural.
- Draw a horizontal rectangle for the main shape
- Round all four corners slightly
- Keep lines light for easy correction
- Add a thinner rectangle on top to show the scrubbing side
Proportions And Angles
Check the sponge’s proportions by comparing its length, width, and height. Usually, the length is about twice the width. Angles are very soft, almost flat on the edges.
| Feature | Ratio | Notes |
| Length | 2 units | Twice the width |
| Width | 1 unit | Main body width |
| Height | 0.5 unit | Thickness of the sponge |
| Corner Angle | Rounded | Soft, no sharp points |
Adding Texture
Drawing a kitchen sponge looks simple but adding texture makes it look real. Texture shows the sponge’s soft and porous nature.
Use different drawing techniques to create a rough and bumpy surface. This helps your sponge stand out on paper.
Creating The Porous Surface
Start by sketching small holes and pores on the sponge’s surface. These pores are uneven in size and shape.
- Use light, irregular circles and ovals for pores.
- Cluster some pores closer together and leave others spaced out.
- Vary the size to show natural sponge texture.
- Draw some pores partially cut off by the sponge edges.
- Keep the lines soft and avoid harsh outlines.
Using Shading For Depth
Shading helps show the sponge’s curves and depth. Darker areas appear inside pores and under edges.
| Shading Technique | Purpose |
| Light shading | Shows flat sponge surface |
| Dark shading inside pores | Creates depth |
| Soft shadows under edges | Suggests thickness |
| Gradual blending | Makes texture look natural |
Detailing Edges And Highlights
Drawing a kitchen sponge with details makes it look real. Focus on edges and highlights to show texture and shape.
Careful shading and lines help the sponge appear soft and wet. This guide explains how to add these details clearly.
Defining Sponge Borders
Start by outlining the sponge shape with clean lines. Use soft curves to show the sponge’s rounded edges.
Add small bumps or uneven lines along the border. This gives the sponge a natural, porous look.
- Draw gentle curves instead of sharp corners
- Use light, broken lines for texture
- Add slight shadows near the edges
- Make the corners slightly rounded
Highlighting Wet Or Used Areas
Wet areas on the sponge look shiny and darker. Use highlights to show wet spots clearly.
Show used parts by adding small dents or rough textures. Highlights and shadows make these areas stand out.
- Use white or light strokes for shiny wet spots
- Darken areas that look soaked
- Add small dots or rough lines for wear
- Blend highlights softly to avoid harsh lines
Coloring Techniques
Coloring a kitchen sponge can make your drawing look real and lively. Using the right colors and blending them well helps add depth.
These simple coloring tips will help you create a soft and natural look for your sponge drawing.
Choosing Colors For Realism
Choose colors that match a real kitchen sponge. Most sponges have yellow, green, or blue tones.
Use lighter shades for soft parts and darker shades for rough areas. This contrast makes the sponge look three-dimensional.
- Start with a base color like light yellow or beige
- Add green or blue for the scrubbing side
- Use light brown or gray for shadows
- Keep colors soft to show sponge texture
Blending And Layering Colors
Blending colors smoothly helps create a soft sponge look. Use light strokes to blend colors gently.
Layer colors by adding light colors first. Then add darker shades on top for depth and shadows.
- Apply base color evenly
- Blend edges softly using a blending tool or finger
- Add darker layers in small areas for shadow
- Use a white or light color to highlight raised parts
Final Touches
After drawing the basic shape of the kitchen sponge, it is time to add the final touches. These small improvements make your drawing look complete and realistic.
Focus on refining details and adding background elements. These steps help your sponge stand out and look more natural.
Refining Details
Look closely at your sponge drawing. Add small dots and textures to show its porous surface. Use light shading to give it depth.
Pay attention to the edges. Soften them slightly to show the sponge’s soft feel. Add tiny lines to suggest the sponge’s rough texture.
- Add small dots to represent pores.
- Use shading for a 3D effect.
- Soften edges to show softness.
- Include light lines for texture.
Adding Background Elements
Add simple background items to give context. A sink, bubbles, or water drops make your drawing more interesting.
Keep background elements light and simple. They should support the sponge without stealing focus.
- Draw a kitchen sink or faucet outline.
- Add bubbles or water drops around the sponge.
- Use light colors for background details.
- Keep the sponge as the main focus.
Tips For Practice
Drawing a kitchen sponge takes patience and practice. You can improve your skills by focusing on simple shapes and details.
Practicing regularly helps you see small differences and correct your mistakes quickly.
Common Mistakes To Avoid
Many beginners draw the sponge with hard edges instead of soft, rounded corners. This makes it look less natural.
- Ignoring the texture that makes the sponge look real
- Making the shape too perfect or square
- Forgetting to add shadows for depth
- Using too many details at once, which can confuse the drawing
Improving With Repetition
Drawing the sponge many times will help your hand get steady. You will learn how to draw the shape faster and cleaner.
| Practice Activity | Focus | Benefit |
| Sketch basic shapes | Shape and outline | Builds foundation |
| Add texture details | Surface look | Makes drawing realistic |
| Shade with light and shadow | Depth and volume | Improves 3D effect |
| Draw from different angles | Perspective | Enhances skill and creativity |

Credit: www.shutterstock.com
Frequently Asked Questions
How Do I Start Drawing A Kitchen Sponge?
Begin by sketching a simple rectangular shape with rounded edges. This forms the sponge's basic outline. Use light pencil strokes to adjust proportions easily.
What Materials Are Best For Drawing A Kitchen Sponge?
Use a pencil for initial sketches and colored pencils or markers for shading. Soft pastels can add texture for a realistic look.
How Can I Add Texture To My Kitchen Sponge Drawing?
Create small dots and irregular lines to mimic sponge holes. Vary pressure and stroke direction for a natural, porous effect.
What Colors Should I Use For A Kitchen Sponge?
Use yellow or green for the sponge body and a darker shade for the scrubby side. Blend colors softly for a realistic appearance.
Conclusion
Drawing a kitchen sponge can be simple and fun. Start with basic shapes and add small details. Practice helps you improve your drawing skills fast. Try different colors to make your sponge look real. Keep your lines light at first, then darken them later.
Anyone can learn with patience and time. Now, grab your pencil and start drawing!


