
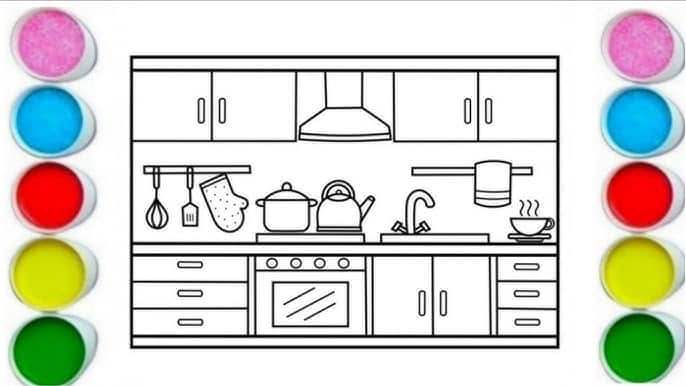
Are you ready to bring your kitchen ideas to life with a simple drawing? Learning how to draw a kitchen cabinet might sound tricky, but it’s easier than you think.
Whether you want to design your dream kitchen or just need a clear plan before you start building, this guide will walk you through every step. By the end, you’ll have a neat, accurate sketch that shows exactly how your cabinet will look.
Keep reading, and discover how a few easy tips can turn your vision into a clear, confident drawing.

Credit: www.cabinetplans.io
Materials And Tools Needed
Drawing a kitchen cabinet requires some basic materials and tools. These help you create clear and accurate sketches.
Getting the right supplies makes the process easier and more enjoyable. You will need both essential and optional tools.
Essential Drawing Supplies
Start with basic supplies to sketch your kitchen cabinet. These tools help you draw shapes and details clearly.
- Pencils (HB and 2B) for light and dark lines
- Eraser to fix mistakes
- Ruler or straightedge for straight lines
- Sketch paper or drawing pad
- Sharpener to keep pencil tips fine
Optional Tools For Precision
Use these optional tools to improve accuracy and add details. They help you draw neat and professional-looking cabinets.
- Mechanical pencil for consistent thin lines
- Protractor to measure angles
- Compass for drawing circles or curves
- Drafting templates for cabinet shapes
- Colored pencils or markers to highlight parts
Basic Shapes And Proportions
Drawing a kitchen cabinet starts with simple shapes. Use basic forms to keep your drawing clear and correct.
Proportions help your cabinet look real. They keep all parts in the right size compared to each other.
Sketching Rectangles And Squares
Start your cabinet with rectangles and squares. These shapes form the cabinet’s body and doors.
Draw light lines first. This way, you can fix mistakes easily before adding details.
- Use a large rectangle for the cabinet frame
- Sketch smaller rectangles for doors and drawers
- Keep lines straight and corners sharp
Setting Cabinet Dimensions
Decide the size of your cabinet before drawing details. This keeps the drawing balanced.
Use common kitchen cabinet sizes as a guide. This helps your drawing look practical and useful.
| Part | Typical Size (inches) |
|---|---|
| Cabinet Height | 30 to 42 |
| Cabinet Width | 12 to 36 |
| Cabinet Depth | 12 to 24 |
Adding Cabinet Details
Adding details to your kitchen cabinet drawing makes it look more realistic. Small touches help show the cabinet’s function and style.
Focus on the doors, drawers, and hardware to bring your sketch to life. These elements add depth and character.
Drawing Doors And Drawers
Start by drawing the outlines of doors and drawers on the cabinet front. Use straight lines to keep shapes clear and neat.
- Draw rectangles for doors and squares for drawers.
- Add thin border lines to show door panels.
- Include small gaps between doors and drawers to separate them.
- Use light shading inside panels to suggest depth.
Incorporating Handles And Knobs
Handles and knobs give cabinets a finished look. They also show how the cabinet opens.
| Type | Description | Shape |
| Handle | Long grip attached horizontally or vertically | Rectangle or bar |
| Knob | Small round or square piece for pulling | Circle or square |
| Recessed Pull | Built-in grip inside the door surface | Indented oval or rectangle |
Place handles or knobs near the door edges or drawer tops. Draw them with simple shapes to keep your sketch clear.
Shading And Texturing Techniques
Drawing a kitchen cabinet looks more real with good shading and texture. These techniques add details that show the material and shape.
Shading shows light and dark areas. Texturing adds patterns to show different surfaces. Both help the drawing look 3D and natural.
Creating Wood Grain Effects
Wood grain makes the cabinet surface look like real wood. Use thin, wavy lines to create the grain pattern. Follow the direction of the wood.
Change the pressure on your pencil or brush to make light and dark lines. This adds variety to the grain. You can also add small knots for more detail.
- Draw long, curved lines following the wood direction
- Use lighter lines for soft grain and darker lines for rough grain
- Add small oval shapes for knots and imperfections
- Blend some lines softly to avoid harsh edges
Using Shadows For Depth
Shadows make the cabinet parts look 3D and solid. Look where the light hits the cabinet and add dark shading on the opposite sides.
Use soft shading to show curved edges and harder shadows for sharp corners. This gives a sense of space and form to your drawing.
- Shade under cabinet doors and shelves to show depth
- Darken areas where two surfaces meet
- Use gradual shading on rounded edges
- Leave highlights where light hits strongest
Design Variations And Styles
Kitchen cabinets come in many designs and styles. Each style fits different tastes and room themes. Understanding these options helps you choose the best look for your space.
This guide covers two popular cabinet styles. You will learn about modern cabinet concepts and classic, rustic designs.
Modern Cabinet Concepts
Modern kitchen cabinets often have clean lines and simple shapes. They use smooth surfaces and minimal decoration. Colors tend to be neutral or bold but solid.
- Flat-panel doors with no frames
- Materials like glass, metal, or high-gloss finishes
- Hidden handles or push-to-open mechanisms
- Open shelving mixed with closed storage
- Light colors like white, gray, or black
Classic And Rustic Designs
Classic and rustic cabinets bring warmth and charm. They often feature wood textures and detailed craftsmanship. These styles add a cozy feel to kitchens.
| Style | Materials | Common Features |
| Classic | Wood, painted finishes | Raised panels, crown molding |
| Rustic | Natural wood, distressed finishes | Exposed joinery, wrought iron handles |

Credit: www.freepik.com
Tips For Refining Your Drawing
Drawing a kitchen cabinet takes practice and attention to detail. Refining your drawing helps make it look more realistic.
Use simple tips to improve your lines and fix the shapes. This will make your cabinet drawing clearer and nicer.
Correcting Proportions
Check the size of each part of the cabinet. Make sure the doors, drawers, and shelves match the real shapes.
Use light lines to sketch first. Erase and adjust parts that look too big or too small.
- Measure the height and width of each cabinet section
- Compare parts to keep balance and symmetry
- Keep the cabinet depth consistent in your drawing
- Use simple shapes like rectangles and squares for accuracy
Enhancing Line Work
Strong, clean lines make your drawing look sharp. Use a steady hand to go over your sketch lines.
Vary the thickness of lines to show edges and details. Thicker lines can show outer edges, thinner lines can show inner details.
- Use light lines for guides and details
- Darken main outlines for better focus
- Keep lines smooth and avoid shaky strokes
- Add small lines for texture, like wood grain or handles

Credit: www.youtube.com
Frequently Asked Questions
What Materials Do I Need To Draw A Kitchen Cabinet?
You need paper, pencil, ruler, eraser, and colored pencils. These tools help create accurate and clean cabinet drawings. Using a ruler ensures straight lines and proper proportions for a realistic look.
How Do I Start Drawing A Kitchen Cabinet?
Begin by sketching the cabinet’s basic shape using light lines. Draw rectangles for the cabinet body and doors. Add details gradually, such as handles and shelves, for a complete design.
What Are Key Features To Include In Cabinet Drawings?
Include doors, drawers, handles, and shelves in your drawing. Show cabinet dimensions and panel styles clearly. Adding shadows and textures enhances the three-dimensional effect and realism.
How Can I Make My Kitchen Cabinet Drawing Realistic?
Use shading to show light and shadow on cabinet surfaces. Add textures like wood grain or paint finishes. Maintain proper proportions and perspectives for a lifelike appearance.
Conclusion
Learning to draw a kitchen cabinet can be rewarding. You now know the steps involved. Start by sketching basic shapes. Add details like handles and shelves. Use a ruler for straight lines. Practice makes perfect. Keep refining your technique. With time, your drawings will improve.
Experiment with different styles. Try various perspectives. Creativity is key. Enjoy the process and have fun. Keep your tools ready. Drawing can be a relaxing hobby. Share your artwork with friends. Get feedback and grow. Remember, patience is important. Happy drawing!


