

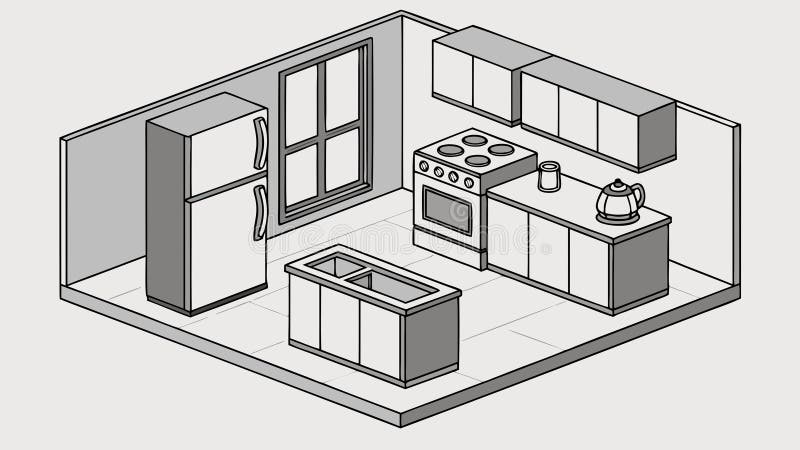
Have you ever wanted to bring your dream kitchen to life before building it? Knowing how to draw a 3D kitchen can turn your ideas into a clear, detailed vision you can see and share.
Imagine being able to walk through your kitchen on paper, understanding every corner and design choice. This skill not only makes planning easier but also saves you time and money by avoiding costly mistakes. You’ll discover simple steps to create your own 3D kitchen drawing, even if you’ve never tried it before.
Ready to unlock your creativity and design the perfect kitchen space? Keep reading—you’re about to learn how to make your ideas pop off the page.
Tools And Materials
Drawing a 3D kitchen needs the right tools and materials. These help you create clear and detailed designs.
Using good supplies and software makes your drawing process easier and more accurate.
Drawing Supplies
Start with basic drawing supplies to create your 3D kitchen sketch. These tools help you draft lines and shapes precisely.
- Pencils with different hardness (HB, 2B, 4B)
- Eraser for corrections
- Ruler and T-square for straight lines
- Compass for circles and curves
- Graph paper for scale and proportions
- Colored pencils or markers for details
- Blending stumps for shading effects
Software Options
Digital software helps you design and view your kitchen in 3D. It offers tools to make detailed models and realistic views.
| Software | Main Features | Cost |
| SketchUp | Easy 3D modeling, many tutorials | Free & Paid |
| AutoCAD | Professional drafting and design | Subscription |
| Sweet Home 3D | User-friendly, furniture library | Free |
| Blender | Advanced 3D modeling, free | Free |
Basic Drawing Techniques
Drawing a 3D kitchen helps you see how the space will look. It shows depth and makes the design clear.
Using simple drawing techniques makes the process easier. You can create shapes and add perspective step by step.
Perspective Drawing
Perspective drawing adds depth to your kitchen sketch. It shows how objects get smaller as they go far away.
Start by drawing a horizon line. Place one or two vanishing points on it. Draw lines from these points to guide your shapes.
- Draw the horizon line across the paper
- Mark one or two vanishing points on the line
- Use straight lines from vanishing points to shape objects
- Keep objects smaller as they move away
Sketching Shapes
Sketch basic shapes to build your kitchen design. Use rectangles, squares, and circles to form cabinets, tables, and appliances.
Draw light lines first. This helps fix mistakes and improve the drawing. Add details after the shapes look right.
- Start with simple shapes for each kitchen part
- Keep lines light and easy to erase
- Add details like handles and sinks last
- Use a ruler for straight edges
Planning The Kitchen Layout
Drawing a 3D kitchen begins with careful planning. You need to know your space well before adding details.
Planning helps you organize your kitchen for easy use and a neat look. Two key parts are measuring space and arranging elements.
Measuring Space
Start by measuring the length, width, and height of your kitchen area. Write down each measurement clearly.
Use this table to record your measurements:
| Area | Measurement (feet) |
|---|---|
| Length | __________ |
| Width | __________ |
| Height | __________ |
Check doors and windows too. Note their size and position. This helps avoid placing cabinets or appliances in wrong spots.
Arranging Elements
Arrange your kitchen parts to make cooking easier. The main areas are the sink, stove, and refrigerator.
- Keep the sink near the water source.
- Place the stove away from doors to avoid drafts.
- Put the refrigerator where it is easy to open.
- Leave enough space for counters between appliances.
- Plan for storage near cooking and prep areas.
Think about the flow between these elements. A good layout saves time and makes cooking more fun.

Credit: www.freepik.com
Drawing The Kitchen Structure
Drawing a 3D kitchen starts with creating the main structure. This includes the walls, floors, doors, and windows. These elements form the base for your kitchen design.
Focus on clear lines and correct proportions. This helps the kitchen look realistic and balanced.
Walls And Floors
Begin by sketching the walls that define the kitchen space. Use straight lines to make corners sharp and clear. Walls set the boundary for your kitchen.
Next, draw the floor area inside the walls. Adding floor patterns or tiles can add depth to the drawing. Use perspective lines to show the floor’s shape in 3D.
- Draw walls with vertical lines for height
- Use horizontal lines to mark floor edges
- Add floor patterns for depth and detail
- Keep wall and floor lines clean and straight
Doors And Windows
Place doors and windows on the walls to bring light and access. Draw them with frames and panels for better detail. Doors often have handles and hinges to show function.
Windows can be drawn with glass panes and frames. Show reflections or shadows to make them look more 3D. Position windows to balance the kitchen layout.
- Sketch door frames and panels clearly
- Add door handles and hinges for realism
- Draw window panes with frames and reflections
- Place doors and windows to balance the design
Adding Cabinets And Counters
Drawing a 3D kitchen requires careful placement of cabinets and counters. These elements define the kitchen's style and function.
Focus on shapes, sizes, and how cabinets and counters fit together. This creates a realistic and useful kitchen design.
Drawing Cabinets
Start by sketching the basic shapes of your cabinets. Use simple rectangles to show the front faces.
Draw the sides and tops to add depth. Use lines that go back to create the 3D effect.
- Draw the base cabinets first along the floor line
- Add wall cabinets above for storage space
- Show cabinet doors with simple vertical lines
- Use shading or darker lines for depth
Designing Countertops
Draw countertops on top of base cabinets. Use parallel lines to show thickness and edges.
Include details like rounded corners or overhangs. This makes the countertop look more realistic.
- Start with a rectangle matching the cabinet length
- Draw a thin line above for countertop thickness
- Add curves or angles for style
- Shade the edges to show depth
Including Appliances And Fixtures
Drawing a 3D kitchen means adding the right appliances and fixtures. These items make your kitchen look real and useful.
Appliances like ovens and refrigerators, along with sinks and faucets, are key parts. They give your drawing a finished look.
Ovens And Refrigerators
Start by sketching the shapes of ovens and refrigerators. Use simple boxes for their bodies and add details like doors and handles.
Show the depth by drawing side panels and shadows. You can add buttons or screens to make them look modern.
- Draw rectangular shapes for the main bodies
- Add smaller rectangles for doors and panels
- Include handles and control buttons
- Use shading to show depth and dimension
Sinks And Faucets
Draw the sink as a simple oval or rectangle inside the countertop space. Show its depth by adding an inner edge.
Add faucets by sketching thin pipes with curved shapes. Include handles or knobs for more detail.
- Use oval or rectangular shapes for sink basins
- Draw inner lines to show sink depth
- Create curved lines for faucet necks
- Add small circles or rectangles for handles
Applying Colors And Textures
Adding colors and textures makes your 3D kitchen drawing look real. It helps show the materials and style clearly.
Good color and texture choices bring life to the kitchen design. They also help separate different parts visually.
Choosing Color Schemes
Pick colors that match the kitchen style you want. Use light colors for a bright look and dark colors for a cozy feel.
Limit the number of colors to keep the design clean. Use accent colors to highlight details like cabinets or appliances.
- Neutral colors like white, beige, or gray are safe choices
- Warm colors create a welcoming atmosphere
- Cool colors give a fresh and modern look
- Use contrasting colors for visual interest
Adding Surface Details
Textures show the material type, such as wood, metal, or stone. They add depth and realism to your drawing.
Use patterns like wood grain or tile shapes to make surfaces look real. Shadows and highlights help show texture too.
- Wood surfaces often have visible grain lines
- Stone or marble shows natural spots and veins
- Metal surfaces reflect light and may have a smooth shine
- Tile surfaces show grout lines and repeated patterns
Credit: www.dreamstime.com
Final Touches And Enhancements
Adding final touches makes your 3D kitchen drawing look real. Small details bring life to your design.
Focus on lighting and shadows to give depth and mood to your kitchen scene.
Lighting Effects
Good lighting shows the materials and shapes clearly. Use warm lights for a cozy feel.
- Place ceiling lights to brighten the whole kitchen
- Add under-cabinet lights to highlight countertops
- Use spotlights to focus on key areas like the stove or sink
- Adjust light color to match the mood: warm or cool
- Try soft shadows to avoid harsh contrasts
Shadows And Highlights
Shadows and highlights give your drawing a 3D effect. They show where light hits and where it hides.
| Effect | Purpose | Tip |
| Soft Shadows | Make objects look natural | Blur edges slightly |
| Hard Shadows | Show strong light source | Use for direct sunlight |
| Highlights | Show shiny surfaces | Place on edges and curves |
| Reflected Light | Add realism | Use near reflective materials |

Credit: apps.apple.com
Frequently Asked Questions
How Do I Start Drawing A 3d Kitchen?
Begin with a simple floor plan using basic shapes. Sketch walls, cabinets, and appliances in perspective. Use vanishing points for depth. This sets the foundation for your 3D kitchen drawing.
What Tools Help Create A 3d Kitchen Drawing?
Use pencils, rulers, and erasers for accuracy. Digital tools like SketchUp or AutoCAD enhance precision. Both traditional and digital tools aid in creating detailed 3D kitchen designs.
How To Add Depth And Realism To Kitchen Drawings?
Apply shading and shadows to objects. Use perspective lines to create depth. Highlight textures like wood and tiles. These techniques make your 3D kitchen look realistic.
Can Beginners Easily Draw A 3d Kitchen?
Yes, beginners can start with basic shapes and simple perspectives. Practice helps improve accuracy and detail over time. Step-by-step tutorials simplify the process for new artists.
Conclusion
Creating a 3D kitchen drawing is simpler than you think. Start with basic shapes to form your kitchen layout. Add depth by layering features like cabinets and appliances. Remember, practice makes perfect. Use shading to give your drawing a realistic touch.
Experiment with perspective to make objects stand out. Keep refining your skills for better results. Enjoy the process and be patient with yourself. Soon, your kitchen drawings will look lifelike. Happy drawing!


