

Are you ready to transform your kitchen ideas into a clear, lifelike design? Learning how to draw a 3D kitchen plan puts the power in your hands to visualize every detail before you start building or renovating.
Imagine seeing your perfect kitchen come to life on paper, helping you avoid costly mistakes and make smarter choices. In this guide, you’ll discover simple steps to create your own 3D kitchen plan, even if you’ve never drawn a thing before.
Keep reading, and you’ll be amazed at how easy and rewarding it can be to design a kitchen that fits your space and style perfectly.
Tools For 3d Kitchen Design
Drawing a 3D kitchen plan needs the right tools. These tools help you make clear and detailed kitchen designs.
Good tools make it easier to create, edit, and view your kitchen plan in three dimensions.
Software Options
Many software programs help you design kitchens in 3D. They offer different features for planning and visualization.
Some software is simple for beginners, while others have advanced tools for professionals.
- SketchUp: Easy to use with many design tools
- Sweet Home 3D: Free and good for home layouts
- RoomSketcher: Offers clear 3D views and floor plans
- IKEA Home Planner: Helps design kitchens with IKEA products
- Chief Architect: Professional tool with detailed design options
Essential Hardware
Good hardware improves your experience with 3D kitchen design software. It makes drawing faster and smoother.
Most designs need a computer with enough power to run 3D software without problems.
- Desktop or laptop with a strong processor (Intel i5 or better)
- At least 8GB of RAM for smooth multitasking
- Graphics card that supports 3D rendering
- Large monitor for better view of your designs
- Fast storage like SSD for quick loading and saving
Recommended Accessories
Some accessories help you work easier and more accurately when drawing 3D kitchens.
These tools can improve your control and speed during design work.
- Graphic tablet for precise drawing and adjustments
- Mouse with extra buttons for quick commands
- Keyboard shortcuts for faster workflow
- External hard drive for backup and extra storage
- Color calibration tool to see true colors on screen
Planning Your Kitchen Layout
Designing a 3D kitchen plan begins with a clear layout. Planning helps you use space well and work efficiently.
Focus on key areas like measurements, style, and workflow. These guide your design choices and improve kitchen use.
Measuring Your Space
Measure your kitchen area carefully to create an accurate plan. Include walls, doors, and windows in your measurements.
- Measure the length and width of the room.
- Note the height of walls and ceiling.
- Mark locations of doors and windows.
- Record positions of electrical outlets and plumbing.
- Check for any obstacles like radiators or columns.
Choosing The Kitchen Style
Pick a kitchen style that fits your taste and home design. Styles affect the look and feel of your kitchen.
| Style | Description |
| Modern | Clean lines, minimal decoration, and sleek surfaces. |
| Traditional | Classic details, warm colors, and decorative elements. |
| Rustic | Natural materials, earthy tones, and cozy feel. |
| Transitional | Mix of modern and traditional styles. |
Defining Zones And Workflow
Organize your kitchen into zones for cooking, cleaning, and storage. This helps create a smooth workflow.
- Cooking Zone:Place stove, oven, and microwave here.
- Cleaning Zone:Sink and dishwasher belong in this area.
- Storage Zone:Cabinets and pantry for food and utensils.
- Preparation Zone:Counter space for chopping and mixing.
Creating The Basic Floor Plan
Drawing a 3D kitchen plan starts with a clear floor plan. This plan shows the layout of your kitchen space.
A good floor plan helps you place walls, windows, doors, and appliances correctly.
Drawing Walls And Windows
Begin by drawing the outer walls of the kitchen. Use straight lines to mark each wall.
Next, add windows on the walls where natural light will come in. Mark their size and position carefully.
- Draw walls with correct length and thickness
- Place windows where light is needed
- Keep space around windows for curtains or blinds
Adding Doors And Openings
Mark all door locations on the floor plan. Draw door swings to show how doors open.
Include any other openings like pass-throughs or archways. These affect how you move in the kitchen.
- Place doors for easy kitchen access
- Show door swing direction clearly
- Note openings for smooth kitchen flow
Positioning Appliances
Plan where to put appliances like the fridge, stove, and sink. Keep enough space around them.
Arrange appliances to make cooking and cleaning easy. Use the “work triangle” idea for best flow.
- Place fridge near the entrance for easy access
- Keep stove away from windows to avoid drafts
- Put sink near plumbing and windows if possible
Building 3d Elements
Creating a 3D kitchen plan requires detailed building of elements. You can bring your design to life by modeling key parts carefully.
This guide covers how to model cabinets and counters, add fixtures and fittings, and include lighting and details.
Modeling Cabinets And Counters
Start by shaping the cabinets and counters to match your kitchen layout. Use simple shapes like boxes for cabinet frames.
- Set the correct dimensions for each cabinet and counter.
- Adjust the depth and height to fit the kitchen space.
- Use textures to show materials such as wood or stone.
- Add doors and drawers with clear outlines.
Incorporating Fixtures And Fittings
Fixtures and fittings add function and style to your kitchen. Include sinks, faucets, and handles to enhance realism.
| Fixture | Common Materials | Placement Tips |
| Sink | Stainless steel, ceramic | Center under window if possible |
| Faucet | Chrome, brushed nickel | Match sink style and height |
| Cabinet Handles | Metal, wood | Align horizontally on drawers |
Adding Lighting And Details
Lighting sets the mood and shows off your kitchen’s features. Add ceiling lights, under-cabinet lamps, and small details.
Use this checklist to add lighting and details:
- Place ceiling lights evenly for general illumination.
- Install LED strips under cabinets for task lighting.
- Include decorative elements like plants or bowls.
- Add texture details to walls and floors for depth.
Refining And Customizing The Design
After creating the basic 3D kitchen plan, refining the design makes it more personal. Custom touches help the kitchen look exactly as you want. Small changes improve the overall feel and function of the space.
This stage focuses on colors, shapes, and usability. You can make your kitchen more beautiful and easier to use by adjusting details carefully.
Applying Colors And Textures
Colors and textures bring life to your kitchen plan. Choose shades that match your style and mood. Textures add depth and interest to surfaces like walls, cabinets, and floors.
- Pick wall colors that create the right atmosphere.
- Use different textures for cabinets and countertops.
- Try contrasting colors to highlight features.
- Consider natural materials like wood or stone for realism.
Adjusting Dimensions
Check all measurements in your 3D plan to fit your kitchen space. Correct dimensions prevent problems during installation. Make sure every appliance and furniture piece fits well.
| Item | Recommended Size | Notes |
| Kitchen Island | 4-6 feet long | Leave 3 feet clearance around |
| Counter Height | 36 inches | Comfortable for most users |
| Walkway Width | 42-48 inches | Allows easy movement |
| Cabinet Depth | 24 inches | Standard for storage space |
Optimizing For Functionality
A good kitchen plan works well for cooking and cleaning. Arrange items so you can move easily between tasks. Think about the triangle between the sink, stove, and fridge.
- Place the sink near the dishwasher for easy cleanup.
- Keep the stove away from doorways to avoid accidents.
- Use drawers for pots and pans instead of shelves.
- Add enough lighting for all work areas.
- Include enough electrical outlets for appliances.
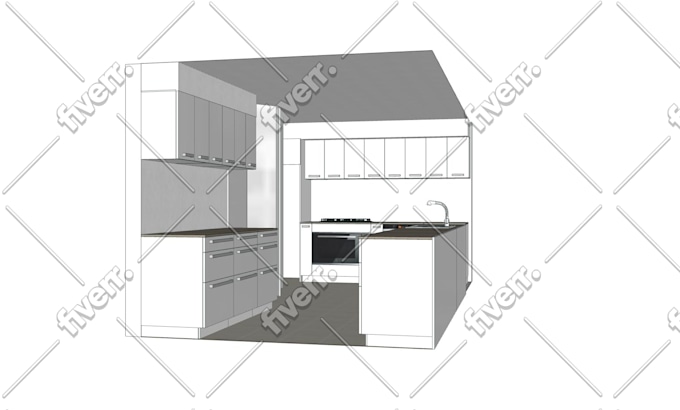
Credit: www.fiverr.com
Reviewing And Exporting Your Plan
After drawing your 3D kitchen plan, check it carefully. This step helps find mistakes early.
Next, create clear views of your plan. Then, export files to share your work with others.
Checking For Accuracy
Look closely at all measurements and placements. Make sure everything fits the space.
Check cabinet sizes, appliance spots, and walking paths. Fix any errors before moving on.
- Verify all measurements match your room size
- Ensure appliances fit their spaces
- Check if cabinets open without hitting anything
- Confirm enough space for movement
Generating Rendered Views
Create rendered views to see your kitchen in 3D. These views help you understand the design better.
You can make different angles and lighting to show details clearly. These images guide your building process.
- Generate front, side, and top views
- Use natural light to see true colors
- Try different materials in renderings
- Save images in high quality for review
Exporting Files For Sharing
Export your kitchen plan files in formats others can open. This helps contractors and clients see your work.
Choose file types like PDF, JPEG, or DWG. Each type works for different uses like printing or editing.
- PDF for easy viewing and printing
- JPEG for sharing images online
- DWG or DXF for CAD editing
- Include all views and notes in exports
Tips For Beginners
Drawing a 3D kitchen plan can feel hard at first. It helps to know some easy tips to start well.
This guide shares key advice to avoid mistakes, save time, and find learning resources.
Common Mistakes To Avoid
Many beginners make these errors when drawing a kitchen plan. Avoiding them will improve your design.
- Ignoring measurements and scale of the space
- Placing appliances too close or too far apart
- Forgetting to plan for cabinet doors and drawer space
- Not showing the flow between work areas
- Using too many colors or details early on
Time-saving Shortcuts
You can draw faster by using tools and tricks that simplify your work.
| Shortcut | How It Helps |
| Use grid paper or digital grids | Keeps dimensions accurate |
| Copy and paste common shapes | Speeds up drawing furniture |
| Start with a simple sketch | Focus on layout before details |
| Use templates for appliances | Ensures correct sizes |
| Label parts clearly | Makes changes easier |
Learning Resources
Find good books, videos, and websites to learn how to draw 3D kitchen plans step by step.
Here are some ways to learn more effectively:
- Watch tutorial videos on basic 3D drawing software
- Join forums where people share kitchen plan ideas
- Use free online courses to understand design principles
- Practice by copying simple kitchen layouts
- Ask for feedback from experienced designers

Credit: www.youtube.com

Credit: www.youtube.com
Frequently Asked Questions
What Tools Do I Need To Draw A 3d Kitchen Plan?
You need a 3D design software like SketchUp or AutoCAD. A computer and basic drawing skills help. These tools allow precise measurements and realistic visualization of your kitchen layout.
How Do I Start Drawing A 3d Kitchen Plan?
Begin by measuring your kitchen space accurately. Draw the floor plan in 2D first. Then, use 3D software to add height and depth for a realistic view.
Can I Customize Kitchen Elements In 3d Plans?
Yes, 3D software lets you customize cabinets, appliances, and fixtures. You can change colors, sizes, and positions to fit your style and needs perfectly.
How To Ensure Accuracy In A 3d Kitchen Plan?
Double-check all measurements before drawing. Use software with snapping and grid features to keep elements aligned. Review your 3D model from different angles for accuracy.
Conclusion
Creating a 3D kitchen plan is easier than you think. Begin with simple sketches. Use them to visualize your ideas. Software tools can enhance your design. Practice makes perfect; keep refining your skills. Small steps lead to great results. Don't rush the process.
Patience and creativity go hand in hand. Remember, every kitchen plan is unique. Make sure it fits your needs and style. Enjoy the journey of designing your dream kitchen. With effort, you can create a beautiful and functional space. Keep experimenting and learning.
Your perfect kitchen plan awaits!


