
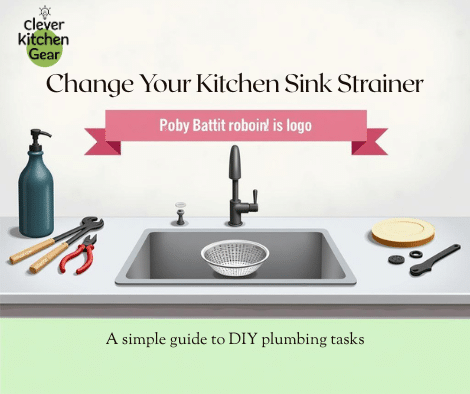
Stop That Leaky Sink! A Simple Fix
Is a leaky kitchen sink annoying you? That constant drip likely comes from your basket strainer. It is probably time to replace it.
You do not need to be a plumber. You can fix this yourself. This guide shows you how to change kitchen sink basket strainer easily. Think about having a smooth sink again. No more drips or water under the cabinet. You also save money by skipping a plumber's visit. This simple, step-by-step process helps you fix your kitchen. Ready to make your sink work better? Let's start!

Credit: www.familyhandyman.com
Tools You Will Need
Replacing a kitchen sink basket strainer is easy. The right tools make the job simple. Having all materials ready speeds up the work. Below are the basic tools and parts needed. Every item plays a key role in this project.
Basic Tools
These tools remove the old strainer. They also help fit the new one securely.
-
Adjustable wrench
-
Pipe wrench
-
Screwdriver (flathead or Phillips)
-
Plumber’s putty or silicone
-
Bucket for catching water
-
Rag or towel
Replacement Parts
You must have the correct replacement strainer. This ensures a proper fit.
Safety And Cleanup
These items protect you while you work. They also keep your workspace clean.
-
Work gloves protect your hands.
-
Safety glasses shield your eyes.
-
Old towels catch spills.
-
A trash bag holds old parts and dirt.

Credit: www.youtube.com
Get The Sink Area Ready
You must prepare the area first. This step makes replacing the kitchen sink basket strainer easier. Taking time to prepare saves you from a later mess. It also prevents trouble.
Turn Off Water Supply
First, shut off the water under the sink. This stops water flow while you work. Find the valves on the hot and cold pipes. Turn them clockwise to close the water.
-
Check both hot and cold water valves.
-
Turn the valves slowly to prevent damage.
-
Open the faucet to drain any leftover water.
Clear Under-sink Space
Remove everything stored under your sink. This gives you space to work. It also prevents items from getting wet. A clean area lets you see the plumbing. You can then avoid accidents.
-
Take out cleaning items and trash bins.
-
Wipe the area to remove water or dirt.
-
Keep a towel nearby for spills.
Take Out The Old Strainer
Now, remove the old kitchen sink basket strainer. Follow the right steps for a simple job. First, disconnect the drain pipes under the sink. Then, unscrew the strainer from the sink opening. This prepares your sink for the new part.
Disconnect Drain Pipes
Look under the sink for the drain pipes. They connect to the basket strainer. Place a bucket below to catch any spilled water. Loosen the slip nuts on the drain pipes. Turn these nuts counterclockwise. Carefully pull the pipes away from the strainer.
-
Place a bucket under the pipes first.
-
Use pliers or your hands to loosen nuts.
-
Remove the pipes gently to stop damage.
Unscrew The Strainer
Move to the sink top now. Use a wrench or pliers to hold the locknut below the sink. Turn the locknut counterclockwise to loosen it. The locknut will be loose now. Lift the basket strainer out of the sink drain. Next, clean the drain area.
-
Hold the locknut tightly with your wrench.
-
Turn the locknut counterclockwise to loosen.
-
Lift the basket strainer out carefully.
Clean The Drain Opening
Cleaning the sink drain opening is very important. A clean drain helps the new strainer fit well. Removing dirt and grime prevents clogs later. It also stops bad smells. A clean area makes the whole process faster.
Remove Old Debris
Start by taking out old plumber’s putty. Scrape out any food scraps from the drain. Use gloves to protect your hands from sharp edges. A small brush can scrub away stuck debris. Make sure the area is completely clear.
Clean With Soapy Water
Mix warm water with a mild dish soap. Use this cleaning solution. Wipe the drain opening with a cloth or sponge.
-
Dip the sponge in the soapy water mix.
-
Scrub the drain opening gently.
-
Rinse the area with clean water.
-
Dry with a clean towel.
Use Vinegar For Stains
Pour white vinegar into the drain opening. Do this if stains remain. Let the vinegar sit for about ten minutes. This will dissolve the buildup. Scrub the area again after soaking. Rinse thoroughly with water. Vinegar cleans well without harsh chemicals.
Dry The Drain Opening
Completely dry the drain opening now. Use a paper towel or clean cloth. Drying removes all moisture. This prevents water from trapping under the strainer. Trapped water can cause leaks or corrosion.
Put In The New Strainer
Installing a new kitchen sink basket strainer is simple. This part stops trash from clogging your drain. This guide shows you the correct installation process.
Apply Plumber’s Putty
Take some plumber’s putty on your fingers. Roll it into a long, thin rope shape. Put the putty rope around the strainer’s bottom edge. This seals the sink and stops leaks.
Position Strainer And Tighten
Insert the basket strainer into the sink drain hole. Do this carefully. Press it down firmly to spread the putty. Go under the sink now. Slide the rubber gasket and metal washer on. Put them onto the strainer’s threaded part. Then, screw the locknut on tightly. This holds everything in place.
-
Center the strainer in the drain hole.
-
Hand-tighten the locknut first.
-
Use a wrench for a very secure fit.
-
Remove extra putty that squeezes out.

Credit: true-routes.com
Connect The Drain Pipes
Reconnect the drain pipes after installing the new strainer. This step is essential. A proper connection stops leaks. It ensures water flows out smoothly. This guide shows you how to attach the gaskets. It also explains how to secure the locknut and pipes.
Attach Rubber Gaskets
Rubber gaskets create a tight seal. This seal is between the sink and drain pipes. Place the gasket over the drain pipe opening. Do this before connecting it to the strainer.
-
Clean the sink drain area well.
-
Slide the rubber gasket onto the drain pipe.
-
Be sure the gasket sits evenly.
-
Press the gasket firmly against the sink's bottom.
Secure Locknut And Pipes
Secure the locknut once the gasket is set. This holds the pipes and strainer together tightly. It prevents leaks and keeps the link stable.
Test For Leaks
Testing for leaks is very important. Do this after installing the new strainer. Checking helps you find and fix problems early. Leaks waste water. They can also damage the area under your sink. Follow these steps to ensure a tight seal.
Run Water And Inspect
Turn on the faucet. Let the water flow through the sink. Watch carefully under the sink. Focus on where the strainer meets the pipe.
-
Look for any water dripping or wet spots.
-
Check the strainer's top and bottom parts.
-
Inspect after a few minutes to catch slow leaks.
Tighten Connections If Needed
Tighten the nuts and bolts if you find leaks. Use a wrench. Do not overtighten, though.
Maintenance Tips
Regular cleaning keeps your sink draining well. It prevents clogs. Simple care extends the strainer's life. Follow these easy steps. They save time and prevent costly repairs.
Regular Cleaning
Clean the basket strainer weekly. Remove food scraps and debris. This stops buildup that blocks water flow.
-
Remove the strainer from the drain.
-
Rinse it under warm water.
-
Use a brush and mild soap to scrub the mesh.
-
Rinse and dry before putting it back.
Avoid Harsh Chemicals
Do not use strong chemicals to clean the strainer. They can damage the metal. This may cause rust or corrosion. Use natural cleaners like baking soda or vinegar. These keep your strainer safe and clean.
Inspect For Damage
Check the strainer regularly for cracks or wear. Replace it if you see damage. This prevents poor drainage or leaks.
Prevent Clogs
Keep large food pieces out of the sink. Use the strainer to catch waste. Empty the strainer often.
-
Scrape plates into the trash before washing.
-
Do not pour grease or oil down the drain.
-
Flush the drain with hot water after use.
Frequently Asked Questions
How do I remove a kitchen sink basket strainer?
First, disconnect the drain pipe under the sink. Next, unscrew the locknut holding the strainer. Finally, carefully lift the basket strainer out.
What tools are needed to change the basket strainer?
You need plumber’s putty, an adjustable wrench, slip-joint pliers, and a screwdriver.
How can I prevent leaks after replacing the basket strainer?
Use plumber’s putty under the strainer flange. Tighten the locknut very securely. Check all connections for leaks after assembly.
How long does it take to change a basket strainer?
It usually takes 30 to 45 minutes. This depends on your experience level.
Final Thoughts
Changing a kitchen sink basket strainer is simple. It is a quick repair. You need only a few tools and steps. This repair saves you money. It also prevents annoying leaks. Take your time with each step. Soon, your sink will drain perfectly again. Regular checks keep your kitchen working well. Try this easy fix and enjoy your smooth sink!


