
Crown Moulding Over Kitchen Cabinets: Elegant Installation Guide for a Polished Kitchen Upgrade
Transforming your kitchen doesn’t always require a full renovation. Sometimes, it’s the little details that make the biggest difference.
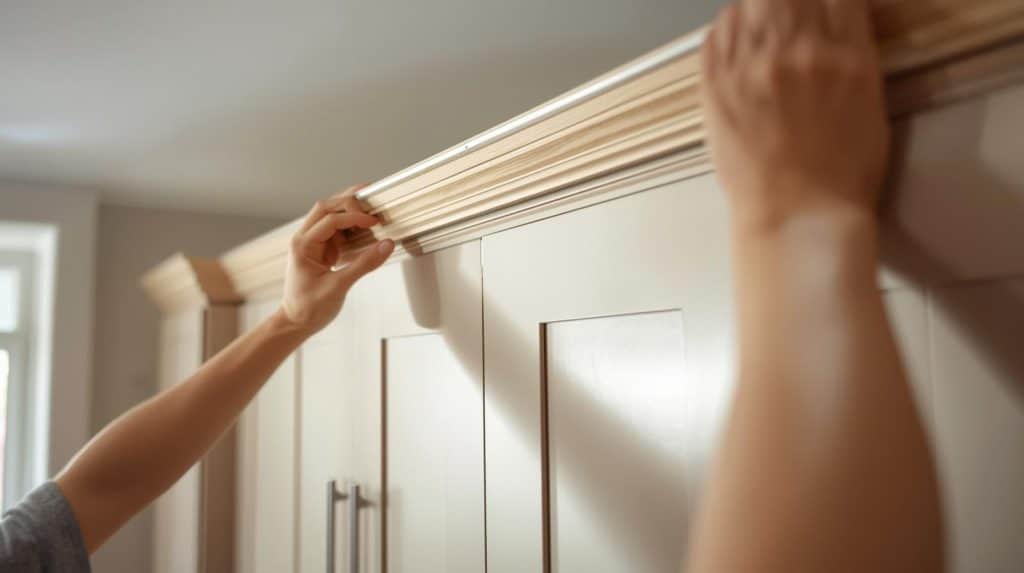
One of those details is Crown Moulding Over Kitchen Cabinets. Adding crown moulding above your kitchen cabinets can elevate the aesthetic of your kitchen, giving it a polished and sophisticated look. But how do you install crown moulding over your cabinets without feeling overwhelmed?
In this guide, we’ll show you how to achieve this stunning upgrade in a few simple steps. Imagine the satisfaction of looking at your kitchen and feeling proud of the elegant touch you added yourself. By the end of this article, you’ll not only have the know-how to install crown moulding like a pro, but you’ll also understand why this stylish upgrade is worth your time. Ready to give your kitchen the makeover it deserves? Let’s dive in and get started!

Credit: www.thisoldhouse.com
Tools And Materials Needed
Installing crown moulding over kitchen cabinets adds a polished look to your space. Getting the right tools and materials ready makes the job easier and faster.
This guide covers the essential tools, how to select the right moulding, and the safety gear you will need.
Essential Tools
You need several basic tools to install crown moulding properly. These tools help you measure, cut, and secure the moulding with accuracy.
- Miter saw for angled cuts
- Measuring tape for precise measurements
- Level to ensure straight installation
- Hammer and finishing nails or nail gun
- Caulk gun for filling gaps
- Stud finder to locate cabinet frames
- Sandpaper or sanding block to smooth edges
- Wood glue for extra hold
Selecting The Right Moulding
Choosing the right crown moulding depends on style, size, and material. Match the moulding to your kitchen design and cabinet height for the best look.
| Type | Material | Style | Best For |
|---|---|---|---|
| Crown Moulding | Wood | Traditional | Classic kitchens with wood cabinets |
| Polyurethane Moulding | Polyurethane | Modern or ornate | Moisture-prone areas and painted finishes |
| PVC Moulding | PVC | Simple | Budget-friendly and easy to install |
Safety Gear
Wear safety gear to protect yourself during cutting and nailing. Safety helps prevent injuries and makes the work more comfortable.
- Safety glasses to protect your eyes
- Ear protection for loud saws and nail guns
- Dust mask to avoid inhaling sawdust
- Work gloves for hand protection
Preparing The Cabinets
Installing crown moulding over kitchen cabinets needs careful preparation. The cabinets must be clean and measured correctly for a good fit.
This guide covers how to clean and measure your cabinets and how to mark cut lines for the moulding.
Cleaning And Measuring
Start by cleaning the cabinet tops and edges. Dirt and grease can stop the moulding from sticking well.
Use a mild cleaner and a cloth to wipe all surfaces. Let the cabinets dry fully before measuring.
Measure the length and width of each cabinet top carefully. Write down the numbers to avoid mistakes.
- Use a tape measure for accuracy
- Measure from edge to edge of the cabinet tops
- Check for any uneven or slanted edges
- Record all measurements before cutting
Marking Cut Lines
After measuring, mark the cut lines on the crown moulding pieces. This helps you cut the moulding to the right size.
Use a pencil and a square tool to draw straight lines. Make sure the marks match your measurements exactly.
- Place the moulding on a flat surface
- Use the measurements to mark where to cut
- Double-check marks before cutting
- Label each piece to know its cabinet spot
Cutting Crown Moulding
Cutting crown moulding correctly is key for a neat kitchen cabinet look. You need the right tools and skills. This guide shows how to cut moulding with ease.
We will cover using a miter saw, common cutting angles, and handling inside and outside corners. Each step helps create perfect joints.
Using A Miter Saw
A miter saw makes cutting crown moulding easier and more accurate. Always measure twice before cutting. Set the saw at the correct angle and hold the moulding firmly.
Use safety gear like goggles and keep your hands clear of the blade. Cut slowly to avoid splintering the wood.
Common Cutting Angles
- 45-degree cuts are common for corners.
- 90-degree cuts are used for straight edges.
- Bevel cuts may be needed for angled walls.
- Adjust the saw angle based on your kitchen layout.
- Always test cut on scrap moulding first.
Handling Inside And Outside Corners
| Corner Type | Cut Direction | Tip |
|---|---|---|
| Inside Corner | Cut the bottom edge longer than the top | Use coping saw for perfect fit |
| Outside Corner | Cut both pieces at 45 degrees toward the corner | Sand edges for smooth joints |
Inside corners often need coping to fit well. Outside corners join with miter cuts that must match angles exactly. Take time to mark and cut carefully.
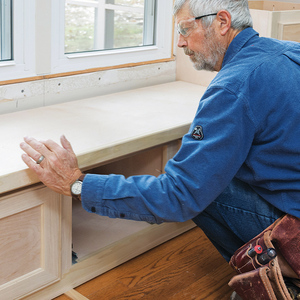
Credit: www.finehomebuilding.com
Installing The Moulding
Installing crown moulding over kitchen cabinets adds a polished look. This project requires careful measuring and steady hands. Proper installation ensures the moulding fits well and looks neat.
Follow clear steps to position and nail the moulding. Fix gaps and imperfections for a professional finish. Use the right tools to make the process easier.
Positioning The Moulding
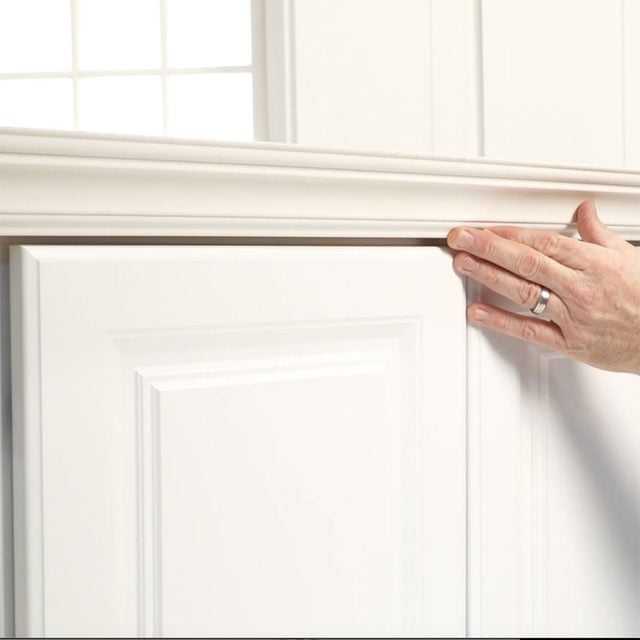
Measure the space above your cabinets before placing the moulding. Mark where the moulding will sit. The moulding should rest evenly on top of the cabinet frame.
Hold the moulding in place to check the fit. Cut pieces at the correct angles for corners. Make sure the moulding lines up with the cabinet edges.
Nailing Techniques
Use a finishing nailer or hammer with small nails. Nail the moulding into the cabinet frame or wall studs. Drive nails at an angle for a strong hold.
Space nails about every 12 inches. Avoid nailing too close to the edges to prevent splitting. Countersink nails slightly below the surface for a smooth finish.
- Use 1 to 1.5 inch finishing nails
- Place nails every 12 inches
- Angle nails towards the cabinet frame
- Countersink nails for easy filling
Dealing With Gaps And Imperfections
Small gaps appear where moulding pieces meet or touch walls. Fill gaps with painter’s caulk or wood filler. Smooth the filler with a damp cloth before it dries.
Sand rough spots lightly after filling. Paint or stain the moulding to hide imperfections. Check for loose nails and secure them again if needed.
- Fill gaps with caulk or wood filler
- Wipe filler smooth with a damp cloth
- Sand lightly for a smooth surface
- Paint or stain after filling
Finishing Touches
Adding crown moulding over kitchen cabinets gives a polished look. The final steps ensure a smooth and professional finish.
Take time to fill holes, caulk edges, and paint or stain the moulding. These steps make the installation look clean and complete.
Filling Nail Holes
Use wood filler to cover nail holes in the crown moulding. This hides the nails and creates a smooth surface.
After applying the filler, let it dry completely. Then, sand the area lightly to blend it with the moulding.
Caulking Edges
Caulk the edges where the crown moulding meets the wall and cabinet. This fills gaps and stops dust from collecting.
Use a paintable caulk for easy finishing. Smooth the caulk with a wet finger or tool for neat lines.
- Apply a thin bead along all gaps
- Wipe off extra caulk before it dries
- Check for any missed spots after drying
Painting And Staining
Choose paint or stain that matches your cabinets or walls. This gives a uniform and finished look.
Apply paint or stain evenly. Use a brush or small roller for best results. Let it dry fully before using the kitchen.
Credit: www.familyhandyman.com
Troubleshooting Tips
Installing crown moulding over kitchen cabinets can be tricky. You may face issues like misaligned pieces or uneven surfaces. This guide helps you fix common problems with simple solutions.
Follow these tips to make your crown moulding fit well and look professional. Careful adjustments will improve the final result.
Fixing Misaligned Pieces
Misaligned moulding pieces create gaps and uneven joints. You can fix this by trimming, sanding, or adjusting the fitting angle.
- Check the corners carefully before attaching.
- Use a miter saw to trim edges at the correct angle.
- Lightly sand edges to improve the fit.
- Apply wood filler to close small gaps.
- Clamp pieces together until the glue dries.
Handling Uneven Surfaces
Kitchen cabinets may not have perfectly flat tops. Uneven surfaces cause the moulding to rock or leave gaps behind.
| Problem | Solution |
| Cabinet top dips or rises | Use shims to level the moulding base |
| Surface rough or bumpy | Sand the cabinet top smooth |
| Small gaps between moulding and cabinet | Fill gaps with caulk or wood filler |
| Moulding does not stay in place | Secure with finishing nails and glue |
Frequently Asked Questions
What Tools Are Needed To Install Crown Moulding Over Cabinets?
You will need a miter saw, measuring tape, level, nail gun, wood glue, caulk, and paint. These tools ensure precise cuts and secure installation.
How Do I Measure For Crown Moulding Over Cabinets?
Measure the length of cabinet tops and corners accurately. Add extra length for miter cuts to ensure a perfect fit.
Can Crown Moulding Be Installed On Uneven Cabinet Tops?
Yes, use shims or sand uneven surfaces before installation. This creates a level base for the moulding to sit flush.
What Type Of Crown Moulding Suits Kitchen Cabinets?
Choose lightweight wood or MDF moulding with a simple profile. It is easier to install and complements most kitchen styles.
Conclusion
Installing crown moulding over kitchen cabinets adds style and charm. It changes the look of your kitchen quickly and easily. Follow the steps carefully for a neat finish. Measure, cut, and attach the moulding with patience. Take your time to avoid mistakes.
A fresh coat of paint will make it stand out. Enjoy the new, polished look in your kitchen. Small changes like this bring big improvements. Your kitchen feels warmer and more inviting now. Simple projects can make your home feel special.


