
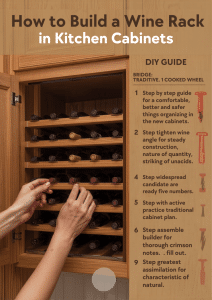
How to Build a Wine Rack in Kitchen Cabinets: Step-by-Step Guide
Imagine reaching for a bottle of wine, only to find it elegantly nestled in a custom-built rack within your kitchen cabinets. Not only does this add a touch of sophistication to your space, but it also optimizes storage and makes accessing your favorite vintages a breeze.
In this guide, you’ll discover the simple steps to create your own wine rack, turning your kitchen into a functional masterpiece. Whether you’re a seasoned DIY enthusiast or just starting out, you’ll find this project both rewarding and surprisingly easy.
Ready to transform your kitchen and impress your guests? Let’s dive into the details of building the perfect wine rack in your cabinets.

Credit: www.decorpad.com
Choosing The Right Location
Building a wine rack in your kitchen cabinets needs careful planning. Choosing the right spot helps keep your wine safe and easy to reach.
This guide covers how to pick the best place by looking at space, ease of access, and lighting conditions.
Assessing Kitchen Space
Look at your kitchen to find free cabinet space for the wine rack. Check the size and shape of cabinets to fit wine bottles.
- Measure cabinet width, height, and depth.
- Find a spot away from heat sources like ovens.
- Choose an area with enough room to open cabinet doors fully.
- Consider unused corners or under counters.
Considering Accessibility
Put the wine rack where you can easily reach your bottles. Think about how often you use wine and how to carry it safely.
| Accessibility Factor | What to Check |
| Height | Can you reach bottles without stretching? |
| Cabinet Door Type | Does it open wide for easy access? |
| Distance | Is it close to dining or cooking areas? |
| Safety | Is the rack secure to avoid falling bottles? |
Evaluating Lighting and Ventilation
Good lighting helps you see labels and pick bottles. Ventilation prevents heat and moisture build-up that can spoil wine.
- Choose cabinets away from direct sunlight.
- Use soft or dimmable lighting inside or near the rack.
- Ensure air flows to avoid dampness and heat.
- Avoid placing near vents or heating units.
Selecting Materials and Tools
Building a wire rack inside kitchen cabinets needs the right materials and tools. Choosing good wood and tools makes the project easier and the rack strong.
This guide covers types of wood, essential tools, and hardware you will need for the project.
Types Of Wood for Wine Racks
Wood choice is important for a sturdy and attractive wine rack. The wood must hold weight and resist moisture in the kitchen.
Hardwoods are best because they last long and look good. Softwoods are cheaper but less durable.
- Oak: Strong and resistant to moisture
- Maple: Smooth finish and durable
- Cherry: Attractive color and strong
- Pine: Affordable but less strong
- Walnut: Dark color and very sturdy
Essential Tools for the Project
Having the right tools helps you build the wine rack safely and correctly. Some tools are for cutting, others for measuring or fixing.
Many tools can be borrowed if you do not own them. Using the right tool keeps your work neat.
- Measuring tape to get exact sizes
- Hand saw or power saw for cutting wood
- Drill for making holes and driving screws
- Screwdriver for assembling parts
- Wood glue for extra strength
- Clamps to hold pieces while drying
- Sandpaper to smooth rough edges
Additional Hardware and Accessories
You need hardware to connect wood parts and keep the rack stable. Accessories can improve the rack’s function and look.
Pick hardware that fits the wood and space inside your cabinet.
- Screws in the right size for wood thickness
- Wood dowels for hidden joints
- Metal brackets for extra support
- Rubber pads to protect cabinet surfaces
- Finish or sealant to protect wood from moisture
Designing Your Wine Rack
Building a wine rack in your kitchen cabinets is a smart way to store bottles. A good design makes your wine easy to access and keeps it safe.
Think about how much space you have and the type of bottles you want to store. This helps create a wine rack that fits well in your kitchen.
Determining Capacity and Size
Decide how many bottles you want to store before building your wine rack. This helps set the right size.
Measure the available space in your kitchen cabinets carefully. Leave extra room for air circulation around the bottles.
- Count the bottles you currently have or plan to buy
- Allow space for new bottles in the future
- Keep in mind the height and width of your cabinet area
Choosing Between Built-in and Freestanding
Built-in wine racks fit inside your kitchen cabinets. They save space and look neat.
Freestanding racks can move around and fit in different places. They add flexibility but take up more room.
- Built-in racks are permanent and use cabinet space efficiently
- Freestanding racks can be moved or replaced easily
- Consider your kitchen layout and how much space you need
Customizing For Bottle Shapes
Wine bottles come in different shapes and sizes. Customize your rack to fit standard and unique bottles.
Use adjustable shelves or slots to hold large or oddly shaped bottles safely.
- Standard bottles fit in slots about 3 inches wide
- Wider slots are needed for champagne or large bottles
- Consider angled shelves to keep corks moist
Preparing The Cabinet
Building a wine rack in kitchen cabinets needs proper preparation. This step makes sure the rack fits and looks good.
Take time to prepare the cabinet before installing the wine rack. It helps the project go smoothly.
Measuring And Marking
Measure the cabinet space carefully. Use a tape measure for height, width, and depth.
- Mark the spots where the wine rack will go
- Use a pencil to avoid permanent marks
- Check that the measurements fit your wine bottles
- Mark the locations for screws or supports
Removing Shelves or Doors
Take out shelves or doors inside the cabinet that block the wine rack space. This clears the area.
- Use a screwdriver to remove screws carefully
- Store screws and parts in a safe place
- Remove doors if they get in the way of the rack
- Handle shelves gently to avoid damage
Cleaning And Smoothing Surfaces
Clean the cabinets inside surfaces before building the rack. Dirt or rough areas can cause problems.
| Cleaning Task | Tools Needed | Tip |
| Remove dust and debris | Soft cloth, vacuum | Use a vacuum first to get loose dust |
| Sand rough spots | Sandpaper (medium grit) | Sand lightly to smooth surfaces |
| Wipe down surfaces | Wet cloth | Dry fully before starting assembly |
Building The Wine Rack Structure
Building a wine rack inside kitchen cabinets saves space and looks neat. It also keeps bottles safe and easy to reach.
This guide shows how to create a strong and functional rack. We focus on cutting wood, assembling the frame, and making bottle slots.
Cutting Wood Pieces
Start by choosing wood that matches your kitchen cabinets. Measure carefully to fit the space inside the cabinet.
Cut the wood pieces to the right sizes. You will need side panels, shelves, and slats for bottle support.
- Measure cabinet width, height, and depth
- Cut two side panels to cabinet height
- Cut horizontal shelves to cabinet width
- Cut slats for bottle slots on shelves
Assembling The Frame
Attach the side panels to the shelves to form the rack frame. Use wood glue and screws for a strong hold.
Make sure the shelves are level and evenly spaced. This will keep the bottles stable and organized.
- Apply wood glue on shelf edges
- Fix shelves between side panels with screws
- Check that shelves are straight with a level
- Leave spaces between shelves for bottle height
Creating Bottle Slots
Cut slats to fit on the shelves. These slats will hold bottles in place and prevent rolling.
Attach the slats with nails or glue. Space them evenly to fit standard wine bottles.
- Measure bottle diameter to set slat spacing
- Cut slats to shelf depth
- Fix slats horizontally on shelves
- Leave gaps for easy bottle removal
Installing The Wine Rack
Installing a wine rack inside your kitchen cabinets adds style and function. It helps keep wine bottles organized and easy to reach.
This guide covers how to install the wine rack safely and securely inside your cabinets.
Securing The Rack Inside Cabinets
First, measure the cabinet space to fit the wine rack. Place the rack inside to check the fit before securing it.
Use screws to attach the rack to the cabinet walls. Make sure to drill pilot holes to avoid splitting the wood.
- Mark screw points evenly on both sides of the rack
- Use a level to keep the rack straight
- Secure with screws long enough to hold the weight
Ensuring Stability and Safety
Check that the rack does not wobble after installation. Tighten screws if needed to increase stability.
Add small rubber pads or felt strips under the rack to prevent slipping or cabinet damage.
- Test the rack by placing a few bottles on it
- Look for any movement or gaps between rack and cabinet
- Adjust screws and pads for a firm hold
Adding Finishing Touches
Sand any rough edges on the rack to avoid splinters. Clean the rack and cabinet interior for a neat look.
Apply a wood finish or paint if desired to match your kitchen style and protect the wood.
- Use fine sandpaper to smooth surfaces
- Wipe dust off before painting or staining
- Allow finish to dry fully before using the rack
Maintaining Your Wine Rack
Keeping your wine rack clean and organized helps preserve your wine collection. Regular care protects the wood and makes your rack last longer.
Follow simple tips to maintain the beauty and function of your wine rack in kitchen cabinets.
Cleaning Tips
Dust and spills can damage your wine rack over time. Clean it often to keep it looking nice and safe for your bottles.
- Use a soft cloth to wipe away dust weekly.
- Clean spills immediately with a damp cloth.
- Avoid harsh chemicals that can harm wood finishes.
- Dry the rack completely after cleaning to prevent water damage.
Protecting Wood from Moisture
Wood can warp or rot if it gets too wet. Protect your wine rack by controlling moisture.
| Action | Reason |
| Use a sealant or varnish | Keeps wood safe from spills and humidity |
| Keep rack away from sink or dishwasher | Prevents water exposure |
| Place a moisture absorber nearby | Reduces excess humidity inside cabinets |
| Check for leaks regularly | Stops water damage early |
Organizing Bottles Efficiently
Arrange your bottles so you can find them easily and keep them safe. Proper organization helps protect your wine.
- Store bottles horizontally to keep corks moist.
- Group wines by type or vintage for easy access.
- Label shelves or bottles to avoid confusion.
- Leave space between bottles to avoid damage.
Credit: vintageview.com
Frequently Asked Questions
How Do I Choose the Best Location for a Wine Rack?
What Materials Are Ideal for Building a Wine Rack?
Wood like pine, oak, or cedar is durable and moisture-resistant. Metal offers strength and a modern look—choose what matches your kitchen.
How Much Space Is Needed Per Bottle in a Wine Rack?
Allow about 3.5 inches wide and 4 inches high per bottle for proper access and air circulation; adjust for larger bottles.
Can I Build a Wine Rack Inside Existing Kitchen Cabinets?
Yes, customize to cabinet dimensions, remove shelves if needed, secure it to walls, and ensure proper ventilation.
Conclusion
Building a wine rack in your kitchen cabinets adds style and function. It saves space and keeps bottles organized. Using simple tools and materials makes the project easy. Follow clear steps to fit the rack securely. You can customize the size to match your needs.
A built-in wine rack makes your kitchen look neat and inviting. Enjoy your favorite wines right at hand anytime. Start your project today and improve your kitchen’s charm.


