
How to Draw a 3D Kitchen Design
Are you ready to design your dream kitchen? Drawing a 3D kitchen helps you plan before you build. You can see every detail. This includes counters and cabinets. A realistic view helps you make smarter choices. This guide shares simple steps for your 3D design. You can do this even with no drawing skill.
Soon you can easily see your perfect kitchen. Share your clear, stunning design with builders. Let’s start turning your ideas into a real design you can view.
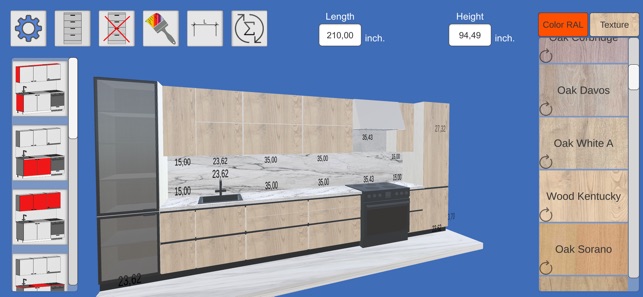
Credit: apps.apple.com
Get Your Tools and Supplies Ready
Drawing a 3D kitchen needs the right tools. Preparation helps your work go smoothly. You will get better results faster. This section covers software and drawing items. We also discuss setting up your workspace.
Pick the Right Software
Choose software that fits your project. Pick a tool that matches your skill level. Some programs are very simple to use. Others have more advanced features.
-
Beginners should look for easy tools.
-
Check if the program supports 3D modeling.
-
Try free or trial versions first.
-
Make sure it works on your computer.
Drawing Supplies You Need
You need physical supplies for planning. These help you sketch your design ideas first.
Set Up Your Work Area
Arrange your space to keep tools nearby. Avoid things that will distract you.
-
Choose a brightly lit area.
-
Use natural or bright overhead light.
-
Keep your table at a comfy height.
-
Organize supplies within easy reach.
-
Clear clutter to help you focus.
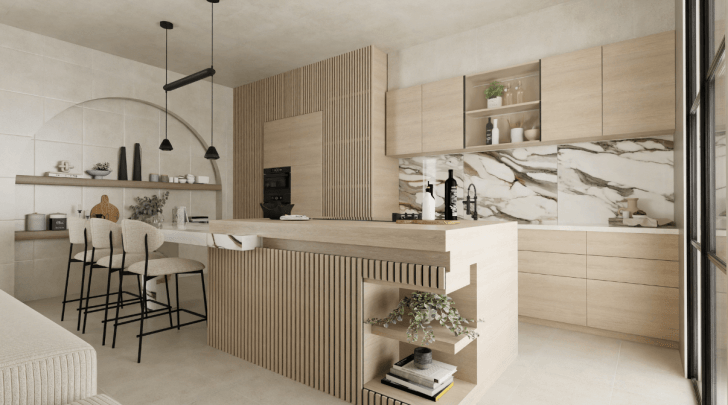
Credit: home.by.me
Plan Your Kitchen Layout
A good plan starts any 3D kitchen design. Think about the space. How will it work best for you? This guide helps you plan your layout. You will create a clear, useful design.
Measure the Space
First, measure your kitchen’s size. Note the length and width of the room. Also check the walls and ceiling height. Measure where doors and windows are located. Note any fixed items like pipes or vents.
-
Measure floor width and length.
-
Write down all wall heights.
-
Mark door and window spots.
-
Note fixed things you cannot move.
Sketch Your Basic Floor Plan
Draw a simple plan on paper or in the software. Clearly show all walls, doors, and windows. Use proper scale to keep sizes correct. This helps you place appliances and furniture.
Include these key parts in your sketch:
-
Kitchen walls and openings.
-
Window and door sizes.
-
Spaces for cabinets and counters.
-
Space for large appliances.
Choose Your Key Features
Decide on your main kitchen parts. Choose the sink, stove, and refrigerator. Plan their placement with care.
Build the 3D Structure
Start your 3D kitchen design by building a framework. This base holds your entire design together. Carefully draw the walls, floor, and ceiling. Include doors and windows. These parts make your kitchen look realistic.
Draw Walls and Room Shape
Begin by drawing the kitchen’s walls. Outline the outer and inner borders. This sets the room’s shape. Use straight, clean lines for the walls. Show the wall thickness for a 3D effect.
Add Windows and Doors
Place openings on the walls for doors and windows. This makes your design look real. Draw clear lines for all frames. Show how they fit to create depth.
-
Position doors for easy kitchen access.
-
Place windows for good natural light.
-
Use correct sizes to keep proportions.
Create the Floor and Ceiling
Sketch the ceiling above the walls. This closes the space. It defines the room’s height in your 3D model. Draw the floor below the walls. Add texture or tiles to make it look real.
-
Keep the ceiling height consistent.
-
Use floor patterns for a better look.
-
Line up floor and ceiling with walls.
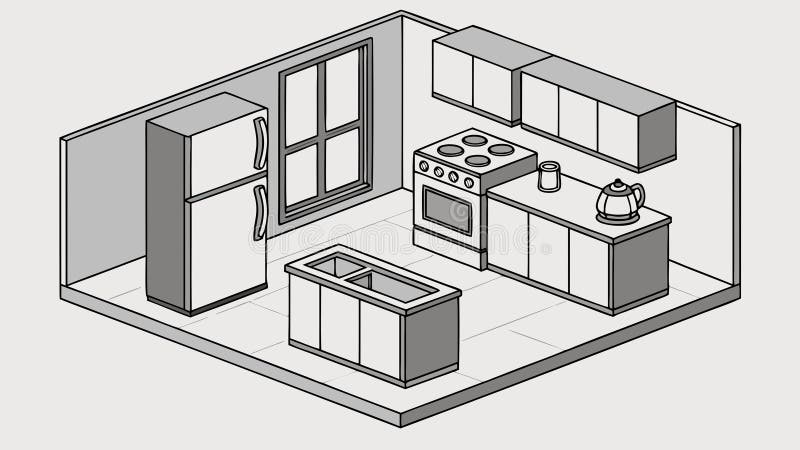
Credit: www.dreamstime.com
Design Cabinets and Appliances
Creating a 3D design shows how things fit. You see how cabinets and appliances work together. This makes planning much simpler. This guide focuses on cabinet design. We cover placing appliances and storage ideas.
Build Cabinets in 3D
Start by drawing cabinet shapes in your software. Use simple boxes for basic sizes. Add details like doors, handles, and drawers. Adjust sizes to fit your kitchen space.
-
Measure your kitchen before modeling.
-
Create base and wall cabinets separately.
-
Include cabinet thickness for realism.
-
Use textures like wood or metal.
Place Appliances Correctly
Place items like the fridge and oven. Follow your kitchen layout plan. Check for enough clearance around each item. Line up appliances with cabinets for a clean look. Use real appliance sizes for proper scale.
-
Allow space for doors and drawers to open.
-
Put the sink near the plumbing.
-
Keep the stove away from flammable cabinets.
-
Ensure the fridge has space for air.
Add Smart Storage Ideas
Good storage makes a kitchen work better. Add shelves and pull-out drawers to your 3D design. Include useful corner units. Think about what you will store there. Use vertical space to get maximum storage.
-
Include spice racks near the stove.
-
Use tall cabinets for pantry items.
-
Add pull-out trays for pots and pans.
-
Think about built-in utensil organizers.
Add Details and Textures
Adding details makes your 3D design feel real. It helps people imagine the space better. Using good materials and lighting creates a nice kitchen.
Apply Materials and Finishes
Choose materials that match your style. Wood, stone, and metal give different feelings.
-
Use glossy finishes for modern kitchens.
-
Matte surfaces give a soft, natural look.
-
Wood grain adds texture and warmth.
-
Stone brings a rugged, natural feel.
-
Metal surfaces reflect light and add shine.
Use Lighting Effects
Lighting changes how colors and textures look. Use different lights to highlight kitchen features.
Include Decorations
Decorations add depth and character. Place items that fit your kitchen’s theme.
-
Add plants for color and freshness.
-
Use wall art or framed pictures.
-
Place colorful kitchenware on shelves.
-
Put textured rugs on the floor.
Check and Improve Your Design
Review your 3D kitchen design after you draw it. It is vital to check and improve it. This ensures the design looks good and works well. Careful review makes your kitchen practical and realistic.
Check Scale and Proportions
Check that all items have the right size. Cabinets, counters, and appliances must match real life. Correct sizes make the kitchen usable and balanced. Use a ruler or digital tools to measure parts.
-
Measure appliance and cabinet sizes.
-
Compare sizes to kitchen standards.
-
Ensure room to walk and work easily.
Make Adjustments
Fix anything that looks too big or small. Move objects to improve comfort and flow. Try changing colors or materials. See what fits the design style best.
-
Resize items to standard kitchen sizes.
-
Move appliances for easy access.
-
Test new colors for walls and cabinets.
Get Ready to Present
Make your 3D design clear before showing it. Clean up extra lines or shadows. Add lighting and angles that highlight the best parts. This makes your presentation attractive and clear.
-
Remove any unnecessary details.
-
Use bright lights to show textures.
-
Choose many views of the kitchen.
Frequently Asked Questions
How Do I Start a 3D Kitchen Design?
First, sketch the layout on paper or software. Define all key features and appliances. Use perspective to give it depth. Start with simple shapes. Then add details for realism.
What Tools Help Create 3D Kitchen Designs?
Tools like SketchUp and AutoCAD are popular. They offer precise modeling features. Choose a tool based on your skill level. Many also help create realistic images.
How Do I Add Realistic Textures?
Use high-quality materials like tile and metal. Apply the texture within your software. Adjust shadows and lighting for realism. Realistic textures make the design look lifelike.
Can Beginners Create Professional Designs?
Yes, you can. Learn the basics first. Practice often. Use easy-to-use software. Start simple, then add more complexity. You will improve your skills over time.
Conclusion
Creating a 3D kitchen design is rewarding and fun. Start by seeing your ideal space clearly. Use the simple tools and software. Bring your ideas to life. Practice will make your work better. Keep trying different styles. Do not rush this process.
Take time to refine every detail. This ensures you get the best results. A good kitchen boosts both use and beauty. Keep exploring new trends and learning. Each step moves you closer to your dream kitchen. Enjoy your creative design journey.



