
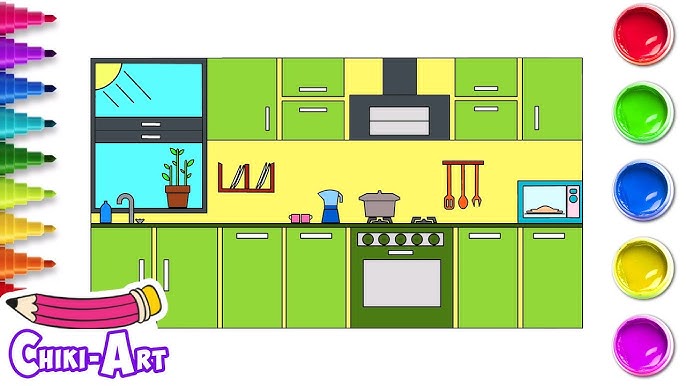
Have you ever wanted to draw your dream kitchen but felt overwhelmed by all the details? You’re not alone.
Drawing a kitchen can seem tricky, but with the right steps, it becomes simple and fun. In this guide, you’ll learn how to draw a kitchen easily, step by step, even if you’ve never tried before. By the end, you’ll have a clear, beautiful kitchen sketch that you can be proud of.
Ready to turn your ideas into a great drawing? Let’s get started!
Gathering Your Materials
Before you start drawing your kitchen, it is important to get all the materials ready. This makes the process easier and more fun.
Having the right tools and paper helps you create a better drawing step by step.
Essential Drawing Tools
Start with basic tools to keep your drawing clear and neat. These tools help you add details and correct mistakes.
- Pencils of different hardness (HB, 2B, 4B)
- Eraser for fixing errors
- Sharpener to keep pencil tips fine
- Ruler for straight lines
- Blending stump for smooth shading
Choosing The Right Paper
Paper choice affects the look of your drawing. Use paper that fits your tools and style.
| Paper Type | Best For | Texture |
| Smooth Bristol | Fine details and clean lines | Smooth |
| Sketching Paper | Practice and rough drafts | Medium |
| Watercolor Paper | Adding color with water-based paints | Rough |
Planning Your Kitchen Layout
Drawing a kitchen starts with planning the layout. A clear plan helps you place each item correctly.
Focus on shapes and perspective to create a realistic kitchen drawing step by step.
Sketching Basic Shapes
Begin by drawing simple shapes like rectangles and squares. These shapes represent cabinets, counters, and appliances.
- Draw a large rectangle for the kitchen floor area.
- Add smaller rectangles for countertops and cabinets.
- Use circles or squares for appliances like the stove or fridge.
- Keep shapes light and easy to erase.
Deciding On Perspective
Choose a perspective to make your kitchen look three-dimensional. This shows depth and space in your drawing.
| Perspective Type | Description | Use |
| One-Point | Lines go to a single point on the horizon. | Good for straight-on views. |
| Two-Point | Lines go to two points on the horizon. | Shows corners and angles. |
| Bird's Eye | View from above looking down. | Shows layout clearly. |
Drawing Key Kitchen Elements
Drawing a kitchen can be simple if you focus on main parts. Key elements include cabinets, shelves, appliances, countertops, and sinks.
These parts give your kitchen drawing structure and realism. Let’s look at how to draw each element step by step.
Sketching Cabinets And Shelves
Start by drawing the outline of cabinets and shelves. Use straight lines to create boxes for cabinets. Add shelves inside or above cabinets as simple horizontal lines.
- Draw rectangles for cabinet doors
- Include handles as small ovals or lines
- Sketch shelves as thin rectangles
- Space shelves evenly for balance
- Add vertical lines for cabinet dividers
Adding Appliances
Appliances make the kitchen look alive. Draw shapes like squares and rectangles for fridges, ovens, and microwaves. Use smaller rectangles for buttons and handles.
| Appliance | Basic Shape | Details |
| Refrigerator | Tall rectangle | Handles, freezer lines |
| Oven | Square or rectangle | Control panel, door window |
| Microwave | Small rectangle | Buttons, display screen |
| Dishwasher | Rectangle | Door handle, control buttons |
Including Countertops And Sink
Draw countertops as long, flat rectangles on top of cabinets. Show thickness by adding parallel lines. The sink is usually a square or oval inside the countertop.
- Draw faucet as two small vertical lines with a curved spout
- Use shading to show countertop depth
- Add small circles for sink drains

Credit: www.youtube.com
Adding Details And Textures
Adding details and textures brings your kitchen drawing to life. These small touches make surfaces look real and interesting.
Focus on patterns and fixtures to create a more complete and appealing kitchen sketch.
Creating Patterns On Surfaces
Patterns add depth and style to counters, tiles, and walls. Use simple shapes to build realistic textures.
- Draw small squares or rectangles to create tile patterns.
- Add wood grain lines for wooden surfaces.
- Use dots or speckles to mimic stone or granite countertops.
- Shade lightly to show smooth or rough textures.
- Repeat patterns evenly to keep the design balanced.
Drawing Handles And Fixtures
Handles and fixtures give your kitchen drawing character and functionality. They come in many shapes and sizes.
| Handle Type | Description | Drawing Tip |
| Bar Handle | Simple straight bar | Draw two small circles at ends and a straight line between |
| Knob | Round or square shape | Use a small circle or square with shading for depth |
| Pull Handle | Curved or ornate | Sketch gentle curves with slight thickness for realism |
| Lever Faucet | Modern faucet with lever | Draw a cylindrical base with a flat lever on top |
Inking And Final Touches
Inking your kitchen drawing adds clarity and strength to your sketch lines. Final touches help bring your drawing to life with depth and detail.
Focus on clean lines and subtle shading to complete your artwork. This part is important to make your kitchen look realistic and neat.
Outlining Your Sketch
Use a fine-tip pen or marker to trace over your pencil sketch. Keep your hand steady and follow the main shapes carefully. Avoid pressing too hard to prevent blotches.
- Start with the largest shapes like cabinets and counters
- Draw smaller details such as knobs and appliances last
- Use varied line thickness to show depth
- Allow the ink to dry before erasing pencil marks
Erasing Pencil Marks
After the ink dries, gently erase all pencil lines. Use a soft eraser to avoid damaging the paper or smudging the ink. Clean lines make your drawing look polished and clear.
| Tips for Erasing |
|---|
| Wait until ink is fully dry |
| Use a soft rubber eraser |
| Erase lightly to protect paper |
| Erase in one direction |
Adding Shadows And Highlights
Shadows add depth and highlights bring light to your drawing. Use a pencil or shading tool to add soft shadows where light falls less. Leave some areas white for highlights.
- Shade under cabinets and counters for shadows
- Add light strokes on shiny surfaces for highlights
- Use blending tools to smooth shadows
- Keep highlights clear and bright

Credit: www.youtube.com
Coloring Your Kitchen Drawing
Adding color to your kitchen drawing makes it lively and real. It helps show materials and lighting well.
Use simple steps to pick colors and apply them smoothly for a neat look. This guide will help you color with ease.
Choosing A Color Palette
Choose colors that match your kitchen style. Think about walls, cabinets, and appliances. Soft colors give calmness. Bright colors add energy.
- Pick 3 to 5 colors to keep it simple
- Use neutral tones for large areas
- Add one or two bright colors for accents
- Consider natural colors like wood and stone
- Test your colors on a small part first
Applying Colors Smoothly
Apply colors evenly to avoid blotches. Use light strokes or layers. Blend colors softly for shadows and highlights.
| Technique | Description |
| Layering | Apply thin layers to build color depth |
| Blending | Use a brush or tool to mix colors smoothly |
| Shading | Add darker tones where shadows fall |
| Highlighting | Use lighter colors on raised surfaces |
Tips For Improving Your Drawing Skills
Drawing takes patience and practice. You can improve by using simple methods daily.
Try different ways to see what helps your skills grow faster and easier.
Practicing Regularly
Drawing often helps your hand get steady. It also trains your eye to see details well.
- Set a daily time to draw, even for 10 minutes.
- Try to draw the same object many times.
- Keep your old drawings to track progress.
Using References
Look at photos or real kitchens to understand shapes and colors better.
| Reference Type | Benefits |
| Photos | Easy to find and use anytime |
| Real Objects | See textures and lighting closely |
| Other Drawings | Learn different drawing methods |
Experimenting With Styles
Try different ways to draw kitchens. Change lines, colors, or shapes to find your style.
Here are some ideas to try:
- Draw with thick or thin lines.
- Use bright or soft colors.
- Make drawings simple or detailed.
- Mix drawing with painting or collage.

Credit: www.youtube.com
Frequently Asked Questions
How Do I Start Drawing A Kitchen Step By Step?
Begin by sketching the kitchen layout with basic shapes. Add major elements like counters, appliances, and cabinets next. Follow a simple sequence to build details gradually for easier drawing.
What Tools Are Best For Easy Kitchen Drawing?
Use pencils, erasers, rulers, and fine liners for precision. Digital tools like drawing tablets also help beginners create clean designs. Choose tools that suit your comfort and style.
How To Add Depth To A Kitchen Drawing?
Incorporate perspective by drawing lines that converge at a vanishing point. Shade areas to highlight light and shadow. These techniques create a realistic and three-dimensional look.
Can Beginners Draw A Kitchen Without Advanced Skills?
Yes, breaking the drawing into small steps simplifies the process. Focus on basic shapes and simple details first. Practice regularly to improve skill and confidence.
Conclusion
Drawing a kitchen step by step is simpler than it seems. With practice, your skills will improve. Start with basic shapes. Then, add details for realism. Remember, patience is key. Don't rush the process. Each step builds on the last.
Soon, you'll see progress. Enjoy the creative journey. Share your drawings with friends. Inspire others to try too. Drawing can be fun and relaxing. Keep experimenting with different styles. Explore and find what works best for you. Keep your passion for drawing alive.
Happy sketching!


