
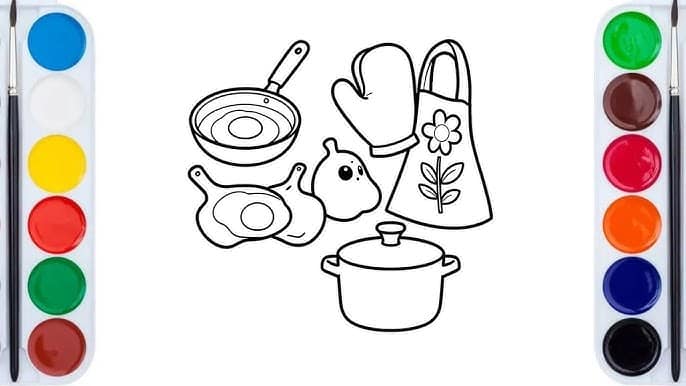
Have you ever wanted to bring your kitchen to life with your own drawings? Learning how to draw kitchen utensils can be easier than you think.
Whether you’re decorating a recipe book, creating art for your home, or just having fun, these simple steps will help you capture every spoon, fork, and pan with confidence. Keep reading, and you’ll discover how to turn everyday tools into impressive sketches that anyone can admire.
Your drawing skills are about to get a tasty upgrade!
Essential Drawing Materials
Drawing kitchen utensils needs the right tools for good results. Using proper materials helps you create clear and detailed sketches.
This guide explains the best pencils, paper, and extra tools to use when drawing kitchen utensils.
Choosing The Right Pencils
Select pencils with different hardness to create light and dark lines. Soft pencils are good for shading. Hard pencils make fine lines.
- 2H or harder for fine outlines
- HB for general sketching
- 2B to 6B for shading and dark areas
- Kneaded eraser for gentle corrections
Paper Types And Sizes
Choose smooth paper for detailed drawings. Larger paper gives space to draw utensils at different angles and sizes.
| Paper Type | Texture | Best For |
| Hot Pressed | Very smooth | Fine details and clean lines |
| Cold Pressed | Medium texture | Sketching and shading |
| Rough | Coarse | Loose sketches and texture effects |
Additional Tools For Detail
Extra tools help add small details and keep your drawing neat. Use these to improve your kitchen utensils sketches.
- Blending stumps for smooth shading
- Fine-tip erasers for small highlights
- Rulers for straight edges
- Sharpener to keep pencils precise

Credit: www.youtube.com
Basic Shapes And Forms
Drawing kitchen utensils is easier when you start with basic shapes. These shapes help create a simple outline.
Using simple forms lets you build detailed drawings step by step. Start small and add details later.
Sketching Simple Geometric Shapes
Begin by drawing basic shapes like circles, rectangles, and ovals. Each utensil has a main shape.
For example, a spoon starts with an oval for the bowl and a long rectangle for the handle.
- Circle or oval for round parts
- Rectangle for handles
- Triangle for pointed ends
- Lines for edges and details
Combining Shapes For Utensil Outlines
Join simple shapes together to form the full utensil outline. Connect shapes smoothly for a natural look.
Use overlapping shapes to add depth and curves. Erase extra lines to clean the drawing.
- Attach ovals to rectangles for spoons and spatulas
- Use cylinders for handles on forks and knives
- Combine circles and rectangles for measuring cups
- Smooth the connections to create curved edges
Step-by-step Utensil Sketches
Drawing kitchen utensils is easy with clear steps. Start with simple shapes and add details later.
Use light lines first. This way you can fix mistakes before making final lines.
Drawing Spoons And Forks
Begin with an oval shape for the spoon’s bowl. Draw a long handle attached to it.
For forks, draw the handle similar to the spoon. Add straight, thin prongs at the top.
- Sketch the spoon bowl as an oval.
- Draw a long, narrow handle.
- For forks, add 3 or 4 thin prongs.
- Keep lines light at first.
Sketching Knives With Detail
Start by drawing a straight line for the knife blade. Make it wider at the base.
Draw the handle with a smooth curve. Add small details like a line for the blade edge.
- Use a straight shape for the blade.
- Make the blade thicker near the handle.
- Add a curved handle for grip.
- Draw a line to show the sharp edge.
Creating Cups And Bowls
Draw a circle for the top of the cup or bowl. Add a curved line below for the body.
For cups, add a handle on the side. Bowls should have a wider opening and round shape.
- Sketch a circle for the rim.
- Draw curved sides for depth.
- Add a handle for cups.
- Make bowls wider and rounder.
Adding Texture And Shading
Drawing kitchen utensils looks better with texture and shading. These add depth and realism to your art.
Textures show the material of the utensils. Shading helps show light and shadow on the surfaces.
Techniques For Metal Surfaces
Metal surfaces reflect light and look shiny. Use smooth shading with sharp highlights to show this.
Draw small, bright spots where light hits. Use soft gradients for curved areas to show roundness.
- Use smooth, even shading for metal parts
- Add bright white spots for reflections
- Blend edges softly to show curves
- Include thin lines to show scratches or dents
Capturing Wood And Plastic Textures
Wood has grain lines and small knots. Draw thin, curved lines to show wood grain patterns.
Plastic looks smooth but can have small shine spots. Use soft shading with gentle highlights.
- For wood, add thin lines following the shape
- Draw small knots or spots on wood surfaces
- Use soft shadows for plastic to show smoothness
- Add small bright spots to show plastic shine
Arranging Utensils In A Composition
Drawing kitchen utensils looks better when you arrange them well. Good arrangement helps show each utensil clearly.
Focus on how the utensils fit together in your drawing. This makes your artwork neat and interesting.
Planning Your Layout
Start by deciding where each utensil will go. Think about space and how utensils relate to one another.
Sketch simple shapes to mark the position of each item. This helps keep your drawing balanced.
- Place large utensils first, like spoons or spatulas
- Fill empty spaces with smaller tools
- Keep similar shapes near each other
- Leave space between items to avoid clutter
Balancing Elements For Visual Appeal
Balance your composition by spreading utensils evenly. Avoid putting all heavy or big items on one side.
Use different angles and sizes to create interest. This keeps the viewer's eye moving around your drawing.
- Mix vertical and horizontal utensils
- Use overlapping to show depth
- Balance light and dark shapes
- Keep the center empty for focus

Credit: www.vecteezy.com
Common Drawing Mistakes To Avoid
Drawing kitchen utensils can be fun but tricky. Many beginners make simple mistakes.
These errors can make your drawing look less realistic. Avoiding them improves your art.
Proportion Errors
Proportion errors happen when parts of the utensil look too big or too small. For example, a spoon's handle might be too long compared to the scoop.
- Compare sizes between parts before drawing.
- Use light guidelines to keep shapes balanced.
- Look at real utensils or photos for reference.
- Practice measuring with your pencil or finger.
- Fix mistakes early to avoid big changes later.
Overworking Details
Adding too many small details can make your utensil look messy. It takes away from the main shape and form.
| Problem | Solution |
| Too many lines and textures | Keep lines simple and clear |
| Over-shading parts | Use light shading to show form |
| Unnecessary decorations | Focus on the utensil's main features |
Tips For Improving Your Sketches
Drawing kitchen utensils can be fun and helpful for learning shapes. You can improve your sketches by practicing often and using good examples. These tips will guide you to make your drawings better.
Focus on simple steps that build your skills. Drawing regularly and looking at real pictures will make your sketches clearer and more accurate.
Practicing Regularly
Practice is the best way to improve your drawing skills. Set aside time every day or week to sketch kitchen utensils. The more you draw, the easier it becomes to see details and shapes.
- Start with simple shapes like circles and rectangles.
- Draw different utensils such as spoons, forks, and knives.
- Try quick sketches to capture the basic form.
- Slow down for detailed drawings to add texture.
- Review your work and note areas to improve.
Using Reference Images
Reference images help you see how real kitchen utensils look. Use photos or objects near you to guide your drawings. This helps you understand size, shape, and details better.
| Type of Reference | How It Helps |
| Photographs | Show clear shapes and colors |
| Actual Utensils | Help you study three-dimensional forms |
| Drawings by Others | Inspire different styles and techniques |
| Instructional Videos | Demonstrate step-by-step drawing |

Credit: www.youtube.com
Frequently Asked Questions
What Materials Are Best For Drawing Kitchen Utensils?
Use pencils, erasers, fine liners, and sketch paper for detailed utensil drawings. These tools help create clean, precise lines and shading.
How Do I Draw Realistic Kitchen Utensils Step-by-step?
Start with basic shapes, add details, refine lines, then shade to create depth. Practice helps improve accuracy and realism.
Which Kitchen Utensils Are Easiest For Beginners To Draw?
Start with simple shapes like spoons, forks, and knives. These utensils have clear outlines and less complex details.
Can I Use Digital Tools To Draw Kitchen Utensils?
Yes, digital tablets and drawing software offer flexible options. They allow easy corrections and layering for detailed artwork.
Conclusion
Drawing kitchen utensils can be fun and simple. Start with basic shapes. Add details like handles and textures. Practice regularly to improve your skills. Use different tools like pencils and erasers. Experiment with light and shadow for depth. Keep a reference image nearby.
This helps with accuracy. Enjoy the process and be patient. Art takes time to perfect. Share your work with friends and family. They might give useful feedback. Remember, every artist begins somewhere. Keep sketching and refining your technique. You'll see progress over time.
Happy drawing!


