
How to Cut Kitchen Cabinet Crown Moulding Like a Pro
Are you ready to give your kitchen a polished, professional look? Cutting kitchen cabinet crown moulding might seem tricky, but with the right tips, you can do it yourself and save money.
Imagine the satisfaction of perfectly fitting moulding that transforms your cabinets instantly. In this guide, you’ll discover simple steps and expert tricks to cut crown moulding like a pro. Keep reading, and you’ll soon have the confidence to tackle this project with ease.
Your dream kitchen makeover starts here!
Credit: www.familyhandyman.com
Tools And Materials Needed
Cutting kitchen cabinet crown moulding needs the right tools and materials. Using proper equipment makes the job easier and cleaner.
This guide covers the tools, types of moulding, and safety gear needed for cutting crown moulding well.
Essential Tools
You need a few key tools to cut crown moulding accurately. These tools help you measure, cut, and fit the moulding properly.
- Miter saw – for angled cuts
- Tape measure – to get exact lengths
- Pencil – to mark cutting lines
- Protractor or angle finder – to measure wall angles
- Clamps – to hold moulding steady
- Sandpaper – to smooth cut edges
Types Of Crown Moulding
Crown moulding comes in many shapes and sizes. Knowing the type helps you choose the right cutting method.
- Simple moulding – small and flat designs
- Ornate moulding – detailed and decorative
- Large moulding – thick and wide pieces
- Flexible moulding – bends around curves
Each type may require a different saw blade or cutting angle for a clean finish.
Safety Gear
Safety gear protects you during cutting. Always wear the right equipment to avoid injuries.
- Safety glasses to protect your eyes
- Hearing protection to guard your ears
- Dust mask to avoid breathing sawdust
- Work gloves to protect your hands
Measuring The Crown Moulding
Measuring crown moulding correctly is key for a perfect fit. Take your time to get exact numbers.
Good measurements help you cut the moulding without mistakes or waste.
Taking Accurate Measurements
Use a tape measure to find the length of each wall where you will place the moulding. Measure from corner to corner.
Write down each measurement clearly. Double-check to avoid errors.
- Measure along the wall, not the ceiling
- Use a pencil and paper for notes
- Measure twice to confirm numbers
Calculating Angles And Lengths
Identify the corner angles where moulding pieces meet. Most corners are 90 degrees but check to be sure.
Use a protractor or angle finder tool to get exact angles. This helps you cut moulding at the right slant.
- Find inside and outside corner angles
- Mark angles on the moulding before cutting
- Adjust lengths based on angle cuts
Setting Up The Miter Saw
Cutting kitchen cabinet crown moulding needs a precise setup. Setting up the miter saw correctly helps you make clean and accurate cuts.
This guide covers how to adjust the saw angle and position the moulding for the best results.
Adjusting The Saw Angle
The saw angle controls how the moulding pieces fit together. Set the angle based on the corner type: inside or outside.
Use the saw’s angle scale to set the correct degree. Common angles for crown moulding are 45 and 38 degrees.
- Check if the corner is inside (concave) or outside (convex)
- Set the saw bevel angle to 45 degrees for most cuts
- Adjust the miter angle to 38 degrees for typical crown moulding
- Use a protractor or angle finder for custom angles
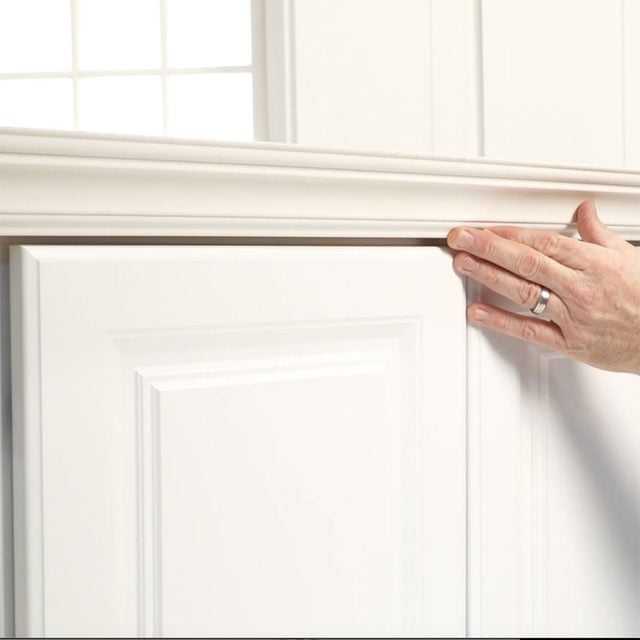
Positioning The Moulding Correctly
Place the crown moulding upside down on the saw. The bottom of the moulding should rest flat on the fence.
Secure the moulding firmly to avoid movement during the cut. This keeps the edges clean and accurate.
- Flip the moulding so the part that touches the wall is against the fence
- Keep the bottom edge flat on the saw table
- Clamp the moulding to hold it steady
- Double-check the position before cutting
Credit: www.familyhandyman.com
Making Inside Corner Cuts
Cutting inside corner joints for kitchen cabinet crown moulding can be tricky. It requires precise measuring and careful cutting to fit the moulding perfectly.
Inside corners need two pieces of moulding to join cleanly. Each piece must be cut at the right angle for a seamless look.
Cutting Techniques
Start by measuring the angle of the inside corner with an angle finder. Most corners are 90 degrees, but some may vary.
Set your miter saw to half of the corner angle. For a 90-degree corner, cut each piece at 45 degrees. This creates a perfect joint.
- Place the moulding upside down on the saw for proper cutting angles.
- Cut the first piece with the blade angled to the left.
- Cut the second piece with the blade angled to the right.
- Test fit the pieces before final installation.
Common Mistakes To Avoid
One common mistake is cutting the moulding right side up. This causes the angles to be reversed and the pieces won’t fit.
Another error is not measuring the corner angle properly. Even a small difference can cause gaps in the joint.
- Do not guess the angle; always measure with a tool.
- Avoid cutting too quickly; take your time for accuracy.
- Do not forget to test fit and adjust if needed.
- Do not cut the moulding on the wrong side.
Making Outside Corner Cuts
Cutting crown moulding for outside corners needs careful measuring. The goal is to make two pieces fit perfectly around the corner.
Using the right angles and tools will help you get clean, tight joints. This guide shows how to cut outside corners step-by-step.
Step-by-step Cutting Process
First, measure the angle of the outside corner with a protractor or angle finder. Most corners are 90 degrees, but check to be sure.
Set your miter saw to cut a 45-degree angle. This angle allows two pieces of moulding to join smoothly around the corner.
- Place the crown moulding upside down on the saw, like it sits on the wall.
- Cut the first piece at a 45-degree angle, with the blade slanting away from the corner.
- Cut the second piece at a 45-degree angle, with the blade slanting toward the corner.
- Test fit the two pieces around the corner before final installation.
Ensuring A Tight Fit
Check the joint closely for gaps or uneven edges. Use a sanding block to smooth small imperfections.
If gaps remain, apply wood filler or caulk to create a seamless look. Paint over the joint to finish.
- Hold the moulding pieces tightly in place when nailing them to the wall.
- Use clamps if needed to keep corners aligned during installation.
- Double-check angles before making final cuts to avoid mistakes.
Credit: www.familyhandyman.com
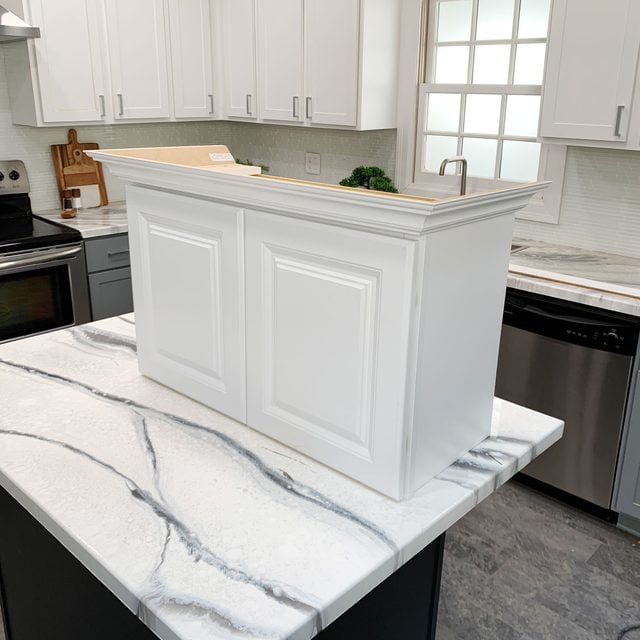
Joining And Installing The Moulding
Cutting and installing kitchen cabinet crown moulding needs care. Proper joining and fitting make the moulding look neat and professional.
Follow these steps to test fit, nail, and finish the moulding for a clean kitchen look.
Test Fitting Pieces
Before nailing, hold the moulding pieces in place. Check the corners and joints for tight fits and smooth lines.
Make small adjustments by sanding or trimming the edges if needed. This step prevents gaps and misalignment.
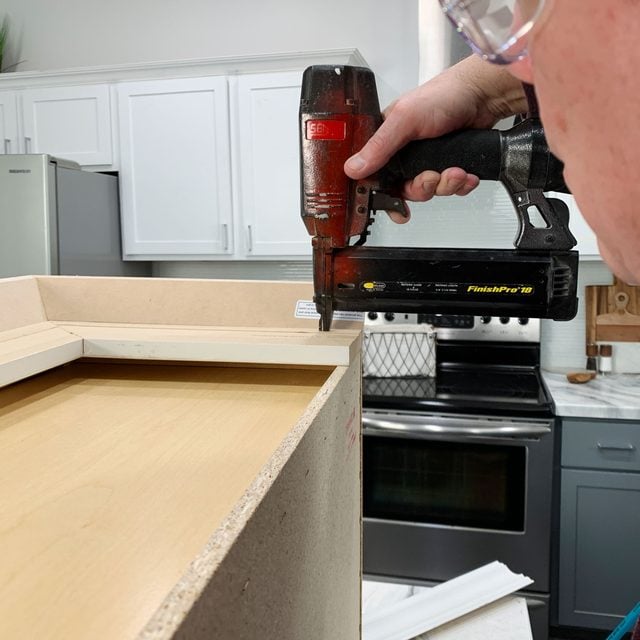
Nailing And Securing
Use a nail gun or hammer with finishing nails to attach the moulding to cabinets. Nail at an angle for better hold.
Place nails into the thickest part of the moulding to avoid splitting. Space nails every 12 to 16 inches for a firm hold.
- Use 1 1/4 inch finishing nails
- Angle nails toward the cabinet frame
- Keep nails 12–16 inches apart
- Fill nail holes for a smooth finish
Filling Gaps And Finishing Touches
Fill small gaps and nail holes with wood filler or caulk. This hides imperfections and smooths the surface.
After drying, sand the filler gently. Paint or stain the moulding to match your cabinets for a polished look.
Tips For A Professional Finish
Cutting kitchen cabinet crown moulding needs care to look right. A clean finish adds value to your kitchen.
Follow simple tips for sanding and painting. Fix common problems to avoid mistakes.
Sanding And Painting
Sand the crown moulding to smooth edges and remove rough spots. Use fine-grit sandpaper for the best results.
- Start with medium-grit sandpaper to shape edges.
- Finish with fine-grit sandpaper for smoothness.
- Wipe dust off with a clean cloth before painting.
- Apply a primer coat to help paint stick better.
- Use a brush or spray for even paint coverage.
Allow paint to dry fully. Apply a second coat if needed for a clean look.
Common Troubleshooting
Check your cuts and joints if moulding does not fit well. Small errors can cause gaps or uneven edges.
| Problem | Cause | Solution |
| Gaps at corners | Wrong angle cuts | Re-cut at correct angle |
| Paint peeling | Not sanding properly | Sand surface, then repaint |
| Rough edges | Skipping sanding steps | Sand with fine-grit paper |
| Uneven paint | Too thick paint layers | Apply thin coats and dry |
Frequently Asked Questions
How Do You Measure Crown Moulding For Cabinets?
Measure the length and angle where the moulding will fit. Use a tape measure and protractor for accuracy. Mark these measurements on the moulding before cutting to ensure a perfect fit.
What Tools Are Needed To Cut Crown Moulding?
You need a miter saw, measuring tape, pencil, and safety goggles. A coping saw helps for intricate cuts. These tools ensure precise and safe crown moulding cuts.
How Do You Make Inside Corner Cuts On Crown Moulding?
Set the miter saw to 45 degrees and cut the moulding upside down. This method matches the angle of inside corners perfectly. It prevents gaps and ensures a snug fit.
Can Beginners Cut Kitchen Cabinet Crown Moulding?
Yes, beginners can cut crown moulding with practice and patience. Start with scrap wood to practice cuts. Follow tutorials and use proper safety gear for best results.
Conclusion
Cutting kitchen cabinet crown moulding isn’t too hard with the right steps. Start with accurate measurements for a perfect fit. Use a miter saw for precise cuts. Double-check angles to avoid mistakes. Safety gear is important; wear goggles and gloves.
Practice on scrap wood if you’re new to this. Doing it yourself saves money and feels rewarding. You will soon have beautiful cabinets with well-fitted crown moulding. Enjoy your refreshed kitchen space!


