
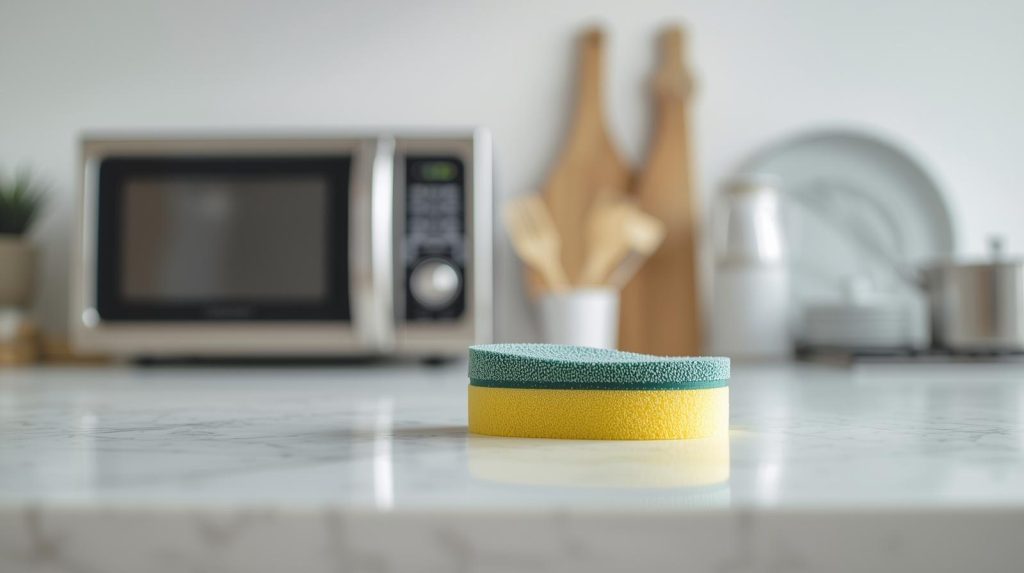
How to Clean Kitchen Dish Sponge in Microwave Without Mistakes
Are you tired of that unpleasant odor wafting from your kitchen dish sponge? You might be shocked to learn that your kitchen sponge can harbor more bacteria than a toilet seat.
But don’t worry; there’s a quick and effective solution to this common kitchen problem. Did you know How to Clean Kitchen Dish Sponge in Microwave is a simple way to sanitize it? Yes, it’s that easy! In just a few simple steps, you can eliminate up to 99.9% of germs lurking in your sponge.
This method not only saves you time but also extends the life of your sponge. Ready to discover how you can keep your kitchen clean and your family safe? Read on to learn the step-by-step process that will transform how you think about kitchen hygiene.
Why Clean Your Sponge
Kitchen sponges help clean dishes and surfaces. They trap food particles and water. This makes them a place where germs can grow fast.
Cleaning your sponge often keeps your kitchen safe. It stops bacteria from spreading to your dishes and hands.
Bacteria And Germs In Sponges
Sponges hold many types of bacteria and germs. These can include salmonella, E. coli, and mold. They grow because sponges stay wet and have food bits.
- Bacteria multiply quickly in damp sponges.
- Germs can transfer to dishes and utensils.
- Sponges can smell bad due to germs.
- Dirty sponges spread illness in the kitchen.
Health Risks Of Dirty Sponges
Using a dirty sponge can cause health problems. Germs can cause food poisoning and infections. Children, elderly, and people with weak immunity are at higher risk.
| Health Issue | Cause |
| Food Poisoning | Bacteria like Salmonella and E. coli |
| Skin Infection | Contact with mold and germs |
| Stomach Illness | Swallowing germs from unclean dishes |
| Allergic Reactions | Mold spores in sponges |
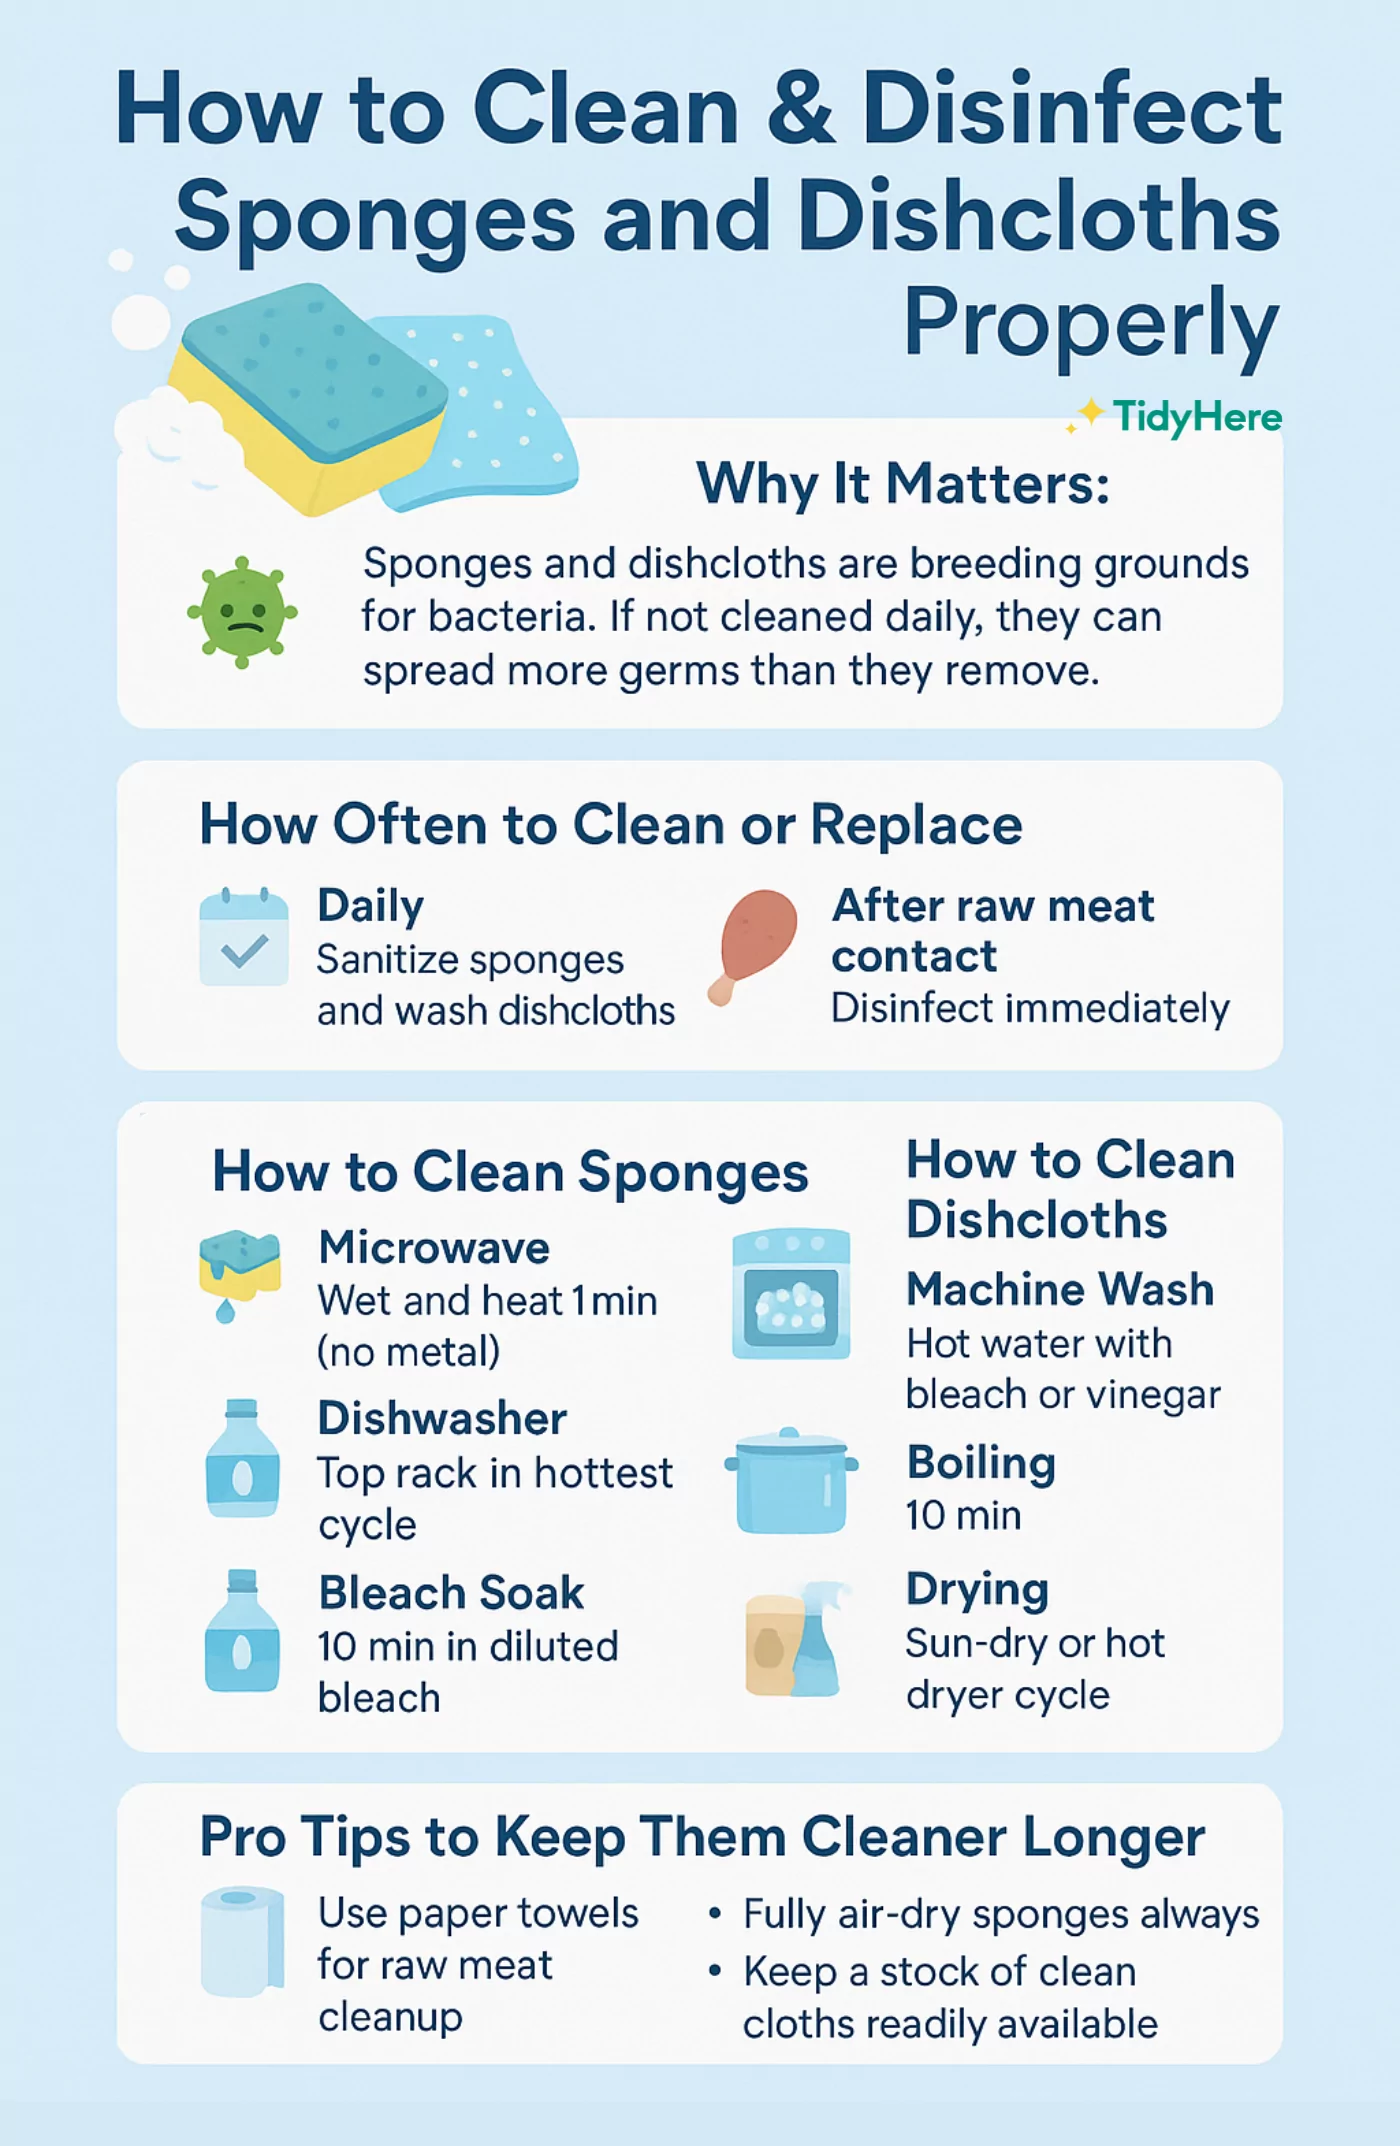
Benefits Of Microwave Cleaning
Cleaning your kitchen dish sponge in the microwave is a quick and easy way to keep it fresh. This method uses heat to remove dirt and germs from the sponge.
Using a microwave to clean your sponge can save time and help keep your kitchen more hygienic. It is simple and works well for regular sponge cleaning.
Fast And Convenient Method
Microwaving your sponge is faster than washing by hand or using other cleaning products. It takes only a few minutes to kill most bacteria and odors.
- Place a wet sponge in the microwave
- Heat on high for about 2 minutes
- Let it cool before removing
- Use the sponge as usual
Kills Most Germs Effectively
The microwave’s heat kills many germs hiding in the sponge. This reduces the risk of spreading bacteria in your kitchen.
| Microorganism | Effect of Microwave Cleaning |
| E. coli | Most killed |
| Salmonella | Most killed |
| Staphylococcus | Most killed |
| Mold Spores | Reduced |
Preparing Sponge For Microwave
Cleaning your kitchen dish sponge in the microwave helps kill germs. Preparing it correctly is key to avoid damage or fire risks.
Follow simple steps to get your sponge ready for safe microwaving.
Rinsing And Wetting The Sponge
Always rinse your sponge before microwaving. Remove food particles and dirt under running water.
- Hold the sponge under warm water.
- Squeeze it several times to release trapped debris.
- Make sure the sponge is fully wet inside and out.
- A dry sponge can catch fire in the microwave.
Placing Sponge Safely
Place the wet sponge on a microwave-safe plate or bowl. Avoid direct contact with the microwave walls.
| Safety Tips | Details |
|---|---|
| Use a microwave-safe container | Prevents melting or damage to microwave |
| Do not microwave dry sponges | Reduces fire risk |
| Keep sponge away from microwave walls | Allows even heat distribution |
| Heat in short intervals | Prevents overheating |

Credit: www.absolutesolutions.com.sg
Microwave Cleaning Steps
Cleaning your kitchen dish sponge in the microwave kills many germs. This method is fast and easy. It helps keep your sponge fresh and safe to use.
Follow these simple steps to clean your sponge using a microwave. Remember to be careful as the sponge gets hot.
Setting Microwave Time
Place the wet sponge in the microwave. Set the microwave timer for the right length. Usually, 1 to 2 minutes works well.
Make sure the sponge is wet. A dry sponge can catch fire in the microwave. Use a microwave-safe plate to hold the sponge.
- Soak the sponge in water before microwaving
- Use 1 to 2 minutes heating time
- Use medium to high microwave power
- Stop if you see smoke or smell burning
Handling Hot Sponge
After microwaving, the sponge will be very hot. Use tongs or a cloth to take it out. Avoid touching it with bare hands.
Let the sponge cool down before using it again. This prevents burns and keeps you safe in the kitchen.
- Use tongs or an oven mitt to remove the sponge
- Place the sponge on a heat-safe surface
- Wait a few minutes for it to cool
- Do not microwave the sponge if it is dry
Precautions And Safety Tips
Cleaning your kitchen dish sponge in the microwave can kill germs quickly. You need to take safety steps first. These steps help avoid accidents and keep your microwave safe.
Read these tips carefully before using your microwave to clean the sponge. Safety is the most important part of this process.
Avoiding Fires And Damage
Microwaving a wet sponge can kill bacteria. Dry sponges can catch fire. Never microwave a dry sponge. Always soak the sponge in water before microwaving.
- Wet the sponge completely to avoid fire risk.
- Place the sponge on a microwave-safe dish.
- Do not microwave for more than 2 minutes at a time.
- Stay near the microwave while it runs to stop it if smoke appears.
- Let the sponge cool before removing it to avoid burns.
Checking For Metal Parts
Some sponges have metal scrubbing pads or wires. Metal can cause sparks and damage your microwave. Always check your sponge for metal parts before microwaving.
| Check Item | Action |
| Metal Scrubber | Remove before microwaving |
| Plastic or Foam Only | Safe to microwave when wet |
| Unknown Material | Do not microwave, use other cleaning methods |
Credit: tidyhere.com
Alternative Sponge Cleaning Methods
Cleaning your kitchen sponge is important to keep it free from germs. The microwave is one way to clean it. You can also use other methods to make your sponge safe and fresh.
Here are some simple ways to clean your kitchen sponge without using a microwave.
Boiling Water Method
Boiling water kills most bacteria in your sponge. It is easy and does not need special tools.
Put the sponge in boiling water for about five minutes. Make sure the sponge is fully wet before boiling.
Dishwasher Cleaning
Your dishwasher can clean sponges well. The hot water and detergent remove dirt and germs.
Place the sponge on the top rack of the dishwasher. Run a full hot cycle to clean it thoroughly.
Using Vinegar or Bleach
Vinegar and bleach are strong cleaners. They kill germs and help remove smells from sponges.
Soak the sponge in a cup of vinegar or a bleach solution for five to ten minutes. Then rinse it well with water.
- For vinegar, use it full strength or diluted with water.
- For bleach, mix one part bleach with nine parts waters.
- Always rinse sponges well after soaking.
How Often to Clean Your Sponge
Kitchen sponges collect many germs and bacteria. Cleaning them often keeps your kitchen safe and fresh.
Microwaving is a quick way to kill germs on your sponge. Knowing when and how to clean it helps maintain hygiene.
Daily Maintenance Tips
Clean your sponge every day to reduce bacteria build-up. Microwaving is an easy daily cleaning method.
Make sure the sponge is wet before microwaving. Heat it on high for one to two minutes to kill most germs.
- Wet the sponge fully before microwaving
- Microwave on high for 1-2 minutes
- Let it cool before removing to avoid burns
- Store the sponge in a dry place after use
When To Replace Your Sponge
Even with cleaning, sponges wear out and can harbor germs. Replace your sponge regularly for best results.
Change your sponge every two weeks or if it smells bad or falls apart. A fresh sponge cleans better and is safer.
- Replace sponge every 1-2 weeks
- Change immediately if it smells bad
- Replace if sponge breaks or crumbles
- Use a new sponge for raw meat cleanup

Credit: www.maidforyou.com.au
Frequently Asked Questions
How Long Should I Microwave A Kitchen Sponge?
Microwave the damp kitchen sponge for 1 to 2 minutes. This duration effectively kills most bacteria and germs. Ensure the sponge is wet to avoid fire hazards. Let it cool before use to prevent burns.
Can Microwaving Sponges Really Kill Bacteria?
Yes, microwaving a wet sponge can kill up to 99% of bacteria. The heat generated destroys harmful microbes. However, this method works best when the sponge is thoroughly wet before microwaving.
Is It Safe To Microwave Kitchen Sponges Daily?
Microwaving kitchen sponges daily is generally safe if done correctly. Always ensure the sponge is wet and monitor it while microwaving. Avoid overheating to prevent fire risks. Replace sponges regularly for best hygiene.
What Precautions Should I Take When Microwaving Sponges?
Always wet the sponge before microwaving to prevent fires. Use microwave-safe containers or plates if needed. Heat for short intervals, checking frequently. Never microwave sponges with metal scrubbers or harsh chemicals.
Conclusion
Cleaning your kitchen sponge in the microwave is quick and easy. Just wet the sponge and heat it for a short time. This method kills most germs and keeps your sponge fresh. Remember to be careful when removing the sponge—it can be hot.
Regular cleaning helps keep your kitchen safe and smells better. Try this simple step to improve your daily kitchen routine. A clean sponge means cleaner dishes and a healthier home. Give it a try today!


