
Update Your Kitchen: Install New Drawer Pulls
Ready to give your kitchen a fresh look? Do you want to save money? New drawer pulls are the easiest fix. The right pull updates your space fast. You can choose a modern or classic look. This guide teaches you How to Install Drawer Pulls on Kitchen Cabinets. You will learn to install the pulls yourself. You do not need a drill to start. You will finish with confidence like a pro. Keep reading to see how easy this is. Add a personal touch to your home now!

Credit: plankhardware.com
Tools And Parts You Will Need
Installing drawer pulls is very simple. You just need the right tools ready. This guide shows what you need first. Getting ready helps you work faster. It also helps you avoid mistakes. Let’s look at the main things to prepare.
Choosing The Right Drawer Pulls
Pick pulls that match your kitchen style. Check that the screw length is right. The finish must match other hardware.
-
Measure the drawer front for the pull size.
-
Match screw length to drawer thickness.
-
Choose a finish like black or brass.
-
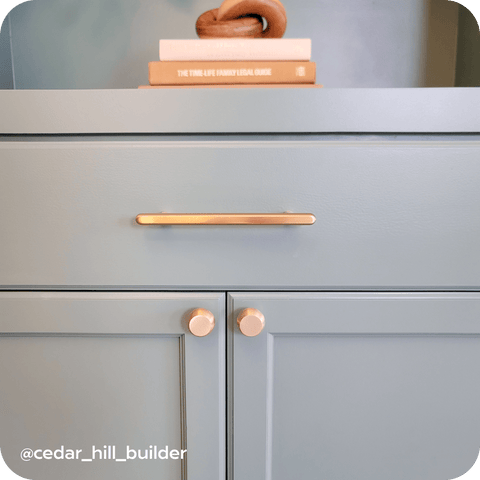
Decide on the style: knob, cup, or bar.
-
Buy extra pulls for backup pieces.
Essential Tools For Installation
Preparing Your Workspace
Clear your work area first. Do not lose small parts. Lay a soft cloth down. This protects the cabinet surface. Good light helps you see your marks well.
-
Remove the drawer from the cabinet.
-
Clear a stable, flat work surface.
-
Lay down a soft towel or cloth.
-
Get all tools and parts nearby.
-
Make sure the area has good lighting.

Credit: plankhardware.com
Measure and Mark Holes
You must measure and mark very carefully. Accurate marks keep pulls straight. Take your time measuring. This makes your cabinets look balanced. This guide shows how to measure correctly.
Finding The Center Point
Find the middle of the drawer front first. This is the best spot for the pull. It looks best here. Use a tape measure for the drawer width. Divide that number by two.
-
Measure the total drawer width.
-
Divide the width by two to find the center.
-
Mark this middle spot lightly with a pencil.
Marking Drill Holes Accurately
Most pulls need two screw holes. Mark these spots correctly now. Measure the screw hole distance on the pull itself. Mark these points evenly from the center spot.
-
Check the pull’s screw hole distance.
-
Divide the distance by two for half the space.
-
Mark holes left and right from the center spot.
Using Templates For Consistency
Templates help mark many drawers the same. All pulls will line up perfectly. This looks very professional. Buy a template or make one yourself. Place the template on the drawer. Mark the holes through the template.
-
Choose a template with the right hole spacing.
-
Center the template with your center mark.
-
Use a pencil to mark holes through the template.
-
Repeat this for every single drawer.
Drilling The Holes
Drilling holes is needed to install the pulls. Accurate drilling ensures a good fit. Prepare well before you drill. This keeps your cabinets looking nice.
Selecting The Correct Drill Bit
Choose a drill bit that matches your screws. Holes should not be too big or small. Use a drill bit made for wood. This makes clean holes. It prevents damage to the cabinet.
-
Measure the screw width first.
-
Wood drill bits work best for cabinets.
-
Use a smaller bit for pilot holes if needed.
Drilling With Precision
Mark each hole spot very clearly. Use a template or ruler for accuracy. Hold the drill steady and straight. Drill straight into the cabinet surface. Do not tilt the drill at all.
-
Use a pencil to mark the hole spots.
-
Check your measurements one more time.
-
Hold the drill straight up and down.
Avoiding Common Mistakes
Do not rush your drilling. Go slowly to avoid splintering the wood. Use gentle pressure on the drill. Use pilot holes for large screws. This stops the wood from cracking.
-
Do not drill close to the drawer edges.
-
Use small pilot holes for big screws.
-
Check hole spots before drilling every time.
Attaching Drawer Pulls
Attaching the pulls updates cabinets fast. The right pull makes drawers easy to open. It also makes them look better. Follow simple steps to attach them well. This keeps them strong and straight.
Aligning Pulls With Holes
First, match the pull holes to the cabinet holes. Check that they line up well first. Use a ruler to make sure the pull is straight.
-
Put the pull over the holes you drilled.
-
Make sure the pull is level and centered.
-
Adjust the position if needed now.
Securing Screws Properly
Insert screws from inside the drawer out. Put them into the pull now. Start by tightening all screws by hand. Use a screwdriver to secure them firmly. Do not over-tighten the screws.
-
Insert the screws very carefully.
-
Tighten screws evenly on both sides.
-
Stop when the pull feels secure and tight.
Checking Stability And Fit
Check that the pull holds tight. It should not move or wobble. Make sure it feels good to grip. Open and close the drawer now. Test the pull’s strength and fit.
-
Check if the pull is loose or wobbles.
-
Ensure it is comfortable to grab.
-
Tighten screws again if they feel loose.
Finishing Touches
The installation is almost done now. These last steps make sure it looks great. They keep your cabinets neat. Cleaning and testing make pulls last long. Follow these steps to finish your job.
Cleaning Up The Area
Clean all around the cabinets now. Remove dust, dirt, and fingerprints. Use a soft cloth and mild cleaner. Clean the inside and outside of the drawers.
-
Wipe the pulls gently with a damp cloth.
-
Remove dust from edges and screw holes.
-
Dry everything with a clean, soft towel.
Testing Drawer Functionality
Check every drawer after the installation. Make sure they open smoothly. Check for catching or sticking. If a drawer sticks, check the screws. Tighten or loosen screws slightly to fix it.
-
Pull each drawer fully open and closed.
-
Look for any rubbing or crookedness.
-
Adjust screws if the pulls feel loose.
Maintaining Your Drawer Pulls
Keep your pulls secure over time. Regular care keeps them shiny. Check all screws every few months. Tighten any loose pulls gently.
-
Use a soft cloth for all cleaning.
-
Check screw tightness every 3 to 6 months.
-
Avoid harsh chemicals on the finishes.
Credit: plankhardware.com
Frequently Asked Questions
How do I measure for drawer pulls?
Measure the space between the screw holes. Use a tape measure for accuracy. Mark the holes lightly with a pencil.
What tools do I need?
You need a drill, screwdriver, and tape measure. A level helps keep pulls straight. These tools make the job easy.
Can I install pulls without new holes?
Yes, if old holes match the new pulls. Otherwise, you must drill new holes. Do not force mismatched pulls to fit.
How do I choose the right size?
Pulls should fit the drawer size well. Bigger drawers need bigger pulls. Consider style and how you grip them.
Conclusion
Installing drawer pulls is simple and fast. This update makes your kitchen look great. Measure carefully for a good placement. Use a drill to make clean holes. Secure the pulls firmly so they last. Your kitchen will look neat and fresh now.
Enjoy the new look and easy access. The right tools make this job easy. Take your time and enjoy the work. A small change makes a big impact. Your cabinets are now stylish and easy to open.
Update Your Kitchen: Install New Drawer Pulls
Ready to give your kitchen a fresh look? Do you want to save money? New drawer pulls are the easiest fix. The right pull updates your space fast. You can choose a modern or classic look. This guide teaches you simple steps. You will learn to install the pulls yourself. You do not need a drill to start. You will finish with confidence like a pro. Keep reading to see how easy this is. Add a personal touch to your home now!
Credit: plankhardware.com
Tools And Parts You Will Need
Installing drawer pulls is very simple. You just need the right tools ready. This guide shows what you need first. Getting ready helps you work faster. It also helps you avoid mistakes. Let’s look at the main things to prepare.
Choosing The Right Drawer Pulls
Pick pulls that match your kitchen style. Check that the screw length is right. The finish must match other hardware.
-
Measure the drawer front for the pull size.
-
Match screw length to drawer thickness.
-
Choose a finish like black or brass.
-
Decide on the style: knob, cup, or bar.
-
Buy extra pulls for backup pieces.
Essential Tools For Installation
Preparing Your Workspace
Clear your work area first. Do not lose small parts. Lay a soft cloth down. This protects the cabinet surface. Good light helps you see your marks well.
-
Remove the drawer from the cabinet.
-
Clear a stable, flat work surface.
-
Lay down a soft towel or cloth.
-
Get all tools and parts nearby.
-
Make sure the area has good lighting.
Credit: plankhardware.com
Measure and Mark Holes
You must measure and mark very carefully. Accurate marks keep pulls straight. Take your time measuring. This makes your cabinets look balanced. This guide shows how to measure correctly.
Finding The Center Point
Find the middle of the drawer front first. This is the best spot for the pull. It looks best here. Use a tape measure for the drawer width. Divide that number by two.
-
Measure the total drawer width.
-
Divide the width by two to find the center.
-
Mark this middle spot lightly with a pencil.
Marking Drill Holes Accurately
Most pulls need two screw holes. Mark these spots correctly now. Measure the screw hole distance on the pull itself. Mark these points evenly from the center spot.
-
Check the pull’s screw hole distance.
-
Divide the distance by two for half the space.
-
Mark holes left and right from the center spot.
Using Templates For Consistency
Templates help mark many drawers the same. All pulls will line up perfectly. This looks very professional. Buy a template or make one yourself. Place the template on the drawer. Mark the holes through the template.
-
Choose a template with the right hole spacing.
-
Center the template with your center mark.
-
Use a pencil to mark holes through the template.
-
Repeat this for every single drawer.
Drilling The Holes
Drilling holes is needed to install the pulls. Accurate drilling ensures a good fit. Prepare well before you drill. This keeps your cabinets looking nice.
Selecting The Correct Drill Bit
Choose a drill bit that matches your screws. Holes should not be too big or small. Use a drill bit made for wood. This makes clean holes. It prevents damage to the cabinet.
-
Measure the screw width first.
-
Wood drill bits work best for cabinets.
-
Use a smaller bit for pilot holes if needed.
Drilling With Precision
Mark each hole spot very clearly. Use a template or ruler for accuracy. Hold the drill steady and straight. Drill straight into the cabinet surface. Do not tilt the drill at all.
-
Use a pencil to mark the hole spots.
-
Check your measurements one more time.
-
Hold the drill straight up and down.
Avoiding Common Mistakes
Do not rush your drilling. Go slowly to avoid splintering the wood. Use gentle pressure on the drill. Use pilot holes for large screws. This stops the wood from cracking.
-
Do not drill close to the drawer edges.
-
Use small pilot holes for big screws.
-
Check hole spots before drilling every time.
Attaching Drawer Pulls
Attaching the pulls updates cabinets fast. The right pull makes drawers easy to open. It also makes them look better. Follow simple steps to attach them well. This keeps them strong and straight.
Aligning Pulls With Holes
First, match the pull holes to the cabinet holes. Check that they line up well first. Use a ruler to make sure the pull is straight.
-
Put the pull over the holes you drilled.
-
Make sure the pull is level and centered.
-
Adjust the position if needed now.
Securing Screws Properly
Insert screws from inside the drawer out. Put them into the pull now. Start by tightening all screws by hand. Use a screwdriver to secure them firmly. Do not over-tighten the screws.
-
Insert the screws very carefully.
-
Tighten screws evenly on both sides.
-
Stop when the pull feels secure and tight.
Checking Stability And Fit
Check that the pull holds tight. It should not move or wobble. Make sure it feels good to grip. Open and close the drawer now. Test the pull’s strength and fit.
-
Check if the pull is loose or wobbles.
-
Ensure it is comfortable to grab.
-
Tighten screws again if they feel loose.
Finishing Touches
The installation is almost done now. These last steps make sure it looks great. They keep your cabinets neat. Cleaning and testing make pulls last long. Follow these steps to finish your job.
Cleaning Up The Area
Clean all around the cabinets now. Remove dust, dirt, and fingerprints. Use a soft cloth and mild cleaner. Clean the inside and outside of the drawers.
-
Wipe the pulls gently with a damp cloth.
-
Remove dust from edges and screw holes.
-
Dry everything with a clean, soft towel.
Testing Drawer Functionality
Check every drawer after the installation. Make sure they open smoothly. Check for catching or sticking. If a drawer sticks, check the screws. Tighten or loosen screws slightly to fix it.
-
Pull each drawer fully open and closed.
-
Look for any rubbing or crookedness.
-
Adjust screws if the pulls feel loose.
Maintaining Your Drawer Pulls
Keep your pulls secure over time. Regular care keeps them shiny. Check all screws every few months. Tighten any loose pulls gently.
-
Use a soft cloth for all cleaning.
-
Check screw tightness every 3 to 6 months.
-
Avoid harsh chemicals on the finishes.
Credit: plankhardware.com
Frequently Asked Questions
How do I measure for drawer pulls?
Measure the space between the screw holes. Use a tape measure for accuracy. Mark the holes lightly with a pencil.
What tools do I need?
You need a drill, screwdriver, and tape measure. A level helps keep pulls straight. These tools make the job easy.
Can I install pulls without new holes?
Yes, if old holes match the new pulls. Otherwise, you must drill new holes. Do not force mismatched pulls to fit.
How do I choose the right size?
Pulls should fit the drawer size well. Bigger drawers need bigger pulls. Consider style and how you grip them.
Conclusion
Installing drawer pulls is simple and fast. This update makes your kitchen look great. Measure carefully for a good placement. Use a drill to make clean holes. Secure the pulls firmly so they last. Your kitchen will look neat and fresh now.
Enjoy the new look and easy access. The right tools make this job easy. Take your time and enjoy the work. A small change makes a big impact. Your cabinets are now stylish and easy to open.



