Are you tired of watching your kitchen scraps go to waste? Imagine turning those peels, cores, and leftovers into nutrient-rich compost that can nourish your garden and reduce your carbon footprint.
Storing kitchen scraps for composting is easier than you think, and it’s a simple step towards a more sustainable lifestyle. In this guide, you’ll discover practical tips to store your scraps without the mess or smell. We’ll show you how to make the most of your kitchen waste, transforming it into a valuable resource.
Ready to dive into the world of composting and make a difference right from your kitchen? Let's get started!

Credit: www.reddit.com
Choosing The Right Container
Storing kitchen scraps properly helps keep your compost fresh. The right container can stop smells and bugs.
Pick a container that fits your space and makes composting easy every day.
Material Options
Containers come in many materials. Each type has good and bad points.
Plastic containers are light and easy to clean. Metal containers last long but can rust. Glass containers do not absorb smells but are heavy.
- Plastic: lightweight and affordable
- Metal: durable but may rust
- Glass: odor-resistant but heavy
- Ceramic: decorative and sturdy
Size And Capacity
Choose a size based on how much food waste you produce. Small containers fit small kitchens.
Larger containers hold more scraps but take more space. Pick one that matches your cooking habits.
- Small (1-2 gallons): good for 1-2 people
- Medium (3-5 gallons): fits families of 3-4
- Large (6+ gallons): best for big households
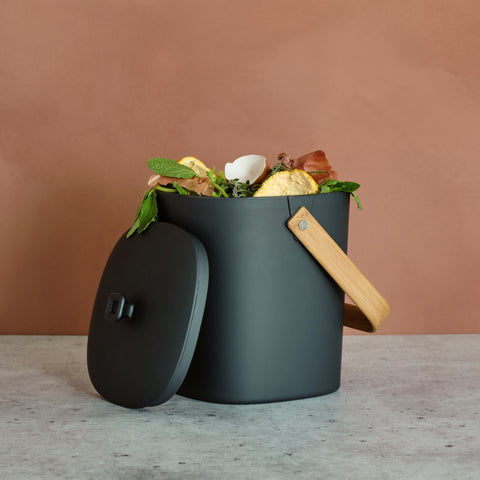
Lid And Ventilation
A container with a tight lid helps stop bad smells and keeps pests out. Ventilation controls moisture inside.
Look for lids with small air holes or filters. This lets air flow but reduces odors.
- Secure lid to block bugs and smells
- Vents or filters allow air circulation
- Easy-to-remove lids make cleaning simple
Credit: www.amazon.com
Preparing Scraps For Storage
Storing kitchen scraps properly helps your compost break down faster. Preparing scraps well keeps your compost bin clean and healthy.
Good preparation means chopping, avoiding bad items, and balancing materials. These steps make composting easier and more effective.
Chopping And Shredding
Cut scraps into small pieces before storing. Smaller pieces decompose faster because microbes can work better.
Use a knife or shredder to break down tough scraps like celery or carrot tops. This helps keep your compost pile active.
- Chop fruit and vegetable peels into small bits
- Shred leafy greens for faster breakdown
- Cut large scraps like melon rinds into smaller parts
Avoiding Problematic Items
Some scraps can slow compost or cause bad smells. Do not store meat, dairy, or oily foods in your kitchen scrap container.
Stay away from diseased plants or weeds with seeds. These can harm your garden or compost health.
- No meat, fish, or bones
- No dairy like cheese or milk
- No oils or greasy foods
- No diseased plants or weed seeds
Balancing Greens And Browns
Kitchen scraps are mostly green materials. Add brown materials to balance compost and avoid bad smells.
Store dry leaves, shredded paper, or cardboard with your scraps. This mix helps compost break down evenly.
- Greens: fruit and vegetable scraps, coffee grounds
- Browns: dry leaves, paper towels, shredded cardboard
- Keep a roughly equal mix of greens and browns
Storage Location Tips
Storing kitchen scraps properly helps keep your compost fresh. Choosing the right spot can reduce odors and pests.
This guide covers good indoor and outdoor storage places. It also explains how temperature affects your scraps.
Indoor Spots
Keep kitchen scraps in a small container with a lid inside your kitchen. This makes it easy to collect scraps daily.
Place the container in a cool, shaded area away from direct sunlight. Avoid spots near heat sources like ovens or stoves.
- Under the sink
- On a countertop corner
- Inside a cabinet with airflow
Outdoor Options
Use a sealed bin or compost pail outside for larger scrap amounts. Keep it near your compost pile or bin.
Choose a shaded spot to protect scraps from sun and rain. Make sure the area is easy to access for emptying.
- Shady porch or deck corner
- Under a tree or bushes
- Near compost bin or pile
Temperature Considerations
Temperature affects how fast scraps break down and how strong odors become. Cooler spots slow decay and smell.
In hot weather, use airtight containers and keep them in shaded or cool areas. In cold weather, scraps may freeze.
- Keep scraps cool to reduce smell
- Use sealed containers in warm weather
- Bring scraps indoors if too cold outside
Managing Odors And Pests
Storing kitchen scraps for compost can cause bad smells and attract pests. Proper storage helps keep your home clean and fresh.
There are easy ways to manage odors and keep pests away from your compost scraps.
Using Baking Soda Or Charcoal
Baking soda can absorb bad smells from your compost container. Sprinkle some at the bottom before adding scraps.
Charcoal also works well to control odors. Place a small piece or charcoal bag inside the container to keep air fresh.
- Sprinkle baking soda regularly
- Replace charcoal every few weeks
- Both help reduce smell and moisture
Regular Cleaning Routines
Cleaning your compost container often stops smells from building up. Wash it with soap and water every few days.
Dry the container well before adding new scraps. This keeps pests like flies and ants away.
- Empty scraps daily or every two days
- Use hot water and mild soap to clean
- Allow the container to dry completely
Sealing And Securing Containers
Use containers with tight-fitting lids to keep smells in and pests out. Make sure the lid closes securely.
If possible, choose containers made from materials that do not absorb odors. This helps keep your kitchen fresh.
- Pick containers with airtight lids
- Check lids for cracks or damage
- Store containers in cool, shaded places
Timing For Composting
Storing kitchen scraps correctly helps make good compost. Timing is key to avoid bad smells and pests.
You want to keep scraps fresh until you add them to your compost pile or bin.
How Long To Store Scraps
Store kitchen scraps for only a few days before composting. The shorter the time, the better.
Keep scraps in the fridge or a cool place to slow down decay.
- Store scraps up to 3 days in a sealed container at room temperature.
- Keep scraps up to 1 week in the refrigerator.
- Avoid storing scraps longer to prevent bad smells and mold.
Signs To Empty Containers
Check your container daily for bad smells or leaks. These signs mean you should empty it soon.
Also watch for mold growth or fruit flies around the container.
- Strong, unpleasant odor from the container
- Visible mold or slimy scraps
- Fruit flies or other insects gathering
- Leakage or liquid buildup inside the container
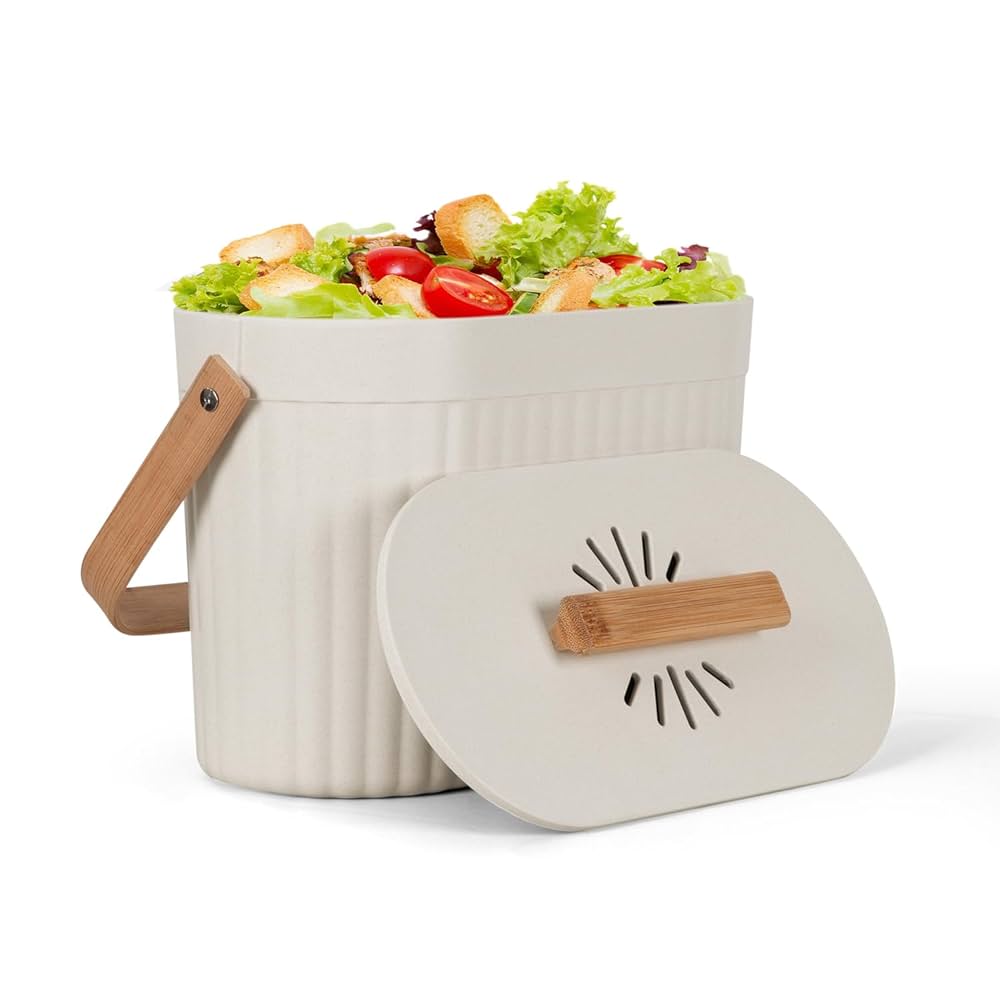
Best Practices For Transfer
Transfer scraps to your compost pile or bin often. This keeps your kitchen area clean and fresh.
Use gloves or a scoop to handle scraps. Wash containers regularly to avoid germs.
- Transfer scraps every 2-3 days for best results
- Break large pieces into smaller bits to speed composting
- Clean containers with soap and water after emptying
- Store containers with tight lids to keep pests out

Credit: www.amazon.com
Additional Tips For Success
Storing kitchen scraps correctly helps keep your compost healthy. Good storage stops bad smells and pests.
These tips make it easier to manage scraps before composting. Try these simple ideas to improve your compost process.
Freezing Scraps
Freezing kitchen scraps slows down decay and stops odors. It also keeps pests away.
- Use a sealed container or freezer bag
- Label the bag with the date
- Freeze scraps like fruit peels and vegetable ends
- Thaw scraps before adding to your compost bin
Using Compostable Bags
Compostable bags help keep scraps tidy and reduce plastic use. They break down in compost quickly.
| Benefit | Details |
| Eco-friendly | Bags are made from natural materials |
| Odor control | Helps contain smells inside the bag |
| Easy cleanup | Bags can go directly into compost |
| Less plastic waste | Reduces use of traditional plastic bags |
Tracking Scrap Types
Knowing what scraps you collect helps balance your compost. Different scraps need different care.
- Keep a simple chart of scraps you save
- Sort scraps by type: greens, browns, others
- Note how much of each type you add weekly
- Adjust your scrap collection to keep compost healthy
Frequently Asked Questions
How Do I Store Kitchen Scraps For Composting?
Store scraps in a breathable container like a compost bin or bucket with a lid. Keep it in a cool, dry place to reduce odor and pests. Empty the container regularly into your compost pile or bin.
What Kitchen Scraps Are Best For Compost?
Vegetable peels, fruit scraps, coffee grounds, eggshells, and tea bags are great for compost. Avoid meat, dairy, and oily foods as they attract pests and slow decomposition.
How Long Can Kitchen Scraps Be Stored Before Composting?
Store scraps for up to one week in a sealed container in the fridge or freezer. This prevents odors and slows decomposition until you add them to your compost pile.
Should I Chop Kitchen Scraps Before Storing For Compost?
Yes, chopping scraps into smaller pieces speeds up decomposition. Smaller pieces create more surface area for microbes to break down the material efficiently.
Conclusion
Storing kitchen scraps for compost helps reduce waste daily. Use a small container with a lid to keep smells away. Keep it in a cool, dry spot inside your kitchen. Empty the scraps into your outdoor compost bin often. Chop scraps into small pieces for faster composting.
Avoid putting meat or dairy in the compost. By following these steps, you create rich soil for your garden. Composting becomes easy and helps the environment too. Start today and watch your garden grow healthy and strong. Simple habits make a big difference over time.