

Think about your kitchen. You want to cook a great meal. But your cutting board looks old and tired. Every mark and stain tells a story. You might not want to show that to your guests.
Is there an easy way to make your board look new again? Learning how to refinish a cutting board is simpler than you think. A few steps can make it a centerpiece in your kitchen.
Imagine your cutting board shining like new. Your friends will be impressed. This guide teaches you how to refinish a cutting board so it will be useful and beautiful. Ready for your board’s makeover? Let’s start!
Picking A Good Cutting Board
Choosing the right board matters for food safety. The board must be tough and easy to clean. Wood boards are popular. They are gentle on knives. Wood fights bacteria naturally. Let’s look at wood types and signs your board needs help.
Types Of Wood
Different woods work as cutting boards. Some are hard. Others soak up moisture better.
-
Maple: Hard and tough. It resists cuts. It is safe for food.
-
Walnut: Darker wood. It has a smooth top. It is strong but softer than maple.
-
Cherry: Medium hard. It has a warm color. It looks better over time.
-
Bamboo: It is a grass, not wood. It is hard and good for the earth. But it can dull knives.
-
Teak: It has natural oils. These oils fight water. It is good for wet places.
Signs It Needs Help
Your board needs a new finish if it has damage. This damage can trap germs. It can also hurt your knives. Watch for these signs.
-
Deep knife marks or grooves. These are hard to clean.
-
Rough wood that feels uneven. It might splinter.
-
Dark stains from food or water.
-
Dry or cracked wood that might split later.
-
The board smells bad even after cleaning.
Getting The Tools Ready
Refinishing a board needs the correct tools. This helps you get a smooth surface. Here are the main groups of tools you need. Get them ready before you start.
Sanding Tools
Sanding takes off old finish. It makes the wood smooth. You need different sandpaper types.
-
Coarse grit sandpaper ( grit) to remove deep marks.
-
Medium grit sandpaper ( grit) to smooth rough parts.
-
Fine grit sandpaper ( grit) to finish the top.
-
Sanding block or electric sander for better control.
-
Clean cloth to wipe dust between sanding steps.
Cleaning Supplies
Cleaning removes dirt and oil. These things can stop the finish from working. Use mild cleaners and drying tools.
Finishing Oils And Sealants
Oils protect the wood. They keep it safe for food. Pick items made for cutting boards.
-
Food-grade mineral oil to hydrate and protect the wood.
-
Beeswax mixed with oil for extra defense.
-
Tung oil or walnut oil as natural finishes.
Preparing The Board
You must prepare the board well before finishing. This makes the new finish stick. It makes it last longer. Cleaning and removing old finish are important. They help bring back the wood. They remove germs or stains.
Cleaning Off Dirt
First, wash the board with warm, soapy water. Use a sponge or brush. Scrub off food bits and dirt.
-
Rinse the board completely with clean water.
-
Wipe it dry with a clean towel.
-
Let the board air dry fully. This stops water damage.
-
If you have stains, use coarse salt. Rub it with half a lemon.
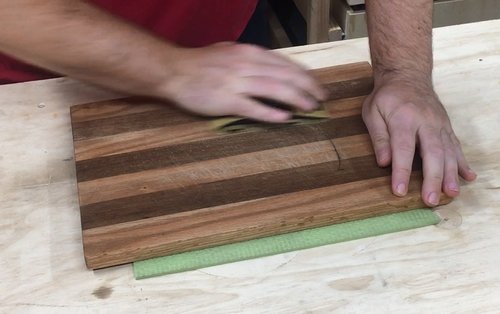
Removing Old Finish
Old finish can block new oil from soaking in. You must remove it carefully.
After removing the old finish, wipe the board with a damp cloth. Let it dry. Then apply the new finish.

Credit: www.youtube.com
Sanding Steps
Refinishing starts with good sanding. Sanding removes old finish and smooths the wood. It gets the top ready for oil. Good sanding protects your board. It keeps it looking new longer. Use the right tools and ways for best results.
Choosing Sandpaper Grit
Pick grit based on how worn the board is. Coarse grit removes deep cuts. Fine grit smooths the top before finishing.
-
Start with or grit for very rough sanding.
-
Use grit for medium smoothing.
-
Finish with grit for a smooth surface.
Sanding Evenly
Sand the flat top with steady, even strokes. Move with the grain of the wood. This avoids scratches. Use a sanding block or sander for even pressure.
Tips for Even Sanding:
-
Keep the sander flat. Do not press too hard.
-
Sand the entire surface, not just a few spots.
-
Check progress by running your hand over the board.
Sanding Corners
Edges and corners need gentle sanding. This keeps their shape. Fold sandpaper or use sanding sponges for tight areas. Do not round sharp edges too much.
Cleaning After Sanding
After sanding, cleaning is important. You must remove all dust and dirt. This gets the top ready for oil. Proper cleaning protects the wood. It keeps your board safe for food. Follow these steps carefully to clean and dry your board.
Removing Dust
Use a soft brush or cloth. Wipe away the sanding dust from the board. Clean all corners and edges well.
-
Brush off loose dust with a dry, soft brush.
-
Use a damp cloth to wipe the board gently.
-
Wipe again if you see dust left behind.
-
Let the board air out for a few minutes.
Drying The Board
The board must be fully dry before adding oil. Water can make wood warp. It can also trap bacteria.
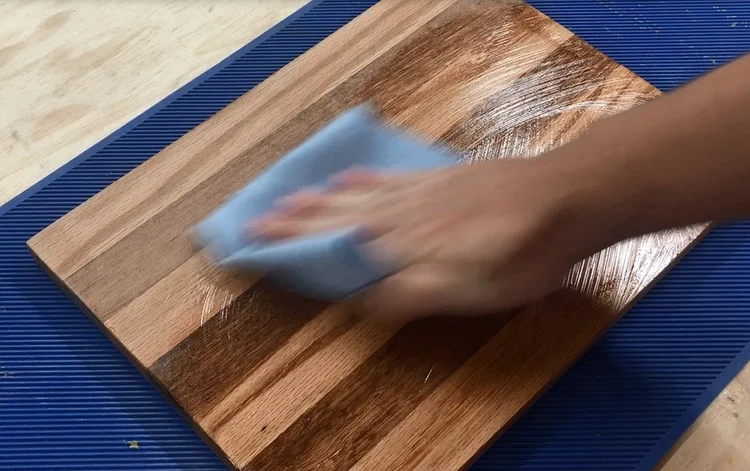
Adding Oil Or Finish
Refinishing protects the board. It keeps it safe and nice looking. Using the right oil protects the wood from water and stains. Use food-safe products. This keeps your board safe for making meals. Proper application and drying help the finish last longer.
Choosing Safe Oils
Not all oils work on cutting boards. Pick oils that do not spoil. They must be safe for food. Mineral oil is a common choice.
Application Tips:
-
Clean and dry the board before adding oil.
-
Use a clean, soft cloth or brush for even coat.
-
Put a lot of oil on all surfaces, even the edges.
-
Let the oil soak in for at least minutes.
-
Wipe off any extra oil with a clean cloth.
-
Add more oil if the wood still looks dry.
Proper Drying Time
Drying time is important for the oil to set. After oiling, leave the board in a warm, dry spot. Do not use or wash it until the finish is ready. Drying time changes by oil type. Mineral oil dries in a few hours. Natural oils may take longer. Check that the board feels dry. It should not be sticky before you use it.
Keeping Your Board Nice
Taking care of your board helps it last longer. Proper care stops cracks and stains. Simple daily habits protect your board. Oil and clean it often for the best results.
Regular Cleaning
Wash your board after every use with warm, soapy water. Rinse well to remove all food bits. Dry the board right away with a towel. Do not soak it in water. This stops warping or cracking.
Oil Treatments
Add food-safe mineral oil once a month. Do this if the board looks dry. This stops the wood from cracking. Rub the oil over the whole board. Use a soft cloth. Let it soak overnight for best results.
-
Use mineral oil only. No vegetable or olive oil.
-
Add oil again after deep cleaning or sanding.
-
Keep the board in a dry place between oil treatments.
Avoiding Damage
Do not cut on a wet or oily board. It can slip. It can hurt the surface. Do not put the board in the dishwasher. Heat and water ruin the wood.
-
Use both sides of the board. This stops warping.
-
Do not use harsh chemicals or bleach.
-
Sand the board lightly if deep cuts appear.
Credit: www.slightlycrookedworkshop.com
Credit: www.slightlycrookedworkshop.com
Frequently Asked Questions
How often should I refinish my cutting board?
Refinish your board every 3 to 6 months. Heavy use and washing cause wear. Regular refinishing keeps it smooth and safe.
What items do I need to refinish a cutting board?
You need sandpaper (medium and fine grit), mineral oil, and a clean cloth. Beeswax is optional. These things remove cuts and restore the finish.
Can I use any oil to refinish my cutting board?
No, use food-grade mineral oil only. Do not use vegetable or olive oils. They can spoil and hurt the board.
How long does it take to refinish a cutting board?
Refinishing takes about 30 to 60 minutes. Oil drying can take several hours. Let it dry overnight for the best result.
Final Thoughts
Refinishing a cutting board makes it new again. Sanding removes old marks and stains. Adding oil protects the wood. It keeps it smooth. Regular care makes your board last. A well-kept board is clean and safe for food.
Small steps make a big change. Try refinishing your board today. Enjoy a fresh, ready-to-use tool in your kitchen.


