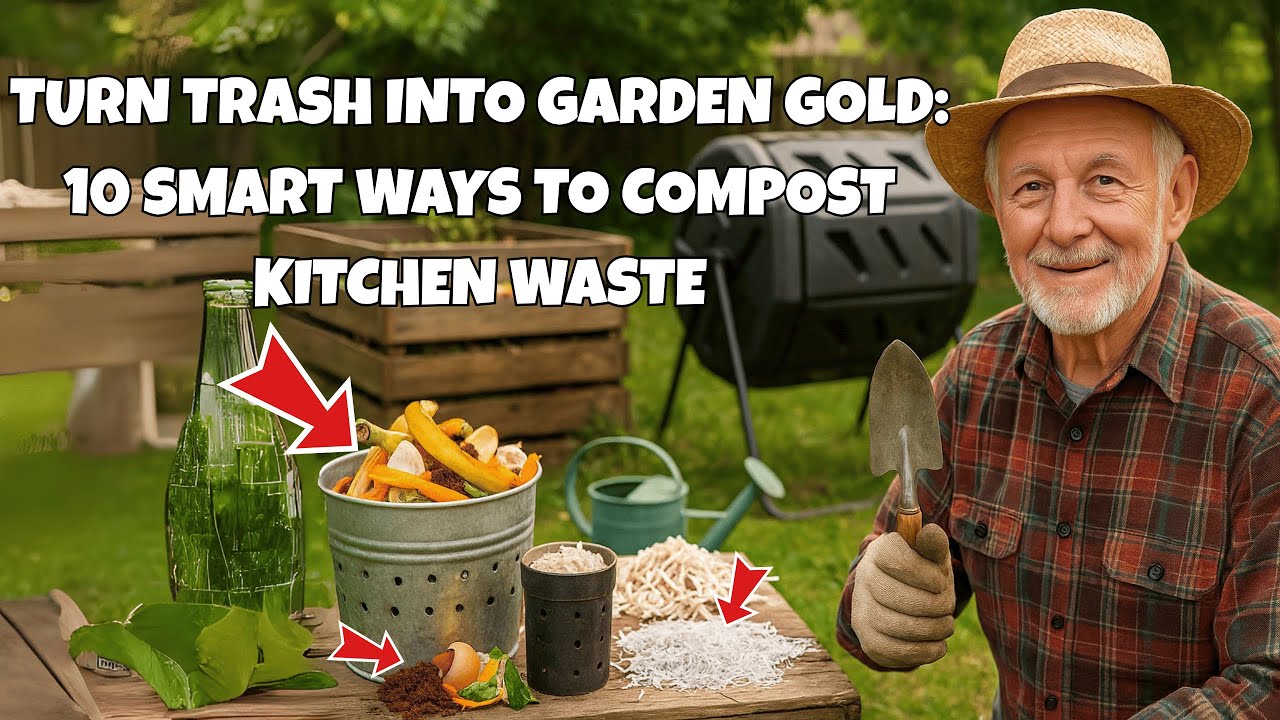
Are you tired of throwing away food scraps and watching them disappear into the trash? What if you could turn those leftovers into something valuable for your garden?
Making a kitchen compost bin is easier than you think, and it’s a simple way to reduce waste while creating rich soil for your plants. In this guide, you’ll learn exactly how to set up your own compost bin right in your kitchen.
Ready to transform your food scraps into gold? Let’s dive in and make composting a part of your daily routine.
Credit: medium.com
Benefits Of Kitchen Composting
Making a kitchen compost bin helps turn food scraps into useful material. It is an easy way to reduce waste at home.
Composting in the kitchen saves money and supports healthy plants. It is good for the environment.
Reducing Household Waste
Kitchen composting cuts down the amount of trash sent to landfills. Food scraps like peels, coffee grounds, and eggshells can be composted.
Less waste means fewer garbage bags and less smell in the trash bin.
- Compost fruit and vegetable scraps
- Avoid throwing away coffee filters and tea bags
- Reduce plastic bag use by composting food waste
Enriching Garden Soil
Compost adds nutrients to garden soil. It helps plants grow stronger and healthier.
Using compost improves soil texture and water retention. This means less need for chemical fertilizers.
- Compost provides natural fertilizer
- Improves soil structure and aeration
- Retains moisture to reduce watering
Lowering Carbon Footprint
Food waste in landfills creates methane, a harmful gas. Composting reduces these emissions.
Turning scraps into compost saves energy. It lowers greenhouse gases and helps fight climate change.
- Reduces methane gas from landfills
- Less energy used in waste transport
- Supports a cleaner environment
Credit: www.familyhandyman.com
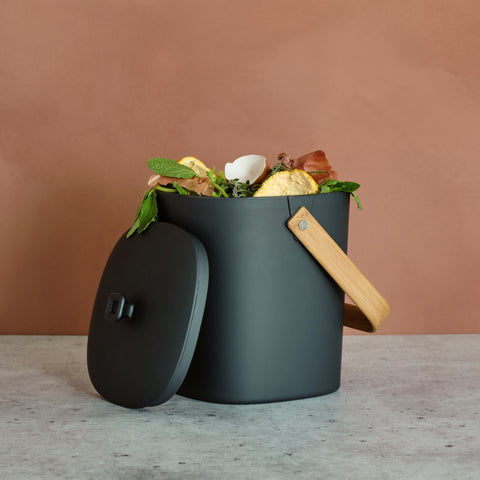
Choosing The Right Container
A good kitchen compost bin helps keep your food scraps tidy and odor-free. Picking the right container makes composting easier and cleaner.
Look for a container that fits your kitchen space and meets your composting needs. Size, material, and design all matter.
Materials And Size Options
Choose a container made of durable material that is easy to clean. Popular materials include plastic, stainless steel, and ceramic.
Size depends on how much food waste you produce. A small bin works for one or two people. Larger bins suit bigger families.
- Plastic bins are lightweight and affordable
- Stainless steel bins resist stains and odors
- Ceramic bins add style but can be heavy
- 1 to 2 gallons is good for small households
- 3 to 5 gallons fit medium to large families
Lid And Ventilation Features
A lid keeps smells inside the bin and prevents pests. Look for lids that fit tightly but are easy to open.
Ventilation holes help air flow. They reduce moisture and bad odors. Some bins have filters to control smell.
- Tight-fitting lids stop bugs and odors
- Vented lids improve airflow and reduce wetness
- Carbon filters help absorb strong smells
- Easy-to-remove lids make emptying simple
Diy Vs Store-bought Bins
Making your own bin can save money and let you customize size and look. Use clean containers like buckets or old jars.
Store-bought bins often have features like filters and vents. They are ready to use and may look nicer in your kitchen.
- DIY bins allow custom size and style
- Store-bought bins include odor control features
- DIY needs more effort to prepare and maintain
- Store-bought bins are convenient and durable
Preparing Your Compost Bin
Setting up your kitchen compost bin correctly helps speed up decomposition. A good setup reduces smells and keeps pests away.
Here are key steps to prepare your bin for effective composting.
Drilling Air Holes
Air holes let oxygen enter the bin. Oxygen helps break down food waste faster. Without air, your compost might smell bad.
Use a drill with a small bit to make holes evenly around the bin. Aim for about 10 to 15 holes on the sides and bottom.
- Space holes about 2 inches apart
- Make holes near the bottom for airflow
- Drill extra holes if the bin is large
- Keep holes small to stop bugs from entering
Adding A Drainage Layer
Drainage stops water from pooling at the bottom of the bin. Too much water slows compost and causes odor.
Place a 1 to 2 inch layer of one of these materials at the bottom:
- Small stones or pebbles
- Broken terra cotta pieces
- Coarse sand
- Shredded cardboard strips
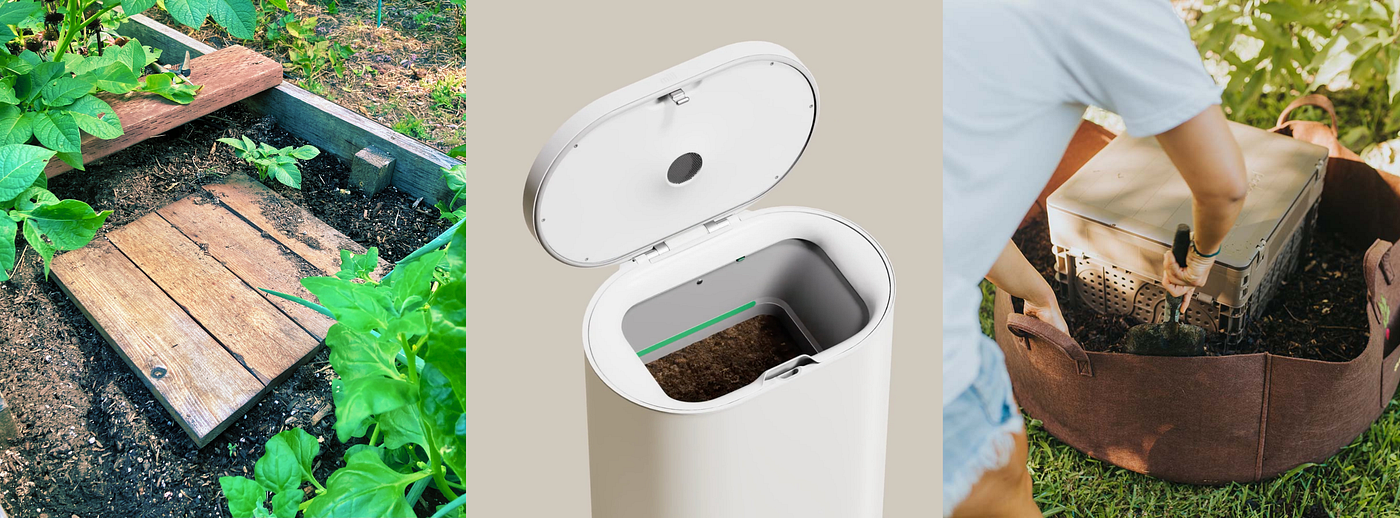
Selecting A Bin Location
Pick a spot that is easy to reach. The place should have good airflow and some shade.
| Location | Advantages |
| Kitchen Counter | Convenient, but may need odor control |
| Under the Sink | Hidden and handy, but watch for leaks |
| Outdoor Patio | Good airflow, keeps smells outside |
| Garage Corner | Protected from weather, less odor |
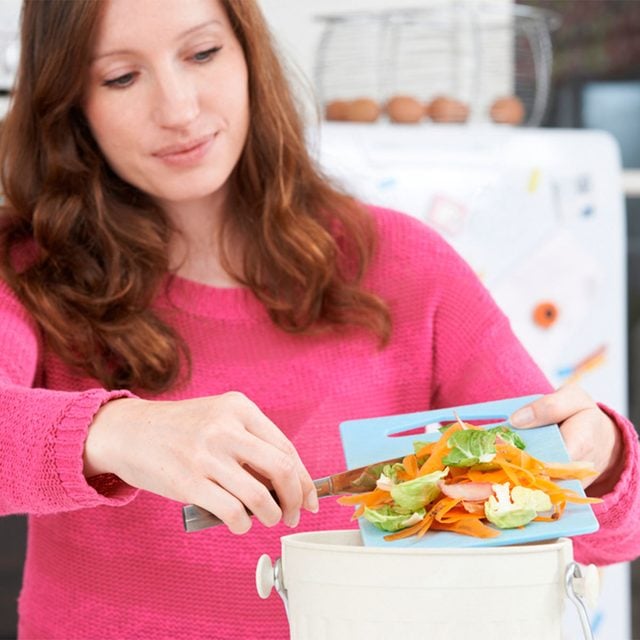
What To Compost In The Kitchen
Composting in the kitchen helps reduce waste and creates rich soil. Knowing what to compost makes the process easy and effective.
This guide covers accepted food scraps, items to avoid, and the use of compostable bags.
Accepted Food Scraps
You can compost many kitchen scraps. These include fruit and vegetable peels, coffee grounds, and eggshells. Avoid adding meat or dairy here.
- Vegetable and fruit scraps
- Eggshells
- Coffee grounds and filters
- Tea bags (without plastic)
- Bread and grains in small amounts
- Nut shells (except walnut shells)
Avoiding Problematic Items
Some food scraps can harm your compost bin. Meat, dairy, and oily foods attract pests and cause bad smells. Also, avoid diseased plants and pet waste.
| Items to Avoid | Reason |
|---|---|
| Meat and fish | Attracts pests and causes odor |
| Dairy products | Slows composting and smells bad |
| Oily or greasy foods | Hard to break down and attracts pests |
| Diseased plants | May spread disease in compost |
| Pet waste | Contains harmful bacteria |
Using Compostable Bags
Compostable bags keep your bin clean and reduce mess. Use bags labeled as certified compostable. Avoid plastic or biodegradable bags not made for compost.
- Choose certified compostable bags
- Do not use regular plastic bags
- Empty bags into the compost bin regularly
- Store the bin in a cool, dry place to slow decay
Maintaining Your Compost Bin
Keeping your kitchen compost bin healthy takes regular care. You must check the balance of materials and moisture. Also, turning the compost helps speed up the process.
Good maintenance stops bad smells and pests. It also helps create rich soil faster. Let’s look at key ways to keep your compost bin working well.
Balancing Greens And Browns
Compost needs a mix of green and brown materials. Greens are fresh scraps like vegetable peels. Browns are dry items like paper or leaves.
Too many greens make the bin wet and smelly. Too many browns slow down composting. Aim for a good balance to keep your compost healthy.
- Use about two parts browns for every one part greens
- Add dry leaves, shredded paper, or cardboard as browns
- Use fruit scraps, coffee grounds, and vegetable waste as greens
Managing Moisture Levels
Moisture is key for compost to break down well. The bin should feel like a damp sponge, not soaking wet or dry.
If the compost is too wet, add more browns to soak up the water. If it is too dry, sprinkle water or add fresh green scraps.
- Check moisture weekly by squeezing compost in your hand
- Add dry materials if water drips out
- Spray water lightly if compost feels dry and crumbly
Turning And Aerating Compost
Turning your compost mixes air inside. Air helps bacteria and worms break down materials faster. It also stops bad smells.
Use a small garden fork or a stick to turn the compost every few days. Mix from the outside to the center for best results.
- Turn compost every 3 to 5 days
- Mix well to add oxygen to all parts
- Check for any dry or wet spots and adjust materials
Harvesting And Using Compost
Compost enriches your soil and helps plants grow strong. Knowing when and how to harvest it is key. Using compost correctly improves your garden’s health.
This guide covers signs that compost is ready, harvesting tips, and ways to apply compost in your garden.
Signs Compost Is Ready
Ready compost looks dark and crumbly. It should smell like fresh earth, not rotten or sour. The materials break down into small pieces and no longer look like food scraps or leaves.
- The color is rich brown or black
- Texture is loose and crumbly
- Temperature feels cool or slightly warm
- No bad odors are present
- Original materials are no longer visible
Harvesting Techniques
Harvest compost carefully to keep the good microbes alive. Use a garden fork or shovel to scoop out the finished compost. Avoid digging into unfinished layers.
- Open the compost bin or pile carefully.
- Use a fork to lift the top layer of finished compost.
- Remove any large chunks that need more time.
- Place the finished compost in a bucket or wheelbarrow.
- Cover the remaining compost to keep it moist.
Applying Compost In Your Garden
Compost adds nutrients and improves soil texture. Apply it before planting or as a top layer on existing plants. Mixing compost into the soil helps roots grow well.
| Method | Description | Best Use |
| Soil Mix | Mix compost with soil before planting | Vegetable beds, flower beds |
| Mulching | Spread compost as a top layer | Around trees, shrubs, and garden beds |
| Potting Mix | Combine compost with potting soil | Container plants and seedlings |
| Top Dressing | Sprinkle compost on lawn | Improve grass health and growth |
Troubleshooting Common Issues
Making a kitchen compost bin is easy, but problems can happen. These problems include bad smells, pests, and slow breaking down of waste.
Knowing how to fix these issues keeps your compost bin working well and your kitchen fresh.
Dealing With Odors
Bad smells come from too much wet or smelly food in the bin. This can happen if you add too many fruit scraps or cooked food.
To stop odors, add dry materials like newspaper or dry leaves. Mix the compost often to let air in.
- Use dry brown materials to balance wet food scraps
- Stir the compost every few days for air
- Keep the bin covered but with air holes
- Avoid adding meat, dairy, or oily foods
Preventing Pests
Pests like flies and ants come to the compost if food scraps are exposed. They can also be attracted by strong smells.
Stop pests by keeping the bin sealed and adding food scraps under a layer of dry material.
- Cover food scraps with dry leaves or shredded paper
- Use a bin with a tight lid and small air holes
- Empty the bin regularly to avoid build-up
- Clean the bin if pests appear
Fixing Slow Decomposition
Compost breaks down slowly if it is too dry, too wet, or has little air. Microbes need the right mix to work fast.
Fix slow compost by adding water if dry or dry material if too wet. Turn the compost to add air and speed up decay.
- Keep the compost moist like a wrung-out sponge
- Add green scraps for nitrogen and brown scraps for carbon
- Turn the compost weekly to add oxygen
- Chop large scraps into smaller pieces

Credit: www.amazon.com
Frequently Asked Questions
What Materials Are Best For A Kitchen Compost Bin?
Use biodegradable materials like fruit scraps, vegetable peels, coffee grounds, and eggshells. Avoid meat, dairy, and oily foods to prevent odors and pests.
How Often Should I Empty My Kitchen Compost Bin?
Empty your kitchen compost bin every 2 to 3 days to prevent odors. Regularly transferring scraps helps maintain freshness and speeds up composting.
Where Should I Place My Kitchen Compost Bin?
Place your bin in a convenient, easily accessible spot in the kitchen. A countertop or under-sink area works well for quick disposal of scraps.
How Do I Prevent Odors In A Kitchen Compost Bin?
Avoid adding meat, dairy, and oily foods. Use a bin with a tight lid and add dry materials like shredded paper to absorb moisture.
Conclusion
Creating a kitchen compost bin is simple and rewarding. It reduces waste and enriches your garden. You need a container, some scraps, and a little patience. Follow the steps, and soon you'll see the benefits. Fresh soil, less trash, and a healthier environment.
Composting at home is a small step with big impacts. Share this knowledge with family and friends. Encourage them to start composting too. It's easy and makes a difference. Happy composting!