

Choosing The Right Pot Lights
Pot lights brighten your kitchen. They highlight key work areas. Choosing the correct ones creates a comfortable space.
Think about the type, brightness, color, and size. These choices must fit your kitchen design.
Types of Pot Lights
You can pick from several light types. Each type works best in a specific area.
-
Recessed Lights: They sit in the ceiling for a clean look.
-
Adjustable Lights: You can angle them to focus light.
-
LED Lights: They save energy and last a long time.
-
Halo Lights: They give a soft, even spread of light.
Brightness and Color Temperature
We measure brightness in lumens. Kitchens need bright light for tasks.
| Lumens | Suggested Use |
| 600–800 | General kitchen lighting |
| 800–1,000 | Task lighting over counters |
| 1,000+ | Focused light on specific work areas |
Pick a color temperature that suits your style.
-
2700K–3000K: Warm light feels cozy.
-
3500K–4100K: Neutral light offers clear sight.
-
5000K–6500K: Cool light looks bright and crisp.
Warm colors help you relax. Cool colors help you see details clearly.
Size and Style Options
Pot lights come in different sizes. Choose one that fits your ceiling height.
-
Small lights (3–4 inches): Good for tight spaces.
-
Medium lights (5–6 inches): Works for most kitchens.
-
Large lights (7 inches or more): Best for high ceilings.
Styles range from simple to classic trims. Trim finishes include white, black, bronze, and nickel.
Credit: umbrellageneralsolutions.com
Planning The Layout
Pot lights brighten your kitchen. They highlight key spots. Good planning creates a balanced look. It ensures even light. It avoids dark spots or harsh glare. Start by measuring your space. Then make a simple plan.
Measuring Your Kitchen Space
Measure the length and width of the ceiling. Note any vents or cabinets. Write down the exact size. This helps place the lights right. Always use a tape measure.
Creating A Lighting Map
Draw a simple map of your ceiling. Mark all walls and appliances. Use the map to mark light positions. This helps you see the final setup.
-
Draw the room shape to scale.
-
Mark fixed features like cabinets.
-
Place light points evenly across the ceiling.
Spacing Guidelines
Keep lights evenly spaced for uniform light. Too close spacing wastes energy. It also causes glare. A good rule: space lights half the ceiling height apart. For example, use 4 feet spacing for an 8-foot ceiling.
-
Measure your ceiling height.
-
Divide the height by two for spacing.
-
Keep lights away from the walls.
Focal Points and Task Areas
Pot lights improve kitchen function and style. They are great for brightening kitchens. They make tasks much easier. Focus on work areas and style points.
Illuminating Work Zones
Work zones need clear, bright light. Lights over these areas reduce shadows. This helps you cook safely. Place lights above sinks, stoves, and counters. This makes tasks faster.
Highlighting Kitchen Islands
Kitchen islands are a central focus. Use pot lights to draw attention. They also provide light for meals. Arrange a line of lights above the island. This adds style and function.
-
Space lights 2 to 3 feet apart.
-
Center the lights over the island.
-
Use dimmers to change brightness.
Lighting Around Cabinets and Counters
Lights near cabinets add depth and brightness. They show off your kitchen’s design. Place lights close to upper cabinets. This brightens the counter space. Angle lights well to avoid glare.
Installation Tips
Pot lights give great kitchen lighting. Correct layout makes your space bright and safe. Follow these tips to install them right. This covers wiring and controls.
Wiring and Safety
Wiring lights needs care. It avoids hazards. Use proper cables for kitchens. Keep wires away from water sources. Turn off power at the breaker first. Check all local building rules.
-
Use junction boxes for all connections.
-
Keep wiring neat and secure.
-
Test connections before closing the ceiling.
Recessed vs. Surface Mount
Recessed lights sit flush with the ceiling. They look clean and save space. Surface mount lights hang lower. They are easier to install.
-
Recessed: Sleek, hidden, needs ceiling space.
-
Surface mount: Visible, easier install, looks bigger.
Choose based on your ceiling and style.
Using Dimmers For Flexibility
Dimmers let you change light brightness. They help set the mood. They also save energy. Install dimmers that work with your lights. Test them to prevent buzzing.
-
Choose dimmers for LED bulbs.
-
Use dimmers on your main circuits.
-
Dimmers create bright or soft light.
Avoiding Common Mistakes
Pot lights brighten your kitchen. But poor setup causes problems. Shadows and glare hurt visibility. Uneven light looks bad. Good planning fixes these issues. It balances and spreads light well.
Preventing Shadows and Glare
Shadows make work areas hard to see. Glare strains your eyes. Place lights so they do not shine in your eyes. Use many lights to soften shadows. Angle lights away from shiny surfaces.
-
Keep lights away from the walls.
-
Use dimmers to control brightness.
-
Install lights above work zones, not behind you.
Balancing Ambient and Task Lighting
Ambient light brightens the whole room. Task light focuses on work areas. Balance both for comfort. Do not use only pot lights. Add under-cabinet lights for tasks. Keep ambient lights dimmable for mood changes.
-
Space pot lights evenly for ambient light.
-
Add brighter task lights over counters.
-
Adjust light levels easily with dimmers.
Ensuring Even Light Distribution
Even light stops dark spots. Space lights 4 to 6 feet apart. Keep them at least 2 feet from walls. Use the same bulb power and beam angle. This prevents bright or dull areas.
-
Measure your kitchen size carefully.
-
Plan to cover the entire area.
Enhancing Kitchen Ambiance
Pot lights light up the kitchen well. They give a bright, soft light. This makes the space feel open and clean. The right layout creates a warm feel. It highlights key spots like the island.
Combining Lights With Other Fixtures
Pot lights pair well with other fixtures. Mixing lights adds depth to your look. Use pendants over the island. Add under-cabinet lights for tasks.
-
Pot lights handle general lighting.
-
Pendants add style and focus.
-
Under-cabinet lights help with work.
Using Color and Intensity
Choose light colors to set the mood. Warm white lights feel cozy. Cool white lights look fresh and bright. Adjust brightness for different activities. Dimmers help change light levels easily.
-
Warm light (2700K) is for relaxing.
-
Cool light (4000K) is for cooking.
-
Dimmers offer flexible brightness.
Smart Lighting Controls
Smart lighting works with your phone or voice. Set lights to turn on automatically. You can change colors without switches. This saves energy and adds convenience.
-
Control lights with apps or voice.
-
Set schedules for light times.
-
Adjust brightness remotely.
Credit: trubuildconstruction.com
Frequently Asked Questions
How Far Apart Should Pot Lights Be In A Kitchen?
Pot lights should be spaced about 4 to 6 feet apart. This ensures even lighting without dark spots or excessive glare. Adjust spacing based on ceiling height and kitchen size for optimal brightness.
What Is The Best Layout For Kitchen Pot Lights?
A grid pattern works well, placing lights evenly across the ceiling. Focus on work areas like countertops and islands. Avoid placing lights too close to walls to reduce shadows and enhance illumination.
How Many Pot Lights Are Needed For A Kitchen?
Typically, a kitchen requires 6 to 12 pot lights, depending on size. Larger kitchens need more lights for balanced coverage. Consider task lighting needs and ceiling height when planning the number.
Should Pot Lights Be Dimmable In Kitchens?
Yes, dimmable pot lights offer versatile lighting control. They adjust brightness for cooking, dining, or ambiance. Installing dimmer switches enhances energy efficiency and comfort in your kitchen.
Conclusion
Good pot light layout makes your kitchen bright and clear. Plan spacing well to avoid shadows. Focus lights on work areas like counters. Use dimmers for adjustable brightness. Simple steps make your kitchen feel bigger and cleaner.
Good lighting means safe, comfortable cooking. Take time to place lights correctly. This effort changes your kitchen’s feel and use. Pot lights bring both style and function to your space.
How to Layout Pot Lights in Kitchen: Pro Layout Secrets
Light Up Your Kitchen: Pot Light Layout Secrets
Imagine a bright kitchen. Every surface is perfectly lit. This is the power of well-placed pot lights.
Dream of a bright, inviting kitchen? Getting the light layout right is key. Are you updating a space? Or designing a new one? Knowing How to Layout Pot Lights in Kitchen matters. You will learn to create a beautiful, functional kitchen. Discover the perfect balance of style and use.
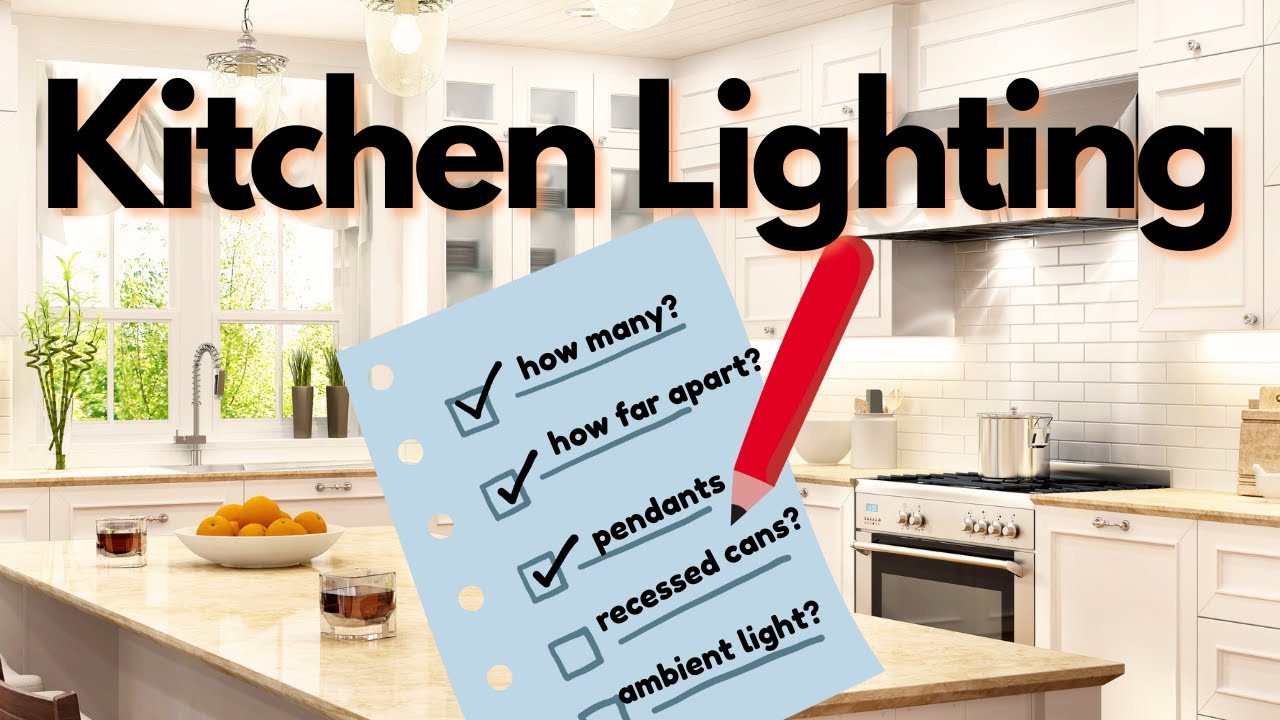
Credit: www.youtube.com
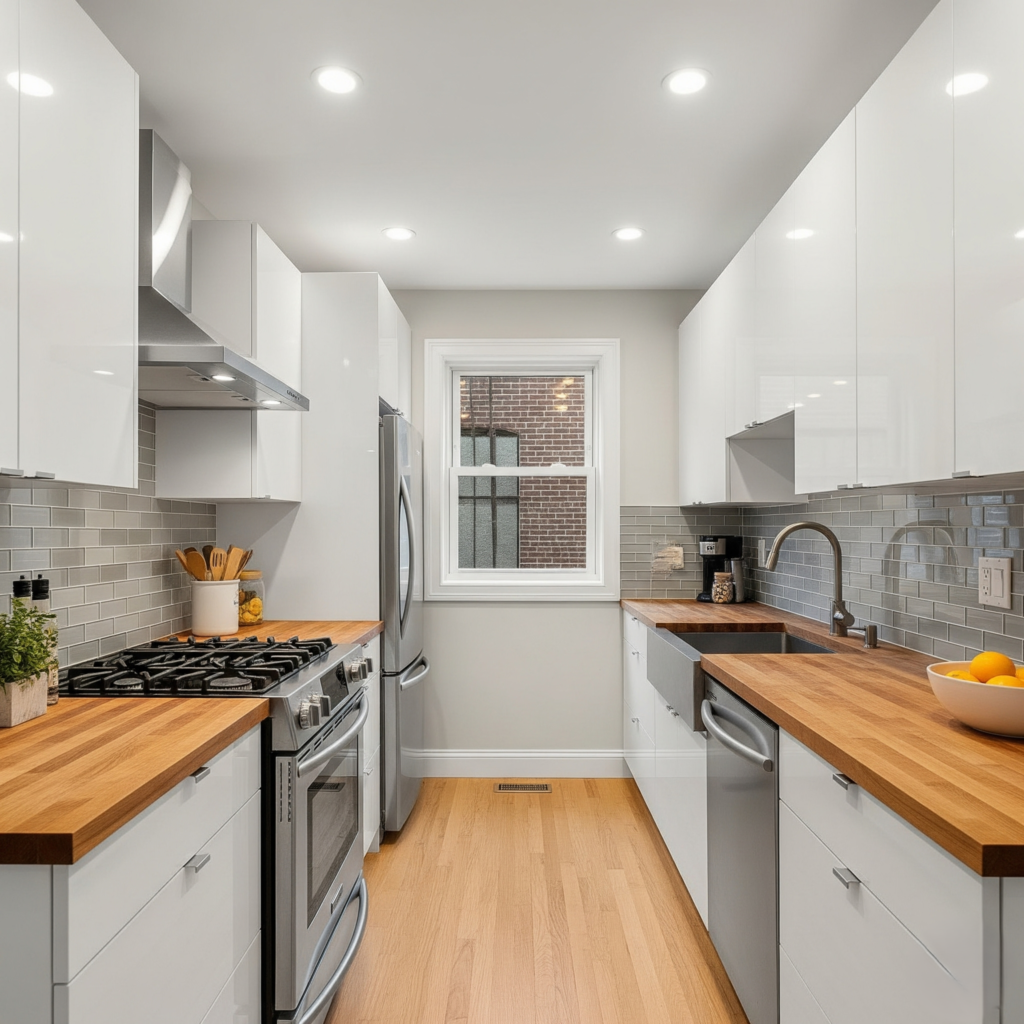
Choosing The Right Pot Lights
Pot lights brighten your kitchen. They highlight key work areas. Choosing the correct ones creates a comfortable space.
Think about the type, brightness, color, and size. These choices must fit your kitchen design.
Types of Pot Lights
You can pick from several light types. Each type works best in a specific area.
-
Recessed Lights: They sit in the ceiling for a clean look.
-
Adjustable Lights: You can angle them to focus light.
-
LED Lights: They save energy and last a long time.
-
Halo Lights: They give a soft, even spread of light.
Brightness and Color Temperature
We measure brightness in lumens. Kitchens need bright light for tasks.
| Lumens | Suggested Use |
| 600–800 | General kitchen lighting |
| 800–1,000 | Task lighting over counters |
| 1,000+ | Focused light on specific work areas |
Pick a color temperature that suits your style.
-
2700K–3000K: Warm light feels cozy.
-
3500K–4100K: Neutral light offers clear sight.
-
5000K–6500K: Cool light looks bright and crisp.
Warm colors help you relax. Cool colors help you see details clearly.
Size and Style Options
Pot lights come in different sizes. Choose one that fits your ceiling height.
-
Small lights (3–4 inches): Good for tight spaces.
-
Medium lights (5–6 inches): Works for most kitchens.
-
Large lights (7 inches or more): Best for high ceilings.
Styles range from simple to classic trims. Trim finishes include white, black, bronze, and nickel.
Credit: umbrellageneralsolutions.com
Planning The Layout
Pot lights brighten your kitchen. They highlight key spots. Good planning creates a balanced look. It ensures even light. It avoids dark spots or harsh glare. Start by measuring your space. Then make a simple plan.
Measuring Your Kitchen Space
Measure the length and width of the ceiling. Note any vents or cabinets. Write down the exact size. This helps place the lights right. Always use a tape measure.
Creating A Lighting Map
Draw a simple map of your ceiling. Mark all walls and appliances. Use the map to mark light positions. This helps you see the final setup.
-
Draw the room shape to scale.
-
Mark fixed features like cabinets.
-
Place light points evenly across the ceiling.
Spacing Guidelines
Keep lights evenly spaced for uniform light. Too close spacing wastes energy. It also causes glare. A good rule: space lights half the ceiling height apart. For example, use 4 feet spacing for an 8-foot ceiling.
-
Measure your ceiling height.
-
Divide the height by two for spacing.
-
Keep lights away from the walls.
Focal Points and Task Areas
Pot lights improve kitchen function and style. They are great for brightening kitchens. They make tasks much easier. Focus on work areas and style points.
Illuminating Work Zones
Work zones need clear, bright light. Lights over these areas reduce shadows. This helps you cook safely. Place lights above sinks, stoves, and counters. This makes tasks faster.
Highlighting Kitchen Islands
Kitchen islands are a central focus. Use pot lights to draw attention. They also provide light for meals. Arrange a line of lights above the island. This adds style and function.
-
Space lights 2 to 3 feet apart.
-
Center the lights over the island.
-
Use dimmers to change brightness.
Lighting Around Cabinets and Counters
Lights near cabinets add depth and brightness. They show off your kitchen’s design. Place lights close to upper cabinets. This brightens the counter space. Angle lights well to avoid glare.
Installation Tips
Pot lights give great kitchen lighting. Correct layout makes your space bright and safe. Follow these tips to install them right. This covers wiring and controls.
Wiring and Safety
Wiring lights needs care. It avoids hazards. Use proper cables for kitchens. Keep wires away from water sources. Turn off power at the breaker first. Check all local building rules.
-
Use junction boxes for all connections.
-
Keep wiring neat and secure.
-
Test connections before closing the ceiling.
Recessed vs. Surface Mount
Recessed lights sit flush with the ceiling. They look clean and save space. Surface mount lights hang lower. They are easier to install.
-
Recessed: Sleek, hidden, needs ceiling space.
-
Surface mount: Visible, easier install, looks bigger.
Choose based on your ceiling and style.
Using Dimmers For Flexibility
Dimmers let you change light brightness. They help set the mood. They also save energy. Install dimmers that work with your lights. Test them to prevent buzzing.
-
Choose dimmers for LED bulbs.
-
Use dimmers on your main circuits.
-
Dimmers create bright or soft light.
Avoiding Common Mistakes
Pot lights brighten your kitchen. But poor setup causes problems. Shadows and glare hurt visibility. Uneven light looks bad. Good planning fixes these issues. It balances and spreads light well.
Preventing Shadows and Glare
Shadows make work areas hard to see. Glare strains your eyes. Place lights so they do not shine in your eyes. Use many lights to soften shadows. Angle lights away from shiny surfaces.
-
Keep lights away from the walls.
-
Use dimmers to control brightness.
-
Install lights above work zones, not behind you.
Balancing Ambient and Task Lighting
Ambient light brightens the whole room. Task light focuses on work areas. Balance both for comfort. Do not use only pot lights. Add under-cabinet lights for tasks. Keep ambient lights dimmable for mood changes.
-
Space pot lights evenly for ambient light.
-
Add brighter task lights over counters.
-
Adjust light levels easily with dimmers.
Ensuring Even Light Distribution
Even light stops dark spots. Space lights 4 to 6 feet apart. Keep them at least 2 feet from walls. Use the same bulb power and beam angle. This prevents bright or dull areas.
-
Measure your kitchen size carefully.
-
Plan to cover the entire area.
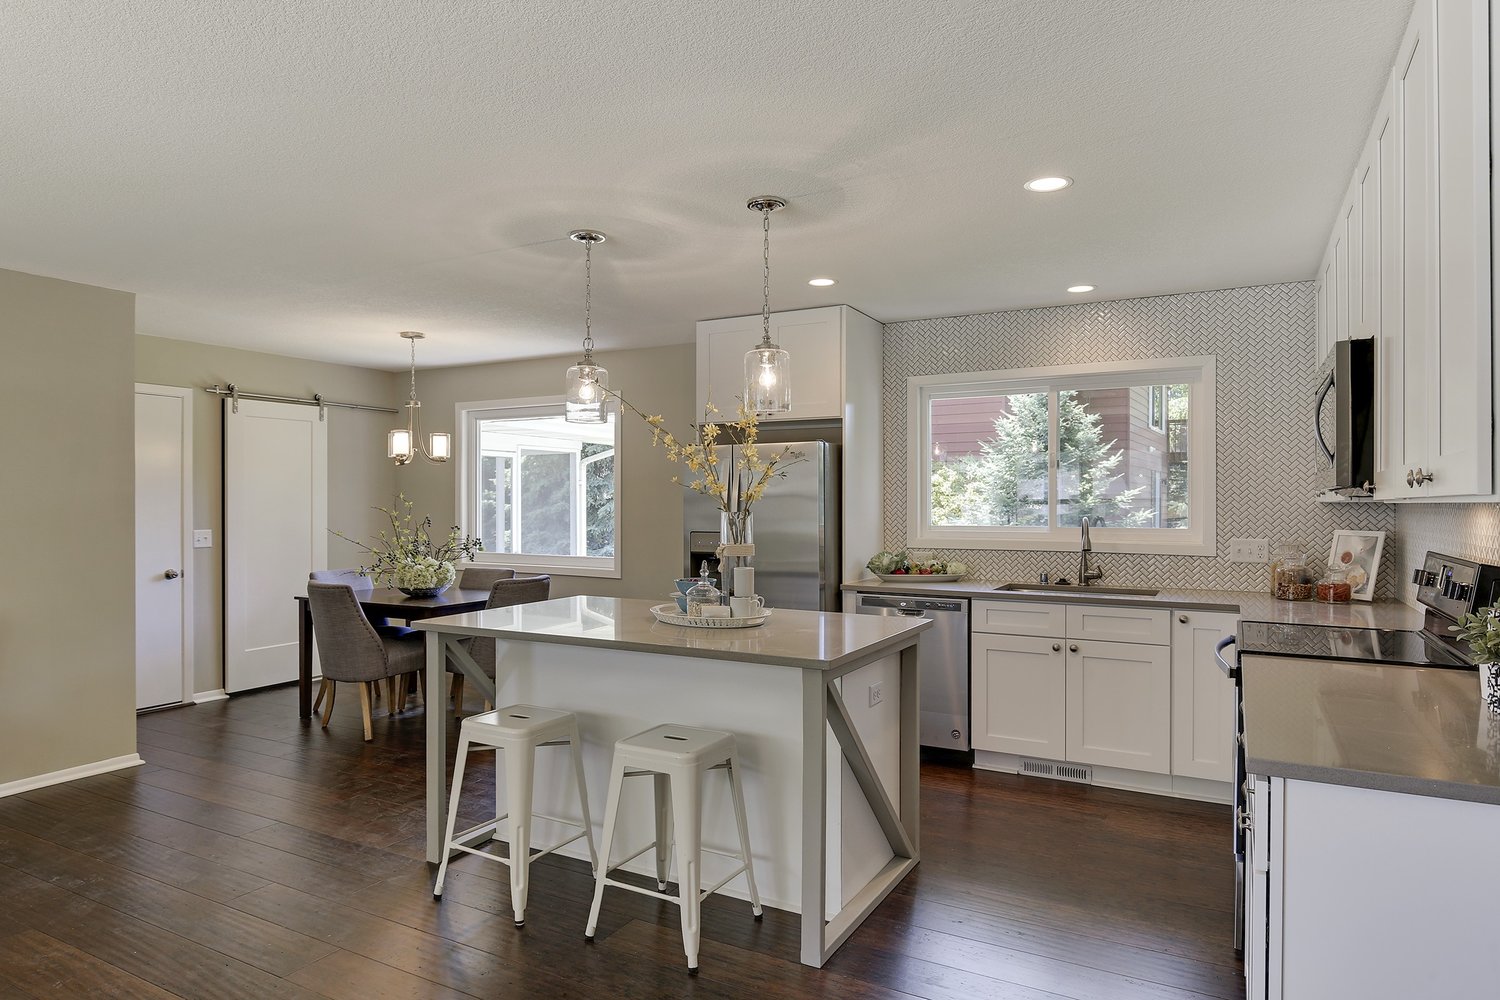
Enhancing Kitchen Ambiance
Pot lights light up the kitchen well. They give a bright, soft light. This makes the space feel open and clean. The right layout creates a warm feel. It highlights key spots like the island.
Combining Lights With Other Fixtures
Pot lights pair well with other fixtures. Mixing lights adds depth to your look. Use pendants over the island. Add under-cabinet lights for tasks.
-
Pot lights handle general lighting.
-
Pendants add style and focus.
-
Under-cabinet lights help with work.
Using Color and Intensity
Choose light colors to set the mood. Warm white lights feel cozy. Cool white lights look fresh and bright. Adjust brightness for different activities. Dimmers help change light levels easily.
-
Warm light (2700K) is for relaxing.
-
Cool light (4000K) is for cooking.
-
Dimmers offer flexible brightness.
Smart Lighting Controls
Smart lighting works with your phone or voice. Set lights to turn on automatically. You can change colors without switches. This saves energy and adds convenience.
-
Control lights with apps or voice.
-
Set schedules for light times.
-
Adjust brightness remotely.
Credit: trubuildconstruction.com
Frequently Asked Questions
How Far Apart Should Pot Lights Be In A Kitchen?
Pot lights should be spaced about 4 to 6 feet apart. This ensures even lighting without dark spots or excessive glare. Adjust spacing based on ceiling height and kitchen size for optimal brightness.
What Is The Best Layout For Kitchen Pot Lights?
A grid pattern works well, placing lights evenly across the ceiling. Focus on work areas like countertops and islands. Avoid placing lights too close to walls to reduce shadows and enhance illumination.
How Many Pot Lights Are Needed For A Kitchen?
Typically, a kitchen requires 6 to 12 pot lights, depending on size. Larger kitchens need more lights for balanced coverage. Consider task lighting needs and ceiling height when planning the number.
Should Pot Lights Be Dimmable In Kitchens?
Yes, dimmable pot lights offer versatile lighting control. They adjust brightness for cooking, dining, or ambiance. Installing dimmer switches enhances energy efficiency and comfort in your kitchen.
Conclusion
Good pot light layout makes your kitchen bright and clear. Plan spacing well to avoid shadows. Focus lights on work areas like counters. Use dimmers for adjustable brightness. Simple steps make your kitchen feel bigger and cleaner.
Good lighting means safe, comfortable cooking. Take time to place lights correctly. This effort changes your kitchen’s feel and use. Pot lights bring both style and function to your space.


