
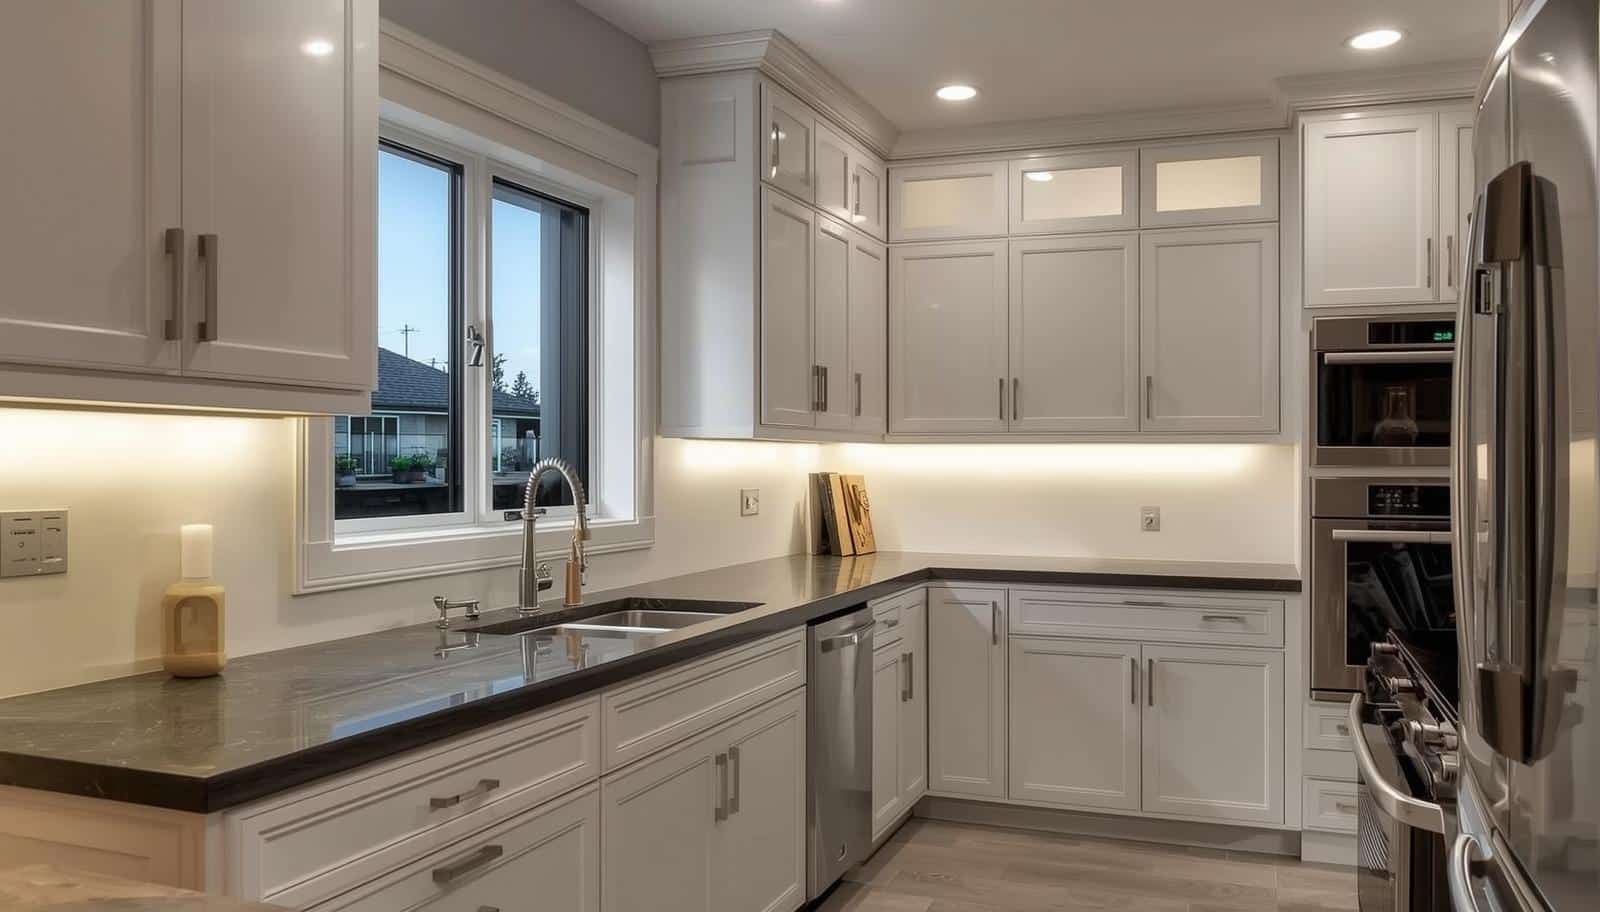
Are you tired of looking at the empty space above your kitchen cabinets? Adding moulding on top of them can transform your kitchen from plain to polished, giving it that high-end, custom look you’ve always dreamed of.
The best part? You can do it yourself! Imagine the satisfaction of stepping back and admiring a job well done, knowing you enhanced your space with your own hands. In this guide, you'll discover simple steps to Install Moulding on Top of Kitchen Cabinets, turning your kitchen into a masterpiece.
Stay with us, and let’s unlock the hidden potential of your kitchen together!
Credit: www.familyhandyman.com
Tools And Materials Needed
Installing moulding on top of kitchen cabinets adds a nice touch. You need the right tools and materials for a smooth job.
Gather everything before you start. This saves time and helps you work safely and efficiently.
Essential Tools
You need some basic tools to install moulding correctly. These tools help you measure, cut, and attach the moulding.
- Measuring tape to get exact lengths
- Miter saw for clean angled cuts
- Hammer or nail gun to attach moulding
- Level to keep moulding straight
- Stud finder to locate cabinet edges
- Wood glue for extra hold
- Sandpaper to smooth cut edges
Choosing The Right Moulding
Pick moulding that matches your kitchen style. The size and shape should fit your cabinets well.
Common moulding types include crown moulding and decorative trim. Choose a wood type that you can paint or stain.
- Simple crown moulding for a classic look
- Decorative trim for added detail
- Pre-primed wood for easy painting
- MDF moulding for a smooth finish
Safety Gear
Wear safety gear to protect yourself while cutting and installing moulding. Safety keeps the job safe and stress-free.
- Safety glasses to protect your eyes
- Ear protection against loud saw noise
- Dust mask to avoid inhaling wood dust
- Work gloves to protect your hands
Preparing The Cabinets
Installing moulding on top of kitchen cabinets needs careful preparation. This step helps the moulding fit well and look good.
Start by making sure the cabinet surface is clean and smooth. Then, measure the space accurately. Finally, mark the cut lines clearly on the moulding.
Cleaning The Surface
Remove all dust, grease, and dirt from the top of the cabinets. Use a damp cloth and mild cleaner to wipe the area. Let it dry completely before moving on.
Measuring The Space
Use a tape measure to find the length and width where the moulding will go. Measure carefully along each cabinet top edge. Write down each measurement.
- Measure the front edge of each cabinet section.
- Measure any corner or side spaces.
- Double-check your numbers for accuracy.
Marking Cut Lines
Use a pencil and a straight edge to mark cut lines on the moulding. Mark where each piece should be cut to fit the cabinet tops.
| Tool | Purpose |
|---|---|
| Pencil | Mark cut lines on moulding |
| Straight Edge | Draw straight, clear lines |
| Miter Saw | Cut moulding at marked lines |
Cutting The Moulding
Cutting moulding correctly is key to a neat look on top of kitchen cabinets. Accurate cuts help the moulding fit well and look professional.
This guide covers how to measure, use a miter saw, and handle corners and angles when cutting moulding.
Measuring For Accurate Cuts
Measure the length of the area where the moulding will go. Use a tape measure to get exact numbers. Mark the moulding with a pencil before cutting.
Double-check your measurements to avoid mistakes. Cut a bit longer if unsure, you can always trim later.
Using A Miter Saw
A miter saw makes angled cuts easy and precise. Set the saw blade to the correct angle based on your measurements. Always wear safety glasses while cutting.
Hold the moulding firmly against the saw fence. Cut slowly and steadily to avoid splintering the wood.
Handling Corners And Angles
Inside and outside corners need special cuts called miters. Measure the corner angle with a protractor or angle finder. Adjust the saw to half of that angle for each piece.
- Inside corners usually require a 45-degree cut each.
- Outside corners also need 45-degree cuts but in the opposite direction.
- Check fit before final installation and trim if needed.
Credit: www.familyhandyman.com
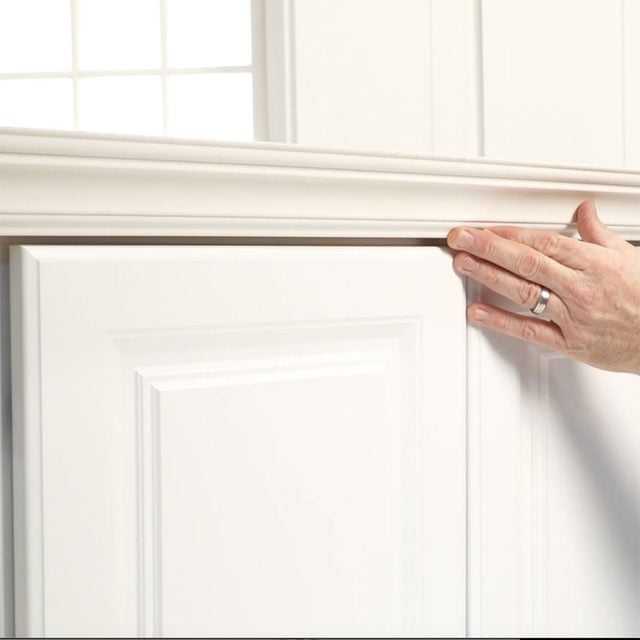
Attaching The Moulding
Installing moulding on top of kitchen cabinets adds a nice finish. It hides gaps and makes cabinets look taller.
Attaching the moulding properly is important for a neat and lasting look. Use the right tools and steps.
Applying Adhesive
Apply adhesive to the back of the moulding before placing it on the cabinet. This helps hold the moulding in place.
Use a strong wood glue or construction adhesive. Spread it evenly for a good bond.
- Use a caulking gun for easy application
- Apply adhesive in a thin, continuous line
- Avoid using too much to prevent mess
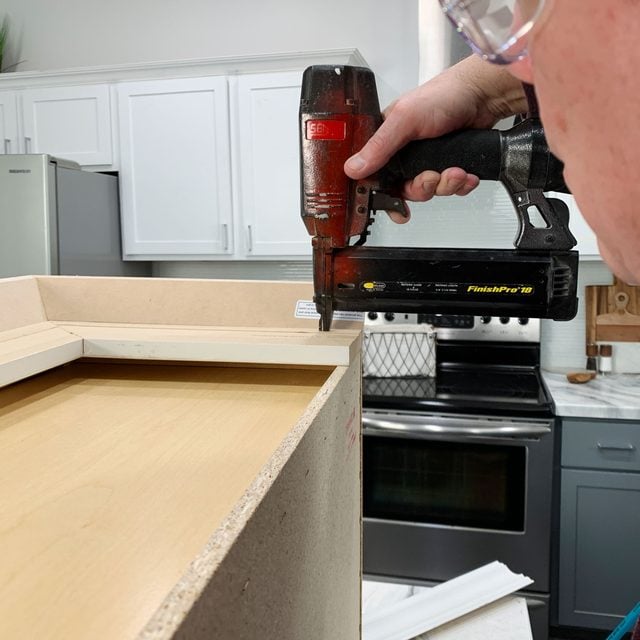
Nailing The Moulding
After placing the moulding, secure it with nails. This keeps it steady while the adhesive dries.
Use finishing nails and a hammer or nail gun. Nail at an angle to avoid splitting the moulding.
- Space nails about 12 inches apart
- Drive nails into cabinet frame, not just the plywood
- Use a nail set to countersink nails slightly
Ensuring A Secure Fit
Check the moulding for gaps or loose spots after nailing. Press and adjust as needed for a tight fit.
Fill nail holes and gaps with wood filler. Sand smooth when dry for a clean finish.
- Use clamps if moulding lifts from cabinet
- Wipe off excess adhesive before it dries
- Allow adhesive to cure fully before painting
Finishing Touches
Installing moulding on top of kitchen cabinets gives your kitchen a polished look. The final steps ensure the moulding blends well with your cabinets. These steps include filling gaps, sanding, and finishing with paint or stain.
Proper finishing makes the moulding look professional and protects it from damage. Take time to complete each step carefully.
Filling Gaps And Nail Holes
After attaching the moulding, you will see small gaps and nail holes. Filling these imperfections improves the look and prevents dirt from collecting.
- Use wood filler that matches your moulding color.
- Apply filler with a putty knife into each gap and hole.
- Wipe away excess filler before it dries.
- Let the filler dry fully according to instructions.
- Check if more filling is needed and repeat if necessary.
Sanding For Smoothness
Sanding smooths the filled areas and the moulding surface. It helps the paint or stain stick better and creates a clean finish.
| Tool | Use |
| Fine-grit sandpaper (220 grit) | Smooth filled gaps and nail holes |
| Medium-grit sandpaper (150 grit) | Even out rough moulding edges |
| Sanding block or sponge | Hold sandpaper flat for even sanding |
Sand lightly and evenly to avoid damage. Remove dust with a dry cloth before painting or staining.
Painting Or Staining
Choose paint or stain that matches your kitchen cabinets. Proper finishing protects the moulding and completes the look.
- Apply a primer if you use paint for better adhesion.
- Use a brush or small roller for even coverage.
- Apply thin coats and let each dry fully before next coat.
- For stain, wipe off excess with a clean cloth.
- Finish with a clear sealant for protection if needed.
Common Mistakes To Avoid
Installing moulding on top of kitchen cabinets can improve the room's look. It takes careful work to do it right. Avoiding common mistakes saves time and money.
Read these tips to learn what to watch out for during your project. Fixing errors later can be hard and costly.
Incorrect Measurements
Wrong measurements cause gaps or uneven moulding. Always measure twice to get the right length and angles. Use a reliable tape measure and mark cuts clearly.
- Measure the cabinet top width carefully.
- Account for corners and joints precisely.
- Check your marks before cutting the moulding.
- Use a miter saw for clean angled cuts.
Poor Adhesion
Bad glue or nails can make moulding fall off. Prepare the surface before attaching. Clean dust and grease from cabinet tops.
| Adhesive Type | Best Use |
| Wood glue | Strong bond for wood moulding |
| Construction adhesive | Good for heavy or large mouldings |
| Finish nails | Secure moulding while glue dries |
Use the right adhesive for your moulding type. Add finish nails to hold moulding firmly in place until the glue sets.
Ignoring Safety Precautions
Safety matters during installation. Wear eye protection and gloves. Use tools carefully to avoid injury.
- Wear safety glasses to protect your eyes.
- Use gloves to avoid splinters and cuts.
- Keep your work area clean and well-lit.
- Follow the tool instructions exactly.
Tips For A Professional Look
Installing moulding on top of kitchen cabinets adds a polished finish. It makes your kitchen look complete and well-designed.
Simple steps can help you get a clean and professional result. Use the right tools and techniques for the best effect.
Matching Moulding Style To Cabinets
Choose moulding that fits the style of your cabinets. This keeps the kitchen design balanced and attractive.
For classic cabinets, select traditional moulding with curves. For modern cabinets, pick straight and simple moulding.
- Match wood type and color for a uniform look
- Use similar finishes to blend moulding and cabinets
- Consider the kitchen’s overall style before choosing moulding
Using Caulk For Seamless Edges
Caulk fills gaps between moulding and cabinets. This hides any uneven edges and creates a smooth finish.
Apply caulk carefully and wipe away the extra with a damp cloth before it dries. This keeps the look neat and clean.
- Use paintable caulk to match moulding color
- Apply a thin, even bead along all edges
- Smooth the caulk with a finger or tool for best results
Regular Maintenance
Keep moulding looking fresh by cleaning it regularly. Dust and grease can build up and make it look dull.
Check for cracks or damage, and fix them quickly. This prevents bigger problems and keeps moulding secure.
- Dust moulding weekly with a soft cloth
- Use mild soap and water to clean grease spots
- Touch up paint or caulk as needed to cover wear
Credit: www.familyhandyman.com
Frequently Asked Questions
What Tools Are Needed To Install Moulding On Cabinets?
You need a miter saw, measuring tape, nail gun, wood glue, level, and safety glasses. These tools ensure precise cuts and secure installation.
How Do I Measure Moulding For Kitchen Cabinets?
Measure the top perimeter of the cabinets accurately. Add extra inches for mitered corners to ensure perfect fitting moulding pieces.
Can I Install Moulding Without Professional Help?
Yes, with basic carpentry skills and proper tools, you can install moulding yourself. Follow step-by-step instructions carefully for best results.
What Type Of Moulding Is Best For Kitchen Cabinets?
Crown moulding or decorative trim works best. Choose moisture-resistant materials like MDF or hardwood for durability in kitchen environments.
Conclusion
Adding moulding on top of kitchen cabinets improves your kitchen’s look. It fills empty space and makes cabinets feel taller. Measure carefully and cut pieces to fit well. Use nails and glue to hold moulding firmly in place. Take your time to avoid mistakes.
A neat finish gives your kitchen a fresh, clean style. This simple project can make a big difference. Enjoy your upgraded kitchen space every day. Easy steps, great results.


