Are you frustrated with your kitchen clutter? Wondering how you can maximize your wall space with a kitchen rack that’s longer than the standard studs?
You’re not alone. Many homeowners face this challenge and often find themselves unsure of where to start. But here’s the good news: How to Install Kitchen Rack when it surpasses the length of your wall studs is not only possible but also simpler than you might think. With the right approach, you can create a sturdy, stylish storage solution that works perfectly in your space.
By following some clever techniques, you can transform your kitchen into an organized haven. This guide will walk you through each step, ensuring your rack is securely mounted and ready to hold all your kitchen essentials. Don’t miss out on these practical tips that could revolutionize your kitchen space. Let’s dive in and get your kitchen looking stylish and efficient!

Credit: www.reddit.com
Tools And Materials Needed
Installing a kitchen rack longer than the studs takes careful planning. Using the right tools and materials makes the job easier and safer.
This guide lists the essentials you need before you start the installation. Prepare everything to avoid delays and mistakes.
Basic Tools
Gather these tools to handle measurement, drilling, and mounting tasks efficiently.
- Stud finder to locate wall studs accurately
- Measuring tape for precise length and width checks
- Level to ensure the rack is straight and balanced
- Electric drill with drill bits for making holes
- Screwdriver or screw gun for securing screws
- Hammer for any minor adjustments
- Safety glasses to protect your eyes while drilling
Materials For Installation
Choose sturdy materials that can support the weight of your kitchen rack and contents.
| Material | Purpose | Notes |
| Wall anchors or toggle bolts | Support rack where no studs are available | Use heavy-duty types for safety |
| Wood screws | Attach rack to wall studs | Length depends on wall thickness |
| Mounting brackets | Hold the rack securely on the wall | Match size to rack and wall type |
| Kitchen rack | Main item to install | Longer than stud spacing |
| Studs (optional) | For additional support if needed | Can add horizontal support between studs |
Safety Gear
Protect yourself with these items during installation.
- Gloves to protect your hands from sharp edges
- Dust mask to avoid inhaling dust during drilling
- Work boots to protect feet from falling objects
Locating Wall Studs
Installing a kitchen rack longer than the wall studs needs strong support. You must find the studs first. Studs are vertical wooden beams behind the wall. They hold heavy items well.
Knowing where the studs are helps to fix the rack securely. This guide explains two ways to find wall studs. Use tools or simple tricks to find them.
Using A Stud Finder
A stud finder is a small tool that detects wood behind the wall. It helps you find the exact location of studs quickly. This tool saves time and effort.
Hold the stud finder flat against the wall. Slowly move it horizontally. The device will beep or light up when it finds a stud. Mark the spot with a pencil. Repeat to find all studs along the rack area.
- Use fresh batteries for accurate results
- Calibrate the tool before each use
- Check for electrical wires to avoid damage
- Mark the edges of the stud for better rack support
Manual Detection Techniques
You can find studs without tools by using simple methods. These tricks help when you do not have a stud finder. Look closely at your wall for signs of studs.
Start by tapping the wall with your knuckles. A hollow sound means no stud. A solid sound means wood is behind the wall. Also, look for nails or screws on baseboards or trim. They usually mark stud locations.
- Measure 16 or 24 inches from a corner; studs often follow these distances
- Look for electrical outlets or switches; they are usually attached to studs
- Use a small nail to test suspected spots gently
- Use a flashlight to see dimples or lines in the wall paint where drywall is fastened
Measuring And Marking The Rack Position
Installing a kitchen rack longer than the studs needs careful measuring. Correct marking helps make the rack strong and level.
This guide covers how to measure the right height and mark stud locations before installation.
Determining Rack Height
Choose a height that fits your kitchen needs. Consider what you will store and reach easily.
- Measure from the floor to where the bottom of the rack will be.
- Check if the rack will block windows or switches.
- Adjust height so the rack is comfortable to use.
- Mark the chosen height lightly on the wall with a pencil.
Marking Stud Locations On The Wall
Studs provide strong support for heavy racks. Find and mark them clearly.
| Tool | Purpose |
|---|---|
| Stud Finder | Detects studs behind drywall |
| Measuring Tape | Measures distance between studs |
| Pencil | Marks stud locations on the wall |
Use a stud finder to locate the edges of each stud. Mark the center point for screws.
- Start at one end of the rack’s length.
- Move the stud finder slowly along the wall.
- Mark each stud center at the rack height line.
- Measure 16 inches between marks if studs are not detected.
Credit: grassrootsmotorsports.com
Choosing Appropriate Anchors
Installing a kitchen rack longer than wall studs needs strong anchors. Choosing the right anchors keeps the rack safe and steady.
This guide explains the best anchors for stud and non-stud areas. Use anchors that fit your wall type and rack size.
Anchors For Stud Areas
Studs are wooden or metal supports behind the wall. Anchors that go into studs hold more weight.
Use screws or lag bolts to fasten the rack to studs. They provide a strong, secure hold for heavy racks.
- Find studs with a stud finder or tap the wall to listen for solid areas.
- Use screws at least 2 inches long to reach deep into the stud.
- Lag bolts work well for very heavy racks.
- Pre-drill holes to avoid splitting wood studs.
Anchors For Non-stud Areas
Some parts of the rack may hang where no studs exist. Use special wall anchors in these spots.
Wall anchors spread the load across drywall or plaster. They stop the rack from pulling out or falling.
- Toggle bolts are strong and expand behind the wall for good support.
- Molly bolts expand inside the wall and lock tightly.
- Plastic or metal drywall anchors are good for light racks.
- Match anchor size to the rack’s weight and screw size.
Mounting The Rack Brackets
Installing a kitchen rack longer than the wall studs needs careful mounting. Proper bracket placement is key to support the rack safely.
This guide explains how to mount rack brackets by securing them to studs or using anchors on drywall for extra support.
Securing To Studs
Studs provide the strongest support for heavy racks. Find the studs behind the wall using a stud finder before you start.
Mark the stud locations and position the brackets so they line up with the studs. Use long screws to fasten the brackets into the studs securely.
- Locate studs with a stud finder
- Mark stud centers on the wall
- Align brackets over the marked studs
- Use screws long enough to reach the stud
- Tighten screws until brackets feel secure
Using Anchors On Drywall
If the rack extends beyond the studs, use drywall anchors to support the brackets. Anchors hold the screws firmly in drywall.
Choose anchors rated for the rack weight. Drill holes for the anchors, insert them, and then screw the brackets into the anchors.
- Select anchors that support heavy loads
- Drill holes matching the anchor size
- Insert anchors fully into the holes
- Place brackets and align screw holes
- Drive screws into anchors until tight
Installing The Kitchen Rack
Installing a kitchen rack that is longer than the studs can be tricky. You need to make sure it is strong and secure.
This guide will help you install the rack safely and correctly on your kitchen wall.
Locate The Studs On The Wall
Use a stud finder to find the studs behind the wall. Mark each stud with a pencil.
Studs are usually 16 or 24 inches apart. Knowing their position is important for support.
Measure And Mark The Rack Position
Hold the kitchen rack on the wall where you want to place it. Measure its length carefully.
Mark the top edge of the rack on the wall with a pencil. Make sure the rack is level.
Use A Support Board For Extra Strength
If the rack is longer than the studs, use a wooden board to add support. Attach the board horizontally across the studs.
This board will spread the weight and help hold the rack firmly.
- Cut a board to the rack’s length
- Screw the board into the studs
- Make sure the board is level
Attach The Kitchen Rack To The Wall
Use long screws to fix the kitchen rack to the studs or the support board. Screws must go deep into the wood.
Check that the rack is level and tighten all screws securely.
- Use a drill to make pilot holes
- Insert screws into the holes
- Secure the rack firmly
Test The Stability Of The Rack
After installation, gently pull and push the rack to check its strength.
The rack should not wobble or feel loose. If it does, tighten the screws more.
Testing Rack Stability
After installing a kitchen rack longer than the studs, checking its stability is key. This ensures safety and prevents damage.
Testing the rack helps confirm it can hold weight without shifting or falling.
Check For Secure Attachment
Start by gently pushing the rack from different sides. It should not move or wiggle.
Apply Weight Gradually
Place items slowly on the rack to test how it holds weight. Begin with light objects and increase the load.
Inspect Wall Anchors And Brackets
Check all screws, anchors, and brackets for tightness. Loose parts reduce stability and risk damage.
Signs Of Instability To Watch For
- Visible gaps between rack and wall
- Movement or swaying when touched
- Strain marks or cracks near anchors
- Creaking sounds under weight
Use A Level To Confirm Alignment
Place a level tool on the rack to ensure it sits straight. A tilted rack can cause items to slide off.
| Level Position | Expected Result |
|---|---|
| Horizontal | Bubble centered |
| Vertical | Bubble centered |
Tips For Long-term Support
Installing a kitchen rack longer than the studs requires careful planning. Proper support ensures safety and durability.
This guide offers tips to help you provide strong, lasting support for your extended kitchen rack.
Locate Additional Support Points
Studs often do not cover the full length of a long kitchen rack. Find extra support points to keep the rack stable.
Use a stud finder to locate all studs and secure the rack at multiple points. Consider adding wall anchors or brackets where needed.
Use Strong Mounting Hardware
Choose screws and anchors rated for heavy loads. This hardware keeps your kitchen rack firmly attached to the wall.
- Use lag bolts for wooden studs
- Install toggle bolts for drywall areas without studs
- Consider metal brackets for extra strength
- Check weight capacity of all hardware
Reinforce With A Support Frame
Adding a support frame beneath the rack can spread weight evenly. This reduces stress on individual studs.
Example of a simple support frame:
- Attach horizontal cleats to studs
- Mount vertical supports under the rack
- Secure the rack onto the frame
Check For Wall Material And Condition
Different walls need different support methods. Drywall, plaster, and brick require specific anchors and techniques.
| Wall Type | Recommended Support | Notes |
| Drywall | Toggle bolts, molly bolts | Use with studs if possible |
| Plaster | Plastic anchors, toggle bolts | Drill carefully to avoid cracks |
| Brick or Concrete | Masonry anchors, sleeve anchors | Use hammer drill for holes |

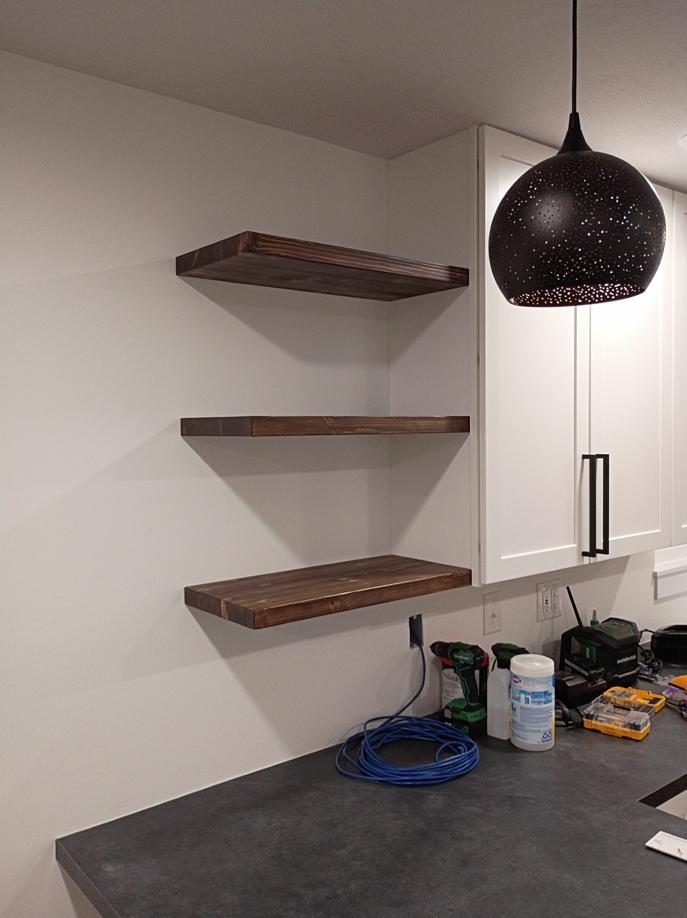
Credit: www.roomix.com
Frequently Asked Questions
How Do I Find Studs For A Longer Kitchen Rack?
Use a stud finder to locate studs behind the wall. Mark the edges and center of each stud for accurate placement. Measure and plan the rack’s length accordingly to align with multiple studs for strong support.
Can I Install A Kitchen Rack Without Studs?
Yes, but it requires heavy-duty wall anchors or toggle bolts. These provide extra grip in drywall when studs are not available. However, mounting on studs is always more secure for heavier kitchen racks.
What Tools Are Needed To Install A Longer Kitchen Rack?
You need a stud finder, drill, level, screwdriver, tape measure, and appropriate screws or anchors. These tools help ensure precise alignment and secure attachment of the rack to the wall studs.
How To Secure A Kitchen Rack Longer Than Available Studs?
Use a mounting board or horizontal support attached to studs. Then, fix the kitchen rack to this board, distributing weight evenly. This method offers stability even if the rack exceeds stud spacing.
Conclusion
Installing a kitchen rack longer than studs takes careful planning. Use strong anchors and support brackets for stability. Measure and mark stud locations before drilling. Secure the rack firmly to avoid accidents. This method ensures your rack holds weight safely.
Now, your kitchen has extra storage space. Enjoy an organized, tidy cooking area that lasts. Simple steps lead to great results.