Are you looking to add a touch of elegance to your kitchen without a full remodel? Installing Crown Moulding on Kitchen Cabinets is a simple and effective way to give your space a polished, custom look.
You don’t need to be a professional carpenter to do this—you just need the right tools, a bit of patience, and clear instructions. In this guide, you’ll learn exactly how to install crown moulding on your kitchen cabinets step-by-step, saving money and boosting your kitchen’s style.
Ready to transform your cabinets and impress everyone who walks into your kitchen? Let’s get started!
Tools And Materials Needed
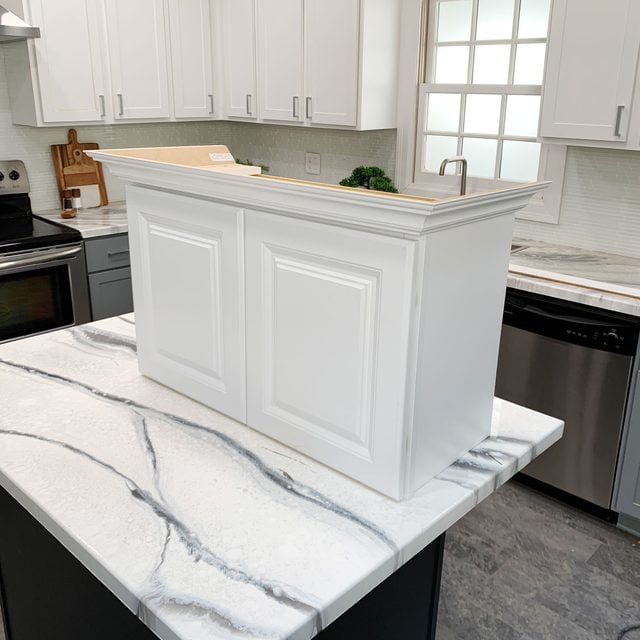
Installing crown moulding on kitchen cabinets gives a polished look to your space. You need the right tools and materials for a smooth job. This guide lists what you will need to get started.
Be sure to gather all items before you begin. This will save time and help avoid mistakes during installation.
Essential Tools
- Miter saw for precise angled cuts
- Measuring tape for accurate dimensions
- Level to keep moulding straight
- Nail gun or hammer with finishing nails
- Stud finder to locate wall studs
- Caulk gun for sealing gaps
- Sandpaper to smooth edges
- Safety glasses and gloves for protection
Choosing The Right Crown Moulding
| Type | Material | Style | Price Range |
| Basic | MDF or pine | Simple, flat design | Low |
| Decorative | Wood or polyurethane | Detailed and ornate | Medium |
| Flexible | Polyurethane | Curved or irregular shapes | Medium to High |
| Custom | Wood | Handcrafted designs | High |
Pick moulding that fits your kitchen style and budget. Measure your cabinets carefully to buy enough material.
Additional Supplies
You also need some extra items to finish the job cleanly. These supplies help with fitting and finishing the moulding.
- Wood filler to cover nail holes
- Paint or stain to match cabinets
- Painters tape to protect surfaces
- Drop cloth to catch debris
- Caulk for filling small gaps
- Putty knife for applying filler
Credit: www.familyhandyman.com
Preparing The Kitchen Cabinets
Installing crown moulding on kitchen cabinets starts with good preparation. This step ensures the moulding fits well and looks neat.
Focus on cleaning, measuring, and marking before attaching the moulding. These tasks save time and avoid mistakes later.
Cleaning And Clearing The Surface
Clean your cabinet tops and edges to remove dust, grease, and dirt. A clean surface helps the moulding stick better and hold firmly.
- Use a mild cleaner and a soft cloth to wipe the surfaces.
- Remove any items on top of the cabinets.
- Check for loose nails or screws and tighten them.
- Let the cabinets dry completely before proceeding.
Measuring The Cabinets
Measure the length of each cabinet top where the moulding will go. Accurate measurements help you cut the moulding correctly.
| Cabinet Section | Length (inches) | Notes |
| Left Side | 36 | Near the window |
| Center Section | 48 | Main cabinet area |
| Right Side | 24 | Next to the fridge |
Marking The Moulding Placement
Mark where the crown moulding will attach to guide your installation. Use a pencil and a level to make straight, even marks.
- Place a level along the cabinet top edge.
- Draw a light pencil line where the bottom of the moulding will sit.
- Mark corners and joints clearly for accurate cuts.
- Double-check all marks before cutting or nailing.
Cutting The Crown Moulding
Cutting crown moulding for kitchen cabinets needs care and accuracy. This step shapes the moulding to fit perfectly on your cabinets.
Using the right tools and techniques ensures clean cuts and a professional look. Let’s look at how to measure, cut, and handle corners.
Measuring And Marking Cuts
Measure the length of the cabinet edges where the moulding will go. Always measure twice to avoid mistakes.
Mark the cut lines clearly on the back of the moulding. Use a pencil and a ruler or a square for straight lines.
- Measure from corner to corner carefully
- Mark the cut line on the moulding’s back side
- Use a square tool to keep lines straight
- Double-check all measurements before cutting
Using A Miter Saw
A miter saw helps make angled cuts needed for crown moulding. Set the saw to the correct angle before cutting.
Hold the moulding firmly against the saw fence. Cut slowly and follow the marked lines closely for a clean edge.
- Set the miter saw to the needed angle
- Place moulding firmly against the fence
- Cut along the pencil line slowly and steadily
- Wear safety goggles to protect your eyes
Handling Inside And Outside Corners
Inside corners require the moulding ends to be cut at opposite angles so they fit tightly. Outside corners need cuts that wrap around the corner.
Use your miter saw to cut the angles. Check the fit by placing the pieces together before final installation.
- Inside corners: cut one piece at a positive angle, the other at a negative angle
- Outside corners: cut both pieces at complementary angles
- Test fit pieces before attaching
- Make small adjustments if needed for a tight fit
Attaching The Crown Moulding
Attaching crown moulding to kitchen cabinets adds a polished look. It requires careful steps to ensure a secure fit and neat finish.
Use the right tools and materials to make the process easier. Follow each step to attach the moulding firmly.
Applying Adhesive
Start by applying a strong wood adhesive to the back edge of the crown moulding. This helps hold the moulding in place before nailing.
Spread the adhesive evenly to avoid lumps. Press the moulding gently against the cabinet top to secure the bond.
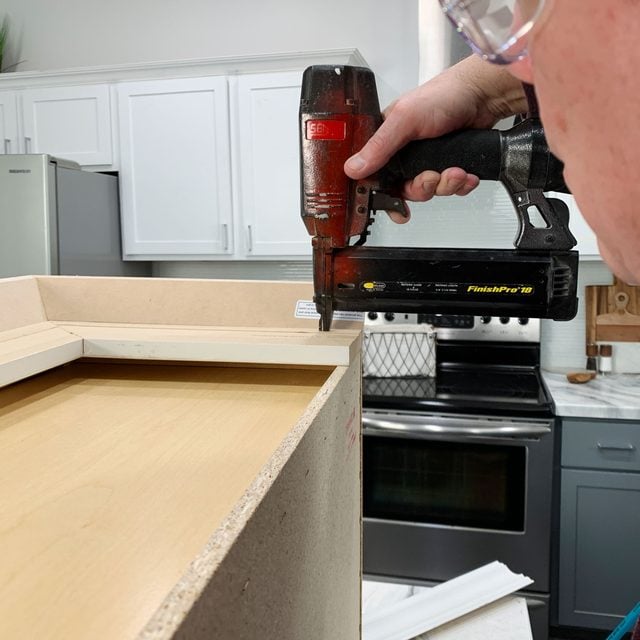
Nailing The Moulding
Use finishing nails to fasten the moulding to the cabinets. Nailing keeps the moulding tight while the adhesive dries.
- Place the moulding on the cabinet edge.
- Use a nail gun or hammer to drive nails through the moulding into the cabinet frame.
- Space nails about 12 inches apart for strong support.
- Drive nails at an angle to hold the moulding firmly.
- Fill any nail holes with wood filler for a smooth finish.
Securing Corners And Joints
Corners and joints need extra care to look seamless and hold well. Use clamps or tape to keep pieces tight while they dry.
| Type of Joint | Method to Secure | Tip |
|---|---|---|
| Inside Corner | Apply adhesive and use a clamp until dry | Cut moulding at 45-degree angles for a tight fit |
| Outside Corner | Use finishing nails along with adhesive | Check alignment before nailing |
| Straight Joint | Glue and nail both pieces securely | Sand the joint smooth after drying |
Finishing Touches
Adding crown moulding to kitchen cabinets gives a polished look. The finishing touches make it look clean and professional.
These steps help hide imperfections and prepare the moulding for a perfect finish.
Filling Nail Holes And Gaps
Use wood filler to cover all nail holes in the crown moulding. This makes the surface smooth and even.
Fill any gaps between the moulding and cabinets with caulk. This hides spaces and prevents dust build-up.
- Apply wood filler with a putty knife
- Let it dry completely
- Use paintable caulk for gaps
- Smooth caulk with a wet finger or tool
Sanding Smooth
After the filler and caulk dry, sand the moulding gently. This removes bumps and rough edges.
Use fine-grit sandpaper for a smooth finish. Wipe off dust with a clean cloth before painting.
- Start with 120-grit sandpaper
- Finish with 220-grit for smoothness
- Sand along the grain to avoid scratches
- Clean dust before next step
Painting Or Staining
Choose paint or stain that matches your kitchen decor. This protects the moulding and improves its look.
Apply paint or stain evenly with a brush. Let it dry fully before adding a second coat if needed.
- Use primer if painting over bare wood
- Apply thin, even coats
- Allow drying time between coats
- Use a topcoat for extra protection

Credit: www.thisoldhouse.com
Tips For A Professional Look
Adding crown moulding to kitchen cabinets gives your space a polished look. Proper installation makes a big difference in appearance.
This guide shares key tips to help you install crown moulding cleanly and neatly on different cabinet styles.
Working With Different Cabinet Styles
Cabinets come in many styles such as shaker, flat panel, and raised panel. Each style needs a slightly different approach for crown moulding.
- For shaker cabinets, keep moulding simple to match the clean lines.
- Flat panel cabinets work well with wide, flat crown moulding.
- Raised panel cabinets pair nicely with ornate or layered moulding for extra detail.
- Measure the cabinet height and depth accurately before cutting the moulding.
Avoiding Common Mistakes
Many mistakes can ruin the look of crown moulding. Avoid gaps, uneven edges, and poor fastening.
- Always measure twice and cut once to avoid wrong cuts.
- Use a miter saw to get clean corner angles.
- Fill nail holes and gaps with wood filler for a smooth finish.
- Check that the moulding is level before nailing it to cabinets.
- Sand and paint or stain the moulding before installation.
Maintaining The Crown Moulding
Proper care keeps your crown moulding looking fresh and lasts longer. Cleaning and touch-ups are important.
| Task | Frequency | Tips |
|---|---|---|
| Dusting | Weekly | Use a soft cloth or feather duster |
| Cleaning | Monthly | Wipe with mild soap and water, dry immediately |
| Touch-up Paint/Stain | As needed | Match original color and apply thin coats |
| Check for Damage | Every 6 months | Look for cracks or loose pieces and fix quickly |
Credit: www.familyhandyman.com
Frequently Asked Questions
What Tools Are Needed To Install Crown Moulding On Cabinets?
You need a miter saw, measuring tape, nail gun, wood glue, caulk, and a level. These tools ensure precise cuts and secure installation.
How Do You Measure For Crown Moulding On Cabinets?
Measure the length of each cabinet top edge carefully. Add a few extra inches for miter cuts and adjustments to ensure a perfect fit.
Can I Install Crown Moulding Without Professional Help?
Yes, with proper tools and patience, DIY installation is possible. Follow step-by-step instructions and take safety precautions for the best results.
What Type Of Crown Moulding Suits Kitchen Cabinets?
Lightweight, durable moulding like MDF or wood is ideal. Choose styles that complement your kitchen’s design and cabinetry for a cohesive look.
Conclusion
Installing crown moulding on kitchen cabinets adds elegance. It transforms the space. Follow the steps carefully. Measure accurately. Cut precisely. Use the right tools. Secure it firmly. This enhances your kitchen's charm. Anyone can do it. Just be patient and focused.
Practice makes perfect. Once done, admire your handiwork. Your kitchen will look classy. A simple project with big impact. Enjoy your refreshed kitchen. Share this with friends. They might love it too. Happy decorating!