
Are you ready to give your kitchen cabinets a stunning makeover? Adding crown moulding is one of the easiest and most effective ways to elevate the look of your kitchen.
If you’re wondering How to Do Crown Moulding on Kitchen Cabinets, imagine transforming plain cabinet tops into elegant, custom-looking finishes that impress everyone who walks in. In this guide, you’ll learn simple steps to install crown moulding like a pro—no fancy tools or experience needed. Keep reading, and you’ll discover how a little detail can make a huge difference in your kitchen’s style and value.
Credit: www.familyhandyman.com
Tools And Materials Needed
Installing crown moulding on kitchen cabinets improves the overall look of your kitchen. You need the right tools and materials to get a clean, professional finish.
This guide covers the essential items for the job. Make sure you have everything ready before you start.
Measuring And Marking Tools
Accurate measurements and marks help fit the moulding perfectly. Use reliable tools to avoid mistakes.
- Tape measure – for precise length measurements
- Pencil – to mark cutting lines and placement
- Combination square – to check angles and straight lines
- Speed square – useful for marking 90 and 45-degree cuts
Cutting Tools
Proper cutting tools make smooth and clean edges on the crown moulding. Choose the right saw for angled cuts.
| Tool | Purpose |
| Miter saw | Cut crown moulding at precise angles |
| Hand saw | Trim small sections or fine adjustments |
| Utility knife | Score and clean edges if needed |
Installation Tools
These tools help attach the moulding securely to the cabinets and walls.
- Brad nailer or finish nailer – to fasten moulding without splitting wood
- Hammer – for manual nailing or adjustments
- Level – ensures moulding is straight and even
- Stud finder – locates wall studs for strong attachment points
Materials For Finishing
Use these materials to fill gaps and create a smooth look after installation.
- Wood filler – fills nail holes and small gaps
- Caulk – seals gaps between moulding and cabinets or walls
- Sandpaper (120-220 grit) – smooths filler and rough edges
- Paint or stain – matches moulding to your cabinets
- Paintbrush or small roller – applies finish evenly
Choosing The Right Crown Moulding
Crown moulding adds style to kitchen cabinets. Picking the right type can change your kitchen’s look.
There are many sizes and shapes to choose from. This guide helps you find the best moulding for your cabinets.
Consider The Style Of Your Kitchen
Match crown moulding to your kitchen’s design. Traditional kitchens suit detailed moulding.
Modern kitchens look good with simple, clean moulding. Pick a style that fits your space.
Measure Your Cabinets Accurately
Measure the height and width of your cabinets first. This helps you choose moulding that fits well.
Use a tape measure for exact numbers. Larger cabinets usually need bigger moulding for balance.
Choose The Right Material
Crown moulding comes in wood, MDF, and polyurethane. Wood offers a classic look but costs more.
MDF is budget-friendly and easy to paint. Polyurethane resists moisture and is lightweight.
- Wood: durable and traditional
- MDF: affordable and paint-friendly
- Polyurethane: moisture-resistant
Pick The Right Size And Shape
Small moulding suits small cabinets. Large moulding fits tall or wide cabinets better.
Shapes range from simple curves to ornate designs. Choose shapes that match your kitchen’s style.
- Simple curves for modern kitchens
- Ornate designs for classic kitchens
- Flat profiles for minimalist looks
Consider The Finish And Color
Choose a finish that matches or contrasts your cabinets. Painted moulding can brighten the space.
Natural wood finishes add warmth. Pick colors that blend well with your kitchen’s palette.
Preparing Kitchen Cabinets
Adding crown moulding to kitchen cabinets can improve the look of your kitchen. Preparing the cabinets well makes the job easier and the finish better.
This section covers cleaning and measuring your cabinets. It also explains how to mark cut lines accurately.
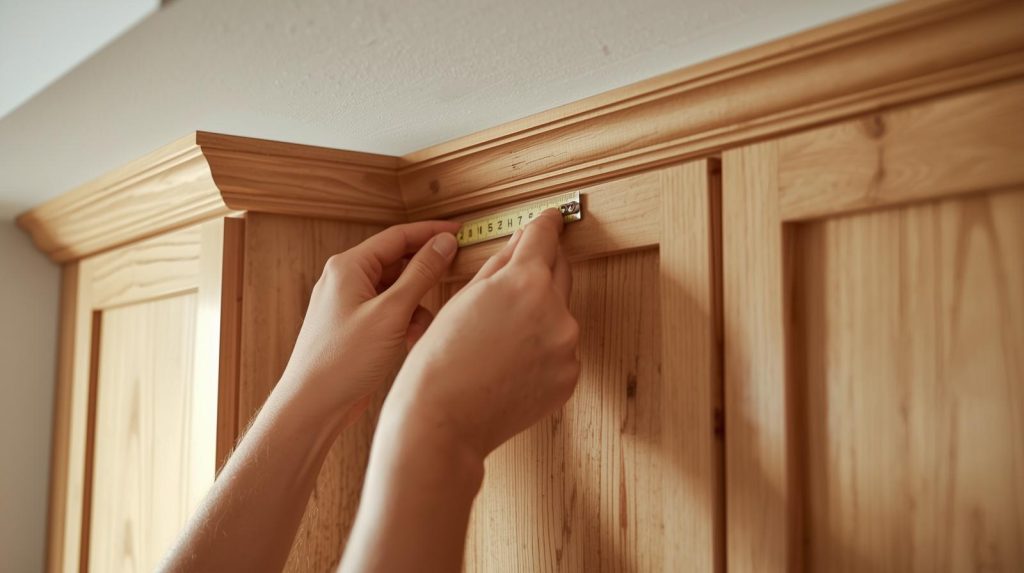
Cleaning And Measuring
Start by cleaning the cabinet surfaces. Remove dust, grease, and grime for a smooth fit. Use a mild cleaner and a soft cloth to avoid damage.
- Wipe down all cabinet surfaces where the moulding will attach
- Remove any loose paint or debris
- Let the cabinets dry completely before measuring
- Use a tape measure to get accurate lengths and heights
- Measure both width and height of the cabinet tops and edges
Marking Cut Lines
Mark the cut lines on your crown moulding pieces carefully. Use a pencil and a square for straight lines. Double-check measurements before cutting.
| Tool | Purpose |
|---|---|
| Measuring Tape | Measure cabinet dimensions |
| Pencil | Mark cut lines on moulding |
| Square | Draw straight, accurate lines |
| Safety Glasses | Protect eyes while cutting |
Credit: www.familyhandyman.com
Cutting Crown Moulding
Cutting crown moulding for kitchen cabinets needs care and accuracy. It is important to get the right angles for a neat fit.
This guide explains how to cut crown moulding using a miter saw and how to create inside and outside corners.
Using A Miter Saw
A miter saw makes cutting crown moulding easier. Set the saw angle to match the moulding’s angle on the wall.
Hold the moulding upside down on the saw. This matches how it sits on the cabinet top.
- Set the saw blade to the needed angle (usually 45° for corners)
- Place the moulding upside down and flush against the fence
- Make smooth, steady cuts to avoid splintering
Creating Inside And Outside Corners
Inside corners go where two mouldings meet inside a corner. Outside corners are where two mouldings meet on an outside edge.
Cut inside corners with opposite angles. Cut outside corners with angles that create a point.
- Inside corners: Cut one piece with a 45° bevel to the right and the other 45° bevel to the left
- Outside corners: Cut both pieces with 45° bevels that face away from each other
- Test fit pieces before attaching to cabinets
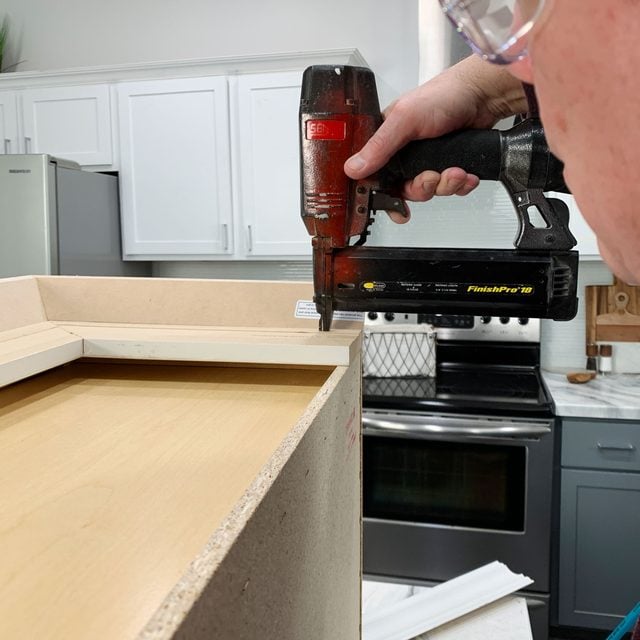
Attaching The Moulding
Attaching crown moulding on kitchen cabinets adds a polished look. This step needs care to make sure the moulding fits well and stays in place.
Use the right tools and techniques to fix the moulding securely. This guide explains how to position, nail, and glue the moulding properly.
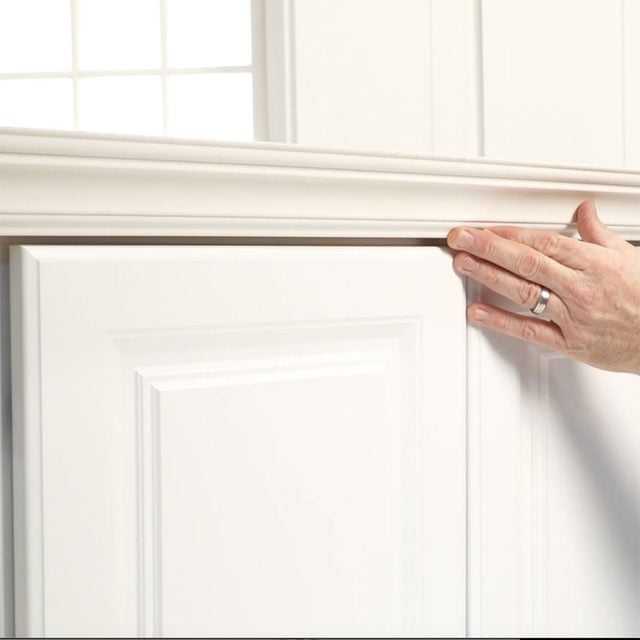
Positioning The Moulding
Start by holding the moulding against the top edge of the cabinet. Check that it aligns evenly and covers the gap between the cabinet and ceiling.
Look for any uneven spots or gaps. Use a level or straight edge to ensure the moulding is straight before attaching it.
- Place moulding flush with cabinet top
- Check alignment with ceiling and walls
- Adjust for any corners or uneven surfaces
- Mark the placement lightly with a pencil
Nailing And Gluing Techniques
Use finishing nails to secure the moulding firmly. Nails should go into the cabinet frame or studs behind the wall for strong hold.
Apply wood glue along the back of the moulding before nailing. This adds extra strength and helps prevent gaps over time.
- Apply a thin line of wood glue on the moulding back
- Press moulding firmly in place
- Use a nail gun or hammer with finishing nails
- Space nails about every 12 inches for stability
- Fill nail holes with wood filler for a smooth finish
Credit: crystelmontenegrohome.com
Filling Gaps And Seams
Filling gaps and seams is important when adding crown moulding to kitchen cabinets. It makes the finish look clean and smooth. Without filling, small spaces between the moulding and cabinets can be very noticeable.
This guide shows how to fill gaps and seams for a professional appearance. You will learn about choosing the right filler, applying it correctly, and finishing touches.
Choosing The Right Filler
Use a filler that matches the colour of your crown moulding or paint. Acrylic latex caulk is a good choice for small gaps. Wood filler works well for larger seams or damaged areas. Avoid using fillers that crack or shrink over time.
- Acrylic latex caulk for small gaps
- Wood filler for bigger seams
- Paintable fillers for a smooth finish
- Flexible fillers for joints that move
Applying Filler Correctly
Clean the gaps and seams before applying filler. Remove dust and loose material with a brush or vacuum. Use a caulking gun for caulk or a putty knife for wood filler. Press the filler into the gap fully to avoid air pockets.
- Clean the gap area well
- Cut the caulk tube tip to size
- Apply caulk steadily along the seam
- Use a wet finger or tool to smooth it out
- Let it dry before sanding or painting
Sanding And Painting For A Finished Look
After filler dries, lightly sand the area for smoothness. Use fine-grit sandpaper to avoid damage. Clean dust before painting. Paint over the filled areas to match the moulding and cabinets. This seals the filler and hides seams.
| Material | Drying Time | Sanding Type |
| Acrylic Latex Caulk | 1-2 hours | Light sanding |
| Wood Filler | 2-4 hours | Medium sanding |
| Paint | 1 hour per coat | Not needed |
Sanding And Finishing Touches
After installing crown moulding on kitchen cabinets, sanding and finishing are key steps. These steps make the moulding look smooth and complete.
Proper sanding removes rough edges, and finishing adds a polished look. These steps help the moulding match the cabinets perfectly.
Sanding Smooth
Start sanding the crown moulding with medium-grit sandpaper. This removes any rough spots or glue marks.
Use fine-grit sandpaper after to create a smooth surface. Sand gently to avoid damage to the moulding.
- Sand along the grain of the wood
- Check corners and edges carefully
- Wipe off dust with a clean cloth after sanding
Painting Or Staining
Choose paint or stain that matches your kitchen cabinets. Paint gives a solid color, while stain shows the wood grain.
Apply thin, even coats for a neat finish. Let each coat dry fully before adding the next one.
- Use a brush or small roller for paint
- Apply stain with a cloth or brush
- Seal with clear varnish to protect the finish
Tips For A Professional Look
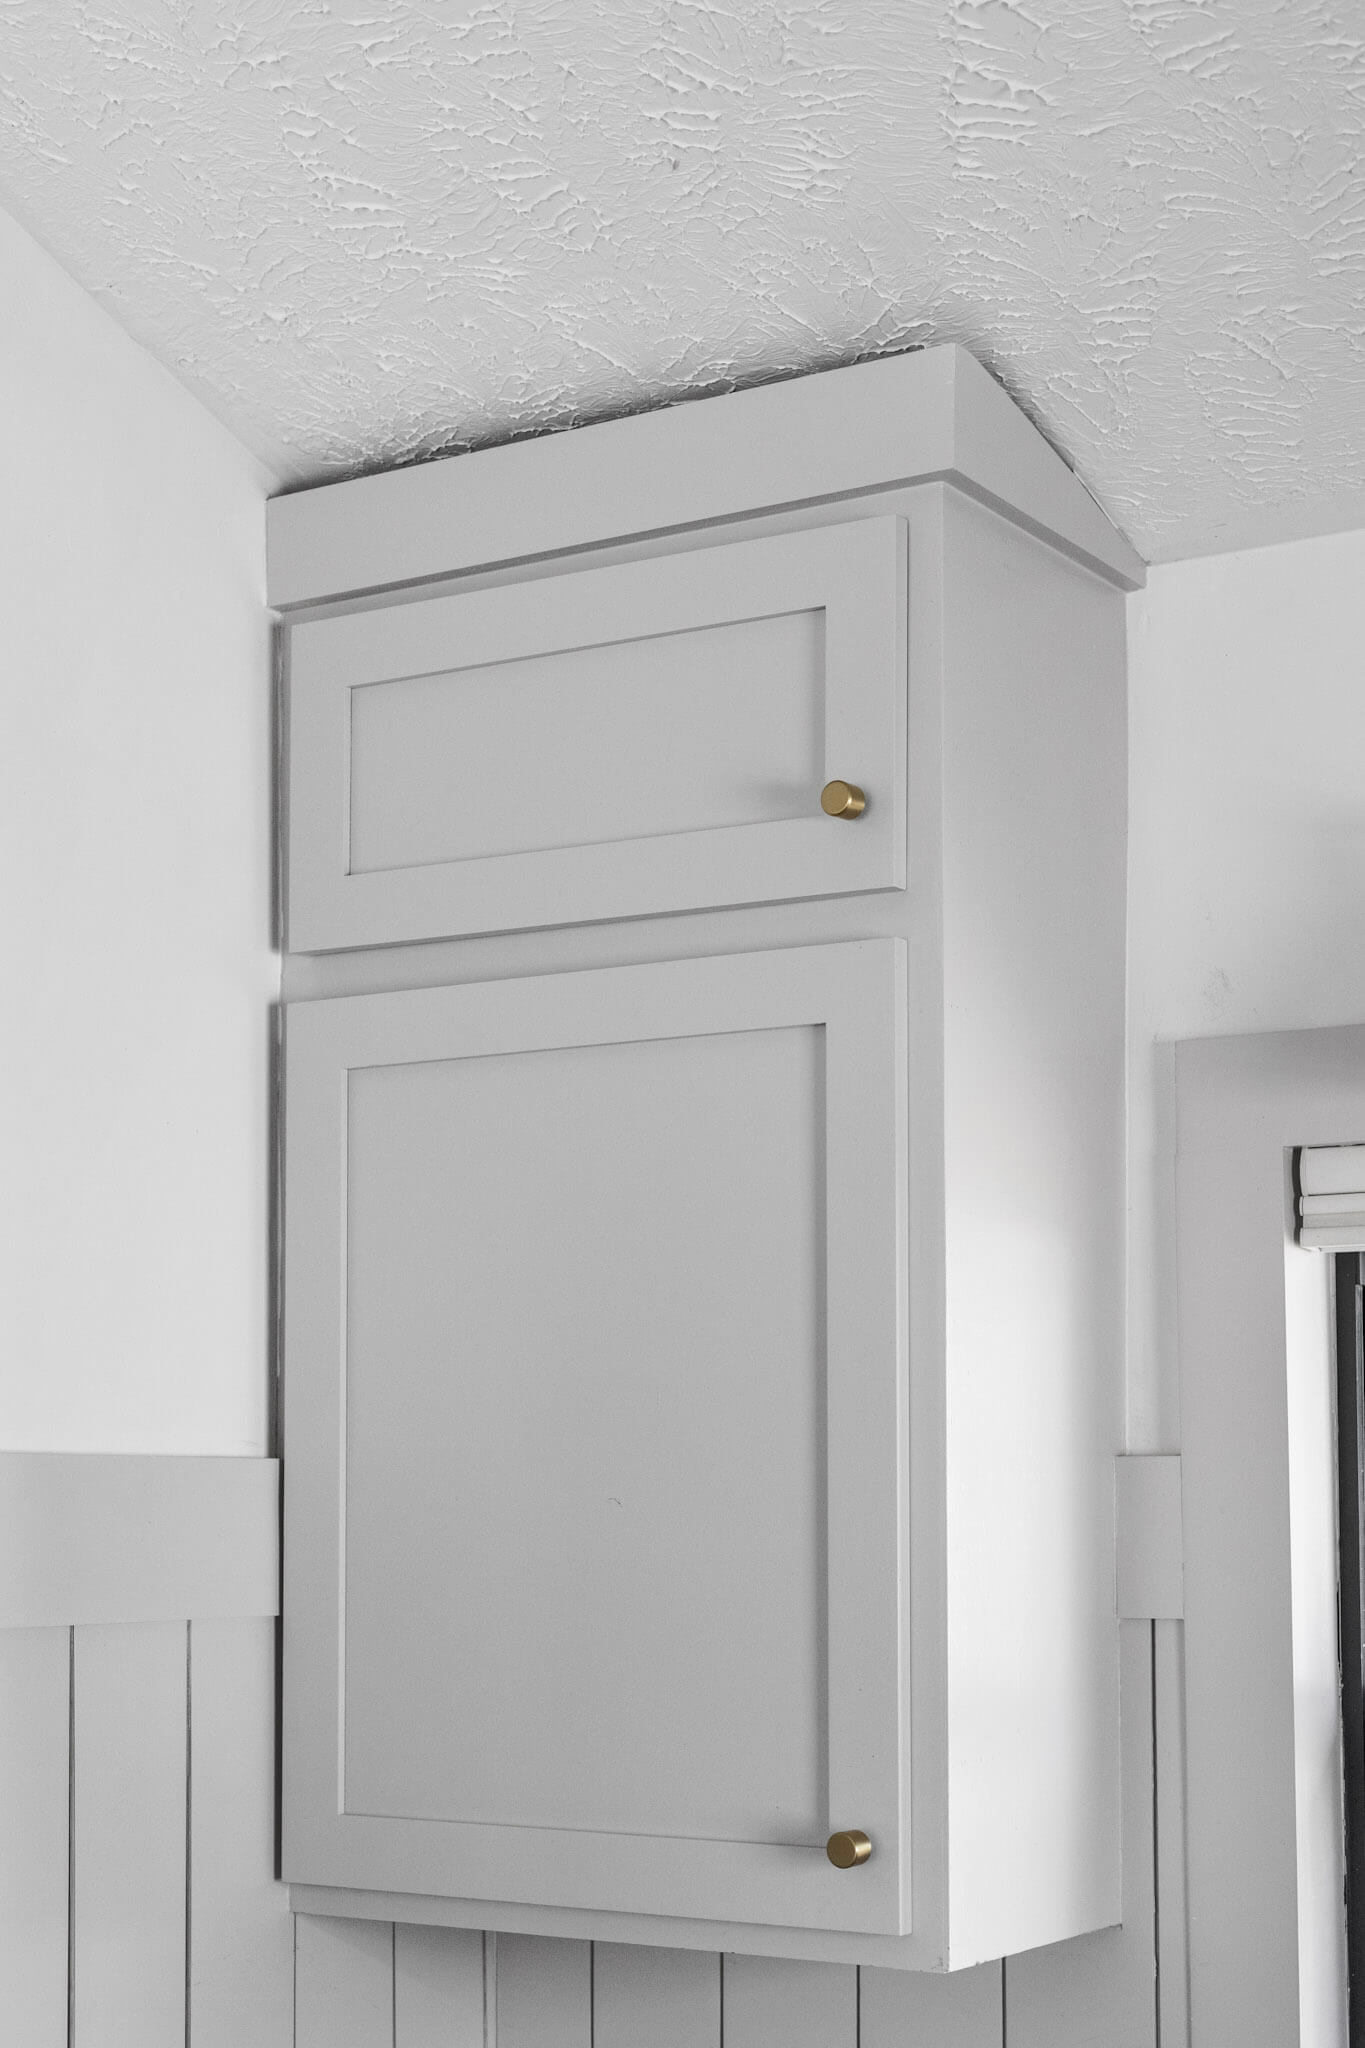
Crown moulding adds a stylish finish to kitchen cabinets. It creates a smooth transition between cabinets and ceiling.
Follow these tips to get a clean and professional crown moulding installation.
Measure Carefully Before Cutting
Accurate measurements are key to a good fit. Measure twice to avoid mistakes.
Use a protractor or angle finder to check corners. This helps cut moulding at the right angle.
- Measure cabinet width and height
- Mark angles clearly on moulding
- Cut moulding with a miter saw
Use The Right Tools
Good tools make the job easier and neater. A sharp miter saw helps cut clean edges.
Other useful tools include a nail gun, wood glue, and a level.
- Miter saw for angled cuts
- Nail gun to secure moulding
- Wood glue for stronger joints
- Level to keep moulding straight
Fill Gaps And Seams
Small gaps between moulding pieces can ruin the look. Use wood filler or caulk to cover gaps.
Sand the filler smooth after it dries. This creates a seamless finish.
- Apply wood filler in joints and nail holes
- Let filler dry fully
- Sand surface smooth with fine sandpaper
- Paint or stain to match cabinets
Paint Or Stain Before Installation
Painting or staining moulding before attaching saves time. It also prevents mess on cabinets.
Let paint or stain dry completely before installation for a neat look.
- Choose paint or stain that matches cabinets
- Apply thin, even coats
- Allow full drying time
- Touch up after installation if needed
Work With A Helper
Having an extra pair of hands helps hold moulding in place. It makes nailing easier and safer.
A helper also checks alignment while you work. This reduces mistakes.
- Hold moulding steady during cuts
- Help position moulding on cabinets
- Check level and fit before nailing
- Pass tools and supplies
Frequently Asked Questions
What Tools Are Needed For Crown Moulding Installation?
You need a miter saw, measuring tape, nail gun, wood glue, and sandpaper. These tools ensure precise cuts and secure attachment. Having the right tools makes the installation process smoother and more accurate.
How To Measure Kitchen Cabinets For Crown Moulding?
Measure the cabinet width and height accurately. Add extra length for corners and overlaps. Proper measurements prevent material waste and ensure a perfect fit.
Can I Install Crown Moulding Without Professional Help?
Yes, with basic carpentry skills and proper tools, you can install it yourself. Follow step-by-step guides and take safety precautions. DIY installation saves money and personalizes your kitchen.
What Type Of Wood Is Best For Crown Moulding?
Pine, poplar, and MDF are popular choices. Pine is affordable, poplar is easy to paint, and MDF is smooth and cost-effective. Select based on your budget and finish preference.
Conclusion
Adding crown moulding enhances kitchen cabinets beautifully. It’s a simple upgrade. Start by measuring accurately. Choose the right moulding style for your space. Always use quality tools for precise cuts. Secure the moulding with nails or adhesive. Paint or stain to match your cabinets.
This final touch makes your kitchen look elegant and complete. Enjoy the transformation! With patience and care, anyone can achieve this look. Upgrade your kitchen today. It’s worth the effort. Your cabinets will thank you.


