
Are you looking to give your kitchen cabinets a polished, elegant finish? Attaching crown moulding is one of the best ways to add that professional touch without spending a fortune.
This guide on How to Attach Crown Moulding to Kitchen Cabinets walks you through simple, step-by-step instructions that anyone can follow. By the end, you’ll know exactly how to install crown moulding so it fits perfectly, giving your kitchen a stylish, professional, and complete look.
Ready to upgrade your space and impress everyone who walks in? Let’s get started!
Tools And Materials Needed
Attaching crown moulding to kitchen cabinets adds a polished look. Using the right tools and materials makes the job easier.
This guide covers everything needed to attach crown moulding properly and safely.
Essential Tools For The Job
You need some basic tools to attach crown moulding correctly. These tools help you measure, cut, and fix the moulding in place.
- Miter saw for accurate angled cuts
- Measuring tape to get exact lengths
- Level to check straightness
- Stud finder to locate cabinet frames
- Nail gun or hammer with finishing nails
- Caulk gun for filling gaps
- Sandpaper to smooth edges
- Safety glasses and gloves for protection
Choosing The Right Crown Moulding
Select crown moulding that fits your kitchen style and cabinet size. The right moulding enhances your cabinets without overpowering them.
- Wood moulding offers a classic look and can be painted or stained
- MDF moulding is affordable and easy to paint
- Polyurethane moulding resists moisture and is lightweight
- Match the height of the moulding to the cabinet height for balance
- Simple designs suit modern kitchens; ornate styles fit traditional kitchens
Additional Supplies
Besides tools and moulding, some extra supplies ensure a clean and strong installation. These help finish the job neatly.
- Wood glue for extra bonding strength
- Painter’s tape to hold pieces during installation
- Wood filler to cover nail holes and gaps
- Touch-up paint or stain to match the moulding
- Drop cloth to protect your workspace
Credit: www.familyhandyman.com
Preparing The Cabinets
Attaching crown moulding to kitchen cabinets starts with good preparation. You need clean surfaces and clear measurements. This makes the process easier and the result neater.
Take your time to prepare the cabinets. This helps the moulding fit well and stay secure.
Cleaning And Measuring
Clean the cabinets carefully before adding moulding. Remove dust, grease, and dirt. A clean surface helps glue or nails hold better.
- Use a mild cleaner and a soft cloth.
- Wipe all surfaces where the moulding will attach.
- Dry the area completely to avoid moisture damage.
- Measure the length and width of the cabinet tops.
- Note any corners or uneven edges.
Marking Attachment Points
Mark where you will attach the moulding. Use a pencil to make small marks on the cabinet. This guides you during installation and keeps the moulding straight.
| Tool | Purpose | Tip |
|---|---|---|
| Pencil | Mark attachment points | Use light marks to avoid visible lines |
| Tape Measure | Measure cabinet edges | Double-check measurements for accuracy |
| Level | Ensure marks are straight | Hold steady while marking |
Cutting Crown Moulding
Attaching crown moulding to kitchen cabinets starts with precise cutting. Accurate cuts ensure a neat fit and a professional look.
This guide focuses on cutting crown moulding correctly. You will learn how to measure, use a miter saw, and handle corners.
Measuring For Accurate Cuts
Measure the length where the crown moulding will go. Use a tape measure and write down each measurement clearly.
Double-check your measurements before cutting. This helps avoid mistakes and wasted material.
- Measure from one end of the cabinet to the other
- Note angles where moulding will join
- Mark measurements directly on the moulding with a pencil
Using A Miter Saw
A miter saw makes angled cuts needed for crown moulding. Set the saw to the correct angle before cutting.
Place the moulding securely on the saw base. Keep your hands away from the blade for safety.
- Set the saw angle to 45 degrees for standard corners
- Cut slowly to avoid splintering the wood
- Use a sharp blade for clean cuts
Handling Inside And Outside Corners
Inside and outside corners require different cutting angles. Measure the angle of the corner before cutting.
Use the miter saw to cut the moulding at angles that fit together snugly at the corners.
- Inside corners usually need two 45-degree cuts facing inward
- Outside corners require two 45-degree cuts facing outward
- Test fit the pieces before attaching to cabinets
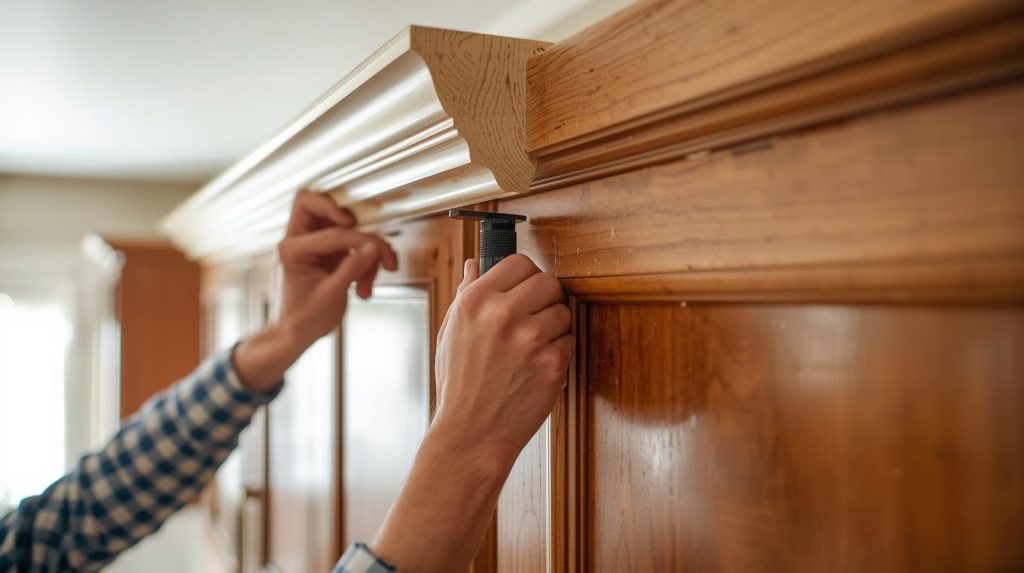
Attaching The Moulding
Attaching crown moulding to kitchen cabinets adds a polished look. It requires care to fit the moulding securely and neatly.
This guide covers how to apply adhesive, use nails, and keep the moulding in place during installation.
Applying Adhesive
Use a strong wood adhesive to hold the moulding firmly. Apply it evenly to the back edges of the moulding.
Press the moulding against the cabinet crown gently to spread the glue. Avoid excess glue that can squeeze out.
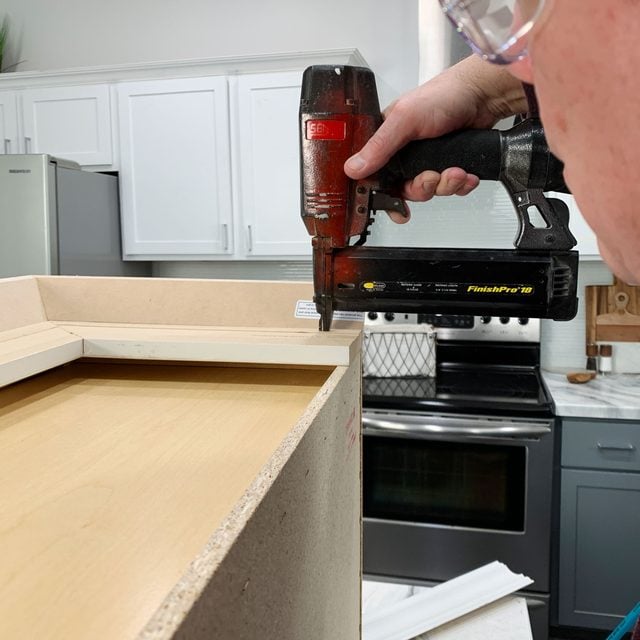
Nailing Techniques
Use finishing nails to secure the moulding after the adhesive sets slightly. Nails add extra strength to the bond.
Drive nails at an angle through the moulding into the cabinet frame. Space nails every 12 to 16 inches for stability.
- Choose 1 ¼ inch finishing nails
- Use a nail gun or hammer carefully
- Pre-drill holes if wood may split
- Set nails below surface with a nail set
Securing The Moulding In Place
Hold the moulding tightly after nailing to ensure it does not move. Use clamps or painter’s tape to keep it steady.
Leave the moulding clamped until the adhesive dries fully. This prevents gaps and keeps the moulding flush with cabinets.
- Use clamps suitable for small surfaces
- Apply painter’s tape across moulding and cabinet
- Check alignment before adhesive dries
- Remove clamps and tape carefully after drying
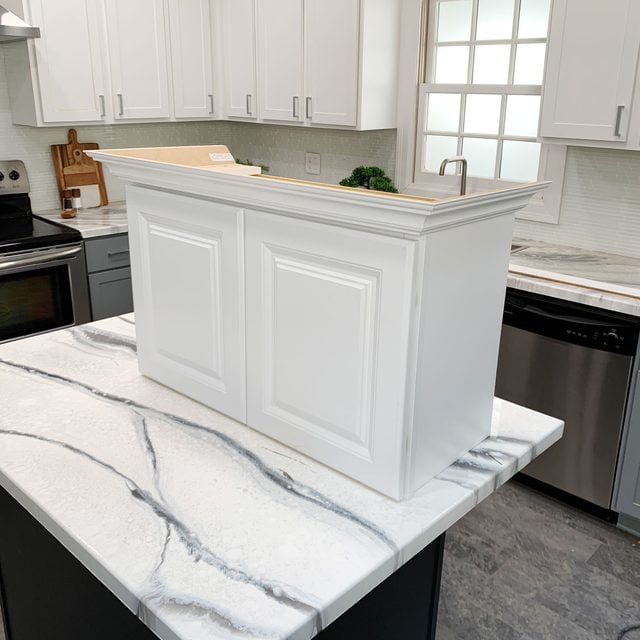
Finishing Touches
After attaching crown moulding to your kitchen cabinets, some finishing work makes it look perfect. These last steps help hide flaws and give a smooth, polished look.
This guide covers filling nail holes, caulking gaps, and painting or staining the moulding.
Filling Nail Holes
Use wood filler to cover nail holes in the crown moulding. It hides the nails and makes the surface even.
- Choose a filler that matches your moulding color.
- Apply filler with a putty knife, pressing into holes.
- Let it dry fully before sanding smooth.
- Sand gently to avoid damaging the moulding.
Caulking Gaps
Fill gaps between the moulding and cabinets or walls with caulk. This prevents cracks and gives a clean line.
| Type of Caulk | Use |
| Acrylic Latex | Easy to paint, good for indoor use |
| Silicone | Flexible and waterproof, but harder to paint |
| Painter’s Caulk | Dries fast and paints well |
Apply a thin line of caulk with a caulking gun. Smooth it with a wet finger or tool for a neat finish.
Painting Or Staining
Finish the moulding by painting or staining to match your cabinets. This protects the wood and improves the look.
- Sand the moulding lightly before finishing.
- Use primer if painting over bare wood.
- Apply paint or stain evenly with a brush.
- Allow each coat to dry before adding another.
- Use a clear sealant for extra protection.
Common Mistakes To Avoid
Attaching crown moulding to kitchen cabinets can improve your kitchen’s look. Avoiding common mistakes helps ensure a clean, professional finish.
These mistakes often cause wasted time and materials. Learning what to avoid saves effort and money.
Incorrect Measurements
Measuring crown moulding and cabinet edges incorrectly leads to gaps and uneven joints. This mistake makes the moulding look sloppy and unfinished.
Always measure twice before cutting. Use a reliable tape measure and mark carefully. Remember to account for angles and corners.
- Measure the cabinet width and height accurately
- Check angles with a protractor or angle finder
- Cut moulding pieces slightly longer to trim as needed
- Test fit before final attachment
Poor Adhesion
Using the wrong glue or nails causes the moulding to come loose. Poor adhesion also creates gaps between the moulding and cabinets.
Choose the right adhesive for wood and kitchen use. Clean surfaces before applying glue. Secure with nails or brads and let the glue dry fully.
- Use wood glue or construction adhesive made for trim
- Remove dust and grease from cabinet edges
- Clamp or nail moulding firmly in place
- Allow enough drying time before touching
Ignoring Safety Precautions
Not wearing safety gear or rushing the work can cause injuries. Power tools and sharp blades need careful handling.
Wear safety glasses and gloves. Keep your workspace clean and well-lit. Cut slowly and steadily to avoid slips or mistakes.
- Always wear eye protection when cutting moulding
- Use gloves to protect your hands from splinters
- Keep tools sharp and in good condition
- Do not rush cuts or installation steps
Maintenance Tips
Keeping crown moulding on kitchen cabinets clean and in good shape helps it last longer. Regular care stops damage and keeps it looking nice.
Simple maintenance tasks can save you time and money later. Follow these tips to care for your crown moulding properly.
Cleaning Crown Moulding
Dust and grease build up on crown moulding in kitchens. Cleaning it often keeps the moulding fresh and bright.
Use a soft cloth or brush to remove dust. A mild soap mixed with water can clean grease and dirt.
- Wipe dust weekly with a microfiber cloth
- Use warm water and mild soap for sticky spots
- Dry moulding well to avoid water damage
- Avoid harsh chemicals that can damage the finish
Repairing Damage
Small scratches or dents can happen on crown moulding. Fixing them quickly stops bigger problems.
Wood filler works well for small holes and dents. Sand the area smooth after it dries, then paint to match.
- Fill scratches with wood filler or putty
- Sand the patch smooth once dry
- Touch up paint or stain to blend repairs
- Replace moulding pieces if damage is severe
Credit: www.familyhandyman.com

Credit: www.thisoldhouse.com
Frequently Asked Questions
What Tools Are Needed To Attach Crown Moulding To Cabinets?
You need a miter saw, measuring tape, nail gun, wood glue, and a level. These tools ensure precise cuts and secure attachment. A stud finder and clamps can also help for a stable installation.
How Do You Measure Crown Moulding For Cabinets?
Measure the cabinet’s top length accurately with a tape measure. Add extra inches for miter cuts at corners. Mark measurements on the moulding before cutting to ensure a perfect fit.
Can Crown Moulding Be Attached Without Nails?
Yes, you can use strong wood glue and clamps for a nail-free attachment. However, nails or brad nails offer better durability and hold, especially for heavier moulding pieces.
What Is The Best Way To Cut Crown Moulding Corners?
Use a miter saw set at 45 degrees for inside and outside corners. Ensure the moulding is positioned correctly to avoid gaps. Practice on scrap pieces before cutting the final moulding.
Conclusion
Attaching crown moulding enhances kitchen cabinets beautifully. It adds elegance and style. Follow the steps carefully for a clean finish. Measure accurately to ensure a perfect fit. Use the right tools and materials. This saves time and prevents mistakes. Sand and paint for a smooth look.
Your kitchen will feel more polished and complete. With patience and attention, anyone can achieve great results. Transform your kitchen with this simple project. Enjoy your newly updated space.


