


Resting And Rising Times
Resting and rising are key steps in baking no-knead bread in a skillet. These steps let the dough develop flavour and texture. Timing is important for the best results.
Understanding how long to let the dough rest and rise helps you bake soft, fluffy bread with a nice crust. Follow the guidelines below for each stage.
Initial Resting
After mixing the dough, let it rest at room temperature. This allows the flour to absorb water fully. A good rest time is between 12 and 18 hours.
During this time, the dough will bubble and expand slowly. Do not rush this step because it builds flavour and gluten structure.
Shaping And Final Rise
Once the dough has rested, shape it gently into a ball. Place it in the skillet or on a surface for the final rise. This usually takes 30 to 45 minutes.
This shorter rise helps the dough relax and prepare for baking. It also improves the bread’s crumb texture.
- Keep the dough covered during the final rise to avoid drying out.
- Check the dough; it should feel puffy but not doubled in size.
- If the dough is too soft, let it rise a little longer.
Resting Times Summary
Stage Time Range Purpose
Initial Resting 12–18 hours: Hydrates flour, develops flavour
Final Rise 30–45 minutes Prepares dough for baking
Preparing The Skillet
Using a skillet to bake no-knead bread helps create a crispy crust. Proper skillet preparation ensures even baking and easy bread release.
Follow these steps to get your skillet ready before adding the dough.
Choose The Right Skillet
Pick a heavy skillet that holds heat well. Cast-iron skillets work best for baking bread.
A good skillet size is about 8 to 10 inches wide. This size fits most no-knead bread recipes.
Clean And Dry The Skillet
Make sure your skillet is clean and dry before use. Remove any leftover food or oil.
Dry the skillet completely to prevent steam during baking, which can affect the bread crust.
Preheat The Skillet
Place the skillet in the oven while it preheats. A hot skillet helps create a crunchy crust on the bread.
Preheat at 450°F (230°C) for at least 30 minutes before baking.
Grease The Skillet Lightly
Use a small amount of oil or butter to grease the skillet. This prevents the bread from sticking.
- Use a paper towel to spread oil evenly
- Do not use too much oil to avoid a soggy bread bottom
- Choose neutral oils like vegetable or canola oil
Use Parchment Paper For Easy Removal
Cut a piece of parchment paper to fit inside the skillet. Place it before adding the dough.
Parchment paper helps lift the bread out after baking and keeps the skillet clean.
Shaping The Dough
Shaping the dough is a key step in baking no knead bread in a skillet. It helps create the right texture and crust for your bread.
After the dough has risen, it is shaped and carefully prepared for final proof and baking. This process is simple and needs just a few techniques.
Prepare Your Work Surface
Lightly flour a clean surface to stop the dough from sticking. You do not need a lot of flour because too much can dry the dough.
Turn Out The Dough
Gently turn the dough onto the floured surface. Handle it softly to keep the air inside, which makes the bread light and fluffy.
Shape The Dough Into A Ball
Fold the edges of the dough toward the centre to form a round shape. Use your hands to tuck and pinch the dough underneath to create tension on the surface.
- Fold the dough edges to the centre
- Turn the dough seam side down
- Use your hands to create a tight ball
- Cover the dough with a cloth for the final rise
Check The Dough’s Smoothness
The dough surface should feel smooth and tight. If it looks loose or sticky, gently fold it again and reshape.
Final Tips For Shaping
Tip: Let the dough rest if it resists shaping. A 10-minute pause helps relax the gluten.
Tip: Use minimal flour on your hands to avoid drying the dough.
Cooking The Bread
Cooking no-knead bread in a skillet is simple and quick. You do not need an oven.
Using the right heat and timing helps the bread bake evenly and taste great.
Heat Settings
Start by heating your skillet on medium heat. Too high heat can burn the bread outside and leave the inside raw.
- Preheat the skillet on medium heat for 5 minutes.
- Use a lid to trap heat and steam.
- Reduce the heat to low after the first 10 minutes to cook inside well.
Timing Tips
Baking time depends on your stove and skillet size. Watch the bread closely.
- Cook covered for 15 minutes on medium heat.
- Lower the heat and cook for another 10 to 15 minutes.
- Remove the lid for the last 5 minutes to brown the crust.
Checking Doneness
Method: What to Look For
Tap the bottom. It should sound hollow
Check crust colour. Golden brown means done
Use a thermometer. Internal temp around 190°F (88°C)
If the bread feels soft or sounds dull when tapped, cook it a bit longer.
Cooling And Serving
Cooling your no knead bread properly helps keep its texture and flavor. Serving it at the right time makes it taste even better.
This section explains how to cool your bread and offers ideas for serving it fresh from the skillet.
Cooling The Bread
After baking, remove the bread from the skillet carefully. Let it cool on a wire rack to avoid sogginess. Cooling allows steam to escape and the crust to stay crisp.
- Use oven mitts to handle the hot skillet.
- Place the bread on a wire rack for at least 30 minutes.
- Do not cover the bread while cooling to keep the crust crunchy.
Serving Suggestions
Once cooled, slice the bread with a serrated knife. Serve it plain or with toppings for a tasty treat. Warm bread tastes great with butter or jam.
Serving Idea Description
Butter and Honey: Spread fresh butter and drizzle honey on warm slices.
Garlic Bread: Brush with garlic butter and toast lightly in the oven.
Sandwich Base: Use thick slices to make sandwiches with your favourite fillings.
Soup Side Serve alongside soups or stews for dipping.
Troubleshooting Common Issues
Baking no-knead bread in a skillet is easy but may cause some problems. Knowing how to fix these helps you bake better bread.
Here are common issues and tips to solve them when baking bread in a skillet.
Bread Is Too Dense
Dense bread happens when the dough does not rise enough. The yeast needs time and warmth to work well.
Make sure your dough rests in a warm place for at least 8 hours. Avoid cold spots or drafts.
Bread Does Not Cook Evenly
Uneven cooking can happen if the skillet heats unevenly or if the lid is not used.
Use a heavy skillet with a tight lid. Cook on low to medium heat to avoid burning the bottom.
Crust Is Too Hard Or Too Soft
If the crust is too hard, the heat may be too high or the bread is overcooked. If too soft, it may need more time to bake.
- Lower the heat to prevent burning.
- Cook longer with the lid off to crisp the crust.
- Let bread cool on a rack to keep the crust firm.
Dough Sticks To The Skillet
Dough can stick if the skillet is not greased or if the dough is too wet.
Lightly oil or flour the skillet before adding the dough. Use a spatula to loosen edges if needed.
Bread Tastes Yeasty Or Sour
Too much yeast or too long fermentation can cause strong flavours. This affects taste and smell.
- Use the right amount of yeast as the recipe says.
- Keep fermentation time between 8 and 24 hours.
- Store dough in the fridge if you want slower fermentation.
Credit: www.ihearteating.com
Flavor Variations
No knead bread baked in a skillet has a simple, delicious base flavor. You can change it by adding different ingredients. This makes the bread taste unique each time.
Try mixing herbs, spices, or other add-ins to create new flavours. These options are easy and quick to do before baking.
Herbs And Garlic
Add fresh or dried herbs to the dough for a tasty twist. Garlic powder or minced garlic also works well. These give the bread a savoury, aromatic flavour.
- Rosemary and thyme add a woodsy taste
- Basil and oregano bring an Italian touch
- Garlic powder adds a mild spicy note
- Fresh minced garlic gives a stronger flavour
Cheese Blends
Mix shredded cheese into the dough or sprinkle on top before baking. Cheese melts and makes the bread soft and rich. Choose cheese that melts well for the best results.
- Cheddar adds a sharp, tangy taste
- Mozzarella melts smoothly and is mild
- Parmesan brings a salty, nutty flavour
- Feta adds a crumbly, tangy touch
Seeds And Nuts
Seeds and nuts add crunch and flavour to the bread. Mix them in the dough or sprinkle them on the surface for texture. They also add healthy fats and nutrients.
- Sunflower seeds add a mild nutty crunch
- Poppy seeds give a subtle crunch and flavour
- Chopped walnuts add earthiness
- Flaxseeds boost nutrition and have a nutty taste
Sweet Additions
Add sweet ingredients to make a dessert-style bread. These add natural sweetness and flavour without much work. Use dried fruits or spices for the best taste.
- Raisins or dried cranberries add chewy sweetness
- Cinnamon gives warmth and spice
- Chopped dates add rich sweetness
- Vanilla extract adds a soft aroma
Spicy And Savoury Mixes
Use spices to make bread with a kick. These flavours are great for serving with soups or stews. Add small amounts to avoid overpowering the bread.
- Crushed red pepper flakes add heat
- Cumin gives a warm, earthy flavour
- Smoked paprika adds depth and smokiness
- Chopped olives bring a salty, briny taste
Frequently Asked Questions
How Long Does Knead Bread Take To Bake In A Skillet?
No-knead bread typically bakes in a skillet for 30 to 40 minutes. The bread develops a crispy crust and soft interior during this time. Baking time may vary slightly based on skillet size and oven temperature.
Can I Use Any Skillet For No-Knead Bread Baking?
Cast-iron skillets are best for no-knead bread because they retain heat well. Other heavy-bottomed skillets can work, but may not produce the same crust quality. Avoid thin or non-stick pans for optimal results.
Do I Need To Preheat The Skillet Before Baking Bread?
Yes, preheating the skillet is essential for a crispy crust. Heat the skillet in the oven for about 20 minutes before placing the dough inside. This ensures even cooking and a golden-brown crust.
How Do I Store Leftover No-Knead Skillet Bread?
Store leftover bread in a paper bag or bread box at room temperature. Avoid plastic bags as they trap moisture and soften the crust. For longer storage, freeze the bread in an airtight container.
Conclusion
Enjoy the simplicity of baking no-knead bread in a skillet. It's easy, and the results are fantastic. This method saves time and effort. The crust turns out crisp, while the inside stays soft. Perfect for beginners or busy days.
Fresh bread always delights the senses. Try it yourself and savour the homemade goodness. Your kitchen will smell amazing, filling your home with warmth. Share this delightful bread with family and friends. They'll surely appreciate the taste and effort. Happy baking, and enjoy every bite!
Choosing The Right Skillet
Choosing the right skillet is important for baking no-knead bread. The skillet helps create a crispy crust and even baking.
Not all skillets work well for this bread. You need to pick one that holds heat and fits your dough size.
Material Matters
Cast-iron skillets are popular for baking no-knead bread. They hold heat well and spread it evenly.
Other materials like stainless steel or aluminum may not keep heat as long. This can affect the bread crust.
- Cast iron: Best heat retention and even cooking
- Stainless steel: Heats quickly but cools fast
- Aluminium: Lightweight but less heat retention
Size And Depth
Pick a skillet size that fits your dough with space to rise. Usually, 10 to 12 inches works well.
The skillet should be deep enough to hold the dough without spilling. At least 2 to 3 inches deep is good.
- 10-12 inch diameter fits most no-knead bread doughs
- 2-3 inches deep to allow the dough to rise
- A lid or cover helps trap steam during baking
Lid Or Cover Options
A skillet with a lid works best for no knead bread. The lid traps steam and makes the crust crispy.
If your skillet has no lid, use aluminum foil as a cover during baking. This helps keep moisture in.
- Cast-iron Dutch ovens with lids are ideal
- Use foil if no lid is available
- Steam helps create a crunchy crust
Handle And Oven Safety
Check if the skillet handle is oven safe. Some handles can melt or get damaged at high heat.
Cast iron handles are safe for ovens. Silicone or plastic handles may need extra care or removal.
- Cast iron handles are safe at high temperatures
- Remove or cover plastic/silicone handles
- Use oven mitts when handling hot skillets
Mixing The Dough
Mixing the dough is the first step to bake no knead bread in a skillet. It is simple and needs only a few ingredients.
This dough does not require much work. You just need to combine everything well and let the dough rest.
Gather Your Ingredients
You need flour, water, salt, and yeast to make the dough. Use all-purpose flour for the best results.
- 3 cups all-purpose flour
- 1 1/2 cups warm water
- 1 teaspoon salt
- 1/4 teaspoon active dry yeast
Combine Dry Ingredients
Start by mixing flour, salt, and yeast in a large bowl. Stir them well to spread the salt and yeast evenly.
Mixing dry ingredients first helps the dough rise better and taste good.
Add Water And Mix
Pour warm water into the dry mix slowly. Stir with a spoon until all flour is wet and forms a sticky dough.
- Use a wooden spoon or spatula
- Mix until no dry flour remains
- The dough will be loose and sticky
No Kneading Needed
This dough is very sticky, but do not add more flour. The dough will become soft and airy after resting.
Let the dough rest for at least 12 hours. This time helps gluten develop without kneading.

Credit: www.youtube.com
Resting And Rising Times
Resting and rising are key steps in baking no-knead bread in a skillet. These steps let the dough develop flavour and texture. Timing is important for the best results.
Understanding how long to let the dough rest and rise helps you bake soft, fluffy bread with a nice crust. Follow the guidelines below for each stage.
Initial Resting
After mixing the dough, let it rest at room temperature. This allows the flour to absorb water fully. A good rest time is between 12 and 18 hours.
During this time, the dough will bubble and expand slowly. Do not rush this step because it builds flavour and gluten structure.
Shaping And Final Rise
Once the dough has rested, shape it gently into a ball. Place it in the skillet or on a surface for the final rise. This usually takes 30 to 45 minutes.
This shorter rise helps the dough relax and prepare for baking. It also improves the bread’s crumb texture.
- Keep the dough covered during the final rise to avoid drying out.
- Check the dough; it should feel puffy but not doubled in size.
- If the dough is too soft, let it rise a little longer.
Resting Times Summary
Stage Time Range Purpose
Initial Resting 12–18 hours: Hydrates flour, develops flavour
Final Rise 30–45 minutes Prepares dough for baking
Preparing The Skillet
Using a skillet to bake no-knead bread helps create a crispy crust. Proper skillet preparation ensures even baking and easy bread release.
Follow these steps to get your skillet ready before adding the dough.
Choose The Right Skillet
Pick a heavy skillet that holds heat well. Cast-iron skillets work best for baking bread.
A good skillet size is about 8 to 10 inches wide. This size fits most no-knead bread recipes.
Clean And Dry The Skillet
Make sure your skillet is clean and dry before use. Remove any leftover food or oil.
Dry the skillet completely to prevent steam during baking, which can affect the bread crust.
Preheat The Skillet
Place the skillet in the oven while it preheats. A hot skillet helps create a crunchy crust on the bread.
Preheat at 450°F (230°C) for at least 30 minutes before baking.
Grease The Skillet Lightly
Use a small amount of oil or butter to grease the skillet. This prevents the bread from sticking.
- Use a paper towel to spread oil evenly
- Do not use too much oil to avoid a soggy bread bottom
- Choose neutral oils like vegetable or canola oil
Use Parchment Paper For Easy Removal
Cut a piece of parchment paper to fit inside the skillet. Place it before adding the dough.
Parchment paper helps lift the bread out after baking and keeps the skillet clean.
Shaping The Dough
Shaping the dough is a key step in baking no knead bread in a skillet. It helps create the right texture and crust for your bread.
After the dough has risen, it is shaped and carefully prepared for final proof and baking. This process is simple and needs just a few techniques.
Prepare Your Work Surface
Lightly flour a clean surface to stop the dough from sticking. You do not need a lot of flour because too much can dry the dough.
Turn Out The Dough
Gently turn the dough onto the floured surface. Handle it softly to keep the air inside, which makes the bread light and fluffy.
Shape The Dough Into A Ball
Fold the edges of the dough toward the centre to form a round shape. Use your hands to tuck and pinch the dough underneath to create tension on the surface.
- Fold the dough edges to the centre
- Turn the dough seam side down
- Use your hands to create a tight ball
- Cover the dough with a cloth for the final rise
Check The Dough’s Smoothness
The dough surface should feel smooth and tight. If it looks loose or sticky, gently fold it again and reshape.
Final Tips For Shaping
Tip: Let the dough rest if it resists shaping. A 10-minute pause helps relax the gluten.
Tip: Use minimal flour on your hands to avoid drying the dough.
Cooking The Bread
Cooking no-knead bread in a skillet is simple and quick. You do not need an oven.
Using the right heat and timing helps the bread bake evenly and taste great.
Heat Settings
Start by heating your skillet on medium heat. Too high heat can burn the bread outside and leave the inside raw.
- Preheat the skillet on medium heat for 5 minutes.
- Use a lid to trap heat and steam.
- Reduce the heat to low after the first 10 minutes to cook inside well.
Timing Tips
Baking time depends on your stove and skillet size. Watch the bread closely.
- Cook covered for 15 minutes on medium heat.
- Lower the heat and cook for another 10 to 15 minutes.
- Remove the lid for the last 5 minutes to brown the crust.
Checking Doneness
Method: What to Look For
Tap the bottom. It should sound hollow
Check crust colour. Golden brown means done
Use a thermometer. Internal temp around 190°F (88°C)
If the bread feels soft or sounds dull when tapped, cook it a bit longer.
Cooling And Serving
Cooling your no knead bread properly helps keep its texture and flavor. Serving it at the right time makes it taste even better.
This section explains how to cool your bread and offers ideas for serving it fresh from the skillet.
Cooling The Bread
After baking, remove the bread from the skillet carefully. Let it cool on a wire rack to avoid sogginess. Cooling allows steam to escape and the crust to stay crisp.
- Use oven mitts to handle the hot skillet.
- Place the bread on a wire rack for at least 30 minutes.
- Do not cover the bread while cooling to keep the crust crunchy.
Serving Suggestions
Once cooled, slice the bread with a serrated knife. Serve it plain or with toppings for a tasty treat. Warm bread tastes great with butter or jam.
Serving Idea Description
Butter and Honey: Spread fresh butter and drizzle honey on warm slices.
Garlic Bread: Brush with garlic butter and toast lightly in the oven.
Sandwich Base: Use thick slices to make sandwiches with your favourite fillings.
Soup Side Serve alongside soups or stews for dipping.
Troubleshooting Common Issues
Baking no-knead bread in a skillet is easy but may cause some problems. Knowing how to fix these helps you bake better bread.
Here are common issues and tips to solve them when baking bread in a skillet.
Bread Is Too Dense
Dense bread happens when the dough does not rise enough. The yeast needs time and warmth to work well.
Make sure your dough rests in a warm place for at least 8 hours. Avoid cold spots or drafts.
Bread Does Not Cook Evenly
Uneven cooking can happen if the skillet heats unevenly or if the lid is not used.
Use a heavy skillet with a tight lid. Cook on low to medium heat to avoid burning the bottom.
Crust Is Too Hard Or Too Soft
If the crust is too hard, the heat may be too high or the bread is overcooked. If too soft, it may need more time to bake.
- Lower the heat to prevent burning.
- Cook longer with the lid off to crisp the crust.
- Let bread cool on a rack to keep the crust firm.
Dough Sticks To The Skillet
Dough can stick if the skillet is not greased or if the dough is too wet.
Lightly oil or flour the skillet before adding the dough. Use a spatula to loosen edges if needed.
Bread Tastes Yeasty Or Sour
Too much yeast or too long fermentation can cause strong flavours. This affects taste and smell.
- Use the right amount of yeast as the recipe says.
- Keep fermentation time between 8 and 24 hours.
- Store dough in the fridge if you want slower fermentation.
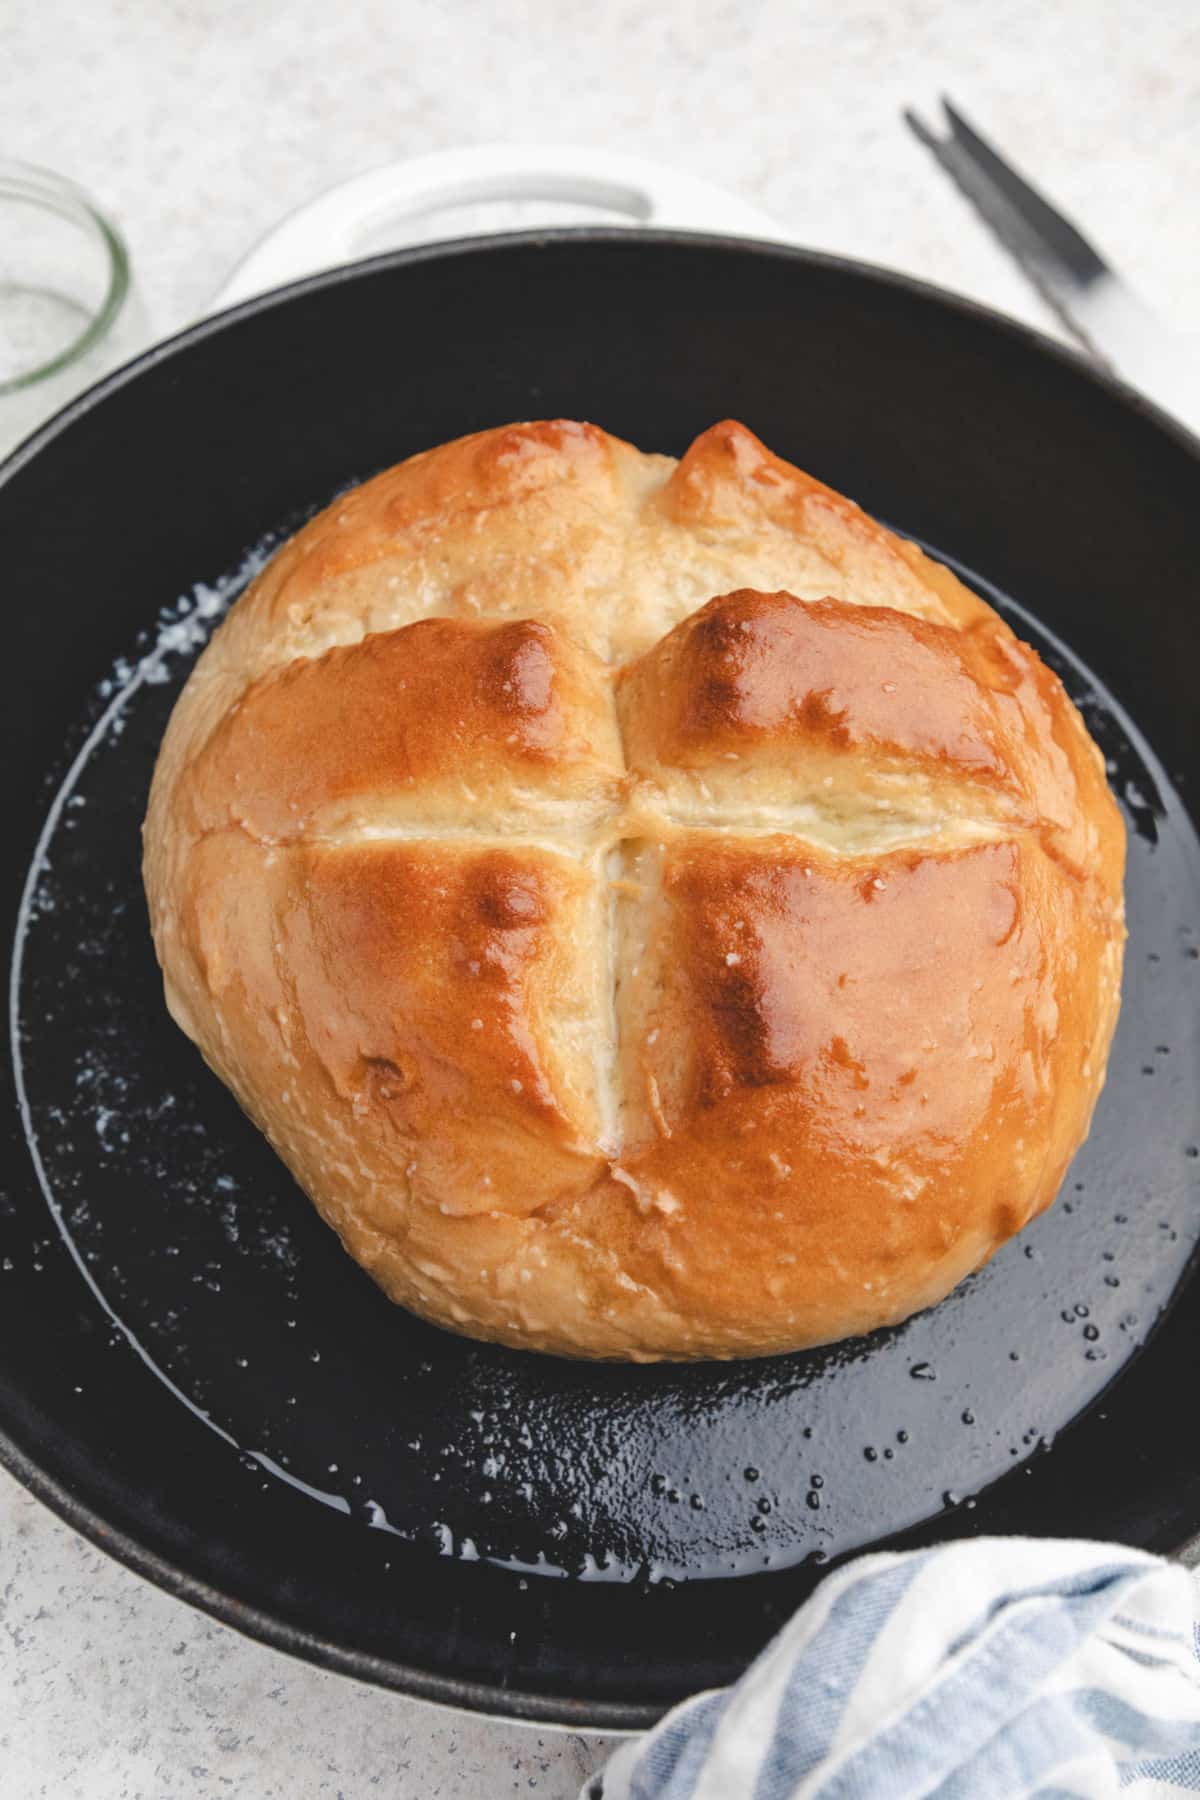
Credit: www.ihearteating.com
Flavor Variations
No knead bread baked in a skillet has a simple, delicious base flavor. You can change it by adding different ingredients. This makes the bread taste unique each time.
Try mixing herbs, spices, or other add-ins to create new flavours. These options are easy and quick to do before baking.
Herbs And Garlic
Add fresh or dried herbs to the dough for a tasty twist. Garlic powder or minced garlic also works well. These give the bread a savoury, aromatic flavour.
- Rosemary and thyme add a woodsy taste
- Basil and oregano bring an Italian touch
- Garlic powder adds a mild spicy note
- Fresh minced garlic gives a stronger flavour
Cheese Blends
Mix shredded cheese into the dough or sprinkle on top before baking. Cheese melts and makes the bread soft and rich. Choose cheese that melts well for the best results.
- Cheddar adds a sharp, tangy taste
- Mozzarella melts smoothly and is mild
- Parmesan brings a salty, nutty flavour
- Feta adds a crumbly, tangy touch
Seeds And Nuts
Seeds and nuts add crunch and flavour to the bread. Mix them in the dough or sprinkle them on the surface for texture. They also add healthy fats and nutrients.
- Sunflower seeds add a mild nutty crunch
- Poppy seeds give a subtle crunch and flavour
- Chopped walnuts add earthiness
- Flaxseeds boost nutrition and have a nutty taste
Sweet Additions
Add sweet ingredients to make a dessert-style bread. These add natural sweetness and flavour without much work. Use dried fruits or spices for the best taste.
- Raisins or dried cranberries add chewy sweetness
- Cinnamon gives warmth and spice
- Chopped dates add rich sweetness
- Vanilla extract adds a soft aroma
Spicy And Savoury Mixes
Use spices to make bread with a kick. These flavours are great for serving with soups or stews. Add small amounts to avoid overpowering the bread.
- Crushed red pepper flakes add heat
- Cumin gives a warm, earthy flavour
- Smoked paprika adds depth and smokiness
- Chopped olives bring a salty, briny taste
Frequently Asked Questions
How Long Does Knead Bread Take To Bake In A Skillet?
No-knead bread typically bakes in a skillet for 30 to 40 minutes. The bread develops a crispy crust and soft interior during this time. Baking time may vary slightly based on skillet size and oven temperature.
Can I Use Any Skillet For No-Knead Bread Baking?
Cast-iron skillets are best for no-knead bread because they retain heat well. Other heavy-bottomed skillets can work, but may not produce the same crust quality. Avoid thin or non-stick pans for optimal results.
Do I Need To Preheat The Skillet Before Baking Bread?
Yes, preheating the skillet is essential for a crispy crust. Heat the skillet in the oven for about 20 minutes before placing the dough inside. This ensures even cooking and a golden-brown crust.
How Do I Store Leftover No-Knead Skillet Bread?
Store leftover bread in a paper bag or bread box at room temperature. Avoid plastic bags as they trap moisture and soften the crust. For longer storage, freeze the bread in an airtight container.
Conclusion
Enjoy the simplicity of baking no-knead bread in a skillet. It's easy, and the results are fantastic. This method saves time and effort. The crust turns out crisp, while the inside stays soft. Perfect for beginners or busy days.
Fresh bread always delights the senses. Try it yourself and savour the homemade goodness. Your kitchen will smell amazing, filling your home with warmth. Share this delightful bread with family and friends. They'll surely appreciate the taste and effort. Happy baking, and enjoy every bite!
Imagine the smell of freshly baked bread filling your kitchen, warm and golden, without the hassle of kneading dough or waiting hours for a rise. You don’t need fancy equipment or a lot of time to enjoy homemade bread that tastes like it came from a bakery.
With just a simple skillet and a few ingredients, you can create soft, crusty bread that’s perfect for any meal. Ready to discover how easy it is to bake no-knead bread in a skillet? Keep reading, and you’ll be amazed at how quickly you can master this delicious skill.
Ingredients Needed
Baking no-knead bread in a skillet is simple and requires a few ingredients.
All ingredients are easy to find and work well together for soft bread.
Flour
Flour is the main ingredient for bread. Use all-purpose flour for the best results.
It gives the bread structure and texture. Measure it carefully for good dough.
Water
Water hydrates the flour and helps form the dough. Use warm water for faster yeast action.
The right amount makes the dough soft and sticky. Avoid using too much water.
Yeast
Yeast makes the bread rise by producing gas bubbles. Use active dry yeast or instant yeast.
Check the expiration date to ensure it is fresh and strong.
Salt
Salt adds flavour to the bread. It also controls yeast activity to improve dough texture.
Use a small amount to balance taste without slowing the yeast too much.
Optional: Sugar
Sugar feeds the yeast and helps the bread brown. It is optional in no-knead bread.
Add a teaspoon if you want a slightly sweeter crust and faster rise.

Credit: www.amazon.com
Choosing The Right Skillet
Choosing the right skillet is important for baking no-knead bread. The skillet helps create a crispy crust and even baking.
Not all skillets work well for this bread. You need to pick one that holds heat and fits your dough size.
Material Matters
Cast-iron skillets are popular for baking no-knead bread. They hold heat well and spread it evenly.
Other materials like stainless steel or aluminum may not keep heat as long. This can affect the bread crust.
- Cast iron: Best heat retention and even cooking
- Stainless steel: Heats quickly but cools fast
- Aluminium: Lightweight but less heat retention
Size And Depth
Pick a skillet size that fits your dough with space to rise. Usually, 10 to 12 inches works well.
The skillet should be deep enough to hold the dough without spilling. At least 2 to 3 inches deep is good.
- 10-12 inch diameter fits most no-knead bread doughs
- 2-3 inches deep to allow the dough to rise
- A lid or cover helps trap steam during baking
Lid Or Cover Options
A skillet with a lid works best for no knead bread. The lid traps steam and makes the crust crispy.
If your skillet has no lid, use aluminum foil as a cover during baking. This helps keep moisture in.
- Cast-iron Dutch ovens with lids are ideal
- Use foil if no lid is available
- Steam helps create a crunchy crust
Handle And Oven Safety
Check if the skillet handle is oven safe. Some handles can melt or get damaged at high heat.
Cast iron handles are safe for ovens. Silicone or plastic handles may need extra care or removal.
- Cast iron handles are safe at high temperatures
- Remove or cover plastic/silicone handles
- Use oven mitts when handling hot skillets
Mixing The Dough
Mixing the dough is the first step to bake no knead bread in a skillet. It is simple and needs only a few ingredients.
This dough does not require much work. You just need to combine everything well and let the dough rest.
Gather Your Ingredients
You need flour, water, salt, and yeast to make the dough. Use all-purpose flour for the best results.
- 3 cups all-purpose flour
- 1 1/2 cups warm water
- 1 teaspoon salt
- 1/4 teaspoon active dry yeast
Combine Dry Ingredients
Start by mixing flour, salt, and yeast in a large bowl. Stir them well to spread the salt and yeast evenly.
Mixing dry ingredients first helps the dough rise better and taste good.
Add Water And Mix
Pour warm water into the dry mix slowly. Stir with a spoon until all flour is wet and forms a sticky dough.
- Use a wooden spoon or spatula
- Mix until no dry flour remains
- The dough will be loose and sticky
No Kneading Needed
This dough is very sticky, but do not add more flour. The dough will become soft and airy after resting.
Let the dough rest for at least 12 hours. This time helps gluten develop without kneading.
Credit: www.youtube.com
Resting And Rising Times
Resting and rising are key steps in baking no-knead bread in a skillet. These steps let the dough develop flavour and texture. Timing is important for the best results.
Understanding how long to let the dough rest and rise helps you bake soft, fluffy bread with a nice crust. Follow the guidelines below for each stage.
Initial Resting
After mixing the dough, let it rest at room temperature. This allows the flour to absorb water fully. A good rest time is between 12 and 18 hours.
During this time, the dough will bubble and expand slowly. Do not rush this step because it builds flavour and gluten structure.
Shaping And Final Rise
Once the dough has rested, shape it gently into a ball. Place it in the skillet or on a surface for the final rise. This usually takes 30 to 45 minutes.
This shorter rise helps the dough relax and prepare for baking. It also improves the bread’s crumb texture.
- Keep the dough covered during the final rise to avoid drying out.
- Check the dough; it should feel puffy but not doubled in size.
- If the dough is too soft, let it rise a little longer.
Resting Times Summary
Stage Time Range Purpose
Initial Resting 12–18 hours: Hydrates flour, develops flavour
Final Rise 30–45 minutes Prepares dough for baking
Preparing The Skillet
Using a skillet to bake no-knead bread helps create a crispy crust. Proper skillet preparation ensures even baking and easy bread release.
Follow these steps to get your skillet ready before adding the dough.
Choose The Right Skillet
Pick a heavy skillet that holds heat well. Cast-iron skillets work best for baking bread.
A good skillet size is about 8 to 10 inches wide. This size fits most no-knead bread recipes.
Clean And Dry The Skillet
Make sure your skillet is clean and dry before use. Remove any leftover food or oil.
Dry the skillet completely to prevent steam during baking, which can affect the bread crust.
Preheat The Skillet
Place the skillet in the oven while it preheats. A hot skillet helps create a crunchy crust on the bread.
Preheat at 450°F (230°C) for at least 30 minutes before baking.
Grease The Skillet Lightly
Use a small amount of oil or butter to grease the skillet. This prevents the bread from sticking.
- Use a paper towel to spread oil evenly
- Do not use too much oil to avoid a soggy bread bottom
- Choose neutral oils like vegetable or canola oil
Use Parchment Paper For Easy Removal
Cut a piece of parchment paper to fit inside the skillet. Place it before adding the dough.
Parchment paper helps lift the bread out after baking and keeps the skillet clean.
Shaping The Dough
Shaping the dough is a key step in baking no knead bread in a skillet. It helps create the right texture and crust for your bread.
After the dough has risen, it is shaped and carefully prepared for final proof and baking. This process is simple and needs just a few techniques.
Prepare Your Work Surface
Lightly flour a clean surface to stop the dough from sticking. You do not need a lot of flour because too much can dry the dough.
Turn Out The Dough
Gently turn the dough onto the floured surface. Handle it softly to keep the air inside, which makes the bread light and fluffy.
Shape The Dough Into A Ball
Fold the edges of the dough toward the centre to form a round shape. Use your hands to tuck and pinch the dough underneath to create tension on the surface.
- Fold the dough edges to the centre
- Turn the dough seam side down
- Use your hands to create a tight ball
- Cover the dough with a cloth for the final rise
Check The Dough’s Smoothness
The dough surface should feel smooth and tight. If it looks loose or sticky, gently fold it again and reshape.
Final Tips For Shaping
Tip: Let the dough rest if it resists shaping. A 10-minute pause helps relax the gluten.
Tip: Use minimal flour on your hands to avoid drying the dough.
Cooking The Bread
Cooking no-knead bread in a skillet is simple and quick. You do not need an oven.
Using the right heat and timing helps the bread bake evenly and taste great.
Heat Settings
Start by heating your skillet on medium heat. Too high heat can burn the bread outside and leave the inside raw.
- Preheat the skillet on medium heat for 5 minutes.
- Use a lid to trap heat and steam.
- Reduce the heat to low after the first 10 minutes to cook inside well.
Timing Tips
Baking time depends on your stove and skillet size. Watch the bread closely.
- Cook covered for 15 minutes on medium heat.
- Lower the heat and cook for another 10 to 15 minutes.
- Remove the lid for the last 5 minutes to brown the crust.
Checking Doneness
Method: What to Look For
Tap the bottom. It should sound hollow
Check crust colour. Golden brown means done
Use a thermometer. Internal temp around 190°F (88°C)
If the bread feels soft or sounds dull when tapped, cook it a bit longer.
Cooling And Serving
Cooling your no knead bread properly helps keep its texture and flavor. Serving it at the right time makes it taste even better.
This section explains how to cool your bread and offers ideas for serving it fresh from the skillet.
Cooling The Bread
After baking, remove the bread from the skillet carefully. Let it cool on a wire rack to avoid sogginess. Cooling allows steam to escape and the crust to stay crisp.
- Use oven mitts to handle the hot skillet.
- Place the bread on a wire rack for at least 30 minutes.
- Do not cover the bread while cooling to keep the crust crunchy.
Serving Suggestions
Once cooled, slice the bread with a serrated knife. Serve it plain or with toppings for a tasty treat. Warm bread tastes great with butter or jam.
Serving Idea Description
Butter and Honey: Spread fresh butter and drizzle honey on warm slices.
Garlic Bread: Brush with garlic butter and toast lightly in the oven.
Sandwich Base: Use thick slices to make sandwiches with your favourite fillings.
Soup Side Serve alongside soups or stews for dipping.
Troubleshooting Common Issues
Baking no-knead bread in a skillet is easy but may cause some problems. Knowing how to fix these helps you bake better bread.
Here are common issues and tips to solve them when baking bread in a skillet.
Bread Is Too Dense
Dense bread happens when the dough does not rise enough. The yeast needs time and warmth to work well.
Make sure your dough rests in a warm place for at least 8 hours. Avoid cold spots or drafts.
Bread Does Not Cook Evenly
Uneven cooking can happen if the skillet heats unevenly or if the lid is not used.
Use a heavy skillet with a tight lid. Cook on low to medium heat to avoid burning the bottom.
Crust Is Too Hard Or Too Soft
If the crust is too hard, the heat may be too high or the bread is overcooked. If too soft, it may need more time to bake.
- Lower the heat to prevent burning.
- Cook longer with the lid off to crisp the crust.
- Let bread cool on a rack to keep the crust firm.
Dough Sticks To The Skillet
Dough can stick if the skillet is not greased or if the dough is too wet.
Lightly oil or flour the skillet before adding the dough. Use a spatula to loosen edges if needed.
Bread Tastes Yeasty Or Sour
Too much yeast or too long fermentation can cause strong flavours. This affects taste and smell.
- Use the right amount of yeast as the recipe says.
- Keep fermentation time between 8 and 24 hours.
- Store dough in the fridge if you want slower fermentation.
Credit: www.ihearteating.com
Flavor Variations
No knead bread baked in a skillet has a simple, delicious base flavor. You can change it by adding different ingredients. This makes the bread taste unique each time.
Try mixing herbs, spices, or other add-ins to create new flavours. These options are easy and quick to do before baking.
Herbs And Garlic
Add fresh or dried herbs to the dough for a tasty twist. Garlic powder or minced garlic also works well. These give the bread a savoury, aromatic flavour.
- Rosemary and thyme add a woodsy taste
- Basil and oregano bring an Italian touch
- Garlic powder adds a mild spicy note
- Fresh minced garlic gives a stronger flavour
Cheese Blends
Mix shredded cheese into the dough or sprinkle on top before baking. Cheese melts and makes the bread soft and rich. Choose cheese that melts well for the best results.
- Cheddar adds a sharp, tangy taste
- Mozzarella melts smoothly and is mild
- Parmesan brings a salty, nutty flavour
- Feta adds a crumbly, tangy touch
Seeds And Nuts
Seeds and nuts add crunch and flavour to the bread. Mix them in the dough or sprinkle them on the surface for texture. They also add healthy fats and nutrients.
- Sunflower seeds add a mild nutty crunch
- Poppy seeds give a subtle crunch and flavour
- Chopped walnuts add earthiness
- Flaxseeds boost nutrition and have a nutty taste
Sweet Additions
Add sweet ingredients to make a dessert-style bread. These add natural sweetness and flavour without much work. Use dried fruits or spices for the best taste.
- Raisins or dried cranberries add chewy sweetness
- Cinnamon gives warmth and spice
- Chopped dates add rich sweetness
- Vanilla extract adds a soft aroma
Spicy And Savoury Mixes
Use spices to make bread with a kick. These flavours are great for serving with soups or stews. Add small amounts to avoid overpowering the bread.
- Crushed red pepper flakes add heat
- Cumin gives a warm, earthy flavour
- Smoked paprika adds depth and smokiness
- Chopped olives bring a salty, briny taste
Frequently Asked Questions
How Long Does Knead Bread Take To Bake In A Skillet?
No-knead bread typically bakes in a skillet for 30 to 40 minutes. The bread develops a crispy crust and soft interior during this time. Baking time may vary slightly based on skillet size and oven temperature.
Can I Use Any Skillet For No-Knead Bread Baking?
Cast-iron skillets are best for no-knead bread because they retain heat well. Other heavy-bottomed skillets can work, but may not produce the same crust quality. Avoid thin or non-stick pans for optimal results.
Do I Need To Preheat The Skillet Before Baking Bread?
Yes, preheating the skillet is essential for a crispy crust. Heat the skillet in the oven for about 20 minutes before placing the dough inside. This ensures even cooking and a golden-brown crust.
How Do I Store Leftover No-Knead Skillet Bread?
Store leftover bread in a paper bag or bread box at room temperature. Avoid plastic bags as they trap moisture and soften the crust. For longer storage, freeze the bread in an airtight container.
Conclusion
Enjoy the simplicity of baking no-knead bread in a skillet. It's easy, and the results are fantastic. This method saves time and effort. The crust turns out crisp, while the inside stays soft. Perfect for beginners or busy days.
Fresh bread always delights the senses. Try it yourself and savour the homemade goodness. Your kitchen will smell amazing, filling your home with warmth. Share this delightful bread with family and friends. They'll surely appreciate the taste and effort. Happy baking, and enjoy every bite!