How to Line a Cake Pan With Baking Paper? If you’ve ever struggled to get your cake out of the pan without it breaking or sticking, you’re not alone. Lining a cake pan with baking paper is a simple step that can make a huge difference in your baking results.
But how exactly do you do it so the paper fits perfectly and your cake comes out clean every time? In this guide, you’ll discover easy, foolproof methods to line your cake pan quickly and correctly. Keep reading, and you’ll never have to worry about a stuck cake again.
Choose The Right Baking Paper
Choosing the right baking paper is key to lining a cake pan properly. It prevents sticking and helps the cake bake evenly.
Not all baking papers are the same. Picking the best one makes your baking easier and cleaner.
Understand Different Types Of Baking Paper
Baking paper comes in various types. Some are coated with silicone, while others are plain or waxed.
Silicone-coated paper is non-stick and heat resistant. Waxed paper is not suitable for baking because it can melt.
- Silicone-coated baking paper: best for baking
- Waxed paper: not for oven use
- Parchment paper: often used as baking paper
Check The Heat Resistance
Baking paper must withstand your oven's temperature. Look for papers rated for at least 420°F (215°C).
Using paper that can't handle high heat may cause burning or smoking.
- Check the packaging for temperature limits
- Use silicone-coated paper for high heat
- Avoid waxed paper in the oven
Consider The Size And Thickness
Choose baking paper large enough to cover your cake pan fully. Extra paper helps with easy removal.
Thicker paper is stronger and less likely to tear when lining the pan or removing the cake.
- Cut paper larger than the pan bottom
- Use thicker paper for heavy or sticky cakes
- Thinner paper is good for light cakes
Choose Food-safe Baking Paper
Make sure your baking paper is labeled food-safe. This means it won’t release harmful chemicals during baking.
Always buy baking paper from trusted brands to ensure safety and quality.
- Look for food-safe labels on packaging
- Avoid recycled paper with unknown coatings
- Use baking paper made for oven use only
Select The Appropriate Cake Pan
Choosing the right cake pan is key for baking success. Different cakes need different pans.
The size and shape of the pan affect baking time and cake texture. Use the correct pan for best results.
Consider The Pan Material
Common pan materials include metal, glass, and silicone. Metal heats quickly and gives a nice crust.
Glass holds heat longer, so cakes may bake slower. Silicone is flexible and non-stick but may need lower heat.
Choose The Right Pan Size
Using a pan that is too large makes a thin cake. A small pan makes a thick cake that may stay raw inside.
- Check the recipe for pan size recommendations.
- Use a pan with the same volume if size is not exact.
- Adjust baking time if your pan size differs.
Select Pan Shape For Cake Type
Round pans work well for layer cakes. Square or rectangular pans fit sheet cakes.
Bundt pans add decorative shape. Springform pans are good for delicate cakes like cheesecakes.
Check Pan Condition Before Use
Make sure your pan is clean and undamaged. Scratched or bent pans can cause uneven baking.
| Pan Condition | Effect on Cake |
|---|---|
| Clean and smooth | Even baking and easy release |
| Scratched or dented | Uneven heat and sticking |
| Non-stick coating worn off | Cake may stick and break |
Measure And Cut The Paper
Lining a cake pan with baking paper helps your cake bake evenly and prevents sticking.
Measuring and cutting the paper correctly is key to a perfect fit inside the pan.
Cutting The Base Circle
Place your cake pan upside down on the baking paper. Use a pencil to trace around the base.
Cut out the circle carefully along the line. This circle will cover the bottom of your pan.
Preparing The Side Strips
Measure the height and circumference of the pan to cut side strips of paper.
- Use a ruler or tape measure to find the height of the pan.
- Wrap a string around the pan’s edge, then measure the string length for circumference.
- Cut a strip of baking paper using these measurements.
- Make the strip a bit longer than the circumference to allow overlap.

Credit: kickassbaker.com
Grease The Pan Before Lining
Lining a cake pan with baking paper helps your cake come out clean. Greasing the pan first makes the paper stick well.
This simple step stops the paper from moving. It also helps your cake bake evenly.
Choose The Right Grease
Use butter, oil, or baking spray to grease your pan. Butter adds flavor, while oil works well for non-stick.
Baking spray is quick and easy. Make sure the grease covers every part of the pan.
- Butter: softens and flavors the cake
- Oil: spreads easily and is light
- Baking spray: fast and convenient
How To Grease The Pan Properly
Use a paper towel or pastry brush to spread the grease. Cover the bottom and sides evenly.
Do not use too much grease. A thin layer is enough to hold the paper in place.
- Dip a paper towel in butter or oil
- Rub the pan’s bottom and sides
- Check for any dry spots and cover them
Cut And Place The Baking Paper
After greasing, cut the baking paper to fit your pan. You can use the pan as a guide to measure.
Press the paper into the pan. The grease will help it stay flat and not slide around.
- Trace the pan’s bottom on paper and cut
- Cut strips for the sides if needed
- Press paper firmly into the greased pan
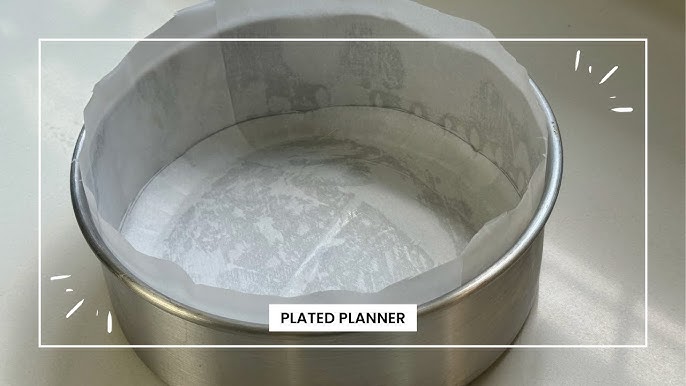
Place The Paper In The Pan
Lining a cake pan with baking paper helps prevent sticking. It also makes cleaning easier after baking.
Placing the paper correctly in the pan ensures the cake bakes evenly. Let’s look at how to position the paper.
Positioning The Base
First, cut a circle of baking paper the same size as the pan base. This will cover the bottom completely.
To get the right size, place the pan on the paper and trace around it with a pencil. Then cut along the line.
- Place the paper circle flat on the pan’s bottom
- Make sure it fits without wrinkles or folds
- Smooth the paper gently to stick it to the base
Fitting The Side Strips
Next, cut long strips of baking paper to line the pan sides. The strips should be taller than the pan’s height.
Press the strips along the inside edge of the pan. They should fit snugly without gaps or tears.
- Cut strips slightly taller than the pan sides
- Press strips to the pan sides, overlapping ends if needed
- Trim excess paper at the top to keep a clean edge
Smooth Out Wrinkles And Air Bubbles
Lining a cake pan with baking paper helps the cake release easily. Wrinkles and air bubbles can cause uneven baking.
Smoothing out the paper ensures a flat surface for the batter. This makes your cake bake evenly and look better.
Prepare The Pan And Paper
Start by cutting baking paper larger than the pan. This gives enough paper to cover the sides and bottom fully.
Lightly grease the pan with butter or oil. This helps the paper stick and stay in place without wrinkles.
- Cut paper 2 inches larger than pan size
- Grease pan with a thin layer of butter
- Place paper inside and press gently
Press The Paper Firmly
Use your fingers to press the paper into the corners and edges. This removes folds and wrinkles that trap air.
Work slowly and smooth out any bumps. A flat paper surface keeps the batter level and stops air pockets.
- Press from the center out to edges
- Smooth corners by folding paper carefully
- Check for any raised spots or folds
Remove Air Bubbles
Tap the pan gently on the counter to release trapped air. This helps the paper lie flat without bubbles.
If bubbles remain, lift the paper and smooth again. Repeat until the paper sticks flat with no air pockets.
- Tap pan firmly but gently on surface
- Lift and press paper if bubbles appear
- Ensure paper stays in place before adding batter
Tips For Different Pan Shapes
Lining a cake pan with baking paper helps your cake bake evenly and release easily. Different pan shapes need special care when lining.
Use the right technique to fit the paper perfectly. This stops the batter from sticking and keeps your cake neat.
Round Pans
Round pans are the most common baking pans. Cut a circle of baking paper to fit the bottom of the pan.
To line the sides, cut strips of paper and press them gently against the pan walls. Use a little butter or oil to help the paper stick.
- Trace the pan base on the paper before cutting.
- Use scissors to trim the edges cleanly.
- Lightly grease the pan so paper stays in place.
- Press paper strips on the sides carefully.
Square And Rectangular Pans
For square or rectangular pans, cut a piece of paper larger than the pan base. Fold the edges up to cover the sides.
Crease the paper well at the corners so it fits snugly. Use a small cut at each corner if needed for a sharper fold.
- Cut paper at least 2 inches wider than pan.
- Fold edges up along the sides of the pan.
- Make small corner cuts to avoid bunching.
- Grease the pan before lining the paper.
Springform Pans
Springform pans have removable sides. Line the bottom with a circle of baking paper. Also, line the sides with strips.
Make sure the paper does not block the latch. Grease the pan well so the paper sticks firmly inside.
- Cut a circle for the base to fit inside.
- Cut strips to line the sides without blocking the latch.
- Grease pan parts well before adding paper.
- Press paper firmly for a tight fit.
Common Mistakes To Avoid
Lining a cake pan with baking paper helps prevent sticking and makes cleanup easier. Many bakers make simple errors that cause problems during baking.
Learn the common mistakes to avoid so your cake comes out perfectly every time.
Using The Wrong Size Of Baking Paper
Cutting baking paper too small will leave parts of the pan exposed. The cake may stick to these uncovered areas.
If the paper is too large, it can wrinkle and cause uneven baking or affect the cake's shape.
- Measure the pan's bottom and sides carefully.
- Cut the paper to fit the base and allow some paper up the sides.
- Avoid large folds or wrinkles in the paper.
Not Greasing The Pan Before Lining
Many skip greasing the pan before placing baking paper. This step helps the paper stick to the pan.
Without grease, the paper can slip or fold during pouring, causing the batter to leak under the paper.
- Use a thin layer of butter or oil on the pan surface.
- Press the paper onto the greased surface to secure it.
Folding Instead Of Cutting The Paper
Folding baking paper creates thick layers in some spots. These areas bake differently and may burn.
Cutting the paper to size avoids extra thickness and helps the cake bake evenly.
- Measure carefully and cut the paper flat.
- Use a round or square piece that fits the pan shape.
Ignoring Paper Placement On The Sides
Only lining the bottom of the pan leaves the sides exposed. Cake batter can stick to these parts.
Covering the sides with baking paper helps the cake release easily and keeps edges neat.
- Cut strips of paper to fit the pan's sides.
- Press strips firmly against the greased sides.
Reusing Baking Paper Too Many Times
Some bakers reuse baking paper to save time. Old paper may have oil stains or tears.
Worn paper can stick to the cake or tear during baking, ruining your cake's surface.
- Use fresh baking paper for each bake.
- Check paper for damage before use.
Benefits Of Lining Cake Pans
Lining cake pans with baking paper makes baking easier and cleaner. It helps cakes come out smoothly from the pan.
Using baking paper protects your cake and your pan. It also saves time during cleanup.
Prevents Sticking
Baking paper stops cakes from sticking to the pan. This means your cake stays whole and looks nice.
Without baking paper, cakes may break or crumble when you try to remove them.
Protects The Pan
Baking paper creates a barrier between the cake and the pan. This keeps the pan clean and free from burnt bits.
It can also help your pans last longer by reducing scratches and stains.
Makes Cleanup Easy
Lining pans with baking paper cuts down on cleaning time. You just lift the paper and throw it away.
The pan stays mostly clean, needing only a quick wash after baking.
Promotes Even Baking
Baking paper helps heat spread evenly across the cake’s surface. This can improve how your cake bakes.
The paper prevents hot spots and burning on the edges of the cake.
Supports Easy Cake Removal
The paper acts like a sling to lift the cake out of the pan. This keeps the cake’s shape intact.
You can peel the paper away gently without damaging the cake’s sides or bottom.

Credit: www.youtube.com

Credit: www.theitaliandishblog.com
Frequently Asked Questions
How Do You Cut Baking Paper For Cake Pans?
Measure the pan's base, then cut a paper circle slightly smaller. For sides, cut strips matching the pan's height and circumference. This ensures perfect coverage without excess paper.
Can I Reuse Baking Paper When Lining Cake Pans?
Reusing baking paper is not recommended. It may stick to the cake or tear during baking. Always use fresh paper for best results and easy cake release.
Why Is Lining A Cake Pan With Baking Paper Important?
Lining prevents the cake from sticking to the pan. It makes removal easier and keeps the cake's shape intact. It also helps with even baking and cleanup.
What’s The Best Way To Stick Baking Paper Inside Pans?
Lightly grease the pan before placing baking paper. This helps the paper adhere and stay in place. It also prevents the cake from sticking to the paper edges.
Conclusion
Lining a cake pan with baking paper ensures easy cake removal. It keeps the cake intact and prevents sticking. First, measure and cut the paper to fit. Then, press it into the pan, smoothing out wrinkles. This simple step saves time and frustration.
Plus, cleaning becomes a breeze. No more scrubbing stubborn cake bits! Remember, practice makes perfect. With these tips, baking becomes more enjoyable. You'll see better results and tastier cakes every time. So, grab your baking paper and start lining those pans! Enjoy the sweet rewards of your efforts.