Are you ready to elevate your baking game with your trusty Kitchenaid stand mixer? Imagine effortlessly crafting the perfect dough, whether for bread, pizza, or pastries, with just a few simple steps.
The convenience and precision of a stand mixer can transform your kitchen experience, saving you time and effort. But how do you make the most of this powerful kitchen tool? In this guide, we'll unlock the secrets to using your Kitchenaid stand mixer for dough, ensuring that every loaf, crust, and pastry turns out just right.
So, grab your mixer and get ready to discover tips and tricks that will make you wonder how you ever baked without it. Dive in and see how easy it can be to become a dough-making pro!

Credit: www.cakesandmore.in
Choosing The Right Attachments
Using the correct attachment on your KitchenAid stand mixer is important for making dough. Each attachment is made for different tasks. Picking the right one helps you get the best results.
This guide will help you understand which attachment to use for dough and why.
Dough Hook Types
The dough hook is the best attachment for kneading dough. KitchenAid offers two main types: the C-shaped hook and the spiral hook. Each works well but in different ways.
The C-shaped hook is good for lighter doughs. The spiral hook works better for heavy and thick doughs. Both save time and effort compared to kneading by hand.
- C-shaped hook:Ideal for soft to medium doughs like pizza or bread.
- Spiral hook:Best for dense doughs like bagels or pretzels.
When To Use The Paddle
The paddle attachment is not for kneading dough. Use it for mixing ingredients quickly and evenly. It works well for batters and cookie dough that is thick but not stretchy.
If your dough is very sticky or heavy, the paddle will not develop the gluten as needed. Use the paddle for mixing dry and wet ingredients before switching to the dough hook.
Benefits Of The Whisk
The whisk attachment is made for whipping air into mixtures. It is not used for dough. Use it for beating eggs, cream, or making meringues.
The whisk helps create light and fluffy textures. It is great for recipes that need volume but not kneading.
Preparing Ingredients
Using a KitchenAid stand mixer for dough is easier when ingredients are ready. Proper preparation helps the dough turn out soft and smooth.
Focus on measuring, temperature, and the order of adding ingredients. These steps ensure good dough texture and rise.
Measuring Flour And Liquids
Measure flour and liquids carefully for the best dough consistency. Too much flour makes dough dry; too much liquid makes it sticky.
- Use a spoon to fluff the flour before scooping it into a measuring cup.
- Level the flour with a straight edge for accuracy.
- Measure liquids in a clear cup at eye level on a flat surface.
- Pour liquids slowly to avoid adding too much.
Temperature Tips For Yeast
Yeast needs the right temperature to work well. Too hot or cold water can stop yeast from activating.
| Water Temperature | Yeast Reaction |
| 95°F to 110°F (35°C to 43°C) | Best for activation |
| Above 130°F (54°C) | Can kill yeast |
| Below 70°F (21°C) | Slow or no activation |
Adding Ingredients In Order
Adding ingredients in the right order helps the mixer work well and the dough develop properly.
- Add warm water and yeast first to activate the yeast.
- Mix in sugar and salt to feed yeast and flavor dough.
- Pour in oil or melted butter for softness.
- Add flour last to form the dough.
Mixing Dough Step-by-step
Using a KitchenAid stand mixer makes dough mixing easier and faster. The mixer helps mix ingredients evenly.
Follow simple steps to mix your dough correctly. This keeps the dough texture just right for baking.
Starting On Low Speed
Begin mixing your dough on low speed. This helps combine ingredients without making a mess.
Start the mixer slowly to avoid flour flying out of the bowl. Let the ingredients come together first.
- Attach the dough hook to the mixer.
- Turn the mixer on low speed (speed 2).
- Mix for 1-2 minutes until ingredients start to form a ball.
Increasing To Medium Speed
After the dough forms a rough ball, raise the speed to medium. This develops the gluten for strength.
Mixing at medium speed makes the dough smooth and elastic. It usually takes about 5 to 7 minutes.
- Set mixer speed to medium (speed 4-6).
- Mix the dough for 5 to 7 minutes.
- Watch the dough become stretchy and smooth.
When To Stop Mixing
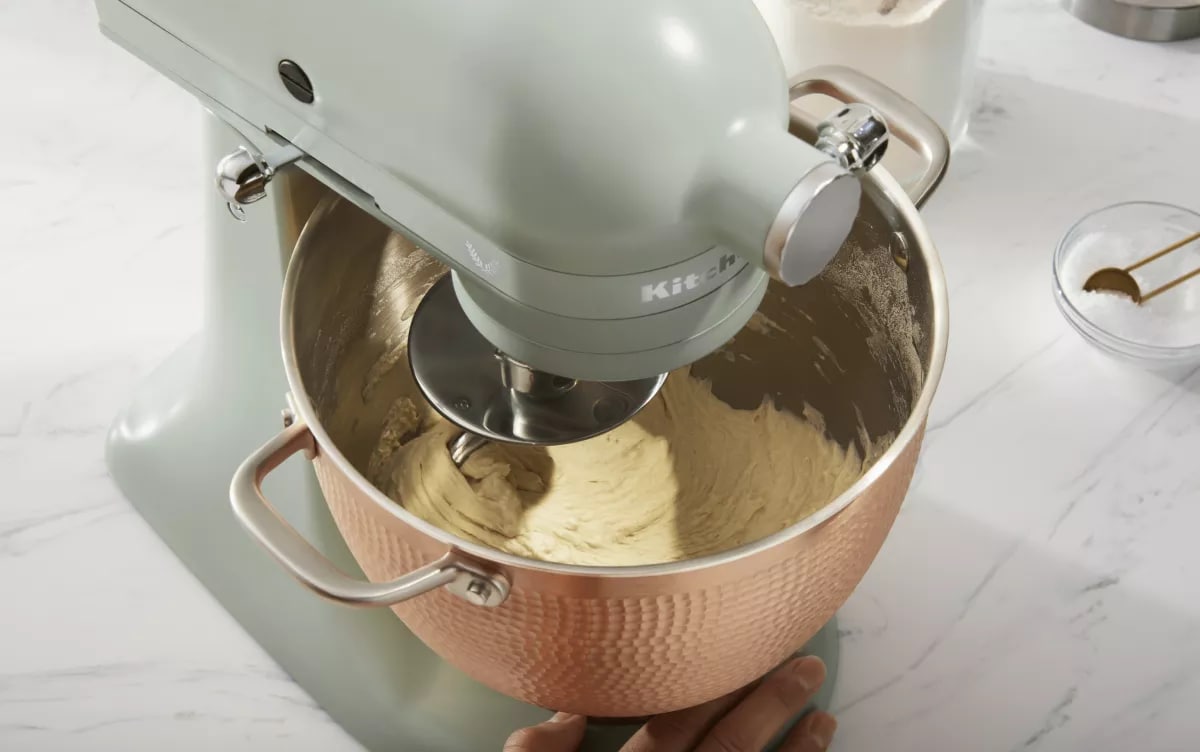
Stop mixing when the dough pulls away from the bowl. It should be smooth and elastic but not sticky.
Overmixing can make dough tough. Check the dough often to get the best texture.
- Dough forms a ball and sticks slightly to the bowl.
- Dough feels soft and elastic when stretched.
- Dough does not tear easily when pulled.
Credit: www.kitchenaid.com
Kneading With The Mixer
Using a KitchenAid stand mixer makes kneading dough easier and faster. The dough hook attachment helps mix and knead dough evenly.
Understanding the right kneading time and signs of well-kneaded dough is important. This prevents problems in your baking.
How Long To Knead
Kneading time depends on the dough type and recipe. Most bread doughs need about 5 to 8 minutes with a mixer.
Start the mixer on low speed to combine ingredients. Then increase to medium speed for kneading.
- Use speed 2 or 3 on your KitchenAid mixer
- Check dough texture after 5 minutes
- Stop kneading when dough is smooth and elastic
Signs Of Well-kneaded Dough
Well-kneaded dough looks smooth and feels elastic. It should stretch without breaking easily.
Another test is the windowpane test. Stretch a small dough piece thin. If it does not tear, kneading is done.
- Smooth, slightly shiny surface
- Elastic and springs back when poked
- Passes the windowpane test without tearing
Avoiding Over-kneading
Over-kneaded dough becomes tough and hard to shape. It may tear easily and not rise well.
Stop kneading as soon as dough is smooth and elastic. Check it often during mixing to avoid overworking.
- Do not knead beyond 10 minutes with mixer
- Watch dough texture closely
- Remove dough from mixer if it feels dry or stiff
Troubleshooting Common Issues
Using a KitchenAid stand mixer for dough can save time and effort. Sometimes, problems happen during mixing. Knowing how to fix common issues helps you get perfect dough.
This guide covers three common problems: dough too sticky, dough too dry, and the mixer not kneading properly. Follow the tips to solve these problems easily.
Dough Too Sticky
Sticky dough can make handling and shaping hard. It usually means there is too much water or not enough flour in the dough.
To fix sticky dough, add small amounts of flour while the mixer runs. Add one tablespoon at a time. Stop when the dough feels soft but not sticky.
- Check the recipe measurements carefully
- Add flour slowly to avoid making dough too dry
- Use the dough hook attachment for best mixing
- Keep the mixer speed low to prevent overmixing
Dough Too Dry
Dry dough looks crumbly and breaks apart easily. This means the dough needs more moisture or fat to hold it together.
Add water or milk in small amounts while the mixer runs. Add one teaspoon at a time. Mix until the dough is soft and elastic.
- Check ingredient amounts before mixing
- Add liquids slowly to avoid sticky dough
- Make sure the mixer dough hook is attached properly
- Use the right mixer speed for kneading
Mixer Not Kneading Properly
The mixer may stop kneading well if the dough is too stiff or the hook is not installed right. It can also happen if the mixer speed is wrong.
Check that the dough hook is tight and placed correctly. Use low to medium speed for kneading. If the dough is too hard, add a little water to soften it.
- Attach the dough hook firmly before use
- Use speed 2 or 3 for kneading dough
- Add water or flour to adjust dough texture
- Stop mixing if the mixer sounds strained
Cleaning And Maintenance Tips
Keeping your Kitchenaid stand mixer clean helps it work well for years. Regular maintenance avoids build-up and damage.
This guide explains how to clean attachments, maintain mixer performance, and store your mixer properly.
Cleaning Attachments
Detach all removable parts before cleaning. Wash attachments with warm, soapy water. Use a soft cloth or brush to remove dough.
- Do not soak attachments with motors or electrical parts.
- Dry thoroughly to avoid rust.
- Some attachments are dishwasher safe; check the manual first.
- Wipe the stand mixer body with a damp cloth only.
Maintaining Mixer Performance
Keep your mixer running smoothly by checking key parts regularly. Lubricate gears if needed and tighten any loose screws.
| Maintenance Task | Frequency | Notes |
| Clean motor housing | After each use | Wipe with dry cloth |
| Lubricate gears | Every 6 months | Use recommended lubricant |
| Check attachments | Monthly | Inspect for wear or damage |
| Tighten screws | Every 3 months | Use screwdriver carefully |
Storage Suggestions
Store your mixer and attachments in a dry place. Keep attachments organized to avoid damage or loss.
- Cover mixer with a dust cover or cloth.
- Store attachments in labeled containers or drawers.
- Keep power cord loosely coiled to prevent wear.
- Avoid stacking heavy items on top of the mixer.
Credit: www.kitchenaid.com
Frequently Asked Questions
How Do I Attach The Dough Hook To My Kitchenaid Mixer?
To attach the dough hook, tilt the mixer head back, insert the hook into the hub, and twist it clockwise until locked. Ensure it’s secure before mixing dough to prevent damage or accidents.
What Speed Setting Is Best For Kneading Dough?
Use the lowest speed setting, usually speed 2, for kneading dough. This prevents overworking the dough and ensures even mixing without overheating the motor.
Can I Use The Stand Mixer For All Dough Types?
Yes, the KitchenAid stand mixer works well with most dough types, including bread, pizza, and pastry dough. Always use the dough hook attachment for best results.
How Long Should I Knead Dough With A Kitchenaid Mixer?
Knead dough for 5 to 8 minutes on low speed. Check dough texture; it should be smooth and elastic but not sticky.
Conclusion
Using a KitchenAid stand mixer makes dough mixing easy and fast. Attach the dough hook, add your ingredients, and let the mixer do the work. Watch the dough come together smoothly without much effort. This tool saves time and helps create consistent results every time.
Practice a few times to get the best dough texture. Soon, baking bread or pizza will feel simple and fun. Enjoy the process and the tasty results from your mixer.