

Are you tired of the greasy buildup and unpleasant odors wafting from your kitchen exhaust fan? If so, you’re not alone.
Many homeowners overlook the importance of maintaining their kitchen exhaust fan filters, leading to decreased efficiency and a less pleasant cooking environment. But worry not—cleaning or removing your kitchen exhaust fan filter is a simple task that can transform your cooking space.
Imagine a kitchen where the air is fresh, your appliances run smoothly, and your cooking experience is more enjoyable. Intrigued? Stick around, and you’ll discover just how easy it is to revitalize your kitchen with a few simple steps. Your kitchen will thank you!

Credit: www.searshomeservices.com
Tools Needed
Removing a kitchen exhaust fan filter is easy with the right tools. Using proper tools helps you clean or replace the filter safely.
This guide lists the tools you need to take out the filter without damage or injury.
Screwdriver
Most exhaust fan filters are held by screws. A screwdriver helps you remove these screws carefully.
Choose a screwdriver with the right head type. Common types are flathead and Phillips.
- Flathead screwdriver
- Phillips screwdriver
Gloves
Wear gloves to protect your hands from dirt and sharp edges. Gloves also help you grip the filter better.
Use reusable or disposable gloves based on your preference.
- Rubber or latex gloves
- Work gloves with grip
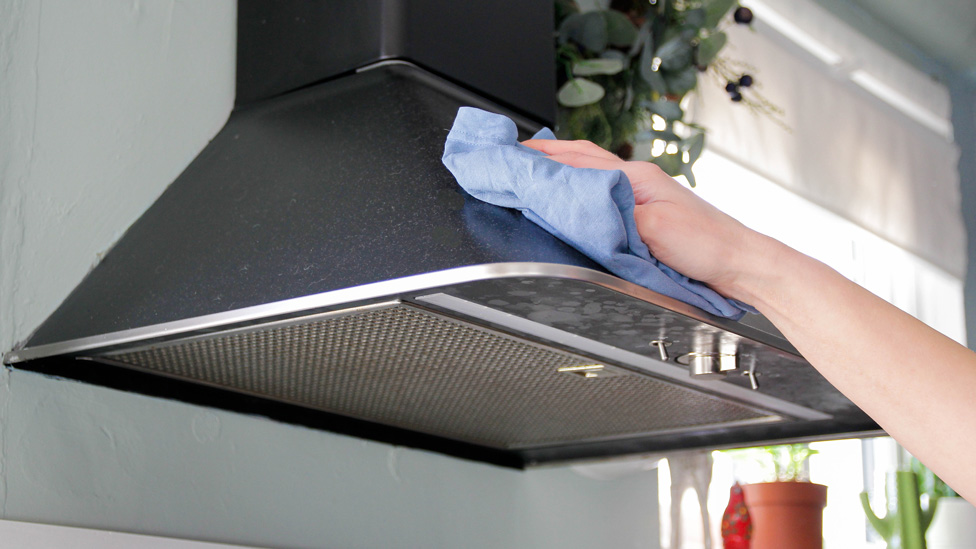
Cleaning Cloth Or Sponge
After removing the filter, you may want to clean the fan area. A cloth or sponge works well for this task.
Use a damp cloth to wipe dust and grease from the fan cover and surrounding areas.
Step Stool Or Ladder
Kitchen exhaust fans are often high up. Use a step stool or ladder to reach the filter safely.
Make sure the stool or ladder is stable before climbing.
Bucket Or Container
Place the removed filter in a bucket or container to avoid mess. This keeps dirty grease and debris contained.
A container also helps carry the filter to the cleaning area easily.
Locate The Exhaust Fan Filter
The kitchen exhaust fan filter helps trap grease and dirt. It keeps your kitchen air cleaner and safer.
Knowing where the filter is will help you remove it for cleaning or replacement. It is usually easy to find.
Check Above The Stove
Most kitchen exhaust fan filters are located above the stove or cooktop. Look for a vent or hood in that area.
The filter is often behind a metal or mesh cover inside the hood. You may need to open or slide the cover to see it.
Look Inside The Vent Hood
Remove the vent hood cover carefully. The filter usually sits inside the hood, near the fan blades.
Filters can be metal mesh or charcoal. Both types are easy to spot once the cover is removed.
Identify The Filter Shape And Size
Filters come in different shapes like rectangular or square. Knowing the size helps if you need a replacement.
- Measure the filter if you cannot find the manual
- Write down the dimensions for future reference
- Check if the filter has tabs or handles for easy removal
Turn Off The Power
Removing a kitchen exhaust fan filter is safer when the power is off. This prevents accidents and electric shocks.
Before you start, find the right way to cut power to the fan. This step protects you and your home.
Locate The Power Source
Look for the switch or circuit breaker that controls the kitchen exhaust fan. This might be near your main electrical panel or a wall switch.
If you cannot find the switch, turn off the main power to the kitchen for safety.
Switch Off The Power
Flip the switch or circuit breaker to the off position. This cuts electricity to the exhaust fan.
Make sure the fan stops running before you touch the filter or any parts.
Test The Power Status
Press the fan’s control button or switch to confirm it is off. The fan should not start or make noise.
- Turn the fan on briefly, then switch off
- Check if the fan blades move
- Use a voltage tester if available
Never remove the filter if the fan still runs or has power. This step keeps you safe.
Remove The Filter Cover
Removing the filter cover is the first step to clean your kitchen exhaust fan filter. It helps you reach the filter easily for maintenance.
Always ensure the fan is off and cool before starting. This keeps you safe and avoids damage.
Locate The Filter Cover
Find the filter cover under the exhaust fan hood. It usually looks like a metal or plastic panel.
Some covers have clips or screws holding them in place. Look closely to spot them.
Prepare Your Tools
Gather tools like a screwdriver or a cloth. They help remove the cover safely.
- Use a flathead or Phillips screwdriver for screws
- Wear gloves to protect your hands
- Have a step stool if the fan is high
Remove The Cover Safely
Follow these actions to remove the cover without damage:
- Turn off the exhaust fan and power supply
- Unscrew or unclip the fasteners carefully
- Hold the cover firmly to prevent it from dropping
- Lift the cover away from the fan gently
Handle The Cover And Filter
| Cover Type | Removal Tip |
|---|---|
| Metal with Screws | Use the correct screwdriver size |
| Plastic with Clips | Press clips gently to avoid breaking |
| Magnetic Cover | Pull gently from edges |
Store the cover on a clean surface. This prevents dirt and damage before reassembly.
Detach The Filter
Removing the kitchen exhaust fan filter helps keep your kitchen clean. A clean filter works better and lasts longer.
This guide explains how to safely detach the filter from your kitchen exhaust fan.
Turn Off The Exhaust Fan
Before removing the filter, switch off the exhaust fan. This stops any accidents and keeps you safe.
Make sure the fan is not running or hot before you start.
Locate The Filter
Look inside the exhaust hood to find the filter. It is usually a metal or mesh panel.
Filters often slide or clip into place near the fan blades.
Release The Filter Clips Or Latches
Check for clips or latches holding the filter. These keep it secure during use.
- Press or pull the clips gently
- Use a screwdriver if needed
- Do not force the filter to avoid damage
Once clips are loose, the filter should move freely.
Slide Or Pull Out The Filter
Carefully slide or pull the filter out of the exhaust fan frame. Use both hands for better control.
Place the filter on a flat surface to clean or replace it.
Clean Or Replace The Filter
Kitchen exhaust fan filters catch grease and dirt from cooking smoke. Keeping them clean helps your fan work well.
You can clean the filter if it is reusable. Replace it if it is too dirty or damaged.
How To Remove The Kitchen Exhaust Fan Filter
First, turn off the exhaust fan and unplug it for safety. Locate the filter under the fan hood.
The filter usually slides or snaps out. Gently pull or push to remove it without bending.
Cleaning A Reusable Filter
Fill a sink or basin with hot water and dish soap. Soak the filter for 10 to 15 minutes.
Use a soft brush to scrub off grease and dirt. Rinse the filter well and let it dry completely before reinstalling.
- Use hot, soapy water
- Soak for 10-15 minutes
- Scrub with a soft brush
- Rinse and dry fully
Replacing The Filter
If the filter is torn or too clogged, get a new one. Check the size and type before buying.
Install the new filter by sliding or snapping it into place. Make sure it fits tightly to catch grease well.
- Measure filter size before purchase
- Buy the correct filter type
- Install securely in the fan hood
- Check for a tight fit
Reinstall The Filter
Reinstalling the kitchen exhaust fan filter is an important final step. It helps keep your kitchen air clean and your fan working well.
Follow these simple tips to put the filter back correctly and safely.
Clean The Filter Before Reinstalling
Make sure the filter is dry and free of grease or dust. A clean filter works better and lasts longer.
Align The Filter Properly
Check the shape and edges of the filter. Match it with the exhaust fan slot carefully.
- Hold the filter by its frame
- Fit it into the slot with the correct side facing out
- Ensure it sits flush and does not wobble
Secure The Filter In Place
Lock the filter using clips or screws depending on your model. This keeps it steady during fan operation.
| Type of Filter | How to Secure |
| Metal Mesh | Snap clips or latches |
| Charcoal | Screws or lock tabs |
| Disposable Paper | Slide and press fit |
Turn on the fan after reinstalling. Listen for unusual sounds and check for proper airflow.
If you hear rattling or feel less air, turn off the fan and check the filter fit again. A loose filter can cause noise and reduce performance.
Test The Exhaust Fan
Testing your kitchen exhaust fan after removing the filter is important. It helps you check if the fan works properly.
Testing also shows if the fan needs cleaning or repair before you put the filter back.
Check The Power Supply
Make sure the exhaust fan is connected to power. Check if the switch is turned on.
If the fan does not start, test the outlet or the circuit breaker. Fix any power issues before testing the fan.
Listen For Unusual Noises
Turn on the exhaust fan and listen carefully. The fan should run smoothly without strange sounds.
Grinding, rattling, or buzzing noises mean the fan needs cleaning or repair.
Feel The Airflow
Place your hand near the fan vent. You should feel strong airflow moving out of the kitchen.
Weak or no airflow means the fan or ducts may be clogged or damaged.
Test The Fan Speed Settings
Try all fan speed settings to check if each one works. The fan should change speed smoothly.
If any speed setting does not work, the control switch or fan motor may need attention.
Maintenance Tips
Keeping your kitchen exhaust fan filter clean helps your kitchen stay fresh. It also improves air quality and fan efficiency.
Removing the filter safely is important for regular cleaning and maintenance. Follow these simple tips to do it right.
Turn Off The Exhaust Fan
Always switch off the fan before removing the filter. This prevents accidents and stops dust from spreading.
Wait a few minutes to make sure the fan has completely stopped before touching the filter.
Locate The Filter
Look inside the exhaust hood to find the filter. It usually fits into a frame or slot inside the hood.
The filter may be held by clips, screws, or a simple slide-in design. Check carefully to avoid damage.
Remove The Filter Carefully
Hold the filter firmly and pull it out gently. Avoid bending or twisting the filter to keep it intact.
If screws or clips hold the filter, use the correct tool to remove them first. Keep all parts safe for reassembly.
Clean The Filter Regularly
Wash the filter with warm soapy water or a degreaser to remove grease and dirt. Rinse it well and let it dry before putting it back.
- Use a soft brush to scrub tough spots
- Do not use harsh chemicals that can damage the filter
- Dry completely to avoid mold growth
Reinstall The Filter Properly
Once dry, place the filter back into its slot or frame. Secure it with clips or screws if needed.
Make sure the filter fits snugly to keep the exhaust system working well and safe.

Credit: vattimalaysia.com
Credit: www.coles.com.au
Frequently Asked Questions
How Often Should I Clean My Kitchen Exhaust Fan Filter?
You should clean your kitchen exhaust fan filter every 1 to 3 months. Frequent cleaning prevents grease buildup and maintains airflow. This keeps your kitchen safe and odor-free. Regular cleaning also extends the filter’s lifespan and improves fan efficiency.
What Tools Do I Need To Remove The Exhaust Fan Filter?
You typically need a screwdriver or no tools at all. Many filters slide or pop out easily. Check your fan’s manual for specific instructions. Using the right tools prevents damage and speeds up the removal process.
Can I Wash The Kitchen Exhaust Fan Filter With Soap?
Yes, you can wash the filter with warm water and dish soap. Soak the filter for 10 to 15 minutes to loosen grease. Rinse thoroughly and let it dry before reinstalling. Avoid harsh chemicals that can damage the filter.
How Do I Safely Reinstall The Kitchen Exhaust Fan Filter?
Align the filter correctly with the fan slot before reinserting. Slide or snap it gently into place without forcing it. Secure it with screws if applicable. Proper installation ensures effective filtration and prevents the filter from falling.
Conclusion
Removing your kitchen exhaust fan filter is simple and important. Clean filters help your kitchen stay fresh and safe. Regular removal and washing keep the fan working well. Remember to turn off the fan before starting. Gently pull out the filter without forcing it.
Wash with warm soapy water and let it dry. Put the filter back carefully to fit right. Doing this often saves money and avoids smells. Keep your kitchen air clean with this easy step.


