Transforming your kitchen doesn't always require a complete overhaul. Sometimes, adding a touch of elegance is all it takes to breathe new life into your space.
Crown moulding on your kitchen cabinets is a simple yet impactful upgrade that can elevate the entire room's aesthetic. If you're wondering how to achieve this sophisticated look, you're in the right place. In this guide, we'll show you how to put crown moulding on kitchen cabinets, making your kitchen feel more polished and high-end.
We'll break it down into easy-to-follow steps, ensuring you can tackle this project with confidence and enjoy stunning results. Ready to give your kitchen the facelift it deserves? Let's dive in and discover how you can enhance your cabinets effortlessly.
Tools And Materials Needed
Installing crown moulding on kitchen cabinets requires specific tools and materials. Using the right items makes the job easier and the result neater.
Below is a list of essential tools and safety gear you will need to complete the task properly.
Measuring Tools
Accurate measurements are important for a perfect fit. You will need tools that help you measure length and angles clearly.
- Tape measure for length
- Speed square for right angles
- Protractor for angled cuts
- Pencil for marking
Cutting Tools
Cutting crown moulding requires sharp and precise tools. Choose tools that make clean cuts along the moulding edges.
| Tool | Purpose |
| Miter saw | For angled and straight cuts |
| Hand saw | For small or detailed cuts |
| Sandpaper | Smooth rough edges after cutting |
| Utility knife | Trim small imperfections |
Adhesives And Fasteners
To hold the crown moulding in place, use strong adhesives and fasteners. This keeps the moulding secure on the cabinet edges.
- Wood glue for bonding
- Finish nails for extra hold
- Hammer or nail gun to drive nails
- Caulk for filling gaps
Safety Gear
Wear safety gear to protect yourself during cutting and installation. This keeps your eyes, ears, and hands safe.
- Safety glasses to protect eyes
- Ear protection for loud tools
- Work gloves to avoid splinters
- Dust mask to prevent inhaling dust
Preparing The Cabinets
Before adding crown moulding to your kitchen cabinets, prepare the surface carefully.
Good preparation helps the moulding fit well and last longer.
Cleaning The Surface
Start by cleaning the cabinet tops and edges. Remove dust, grease, and dirt for better adhesion.
- Use a mild soap and warm water solution
- Wipe the surface with a soft cloth
- Allow the cabinets to dry completely
- Check for old paint chips or peeling areas
Removing Obstacles
Clear the workspace by removing any objects or hardware on top of the cabinets.
- Take down cabinet doors if they block access
- Remove decorative items or kitchen tools
- Unscrew handles or knobs near the crown moulding area
- Move appliances away from the cabinet edges
Marking Measurements
Measure the cabinet tops carefully to cut the moulding to the right size.
| Measurement | Purpose |
|---|---|
| Width of cabinet top | To know moulding length |
| Height from cabinet top to ceiling | To check crown moulding height |
| Angle of cabinet corners | To cut moulding edges accurately |
| Distance between obstacles | To avoid fittings over vents or lights |
Measuring And Cutting Crown Moulding
Adding crown moulding to kitchen cabinets adds a polished look. Accurate measuring and cutting are key for a neat fit. Take your time to ensure the moulding fits perfectly on all sides.
This guide focuses on measuring, making miter cuts, and handling corners correctly. Following these steps will help you avoid mistakes and achieve clean edges.
Taking Accurate Measurements
Measure the length of each cabinet side where the moulding will go. Use a tape measure and write down each measurement clearly. Double-check all numbers before cutting.
- Measure the top width of the cabinets
- Note the length of each wall section
- Record inside corner lengths separately
- Include any overhang or gaps
- Use a pencil to mark measurements on the moulding
Making Miter Cuts
Miter cuts create angled edges for crown moulding joints. Set your miter saw to 45 degrees for most cuts. Cut slowly and hold the moulding firmly to avoid splintering.
- Set the miter saw angle to 45 degrees
- Place the moulding upside down on the saw
- Align the cut line with the saw blade
- Cut each piece carefully along the marked line
- Test fit the pieces before final installation
Handling Inside And Outside Corners
Inside and outside corners need different miter angles. Inside corners usually have two 45-degree cuts. Outside corners require cuts that fit around the edge of the cabinet.
| Corner Type | Cut Angle | Cut Direction |
| Inside Corner | 45 degrees | Both pieces cut inward |
| Outside Corner | 45 degrees | Both pieces cut outward |
| Long Straight Piece | 0 degrees | Straight cut |

Credit: www.thisoldhouse.com
Attaching Crown Moulding
Attaching crown moulding to kitchen cabinets adds a beautiful finish. It requires careful work to fit and secure the moulding properly.
This guide covers three important steps: applying adhesive, nailing the moulding, and securing joints.
Applying Adhesive
Start by applying a strong wood adhesive to the back of the crown moulding. This helps hold it in place before nailing.
Apply a thin, even layer of glue along the edge that will touch the cabinet. Avoid using too much to prevent mess.
Nailing The Moulding
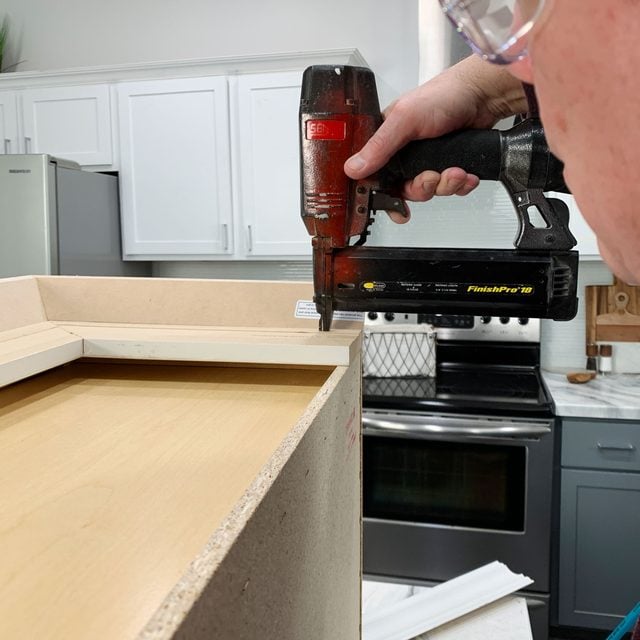
Use finishing nails to attach the moulding securely. Nail through the moulding into the cabinet frame.
- Position the moulding carefully against the cabinet.
- Hold it steady and nail at regular intervals, about every 12 inches.
- Drive nails at an angle to avoid splitting the wood.
- Fill nail holes with wood filler for a clean look.
Securing Joints
Check all joints where two pieces of moulding meet. Tight joints give a neat finish and prevent gaps.
| Joint Type | Tip for Securing |
|---|---|
| Miter Joint | Use wood glue and clamp firmly until dry. |
| Butt Joint | Add a small finishing nail to hold pieces tight. |
| Copeland Joint | Fill gaps with wood filler and sand smooth. |
Finishing Touches
Adding crown moulding to kitchen cabinets makes your space look complete. The final steps help the moulding blend in nicely.
Filling nail holes, caulking seams, and painting or staining give a polished, smooth finish.
Filling Nail Holes
After attaching the crown moulding, nail holes will be visible. Fill these holes with wood filler that matches your moulding color.
Use a putty knife to apply the filler. Let it dry fully before sanding it smooth.
- Choose wood filler close to your moulding color
- Apply with a putty knife
- Let dry completely
- Sand smooth and flush with the surface
Caulking Seams
Seams between moulding pieces and cabinet edges may have small gaps. Use paintable caulk to fill these gaps.
Apply a thin bead of caulk along seams. Smooth it out with a wet finger or tool for a clean look.
- Use paintable caulk for easy finishing
- Apply a thin bead along seams and corners
- Smooth with a wet finger or caulk tool
- Allow caulk to dry before painting or staining
Painting Or Staining
Finish the moulding by painting or staining to match your cabinets. This step protects the wood and improves appearance.
Use a small brush for detailed areas. Apply thin coats and let each coat dry before the next one.
- Choose paint or stain that matches cabinets
- Use a small brush for corners and edges
- Apply thin, even coats
- Let each coat dry fully before adding another
Common Mistakes To Avoid
Adding crown moulding to kitchen cabinets can improve their look. Many people make mistakes that cause problems.
Knowing what to avoid helps you get the best results. Here are common errors to watch out for.
Incorrect Measurements
Measuring wrong is a big problem when adding crown moulding. Even small errors can cause gaps or overlaps.
Measure twice before cutting. Use a tape measure and mark carefully. Check the length of each cabinet side.
- Don’t guess measurements
- Write down all lengths
- Account for corners and angles
- Double-check before cutting
Poor Cutting Angles
Cutting angles wrong will make the moulding not fit properly. Corners need precise angled cuts to join neatly.
Use a miter saw or a miter box for accurate cuts. Practice cutting scraps first to get the angle right.
- Identify inside vs outside corners
- Set saw angle carefully
- Cut slowly and check fit often
- Trim small amounts if needed
Weak Attachment
Not securing the moulding well causes it to fall off or shift. Use the right tools and materials to attach it firmly.
Nails, glue, or screws can work. Make sure the moulding is flush against the cabinet before fastening.
- Use finishing nails or brads
- Apply wood glue for extra hold
- Pre-drill holes to avoid splitting
- Check stability after installation
Tips For A Professional Look
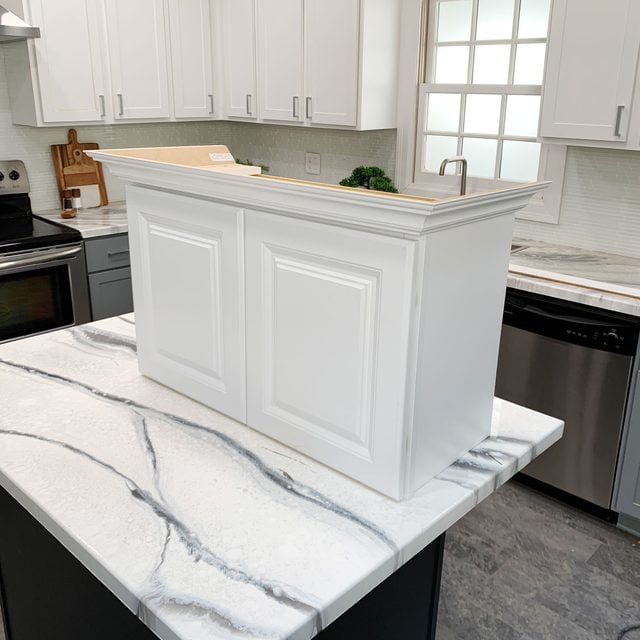
Adding crown moulding to kitchen cabinets gives them a polished finish. This simple upgrade can change the whole look of your kitchen.
To get a neat and professional result, you need to plan carefully. The right style, materials, and teamwork matter a lot.
Choosing The Right Moulding Style
Pick a moulding style that matches your kitchen’s design. Classic kitchens suit simple and elegant moulding. Modern kitchens look good with clean, sharp lines.
- Measure your cabinets before choosing moulding.
- Match the moulding color to your cabinet finish.
- Consider the height of your ceiling when selecting style.
- Choose a style that fits your kitchen’s overall theme.
Using Quality Materials
Good materials make a big difference in the final look. Use moulding made from strong wood or high-quality MDF. These materials hold paint well and last longer.
| Material | Advantages | Best Use |
| Solid Wood | Durable and easy to paint | Traditional kitchens |
| MDF | Smooth surface, affordable | Painted modern styles |
| Polyurethane | Lightweight, moisture resistant | Humid kitchens |
Working With A Helper
Having a helper speeds up the work and improves accuracy. One person can hold the moulding in place while the other nails it down.
- Use two people for measuring and cutting moulding pieces.
- One person can steady the ladder or tools safely.
- Work together to check alignment and fit before nailing.
- Communicate clearly to avoid mistakes.
Credit: www.familyhandyman.com
Credit: www.familyhandyman.com
Frequently Asked Questions
What Tools Are Needed To Install Crown Moulding On Cabinets?
You need a miter saw, measuring tape, nail gun, wood glue, and a level. Safety gear is also essential for protection.
How Do You Measure For Crown Moulding On Cabinets?
Measure the cabinet width and height accurately. Calculate angles for corners using a protractor for precise cuts.
Can Crown Moulding Be Painted After Installation?
Yes, crown moulding can be painted after installation. Use primer first, then apply your chosen paint color for a smooth finish.
How Do You Cut Crown Moulding Corners Perfectly?
Use a miter saw set to 45 degrees for inside and outside corners. Practice on scrap pieces for accuracy.
Conclusion
Adding crown moulding to kitchen cabinets brings style and charm. It creates a smooth, finished look that many love. The process takes some time but feels rewarding. Using the right tools makes the job easier. Careful measuring and cutting help avoid mistakes.
Take your time to fit the moulding just right. A neat finish improves your kitchen’s overall appeal. Small details like these add value to your home. Enjoy the new look and the pride it brings. You can do this with patience and simple steps.