Have you ever stood in your kitchen, staring at your blender, unsure of how to get the perfect blend? While operating a kitchen blender might seem simple, knowing how to operate a kitchen blender properly can make a huge difference in your results.
Whether you want to whip up a smoothie, crush ice, or create a creamy soup, mastering your blender will save you time and frustration. In this guide, you’ll discover easy-to-follow tips that turn your blender into a powerful tool for delicious meals and drinks.
Ready to unlock your blender’s full potential? Keep reading, and you’ll be blending like a pro in no time.

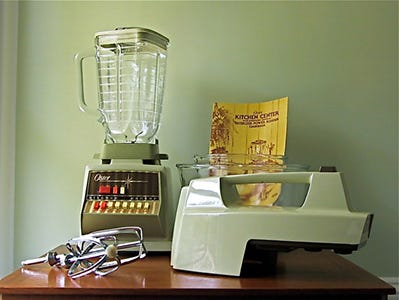
Credit: www.tastingtable.com
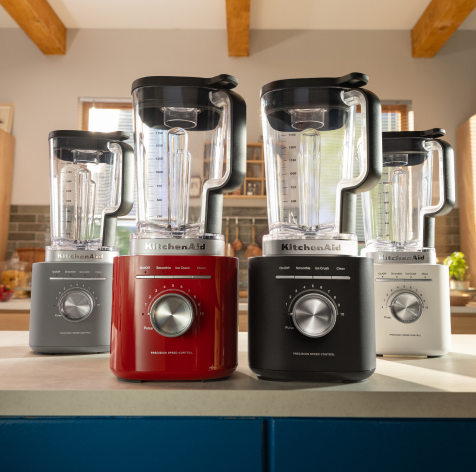
Choosing The Right Blender
Picking the right kitchen blender is important for your cooking needs. The right blender saves time and gives good results.
Consider the type, features, and what you want to do with the blender. This helps you choose the best option.
Types Of Kitchens Blenders
There are many kinds of kitchen blenders. Each type works best for different tasks and foods.
- Countertop Blenders: Good for smoothies and soups.
- Immersion Blenders: Handheld and easy to use in pots.
- Personal Blenders: Small and perfect for single servings.
- High-Speed Blenders: Powerful for tough ingredients.
Key Features To Look For
Look for features that make blending easier and safer. These features improve your experience.
- Power: Higher watts blend faster and smoother.
- Speed Settings: Multiple speeds give more control.
- Blade Quality: Sharp and strong blades last longer.
- Jar Material: Glass jars don’t absorb smells.
- Easy Cleaning: Removable parts save time.
Matching Blender To Your Needs
Think about what you blend most. Choose a blender that fits your cooking style.
If you make smoothies daily, a personal blender works well. For cooking soups, a countertop blender is better.
- For small tasks, pick a lightweight and compact blender.
- For tough ingredients, choose a high-power blender.
- For easy storage, look for blenders with detachable parts.

Credit: manuals.plus
Setting Up Your Blender
Before using your kitchen blender, you need to set it up properly. This helps the blender work well and keeps you safe.
This guide shows you how to assemble the parts, check safety, and position the blender for stability.
Assembling The Parts
Start by gathering all blender parts: the jar, lid, blade, and base. Make sure each part is clean and dry.
Place the blade inside the jar carefully. Attach the jar to the base tightly. Put the lid on top and press it firmly.
- Check that the blade is secure inside the jar
- Lock the jar onto the base with a twist or click
- Ensure the lid fits tightly to avoid spills
Safety Checks Before Use
Look over the blender before plugging it in. Make sure there are no cracks or damage in the jar or base.
Confirm the power cord is not frayed or broken. Check that the blender’s buttons or switches work correctly.
- Inspect the jar and lid for cracks
- Check the power cord for damage
- Test the on/off switch and speed settings
- Never use the blender if parts are broken
Positioning For Stability
Place your blender on a flat, clean surface. This stops it from moving while blending.
Keep the cord away from water and hot areas. Make sure the blender is near an outlet but not stretched tight.
- Use a dry, flat countertop
- Keep the blender away from edges
- Arrange the cord to avoid tripping
- Do not place near sinks or hot appliances
Preparing Ingredients
Getting your ingredients ready is important for using a kitchen blender. It helps the blender work better and keeps your food smooth. Proper preparation saves time and avoids problems.
Focus on cutting, choosing liquids, and not overfilling. These steps make blending easier and safer.
Cutting And Portioning
Cut ingredients into small pieces before blending. Large chunks can block the blades or cause uneven mixing. Portioning helps the blender work faster and protects the motor.
- Cut fruits and vegetables into 1 to 2 inch pieces
- Remove seeds, pits, and hard skins
- Use soft ingredients in larger pieces if needed
- Portion frozen items so they fit easily
Choosing Liquid Bases
Liquids help ingredients move smoothly in the blender. They create a good texture and prevent damage to the blades. Choose the right liquid for your recipe.
| Liquid Type | Use For |
| Water | Smoothies, soups, sauces |
| Milk | Creamy drinks, desserts |
| Juice | Fruit blends, cocktails |
| Broth | Soups, savory blends |
| Yogurt | Thick smoothies, dips |
Avoiding Overfilling
Do not fill the blender jar above the maximum fill line. Overfilling can cause leaks or spills. It also reduces blending efficiency and risks motor damage.
Follow these tips to avoid overfilling:
- Check the jar for maximum fill marks
- Leave space for ingredients to move
- Blend in batches if needed
- Secure the lid tightly before starting

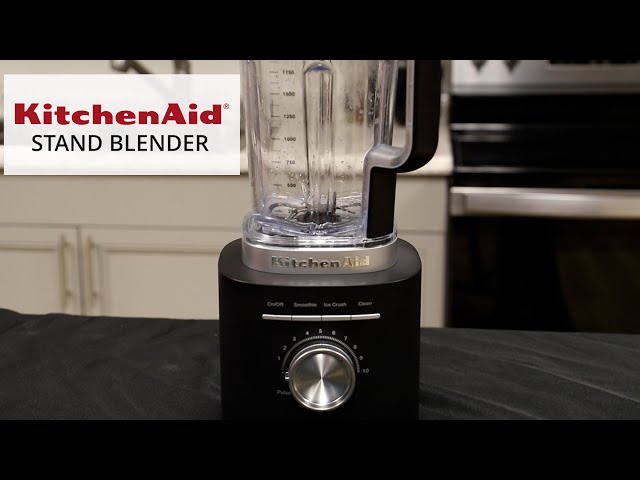
Credit: www.youtube.com
Operating The Blender
Using a kitchen blender is simple and safe when you follow the right steps. Knowing how to control the blender helps you get the best results.
This guide covers how to start the blender, use the pulse function, and adjust speeds for different textures.
Starting At Low Speeds
Begin blending at low speeds to avoid splashing and to mix ingredients evenly. This setting is good for soft foods and liquids.
- Secure the lid tightly before turning on
- Turn the dial or press the button to the lowest speed
- Gradually increase speed if needed
- Stop and check the blend if it seems uneven
Using Pulse Function
The pulse function gives short bursts of power to the blades. It helps control chopping and prevents over-blending.
Press and release the pulse button in quick taps. This method is useful for chopping nuts or mixing chunky ingredients.
| Pulse Function Use | Best For |
|---|---|
| Short bursts | Chopping vegetables |
| Controlled bursts | Mixing chunky salsa |
| Quick pulses | Breaking nuts into pieces |
Adjusting Speed For Texture
Different recipes need different textures. Adjust the blender speed to match the texture you want.
- Low speed for light mixing and soft blends
- Medium speed for smoothies and purees
- High speed for crushing ice and tough ingredients
- Stop often to check the texture
Cleaning And Maintenance
Keeping your kitchen blender clean is key to its performance and safety. Regular care stops odors and bacteria build-up.
Follow simple cleaning steps and check your blender parts often to extend its life and keep it working well.
Quick Cleaning Tips
After each use, rinse the blender jar with warm water and dish soap. This stops food from drying on the blades or jar.
- Fill the blender halfway with warm water and a few drops of soap
- Run the blender on low speed for 30 seconds
- Rinse thoroughly with clean water
- Dry all parts before storing
Deep Cleaning Routine
Clean your blender deeply once a week or after blending sticky or oily foods. This removes hidden grime and buildup.
| Step | Action |
| 1 | Disassemble the blender parts carefully |
| 2 | Soak jar and lid in warm soapy water for 10 minutes |
| 3 | Use a soft brush to scrub the jar, lid, and gasket |
| 4 | Wipe down the base with a damp cloth, avoid water inside |
| 5 | Rinse all parts and dry completely before reassembling |
Blade Care And Replacement
Check blades for dullness or damage often. Sharp blades blend better and safer.
- Inspect blades for cracks or rust
- Do not touch blades directly with bare hands
- Replace blades if they are bent, dull, or broken
- Follow the manufacturer’s guide for blade replacement
Troubleshooting Common Issues
Kitchen blenders are helpful tools but sometimes they face problems. Knowing how to fix common issues saves time and frustration.
This guide covers three common blender problems. Learn how to handle overheating, leaking jars, and motor failures.
Overheating Problems
Blenders can overheat if used too long or with thick ingredients. Overheating may stop the motor to protect it.
To prevent overheating, blend in short bursts. Let the blender cool down between uses. Avoid blending very hard items all at once.
- Use pulse mode for thick mixtures
- Turn off blender for 5-10 minutes after heavy use
- Check for blocked vents and clean them
- Do not overload the jar with ingredients
Leaking Jars
Leaking jars cause mess and reduce blender performance. Leaks often happen because of loose parts or damaged seals.
Always check the jar base and gasket before blending. Tighten the jar properly on the motor base. Replace worn or cracked seals to stop leaks.
- Ensure the jar sits tightly on the base
- Inspect the rubber gasket for cracks or wear
- Replace damaged gaskets with new ones
- Do not fill jar above the maximum line
Motor Not Starting
When the motor does not start, check the power source and blender assembly. Loose connections or safety locks may block operation.
Make sure the blender is plugged in and the outlet works. Attach the jar correctly so safety features allow motor start. Reset any tripped circuit breakers.
- Check if power cord is plugged in properly
- Test the electrical outlet with another device
- Align the jar securely on the base
- Look for blown fuses or tripped breakers
Creative Blender Uses
Blenders do more than mix drinks. They help you prepare many meals easily. Using a blender saves time and effort in the kitchen.
This guide shows creative ways to use your kitchen blender for different recipes.
Making Smoothies And Shakes
Blenders quickly combine fruits, vegetables, and liquids to make tasty smoothies. You can add yogurt, milk, or juice for smooth texture. Shakes become creamy and thick with ice cream or protein powder.
- Use frozen fruits for cold drinks
- Add spinach or kale for extra nutrients
- Include seeds like chia or flax for fiber
- Mix different flavors like banana and peanut butter
- Blend until smooth for the best texture
Preparing Soups And Sauces
Blenders help create creamy soups and smooth sauces fast. You can blend cooked vegetables and broth for a warm soup. Sauces like pesto or tomato sauce get a fine texture with a quick blend.
| Type | Common Ingredients | Blending Tips |
|---|---|---|
| Soup | Carrots, potatoes, broth | Blend cooked veggies until creamy |
| Sauce | Tomatoes, basil, garlic | Pulse for chunky or blend smooth |
| Dressing | Olive oil, vinegar, herbs | Blend on low speed to mix |
Grinding And Chopping
Use the blender to grind nuts, seeds, or coffee beans. It also chops vegetables for salads or cooking. Small amounts work best to avoid over-processing.
- Pulse to chop onions or herbs finely
- Grind almonds to make flour or butter
- Crush ice for cocktails or cold drinks
- Make breadcrumbs from stale bread
- Prepare garlic paste easily
Frequently Asked Questions
How Do I Start Using A Kitchen Blender Safely?
Always place the blender on a flat surface. Secure the lid tightly before turning it on. Start at a low speed to avoid splashes or spills.
What Ingredients Can I Blend In A Kitchen Blender?
You can blend fruits, vegetables, nuts, and ice. Avoid hard items like bones or frozen chunks without liquids. Follow your blender’s guidelines for best results.
How Do I Clean My Kitchen Blender Effectively?
Unplug the blender first. Rinse the jar with warm water and soap. Use a brush to clean blades carefully. Dry all parts before reassembling.
Can I Use A Kitchen Blender For Hot Liquids?
Yes, but be cautious. Let hot liquids cool slightly. Avoid sealing the lid too tightly to prevent pressure buildup.
Conclusion
Operating a kitchen blender is simple and useful. Start by adding ingredients carefully. Choose the right speed for your recipe. Always secure the lid before blending. Clean the blender right after use to keep it working well. With practice, blending becomes quick and easy.
Enjoy making smoothies, soups, and sauces at home. A blender saves time and helps create healthy meals. Try different recipes and have fun experimenting. Your kitchen will feel more complete with this handy tool.