
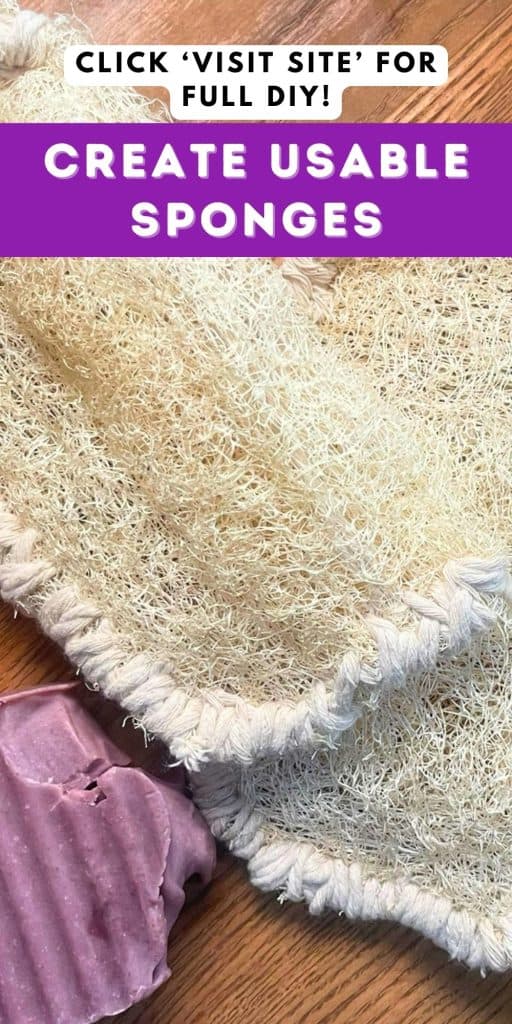
Imagine a kitchen where cleanliness meets sustainability, and you’re not just throwing things away after a single use. Sounds ideal, right?
With reusable kitchen sponges, you can make that dream a reality. These eco-friendly tools not only help you save money but also contribute to a healthier planet. And guess what? You don’t need to be a DIY expert to make them.
In this guide, you’ll discover simple steps to create your own reusable kitchen sponges, transforming your cleaning routine into an eco-conscious activity. Get ready to embrace an effortless change that benefits both your home and the environment. Stick around to learn how you can make a difference with just a little effort in your kitchen.

Credit: www.reddit.com
Benefits Of Reusable Sponges
Reusable kitchen sponges offer a smart alternative to disposable ones. They help reduce waste and save money over time.
Making your own reusable sponges is simple and good for the environment. These sponges can last longer and keep your kitchen clean.
Environmental Impact
Reusable sponges lower the amount of trash sent to landfills. They reduce the need for single-use sponges that pollute the earth.
Using natural or recycled materials for sponges helps protect nature. It also saves resources like water and energy used in making new products.
- Less plastic waste
- Fewer chemical pollutants
- Lower carbon footprint
- Supports a zero-waste lifestyle
Cost Savings
Reusable sponges last much longer than disposable ones. You do not need to buy new sponges often, saving money over time.
Making sponges at home uses cheap or leftover materials. This reduces the cost compared to buying commercial sponges regularly.
- Fewer purchases needed
- Use of low-cost materials
- Less money spent on packaging
- Longer lifespan per sponge
Health Advantages
Reusable sponges made from natural fibers avoid harsh chemicals. This lowers the chance of skin irritation or allergies.
They are easy to clean and dry quickly. This helps stop bacteria and mold from growing on the sponge.
- Less exposure to synthetic chemicals
- Reduced bacteria buildup
- Better for sensitive skin
- Easier to keep clean and fresh
Materials Needed
Making reusable kitchen sponges is simple and eco-friendly. You only need a few basic materials.
These materials help create durable and effective sponges for everyday use.
Natural Fibers
Natural fibers are soft and good for cleaning without scratching. They dry fast and resist odors.
- Cotton fabric or terry cloth
- Hemp or linen cloth
- Bamboo fiber cloth
- Old cotton T-shirts or towels
Scrubbing Surfaces
Scrubbing surfaces help remove tough dirt and grime. Choose materials that are strong but safe.
- Natural sisal or jute fiber pads
- Coconut coir pads
- Reusable mesh pads
- Loofah pieces
Sewing Supplies
You will need basic sewing supplies to put your sponge together. Use tools that match your fabric.
- Strong thread or yarn
- Needle suitable for thick fabric
- Scissors for cutting fabric
- Pins or clips to hold layers
- Measuring tape or ruler
Step-by-step Sponge Making
Making reusable kitchen sponges is simple and fun. You can create sponges that last longer and reduce waste.
This guide shows you how to cut fabric, assemble layers, and sew the sponge together.
Cutting The Fabric
Start by choosing soft cotton fabric and a rougher scrubbing material. Cut both into equal rectangles or squares.
- Use scissors or a rotary cutter for clean edges.
- Cut fabric pieces about 4 by 6 inches.
- Make sure all pieces are the same size for easy assembly.
Assembling Layers
Place the soft cotton fabric and scrubbing material on top of each other. The cotton side should face out.
| Layer | Material | Position |
|---|---|---|
| 1 | Soft cotton fabric | Bottom |
| 2 | Scrubbing fabric | Middle |
| 3 | Soft cotton fabric | Top |
Sewing Techniques
Sew the layers together using a sewing machine or needle and thread. Use a simple straight stitch around the edges.
- Start sewing about half an inch from the edge.
- Keep stitches close to prevent layers from separating.
- Leave a small opening to turn the sponge inside out.
- After turning, sew the opening closed with small stitches.

Credit: www.youtube.com
Creative Designs And Variations
Reusable kitchen sponges save money and reduce waste. You can make them in many fun ways.
Try different shapes, add scrubbing parts, or use colors to match your kitchen style.
Shapes And Sizes
Sponges come in many shapes. Round, square, or even animal shapes work well. Size matters too. Small sponges fit tight spaces. Large sponges cover more area quickly.
- Square sponges for general use
- Round sponges for pots and pans
- Small sponges for corners and crevices
- Fun shapes like stars or hearts for kids
Adding Scouring Pads
Add a scouring pad to one side to scrub tough stains. Use rough materials like nylon or recycled mesh. Attach it by sewing or gluing carefully.
| Material | Use | Attachment |
| Nylon mesh | Scrubbing pots | Sewing |
| Recycled plastic mesh | Removing stuck food | Hot glue |
| Natural fibers | Light scrubbing | Sewing or glue |
Customizing With Colors
Colors brighten the kitchen and help keep sponges separate. Use fabric dye or colored yarn to make patterns or stripes.
Try these color ideas:
- Color-code sponges for different tasks
- Use bright colors to spot dirt easily
- Mix two colors for a striped look
- Match your kitchen’s theme colors
Care And Maintenance Tips
Reusable kitchen sponges save money and reduce waste. Proper care keeps them clean and lasting longer.
Follow simple steps to clean, dry, and know when to replace your sponges for best use.
Cleaning Methods
Clean your reusable sponges often to stop germs and odors. Use these safe methods:
- Rinse sponge with hot water after each use.
- Microwave wet sponge for one minute to kill bacteria.
- Soak sponge in a mixture of vinegar and water for 5 minutes.
- Run sponge through the dishwasher’s top rack cycle.
- Use mild soap and warm water to wash by hand.
Drying And Storage
Dry sponges quickly to prevent mold growth. Store them in a dry place with air flow.
| Drying Tip | Storage Tip |
|---|---|
| Wring out excess water after cleaning. | Keep sponge on a rack or holder, not flat on a sink. |
| Leave sponge in sunlight for natural drying. | Store sponges separately to avoid cross-contamination. |
| Replace drying cloth or mat often to stay clean. | Allow sponges to dry fully before storing in closed containers. |
When To Replace
Replace kitchen sponges when they lose shape or smell bad. Using old sponges can spread germs.
- Check for tears or crumbling edges.
- Notice any persistent bad odors after cleaning.
- Replace every 2 to 4 weeks for best hygiene.
- Use separate sponges for different cleaning tasks.

Credit: www.aol.com
Eco-friendly Alternatives
Making reusable kitchen sponges is a smart way to reduce waste. You can choose materials that are gentle on the planet and last a long time.
These options help you keep your kitchen clean without adding to landfill. Let’s explore some eco-friendly choices for your kitchen sponges.
Compostable Options
Compostable sponges break down naturally after use. You can make them from materials like cellulose and cotton. These sponges are safe to throw in your compost bin.
- Use natural cellulose sponge sheets
- Sew layers of cotton fabric together
- Add natural scrubbing fibers like sisal or hemp
- Allow sponges to dry completely before composting
Reusable Cloths
Reusable cloths are a good alternative to sponges. They can be washed and used many times. Choose soft fabrics that clean well without scratching dishes.
| Fabric Type | Benefits | Care Tips |
| Cotton | Soft and absorbent | Machine wash regularly |
| Linen | Durable and dries fast | Hand wash or machine wash |
| Bamboo fiber | Antibacterial and eco-friendly | Gentle wash, air dry |
Natural Cleaning Tools
Natural cleaning tools help reduce plastic use in the kitchen. You can make scrubbers from plant fibers or other biodegradable materials. These tools work well for tough stains.
- Loofah sponges made from dried gourd
- Coconut coir scrubbers for scrubbing pots
- Wooden brushes with natural bristles
- Knitted scrubbies using cotton or hemp yarn
Frequently Asked Questions
What Materials Are Best For Reusable Kitchen Sponges?
Natural fibers like cotton or cellulose are ideal. They are biodegradable, absorbent, and durable. Avoid synthetic materials that can shed microplastics. Using eco-friendly fabrics ensures safety and long-lasting use in your kitchen.
How Do I Clean Reusable Kitchen Sponges Effectively?
Rinse sponges thoroughly after each use. Soak them in a vinegar or baking soda solution weekly. Microwave damp sponges for 1-2 minutes to kill bacteria. Proper cleaning extends sponge life and maintains hygiene.
Can Reusable Kitchen Sponges Reduce Kitchen Waste?
Yes, reusable sponges significantly cut down disposable waste. They last longer and are often compostable. This reduces landfill impact and supports a sustainable lifestyle. Switching to reusable sponges is an eco-friendly kitchen choice.
How Often Should I Replace Reusable Kitchen Sponges?
Replace reusable sponges every 2 to 4 weeks. If they develop odors or tear, replace sooner. Regular replacement prevents bacteria buildup and keeps your kitchen sanitary.
Conclusion
Making reusable kitchen sponges saves money and helps the planet. You can easily create sponges from simple materials at home. These sponges last longer and reduce waste. Cleaning becomes easier and more eco-friendly. Try making your own sponges to enjoy these benefits.
Small changes in the kitchen make a big difference. Start today and see the positive impact yourself.



