
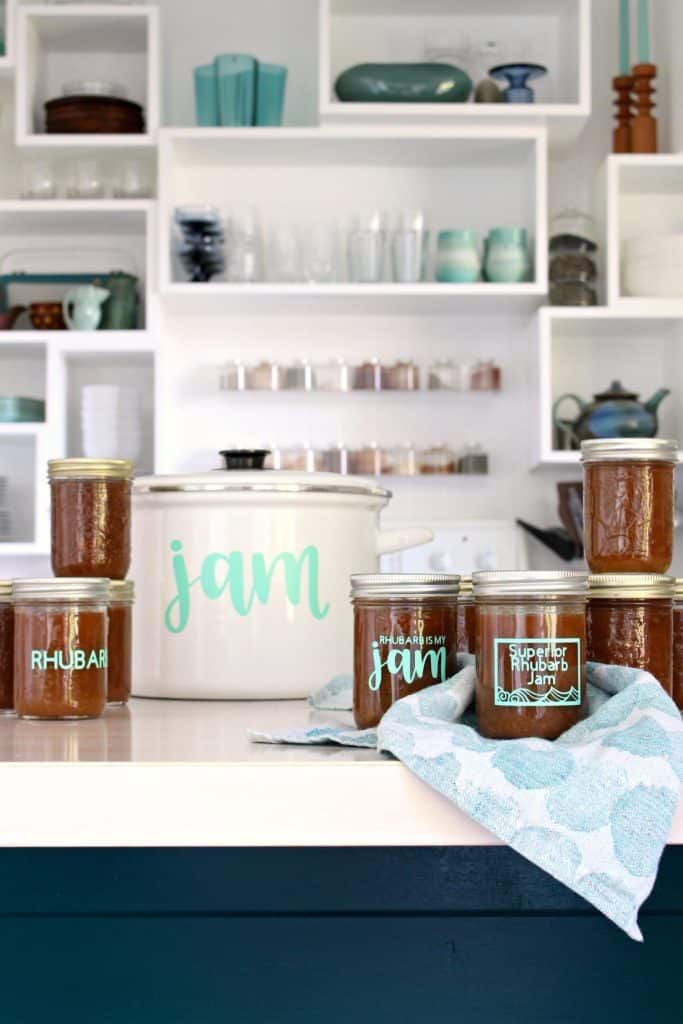
Are you tired of digging through your kitchen cabinets, trying to find the right jar? Making clear, attractive labels for your kitchen jars can save you time and add a personal touch to your space.
Imagine opening a cabinet where every jar is perfectly marked, helping you cook faster and keep your kitchen organized. You’ll discover simple and effective ways to create labels that fit your style and needs. Ready to transform your kitchen jars from cluttered to charming?
Let’s get started!

Credit: www.avery.com
Choosing The Right Materials
Making labels for kitchen jars needs the right materials. Good materials help labels last longer and look nice.
Pick materials that handle kitchen conditions well. Think about water, heat, and how often jars are used.
Types Of Label Materials
Many label materials work for kitchen jars. Each one has its own benefits and limits.
- Paper Labels:Easy to write on but not water-resistant. Best for dry jars.
- Vinyl Labels:Water and heat resistant. Good for jars that get wet often.
- Clear Polyester Labels:See-through and strong. They look neat and last long.
- Chalkboard Labels:Reusable and writable with chalk markers. Perfect for changing jar contents.
- Magnetic Labels:Stick well if jars are metal. Easy to remove and reuse.
Tools You Will Need
Some tools help you make kitchen jar labels. These tools make the process simple and clean.
- Printer:For printing clear and sharp labels at home.
- Label Paper or Sheets:Choose the right type based on your label material.
- Scissors or Paper Cutter:Cut labels neatly to fit jars.
- Laminator or Clear Tape:Protect paper labels from water and stains.
- Marker Pens:Use for writing or decorating labels by hand.
- Ruler:Measure label sizes to fit jar surfaces well.
Creative Label Design Ideas
Labeling kitchen jars helps keep your space neat and organized. Creative labels also add charm to your kitchen decor.
Try different styles to find the best look for your kitchen jars. Each style gives a unique feel and works for different needs.
Handwritten Labels
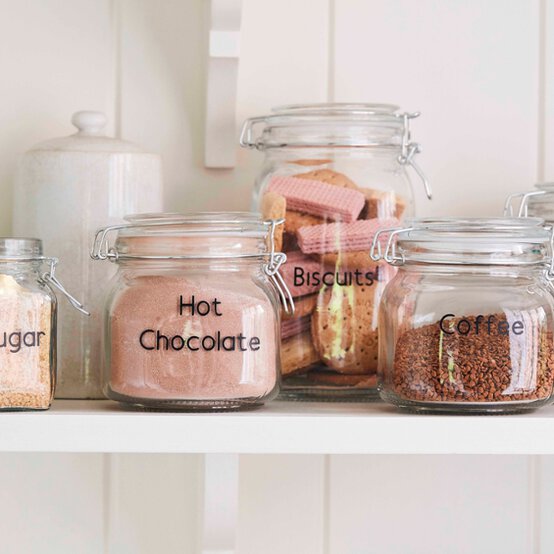
Handwritten labels give a personal and cozy touch. Use a marker or pen to write directly on paper or tag.
You can use colored pens or fancy lettering to make labels stand out. This style works well for a rustic or farmhouse kitchen.
- Write the jar contents clearly
- Use kraft paper or cardstock tags
- Add small drawings or borders
- Attach with twine or ribbon
Printed Labels
Printed labels look neat and professional. Design them on your computer and print with a label printer or regular paper.
Use simple fonts and clear text to make reading easy. You can include icons or colors that match your kitchen style.
- Choose label size that fits your jars
- Use waterproof paper for durability
- Try different shapes like circles or rectangles
- Stick labels firmly to avoid peeling
Chalkboard Labels
Chalkboard labels give a classic look and are easy to update. Use chalk markers or regular chalk to write on the labels.
These labels work well if you change the jar contents often. Erase old text and write new information quickly and cleanly.
- Buy chalkboard sticker sheets
- Cut to fit your jar size
- Write with chalk markers for bold lines
- Wipe clean with a damp cloth to erase
Vinyl Decals
Vinyl decals are durable and waterproof. They stick well to glass and plastic jars and look smooth and clean.
Make decals with a cutting machine or buy ready-made ones. Choose fonts and shapes that match your kitchen’s style.
- Use removable vinyl to avoid residue
- Cut letters or designs precisely
- Apply decal slowly to avoid bubbles
- Clean jar surface before applying
Step-by-step Label Making
Making labels for kitchen jars helps keep your pantry neat. You can easily find ingredients and spices with clear labels.
This guide shows simple steps to create and apply labels that look great and last long.
Measuring And Cutting Labels
Measure the space on your jar where the label will go. This helps you make labels that fit well.
Cut the labels carefully using scissors or a paper cutter. Keep edges straight for a neat look.
- Use a ruler or tape measure to check label size.
- Mark the paper lightly before cutting.
- Cut slowly to avoid jagged edges.
- Make extra labels in case of mistakes.
Applying Labels To Jars
Clean the jar surface before sticking the label. Dirt or oil can make the label peel off.
Peel the backing off the label and place it carefully on the jar. Smooth out air bubbles for a flat finish.
- Wash jars with warm, soapy water.
- Dry jars completely before applying labels.
- Start applying from one edge and press down slowly.
- Use a flat tool like a credit card to smooth the label.
Sealing And Protecting Labels
Protect your labels from water and stains by sealing them. This helps them last longer in the kitchen.
Use a clear spray or tape to cover the label. Let it dry fully before using the jars.
- Spray labels with a clear acrylic sealer.
- Use clear packing tape over the label as an alternative.
- Allow sealant or tape to dry or set for at least one hour.
- Avoid handling labels until they are fully dry.
Credit: www.hobbycraft.co.uk
Labeling Tips For Organization
Organizing kitchen jars with clear labels helps keep your space tidy. It makes cooking faster and reduces waste.
Good labels show what is inside each jar. Use simple methods to make your labels easy to read and use.
Categorizing Ingredients
Group your ingredients by type to find them quickly. Categories like spices, grains, and baking items work well.
- Spices and herbs
- Flours and grains
- Sugars and sweeteners
- Legumes and beans
- Baking essentials
Color Coding Systems
Use colors to separate ingredients by category or use. This helps find items at a glance.
| Color | Category |
| Red | Spices |
| Green | Herbs |
| Blue | Baking |
| Yellow | Grains |
| Orange | Legumes |
Label Placement Techniques
Place labels where they are easy to see and will not wear off. Keep labels at eye level if jars are on open shelves.
- Label the jar lid for top view storage
- Place labels on the front for shelf storage
- Use waterproof labels to avoid damage
- Keep labels clean and replace if faded
Removing And Replacing Labels
Labels on kitchen jars help keep things organized. Sometimes, you need to remove old labels before adding new ones.
It is important to remove labels safely and update them easily to keep your kitchen neat and clean.
Safe Removal Methods
Removing labels without damaging jars or leaving sticky residue is key. Use gentle methods to keep jars clean.
Warm water and soap can soften label glue. You can also try household items that help remove sticky parts.
- Soak jars in warm soapy water for 10-15 minutes
- Use a plastic scraper or old credit card to lift labels
- Rub sticky spots with oil or peanut butter
- Apply rubbing alcohol or vinegar on residue for easy cleaning
- Wash jars again to remove any leftover oils
Updating Labels Easily
Replacing labels should be quick and simple. Choose labels that stick well but peel off cleanly.
Use tools and tricks to help apply new labels neatly and keep them looking fresh.
- Use printable sticker paper or pre-made label sheets
- Make sure jars are dry and clean before sticking new labels
- Press labels firmly to avoid bubbles or wrinkles
- Consider using chalkboard or dry erase labels for easy updates
- Write clearly with permanent or erasable markers

Credit: www.avery.com
Frequently Asked Questions
How Do I Create Durable Labels For Kitchen Jars?
Use waterproof label paper or vinyl stickers for durability. Print with waterproof ink and apply a clear sealant. This protects labels from moisture, heat, and frequent handling, keeping them legible and intact over time.
What Materials Are Best For Kitchen Jar Labels?
Choose waterproof paper, vinyl sheets, or chalkboard labels. These materials resist moisture and can withstand kitchen conditions. They also offer easy customization and strong adhesion to glass or plastic jars.
Can I Make Reusable Labels For Kitchen Jars?
Yes, use chalkboard paint or adhesive chalkboard labels. Write with chalk or chalk markers. These labels can be wiped clean and rewritten, making them ideal for frequently changing contents.
How Do I Design Attractive Kitchen Jar Labels?
Use simple fonts and clear text for readability. Incorporate icons or color codes to identify contents quickly. Keep designs minimalistic for a neat, organized kitchen look.
Conclusion
Creating kitchen jar labels can be easy and fun. Clear labels keep your pantry organized. They help you find ingredients quickly. Use simple materials for a personal touch. Customize labels to match your kitchen style. Experiment with colors and fonts.
Durable labels last longer and resist moisture. Labeling jars saves time during cooking. It also reduces food waste by keeping track of contents. Enjoy the process and make your kitchen neat. Start labeling today and enjoy a clutter-free kitchen.



