
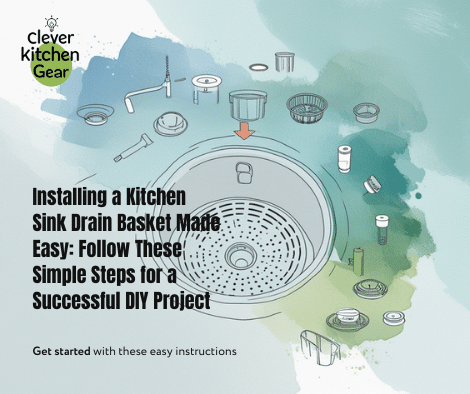
Stop Kitchen Clogs: Install a Drain Basket
Are you tired of slow-draining water? Does your sink clog often? A kitchen sink drain basket is the fix you need. This is a simple, easy upgrade. It stops food from blocking your pipes. This saves you money on future repairs.
In this guide, you will learn How to Install Kitchen Sink Drain Basket. Follow these steps quickly and correctly. You do not need to be a plumbing expert.
Keep reading to the end. You will have a sink that runs smoothly. Your kitchen work will be easier every day.
Tools And Parts You Will Need
You need the right items for this job. Getting them ready makes the work faster. This guide shows the tools. It also tells you how to pick the best basket.
Essential Tools
Gather these tools first. They help you work safely and fast.
- Adjustable wrench: Use this to tighten nuts.
- Plumber’s putty: Use this for sealing leaks.
- Pipe wrench: Good for large pipe fittings.
- Screwdriver: Needed for clamps and screws.
- Bucket: Use it to catch water spills.
- Cleaning cloth: Use this to wipe up spills.
- Utility knife: For cutting away old sealant.
Choosing The Right Drain Basket
Pick a basket that fits your sink size. Material is important for long life. Choose a design that is easy to clean.
| Type | Material | Good Points | Things to Check |
| Standard Basket | Stainless Steel | Strong and rust-proof. | Fits most common sinks. |
| Decorative Basket | Brass or Bronze | Has a nice, stylish look. | Needs special cleaning care. |
| Plastic Basket | Plastic | Costs less, very light weight. | Does not last as long. |
| Strainer Basket | Stainless Mesh | Catches tiny food bits well. | You must clean it often. |
Preparing The Sink Area
Get the sink area ready first. This helps you work safely. A clean space lets you work faster. This guide covers how to clear the area. It shows how to remove old parts.
Clearing The Workspace
Take everything out from under the sink. This gives you room to work. It protects your items from water.
- Empty the cabinet under the sink.
- Remove cleaning supplies and tools.
- Lay down a towel or a bucket.
- Turn off the water supply.
- Put a flashlight nearby to see better.
Removing Old Drain Components
Next, take out the old drain basket. Remove all related parts. This clears the way for the new basket.
| Old Part | Tool Needed | Helpful Tip |
| Drain Basket | Adjustable wrench | Loosen the locknut very slowly. |
| Rubber Gasket | Hands or screwdriver | Pull it off gently, do not tear it. |
| Drain Pipe | Pipe wrench | Turn it left to unscrew the pipe. |
| Plumber’s Putty | Putty knife | Scrape off all the old putty. |
Installing The Drain Basket
Installing the basket is important work. It helps water flow without problems. It stops debris from clogging the pipes. Follow these steps carefully. They help ensure a tight, leak-free fit.
Applying Plumber’s Putty
Putty makes a seal under the basket. This stops water from leaking under the sink. Roll some putty into a rope shape. Put the rope around the drain opening.
- Use enough putty to cover the hole.
- Make sure the putty rope is even.
- Press it lightly to remove air gaps.
Positioning The Drain Basket
Place the basket into the sink hole now. The putty should be under the basket edge. Push the basket down firmly. This creates a good seal. Check that the basket is centered.
- Line up the basket with the sink hole.
- Push down evenly. Do not tilt it.
- Check that the basket edge is flat.
Securing The Basket From Below
Go under the sink now. Put the rubber gasket on the threads first. Then add the metal washer. These parts hold the basket tightly. Screw on the mounting nut by hand. Then use a wrench to finish tightening. Do not tighten too much.
- Put the rubber gasket on first to stop leaks.
- Place the metal washer on top of the gasket.
- Screw the mounting nut on by hand.
- Use a wrench to tighten it firmly.
- Check that the basket is stable.

Credit: www.familyhandyman.com
Connecting The Drain Pipes
Connecting the pipes is the next step. It lets water flow out smoothly. Check that all parts fit well. Make sure there are no leaks. Tight pipes keep your sink working well.
Attaching The Tailpiece
The tailpiece links the basket to the drain pipe. It sends water down the pipe. Slide the tailpiece onto the basket bottom. Use a slip nut and washer to hold it.
-
Check the washer to prevent leaks.
-
Hand-tighten the slip nut first.
-
Line up the tailpiece with the pipe.
Tightening Connections
Tighten all nuts to stop leaks. Use your hands or a wrench with care. Do not tighten too much. That can break the parts. Test for leaks with water right away.
-
Tighten slip nuts firmly, but gently.
-
Use a wrench only if you must.
-
Test for leaks after tightening them.
-
Adjust any joint that drips water.
Testing For Leaks
Checking for leaks is very important. Leaks cause water damage and waste. This test finds weak spots early. Catching leaks saves time and money later.
Running Water Check
Turn on the faucet now. Let water run through the basket. Watch the drain area very closely. Look for any drips under the sink. Even small drops mean a leak.
-
Let water run for several minutes.
-
Check both hot and cold water if possible.
-
Watch all visible pipes and connections.
Inspecting Seals And Joints
Leaks often happen at seals and joints. Check these spots after running water. Look for loose fittings or bad washers. Tighten connections if needed. Avoid tightening them too much.
-
Check the rubber gasket under the basket.
-
Inspect the slip nut and washer on the pipe.
-
Feel around all joints for wet spots.

Credit: www.familyhandyman.com
Maintenance Tips
Keep your drain basket clean. This ensures good water flow. Good care stops clogs and bad smells. Simple care helps the basket last longer. Follow these tips to keep it working well.
Regular Cleaning
Clean the basket often. This stops food and grease buildup. It keeps the basket clean and fresh. Use mild soap and warm water. Rinse well and dry it before using.
-
Take the basket out of the sink.
-
Scrub it with a soft brush.
-
Use baking soda for hard stains.
-
Rinse it with warm water.
-
Dry it completely to stop rust.
Preventing Clogs
Stop food scraps from going down the drain. This prevents pipe clogs. Use the basket to catch big pieces. Empty it into the trash often. This keeps water flowing smoothly.
-
Do not pour any grease down the drain.
-
Use an extra sink strainer if you want.
-
Flush the drain with hot water weekly.
-
Use vinegar and soda for small clogs.

Credit: www.youtube.com
Questions People Ask
What tools do I need to install it?
You need a wrench and plumber’s putty. Also a screwdriver and a bucket. These help seal the drain basket well.
How can I stop leaks when I install it?
Apply putty around the basket edge. Tighten fittings well. Do not overtighten anything. This prevents damage and leaks.
How long does it take to install the basket?
It usually takes 30 to 60 minutes. It is a quick DIY project. Time depends on your skill level.
Can I install a drain basket myself?
Yes, most homeowners can do it. Use basic tools and these steps. Follow directions for a leak-free fit.
Conclusion
Installing your drain basket is simple. Start by getting your tools ready. Follow each step carefully. Make sure every part fits tightly. Check for leaks right away. This prevents future problems. Regular cleaning helps it last. This project saves you money.
You will feel good about home repairs. A good drain keeps your kitchen neat. Enjoy your clean, efficient sink now. Practice makes perfect. Anyone can do this with patience. Now, try more simple DIY projects. Happy fixing!


