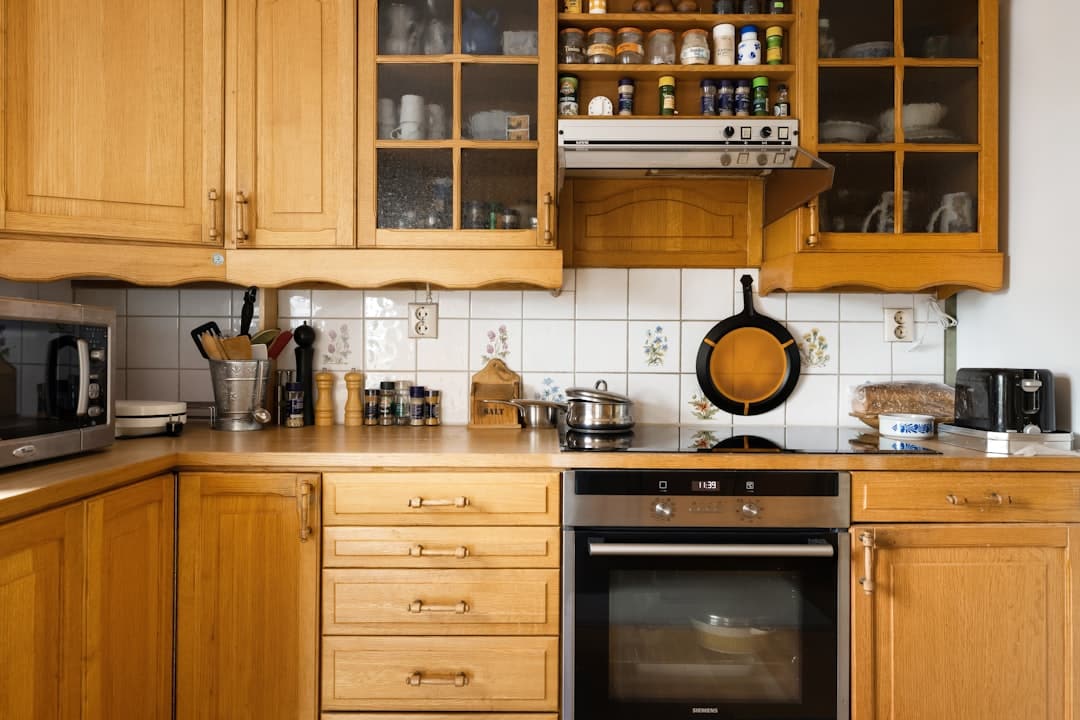
Are you ready to give your kitchen cabinets a fresh, elegant look without spending a fortune? Installing crown moulding is one of the easiest ways to add style and value to your kitchen.
Imagine transforming plain cabinets into stunning focal points that catch every eye. In this guide, you’ll discover simple, step-by-step instructions that anyone can follow—even if you’ve never done a home improvement project before. Keep reading, and you’ll soon have the confidence and know-how to make your kitchen look professionally finished and uniquely yours.
Tools And Materials Needed
Installing crown moulding on kitchen cabinets adds style and detail. You need the right tools and materials to do the job well.
This guide covers the essential tools, choosing the right moulding, and extra supplies you might need.
Essential Tools
Use these tools to measure, cut, and attach the crown moulding safely and accurately.
- Miter saw for precise angle cuts
- Measuring tape to get exact lengths
- Level to ensure straight installation
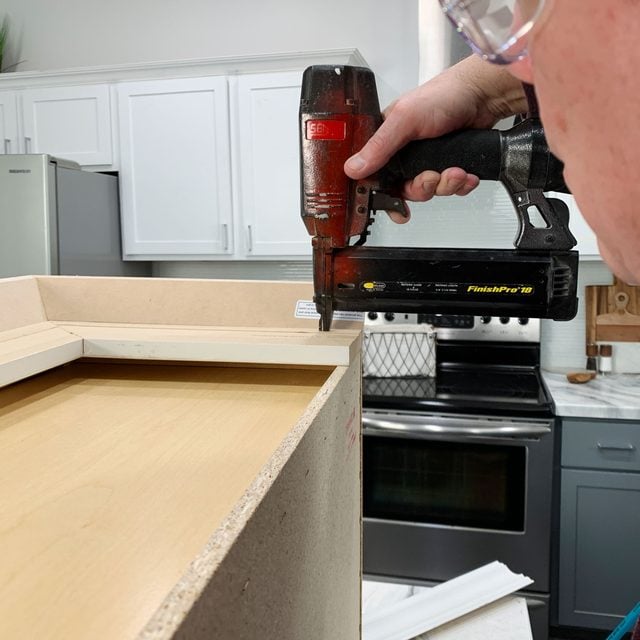
- Nail gun or hammer for fastening
- Stud finder to locate cabinet frames
- Caulk gun for finishing gaps
- Sandpaper to smooth cut edges
Choosing The Right Crown Moulding
Select moulding that fits your kitchen style and cabinet size. The right moulding improves the overall look.
Wood and MDF are popular choices. Wood offers a natural look, while MDF is budget-friendly and easy to paint.
- Wood moulding for a classic, durable finish
- MDF moulding for smooth surfaces and easy painting
- Size depends on cabinet height and room style
- Consider simple or detailed designs to match decor
Additional Supplies
Besides tools and moulding, have these supplies ready to complete your project smoothly.
- Wood glue for extra hold at joints
- Painter’s tape to protect surfaces during installation
- Wood filler to hide nail holes and gaps
- Primer and paint or stain to finish moulding
- Safety glasses and ear protection for cutting

Credit: www.thisoldhouse.com
Preparing The Cabinets
Before installing crown moulding on your kitchen cabinets, you need to prepare the surface. This makes sure the moulding fits well and looks clean.
Preparation involves cleaning, measuring, marking cut lines, and removing any obstacles. Each step helps the installation go smoothly.
Cleaning And Measuring
Start by cleaning the cabinet tops and edges. Remove dust, grease, and dirt with a mild cleaner and a soft cloth. Clean surfaces help the moulding stick better.
Next, measure the width and length of each cabinet section where you will add the moulding. Use a tape measure and write down the numbers carefully.
- Wipe cabinet surfaces clean
- Measure each cabinet top precisely
- Record the measurements on paper
- Double-check measurements for accuracy
Marking Cut Lines
Use your measurements to mark cut lines on the crown moulding pieces. Mark the lines with a pencil where you will cut to fit the cabinets.
Mark inside corners and outside corners clearly. Use a speed square or miter box to guide your cuts and get clean angles.
- Mark lines lightly to avoid permanent marks.
- Use a ruler for straight lines.
- Label each piece for easy assembly.
- Measure twice, cut once.
Removing Obstacles
Look for any obstacles on top of the cabinets. Remove items like vents, light fixtures, or cabinet handles that may block the moulding.
If needed, unscrew or carefully detach these obstacles. Keep screws and parts safe for reinstallation after the moulding is in place.
- Clear all items from cabinet tops
- Remove vent covers or light fixtures
- Take off any cabinet hardware in the way
- Store hardware safely for later use
Cutting The Crown Moulding
Cutting crown moulding for kitchen cabinets requires care and accuracy. Proper cuts help the moulding fit perfectly at the corners.
This guide will explain how to measure angles, use a miter saw, and handle inside and outside corners.
Measuring Angles
Measure the angle where two pieces of moulding will meet. Use a protractor or angle finder for best results.
Write down the angles clearly. This helps you cut the moulding at the correct tilt and length.
Using A Miter Saw
A miter saw lets you make precise angled cuts. Set the saw to the angle you measured earlier.
Always wear safety goggles and hold the moulding firmly. Cut slowly for a clean edge.
Handling Inside And Outside Corners
Inside corners need the moulding to be cut so the edges fit together tightly. Cut one piece with a 45-degree angle inward.
Outside corners require cuts that angle outward. Both pieces should meet to form a neat corner joint.
- Mark inside corners clearly before cutting
- Test fit moulding pieces before final installation
- Sand edges for a smooth finish
Credit: www.familyhandyman.com
Installing The Moulding
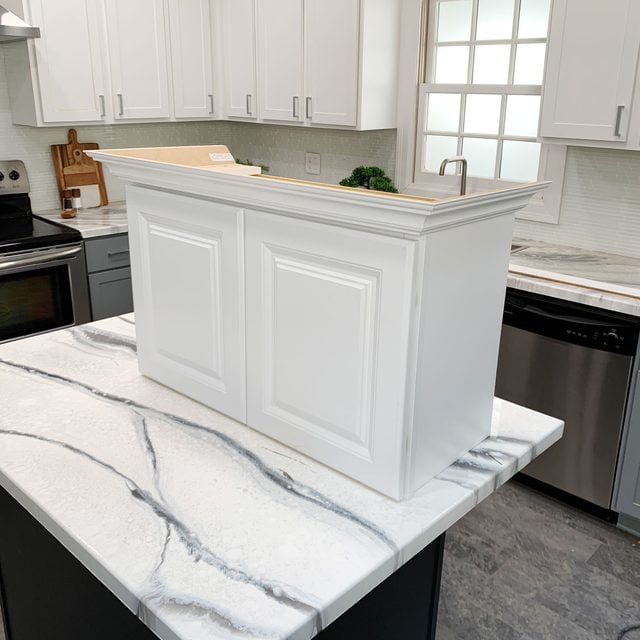
Installing crown moulding on kitchen cabinets adds a polished look. It covers gaps and makes the cabinets appear taller.
This guide helps you place and secure the moulding properly. It also shows how to fix gaps and seams.
Positioning The Moulding
Hold the crown moulding against the top edge of the cabinets. Make sure it fits tightly without blocking cabinet doors.
Check that the moulding lines up evenly along the cabinet tops. Use a level to keep it straight.
Securing With Nails Or Adhesive
Use finishing nails to attach the moulding to the cabinets. Nail into the cabinet frame for a strong hold.
If you prefer no holes, use a strong wood adhesive. Press the moulding firmly and hold it until it sticks well.
- Place nails every 12 to 16 inches
- Use a nail set to sink nails below surface
- Apply adhesive sparingly to avoid mess
- Clamp moulding in place if using glue
Dealing With Gaps And Seams
Fill small gaps with paintable caulk for a smooth finish. Run a thin line along edges and wipe off extra.
For seams between moulding pieces, use wood filler. Sand the filler once dry to blend it with the moulding.
- Use caulk for gaps between moulding and cabinet
- Use wood filler for joints between moulding pieces
- Sand and paint to match the moulding color
Finishing Touches
After installing crown moulding on kitchen cabinets, the final steps make the project look polished. These finishing touches include filling nail holes, sanding edges, and applying paint or stain.
Taking time on these details improves the overall appearance and helps the moulding blend with your kitchen decor.
Filling Nail Holes
Fill nail holes with wood filler to hide the fasteners. Use a putty knife to press the filler firmly into the holes. Let it dry completely before moving on.
- Choose a filler that matches the moulding color.
- Apply the filler smoothly and remove excess.
- Allow drying time as per product instructions.
- Check if the filler is flush with the moulding surface.
Sanding Edges
Sand the edges and filled areas to create a smooth surface. Use fine-grit sandpaper to avoid scratches. Sand gently until the surface feels even and ready for finishing.
| Sandpaper Grit | Purpose |
|---|---|
| 120-150 | Initial sanding of rough spots |
| 180-220 | Smooth sanding after filling holes |
| 320 | Final touch before painting or staining |
Painting Or Staining
Choose paint or stain that matches your kitchen cabinets. Apply evenly with a brush or small roller. Use light coats to avoid drips and allow drying between coats.
- Clean the moulding surface before painting or staining.
- Apply primer if using paint for better adhesion.
- Use a wood conditioner if staining to avoid blotches.
- Finish with a clear protective topcoat for durability.
Credit: www.familyhandyman.com
Common Mistakes To Avoid
Installing crown moulding on kitchen cabinets can improve your kitchen's look. Avoiding mistakes helps get a clean, professional finish.
Many beginners make errors that cause gaps or uneven edges. Learn the common mistakes to save time and effort.
Incorrect Measurements
Wrong measurements cause gaps and poor fitting. Measure twice to ensure accuracy before cutting any pieces.
Keep a tape measure and a pencil handy. Write down each measurement to avoid forgetting or mixing numbers.
- Measure the length of cabinet tops carefully
- Account for corners and angled sections
- Double-check measurements before cutting
Improper Cutting Angles
Crown moulding requires precise angle cuts to fit tight corners. Cutting at wrong angles leads to visible gaps.
Use a miter saw and set it to the correct angle. Practice on scrap pieces before cutting your actual moulding.
- Identify the angle of inside and outside corners
- Cut opposite angles for the two pieces that meet
- Test fit pieces before final installation
Skipping Surface Preparation
Not preparing cabinet surfaces causes poor adhesion and gaps. Clean and sand surfaces for the best results.
Remove dust, grease, and old paint. Smooth surfaces allow glue and nails to hold the moulding firmly.
- Clean cabinet tops with a damp cloth
- Sand rough or uneven areas gently
- Check for loose cabinet parts before installing moulding
Tips For A Professional Look
Installing crown moulding on kitchen cabinets adds style and value. Follow these tips for a neat, professional finish.
Small details make a big difference in how your cabinets look. Take your time and use the right techniques.
Choosing Complementary Moulding Styles
Pick a crown moulding style that matches your cabinet design. The moulding should blend well with the kitchen's overall look.
Simple styles work well with modern cabinets. More detailed moulding suits traditional kitchens.
- Match the moulding's color with cabinet paint or stain
- Keep proportions balanced; not too big or small
- Consider the room’s style and existing trim work
Using Caulk For Seamless Joints
Caulk hides gaps between moulding pieces and the ceiling or cabinets. It creates a smooth, clean look.
Apply caulk carefully after nailing the moulding in place. Use a damp finger to smooth the lines evenly.
- Choose paintable caulk for easy finishing
- Fill all gaps and seams fully
- Clean excess caulk before it dries
Maintaining Consistent Pressure During Installation
Keep steady pressure on the moulding while nailing it to the cabinets. This prevents gaps and ensures a tight fit.
Use clamps or have a helper hold the moulding if needed. Check alignment often as you work along the edges.
- Press moulding firmly against cabinet tops and corners
- Nail slowly and evenly to avoid splitting wood
- Adjust pressure if the moulding moves during installation
Frequently Asked Questions
What Tools Are Needed To Install Crown Moulding On Cabinets?
You need a miter saw, measuring tape, nail gun, wood glue, and a level. These tools ensure precise cuts and secure installation.
How Do You Measure For Crown Moulding On Kitchen Cabinets?
Measure the cabinet width and height carefully. Calculate angles using a protractor for accurate miter cuts. Accurate measurements prevent gaps.
Can I Install Crown Moulding Without Professional Help?
Yes, with proper tools and patience, you can install it yourself. Follow step-by-step instructions and take safety precautions for best results.
What Type Of Wood Is Best For Crown Moulding?
Choose hardwoods like oak or maple for durability and finish. Softwoods like pine are budget-friendly but less durable.
Conclusion
Installing crown moulding on kitchen cabinets adds elegance. It's a rewarding DIY project. With patience and the right tools, success is within reach. Measure carefully and cut precisely for the best fit. Use a ladder for safety while attaching moulding.
Ensure all pieces align seamlessly. Paint or stain the moulding to match your cabinets. This enhances the overall appearance. Take your time to achieve a professional look. Your kitchen will feel more refined and stylish. Enjoy your upgraded space and the satisfaction of a job well done.