

Crown Moulding on Kitchen Cabinets: Installation & Design Guide
Ready to transform your kitchen with a touch of elegance? Crown moulding can do just that, adding a sophisticated finish to your cabinets that you’ll love showing off.
But if you’re worried about the installation process, we’ve got you covered. How to Install Crown Moulding on Kitchen Cabinets Video guides you through each step clearly and confidently. In our step-by-step video, you’ll discover just how simple it can be to install crown moulding on your kitchen cabinets.
Whether you’re a DIY enthusiast or a first-timer, this guide is crafted just for you, helping you achieve a polished, professional look with ease.
You’ll learn the insider tips and tricks that make the process smooth and stress-free. Stick with us, and by the end of this article, you’ll feel confident and excited to give your kitchen a stunning new look. Ready to get started? Let’s dive in!
Tools And Materials Needed
Installing crown moulding on kitchen cabinets can improve their look. Having the right tools and materials makes the job easier and safer.
This guide lists all the basic tools and materials you will need before starting your project.
Measuring Tape
A measuring tape helps you get accurate lengths for the moulding pieces. Use a tape with clear markings for best results.
Measure the width and height of your cabinets carefully. Double-check your numbers before cutting.
Miter Saw
A miter saw cuts the moulding at precise angles. It is important for fitting the corners perfectly.
Set the saw to 45 degrees to make corner cuts. Make sure the blade is sharp for smooth edges.
Crown Moulding Material
Choose the type of crown moulding you want to install. Common materials include wood, MDF, and polyurethane.
Wood is sturdy but costlier. MDF is affordable and easy to paint. Polyurethane is light and moisture resistant.
Nail Gun Or Hammer And Finishing Nails
You need nails to attach the moulding to the cabinets. A nail gun makes the job faster and cleaner.
If you don’t have a nail gun, use a hammer with finishing nails. Be gentle to avoid damaging the moulding.
Wood Glue
Wood glue helps hold the moulding pieces together at the joints. It adds strength to the installation.
Apply glue on the cut ends before joining. Wipe off any excess glue before it dries.
Caulk And Caulking Gun
Caulk fills gaps between the moulding and cabinet or wall. It gives a smooth, finished look.
Use a caulking gun to apply the caulk evenly. Smooth the caulk with a wet finger or tool.
Sandpaper
Sandpaper smooths rough edges after cutting. It also prepares the surface for painting or staining.
Use fine-grit sandpaper to avoid scratches. Sand lightly until the surface feels smooth.
Paint Or Stain
Paint or stain the crown moulding to match your kitchen cabinets or decor. Choose a finish that resists moisture.
Use a brush or spray for even coverage. Allow enough drying time before installing the moulding.
Safety Gear
Wear safety glasses to protect your eyes from sawdust and flying debris. Use ear protection if using loud tools.
Use a dust mask to avoid breathing in fine particles. Always work in a well-ventilated area.
Preparing The Kitchen Cabinets
Before installing crown moulding on your kitchen cabinets, you need to prepare them well. Proper preparation helps the moulding fit perfectly and look clean.
This section explains how to clean and measure your cabinets and mark the cutting lines accurately.
Cleaning And Measuring
Start by cleaning the cabinets to remove dust and grease. A clean surface helps the moulding stick better and prevents gaps.
Next, measure the length of each cabinet edge where you will install the moulding. Use a tape measure for accuracy.
- Wipe cabinets with a damp cloth and mild soap
- Let cabinets dry completely before measuring
- Measure the top edges of all cabinets
- Write down each measurement clearly
Marking The Cutting Lines
Use the measurements to mark cutting lines on the crown moulding pieces. Accurate marks ensure the moulding fits the cabinet edges.
Use a pencil and a square tool to draw straight lines. Double-check the marks before cutting the moulding.
- Place moulding on a flat surface
- Mark the length needed with a pencil
- Use a square to draw straight cutting lines
- Confirm each mark matches your measurements
Cutting The Crown Moulding
Cutting crown moulding is key to fitting it neatly on kitchen cabinets. You need careful cuts for clean corners and smooth edges.
This guide explains how to cut crown moulding using a miter saw. It also shows how to handle inside and outside corners.
Using A Miter Saw
A miter saw helps cut crown moulding at the right angles. Set the saw to the exact angle before cutting.
Place the moulding upside down on the saw, as it will sit on the cabinet. Hold it firmly to avoid slips during the cut.
- Measure the length needed on the moulding.
- Set the miter saw to the correct angle, usually 45 degrees.
- Place the moulding upside down with the bottom against the fence.
- Hold the moulding firmly and make a smooth cut.
- Check the cut piece fits before moving to the next one.
Handling Inside And Outside Corners
Inside and outside corners need different angle cuts. Inside corners fit together like a box, outside corners wrap around.
Cut inside corners with opposing 45-degree angles. For outside corners, cut the angles so the moulding meets smoothly on the outside edge.
- Inside corners: Cut two pieces at 45 degrees, angled inward.
- Outside corners: Cut two pieces at 45 degrees, angled outward.
- Test fit both pieces before final installation.
- Use a coping saw for fine adjustments on inside corners.

Credit: www.youtube.com
Attaching The Moulding
Attaching crown moulding to kitchen cabinets adds a polished look. This process needs care to keep the moulding secure and aligned.
The two main steps are applying adhesive and nailing the moulding in place. Both steps work together to hold the moulding firmly.
Applying Adhesive
Use a strong wood adhesive to help the moulding stick to the cabinet edges. Apply the glue evenly along the back of the moulding.
- Clean the cabinet surface to remove dust and grease.
- Use a caulking gun to apply a bead of adhesive.
- Spread the glue evenly with a small brush if needed.
- Press the moulding firmly against the cabinet after applying glue.
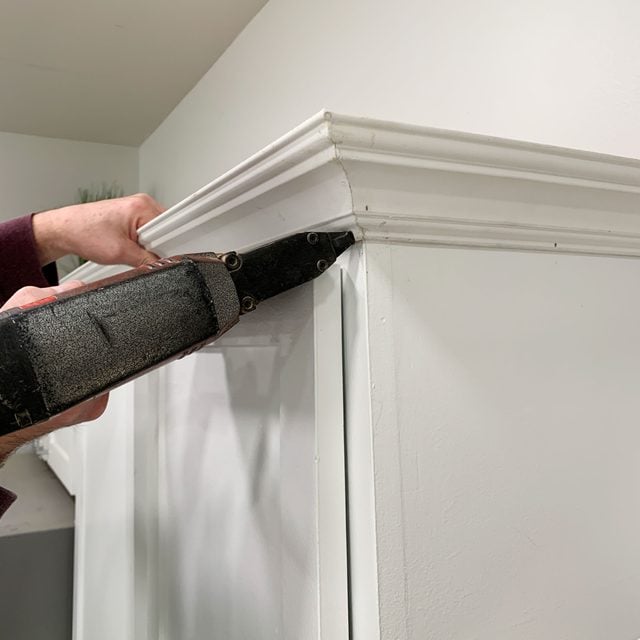
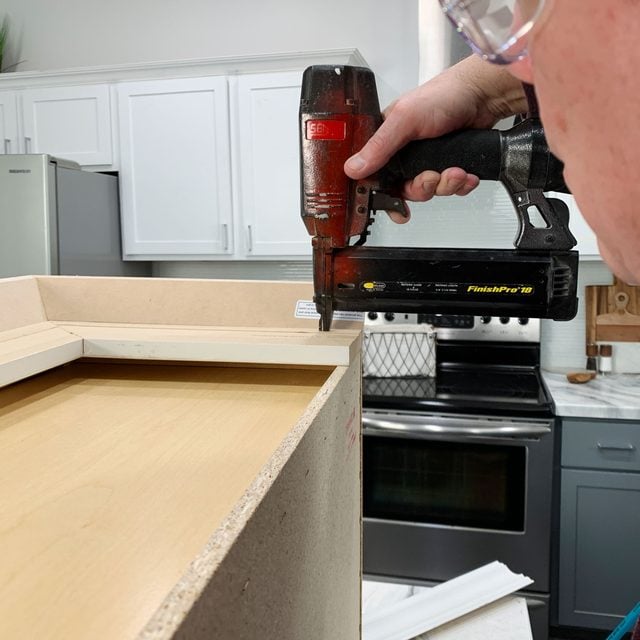
Nailing The Moulding In Place
After the adhesive is applied, use finishing nails to secure the moulding. Nailing keeps the moulding steady while the glue dries.
| Tool | Purpose |
|---|---|
| Brad nailer or hammer | Drive nails into moulding without splitting |
| Finishing nails (1 to 1.5 inch) | Hold moulding firmly against cabinets |
| Wood filler | Cover nail holes for a clean look |
| Sandpaper | Smooth filled nail holes after drying |
Filling And Finishing
After installing crown moulding on kitchen cabinets, filling and finishing create a smooth look. These steps hide nail holes and prepare the surface for paint.
Proper filling and sanding improve the final result and make your cabinets look polished and new.
Filling Nail Holes
Use wood filler or putty to cover nail holes left from attaching the moulding. Choose a filler that matches your cabinet color or paint.
- Apply the filler with a putty knife, pressing it into each hole.
- Remove excess filler by scraping the surface gently.
- Let the filler dry fully before sanding or painting.
- If needed, apply a second coat for deep holes.
Sanding And Painting
Sanding smooths the filled areas and prepares the moulding for paint. Use fine-grit sandpaper to avoid scratches.
| Tool | Purpose | Tip |
| Fine-grit sandpaper (220 grit) | Smooth filler and edges | Sand lightly to avoid damage |
| Primer | Seal surface before paint | Use a primer suitable for wood |
| Paint | Finish with desired color | Apply thin coats for best results |
After sanding, wipe off dust with a damp cloth. Apply primer first, then paint once the primer is dry. Use thin, even layers for a clean finish.
Credit: www.familyhandyman.com
Tips For A Professional Look
Installing crown moulding on kitchen cabinets can change the whole look. It adds a polished, finished style to your kitchen.
Follow these tips to make sure your moulding looks neat and fits well. Small details make a big difference.
Choosing The Right Moulding Style
Pick a moulding style that fits your kitchen design. Simple styles work well with modern kitchens.
For traditional kitchens, use detailed or layered moulding. Match the moulding size to the cabinet height.
- Use small moulding for short cabinets
- Choose wider moulding for tall cabinets
- Keep the style consistent with your kitchen
- Consider the ceiling height when selecting moulding
Common Mistakes To Avoid
Do not rush the cutting or measuring process. Wrong cuts cause gaps and uneven edges.
Avoid using too much glue or nails. It can damage the moulding or cabinets.
- Measure twice before cutting
- Use a miter saw for clean angled cuts
- Sand edges to avoid rough surfaces
- Check for level before nailing moulding
- Paint or stain moulding before installation
Credit: www.familyhandyman.com
Frequently Asked Questions
What Tools Are Needed To Install Crown Moulding?
You need a miter saw, measuring tape, nail gun, wood glue, caulk, and a ladder. These tools ensure precise cuts and secure installation on kitchen cabinets.
How Do You Measure For Crown Moulding On Cabinets?
Measure the length of each cabinet top edge accurately. Add extra length for miter cuts. Proper measurements prevent gaps and waste.
Can Crown Moulding Be Painted After Installation?
Yes, crown moulding can be painted after installation. Use primer first, then apply your chosen paint color. Painting enhances appearance and durability.
How Do You Cut Corners For Crown Moulding?
Use a miter saw to cut corners at 45-degree angles. For inside corners, use coping technique for tight joints. Accurate cuts ensure seamless corners.
Conclusion
Installing crown moulding on kitchen cabinets adds a nice touch to any space. The video guide makes each step clear and easy to follow. Take your time measuring and cutting for the best fit. Using the right tools helps the job go smoothly.
Small details can make a big difference in the final look. With patience and care, your cabinets will look more polished and elegant. Enjoy your improved kitchen and the satisfaction of a job well done. Try this project to add value and style to your home.


