
How to Hang a Kitchen Pot Rack Best Placement Ideas for 2026
Are you tired of cluttered kitchen cabinets and pots stacked everywhere? Hanging a kitchen pot rack can change the way you organize your cooking space, making it easier to find your favorite pans and freeing up valuable cabinet space.
If you’re wondering How to Hang a Kitchen Pot Rack, don’t worry—this guide will walk you through every step, so you can install your rack confidently and quickly. Keep reading, and soon you’ll enjoy a tidier kitchen that looks great and works even better.
Choosing The Right Pot Rack
Picking the right pot rack can save kitchen space and keep cookware organized. It helps you find pots quickly and adds style to your kitchen.
Consider your kitchen size, cooking habits, and décor when choosing a pot rack. This guide will help you decide on the best type, material, and size.
Types Of Pot Racks
Pot racks come in different styles to fit your kitchen layout. Some hang from the ceiling, others mount on walls or sit on counters.
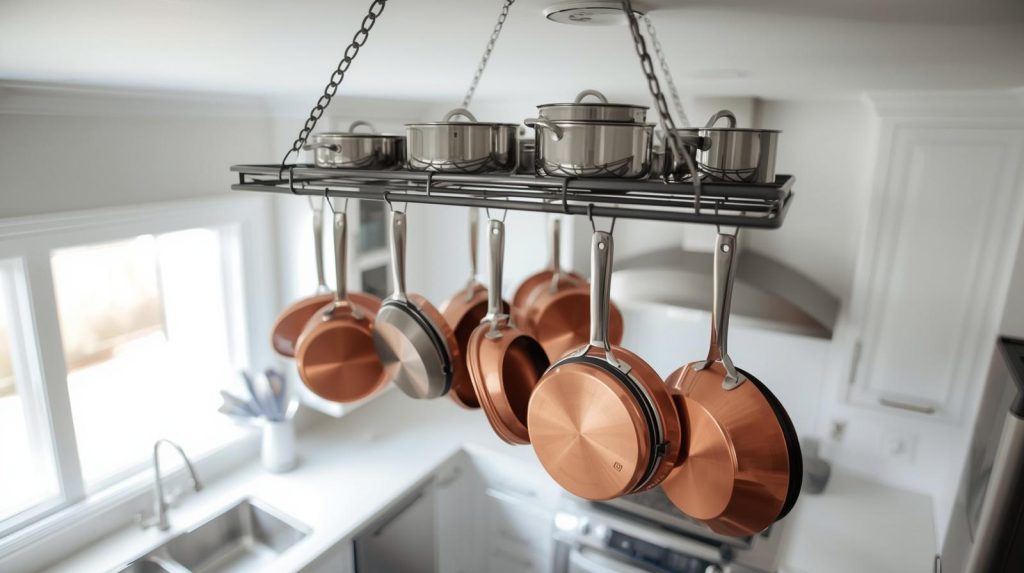
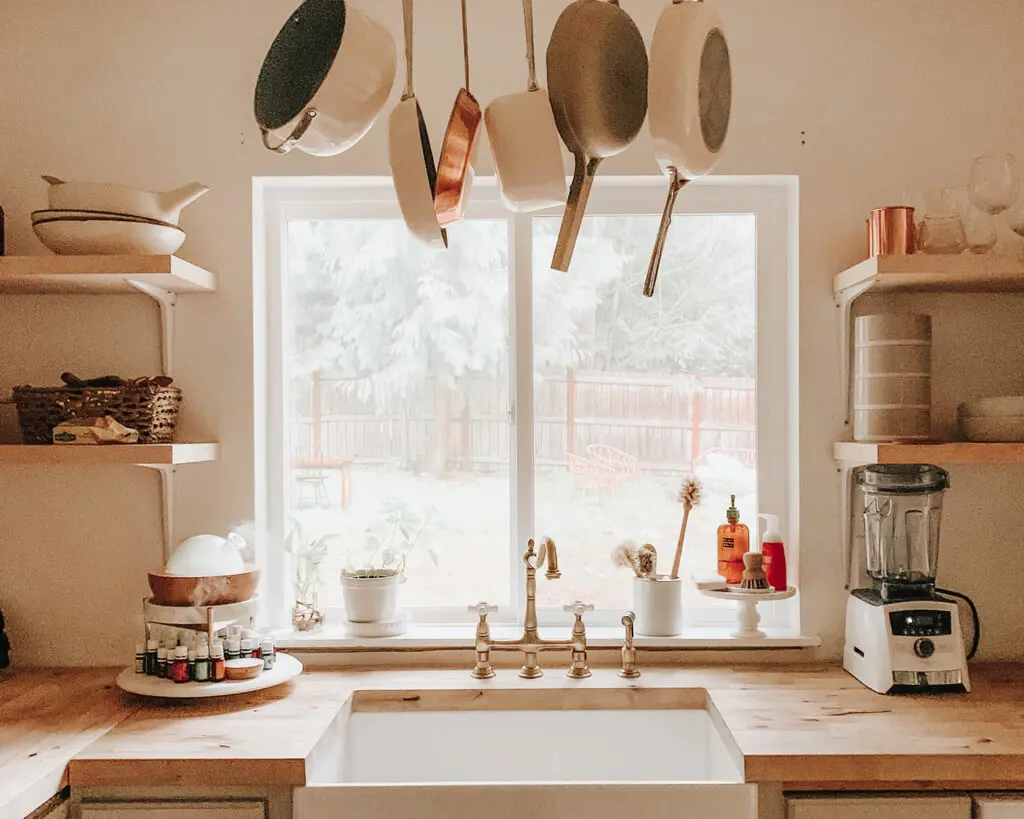
- Ceiling Pot Racks: Hang above islands or counters to save space.
- Wall-Mounted Pot Racks: Attach to walls for easy reach and display.
- Freestanding Pot Racks: Stand on the floor or counters without installation.
- Over-the-Cabinet Pot Racks: Hang on cabinet doors for small kitchens.
Material And Finish Options
Pot racks come in many materials that affect durability and look. Choose a finish that fits your kitchen style and lasts long.
- Steel: Strong and modern, resists rust with good coating.
- Wood: Warm and classic, but needs sealing to avoid damage.
- Wrought Iron: Sturdy with a traditional look, may need touch-ups.
- Aluminum: Lightweight and rust-proof, good for humid kitchens.
Size And Capacity Considerations
Choose a pot rack size that fits your kitchen space and holds your pots well. Too small racks can overcrowd; too large ones waste space.
Check the number of hooks and weight limit before buying. Make sure it supports all your cookware safely.
- Measure your available wall, ceiling, or counter space.
- Count your pots and pans to know hook needs.
- Look for racks with weight limits above your cookware weight.
- Consider extra space for future additions.

Credit: www.reddit.com
Selecting The Ideal Location
Choosing the right spot for your kitchen pot rack helps keep your space organized. It makes cooking easier and your kitchen safer.
Think about your kitchen’s design and daily use. This guide covers key points to find the perfect place.
Assessing Kitchen Layout
Look at your kitchen’s overall shape and where you usually work. The pot rack should not block movement or appliances.
- Keep the rack near your cooking area for easy reach.
- Avoid spots above countertops where you prepare food.
- Check for enough space so pots do not hit walls or cabinets.
- Make sure the rack does not block light or windows.
Measuring Ceiling Height
Measure from the floor to the ceiling before installing. The pot rack should hang at a safe height.
| Ceiling Height | Recommended Pot Rack Height |
| 8 feet (96 inches) | 72 to 78 inches from floor |
| 9 feet (108 inches) | 78 to 84 inches from floor |
| 10 feet (120 inches) | 84 to 90 inches from floor |
Ensuring Accessibility And Safety
Make sure everyone can reach the pots safely. Avoid low hanging racks near walking paths.
- Leave at least 40 inches of clearance below the rack for headroom.
- Secure the rack to ceiling joists or studs only.
- Keep pots organized by size and weight to prevent falls.
- Check your local building codes for any height or weight limits.
Gathering Necessary Tools And Materials
Hanging a kitchen pot rack needs the right tools and materials. Preparing these before you start saves time and effort.
Make sure you have everything handy to avoid interruptions. This guide lists what you need for a smooth installation.
Essential Tools List
These basic tools help you measure, mark, and fix the pot rack firmly on the ceiling or wall.
- Measuring tape to get accurate distances
- Pencil for marking drill spots
- Power drill with proper drill bits
- Screwdriver (manual or electric)
- Stud finder to locate ceiling joists or wall studs
- Level to ensure the rack hangs straight
- Step ladder for safe reach
Hardware And Anchors
Choosing the right hardware and anchors is key to support the weight of your pots and pans safely.
| Hardware | Purpose |
| Screws | Hold the rack securely to studs or anchors |
| Toggle bolts | Provide strong support in drywall without studs |
| Hooks or chains | Attach pots and adjust rack height |
| Mounting brackets | Help fix the rack firmly to the ceiling or wall |
Safety Gear
Protect yourself with basic safety gear while installing the pot rack. It reduces the risk of injury.
- Safety goggles to protect your eyes from dust and debris
- Work gloves to avoid cuts and scrapes
- Dust mask to prevent inhaling particles
- Non-slip shoes to prevent falls on ladders or slippery floors

Credit: www.amazon.com
Preparing For Installation
Installing a kitchen pot rack needs some planning. Preparation helps you hang the rack safely and securely.
Before you start, gather tools and check the ceiling. This makes the process smooth and easy.
Locating Ceiling Joists
Ceiling joists are wooden beams that hold the ceiling. You must find them to support the pot rack weight.
Use a stud finder to locate joists. Move it slowly along the ceiling until it signals a joist.
- Turn on the stud finder
- Place it flat on the ceiling
- Slide it slowly across the area
- Mark where it beeps or lights up
- Confirm by checking a second time
Marking Mounting Points
Mark where you will drill holes for hanging the pot rack. Use the joist marks as a guide.
Measure the rack’s mounting holes. Transfer these measurements to the ceiling, centering on the joists.
- Hold the pot rack up to the ceiling
- Align it with the joist marks
- Mark each mounting hole with a pencil
- Double-check measurements for accuracy
Pre-drilling Holes
Pre-drill holes where you marked the ceiling. This makes it easier to insert screws and prevents wood splitting.
Use a drill bit slightly smaller than the screws. Drill straight into the joists to the right depth.
- Select the correct drill bit size
- Place the drill bit on the mark
- Keep the drill straight and steady
- Drill a hole deep enough for the screw
- Repeat for all mounting points
Installing The Pot Rack
Installing a kitchen pot rack can free up cabinet space and keep your cookware handy. Proper installation ensures it will hold weight safely.
Follow these steps carefully to attach the rack securely to your ceiling.
Attaching Mounting Brackets
Start by locating ceiling joists using a stud finder. Mounting brackets must be screwed into these joists for strong support.
- Mark the bracket positions on the ceiling where joists are found.
- Drill pilot holes for screws at the marked points.
- Use screws and a drill to fix the brackets tightly to the joists.
Securing The Rack To The Ceiling
Next, lift the pot rack and align it with the mounted brackets. Secure it with the provided hooks or bolts to keep it in place.
| Tool | Purpose |
|---|---|
| Drill | To create holes and drive screws |
| Screwdriver | To tighten screws or bolts |
| Stud Finder | To locate ceiling joists |
| Level | To ensure rack hangs evenly |
Checking Stability
After installation, test the rack’s strength by gently applying pressure. Make sure it does not wobble or feel loose.
- Hang a few pots and check for movement.
- Tighten any loose screws or bolts immediately.
- Confirm the rack is level and secure before full use.
Arranging Pots And Pans
Hanging a kitchen pot rack helps save space and keeps pots ready to use. Organizing pots and pans well makes your kitchen look neat.
Good arrangement also protects your cookware from damage. Use smart ideas to hang pots and pans safely.
Weight Distribution Tips
Balance the weight on your pot rack to avoid strain. Place heavy pots near the rack’s strong points or ceiling anchors.
Keep lighter pans and lids on the ends. This helps the rack stay steady and safe.
- Hang heavy pots close to the center
- Use strong ceiling anchors for heavy loads
- Distribute weight evenly on all sides
- Keep lightweight pans at rack edges
Using Hooks And Accessories
Choose hooks that fit your pots’ handles well. S-hooks work for most pots and pans.
Use accessories like racks or shelves for lids and smaller items. This keeps everything in one place and easy to reach.
- Use S-hooks for easy hanging and removal
- Add racks for lids and utensils
- Try magnetic strips for metal lids
- Use adjustable hooks for different pot sizes
Maintaining Organization
Group pots and pans by size or type. This makes finding the right one quick and simple.
Keep frequently used pots in front. Store less used ones at the back or higher up.
- Sort pots by size for easy access
- Place daily-use pots in front
- Store specialty pans at the back
- Check and reorganize regularly
Troubleshooting Common Issues
Hanging a kitchen pot rack can be tricky. Some problems may come up during or after installation.
This guide helps you fix common issues like weak ceilings, wrong rack height, and wobbling racks.
Dealing With Weak Ceilings
Weak ceilings can make your pot rack unsafe. You need to find strong support before hanging.
Use a stud finder to locate ceiling joists. If no joists are available, use heavy-duty anchors made for drywall.
- Locate ceiling joists with a stud finder
- Use toggle bolts or molly bolts for drywall
- Consider adding a wooden board between joists for extra support
- Never hang a heavy rack from just drywall without anchors
Adjusting Rack Height
Set the rack height so pots are easy to reach and don’t block light or cabinets.
Measure the space from the ceiling to the pots. Adjust the chains or rods to get the right height.
- Leave enough space above counters for tall pots
- Keep the rack low enough to reach comfortably
- Make sure the rack does not block kitchen lights
- Use adjustable chains or rods for easy changes
Handling Wobbly Installations
A wobbly rack can cause pots to fall. Check all connections and supports to fix this.
Tighten screws and bolts. Make sure the rack hangs evenly and all supports share the weight.
- Check all screws and tighten if loose
- Verify the rack hangs level using a spirit level
- Balance the pot weight evenly across the rack
- Replace any bent or damaged hardware parts
Maintaining Your Pot Rack
Keeping your kitchen pot rack in good shape helps it last longer. Regular care prevents damage and keeps it looking nice.
Follow simple steps to clean, inspect, and fix your pot rack. This keeps it safe and functional every day.
Regular Cleaning
Clean your pot rack often to remove dust and grease. Use a soft cloth and mild soap for best results.
- Wipe all surfaces gently with a damp cloth
- Use a mild detergent if grease builds up
- Dry the rack completely to stop rust
- Clean hooks and chains carefully
Inspecting For Wear
Check your pot rack for damage each month. Look for loose screws, bent hooks, or worn chains.
| Part | Signs of Wear | Action Needed |
| Hooks | Bent or cracked | Replace immediately |
| Chains | Rust or weak links | Swap out or tighten |
| Screws | Loose or missing | Tighten or replace |
| Rack frame | Cracks or bends | Inspect closely, repair if needed |
Making Repairs
Fix small problems as soon as you find them. This stops bigger damage and keeps your rack safe.
Use these repair tips:
- Tighten loose screws with a screwdriver.
- Replace broken hooks with new ones of the same size.
- Remove rust with sandpaper and apply a rust-resistant paint.
- Check wall anchors and reinstall if they are loose.
Credit: www.carawayhome.com
Frequently Asked Questions
What Tools Are Needed To Hang A Kitchen Pot Rack?
You need a drill, stud finder, screwdriver, measuring tape, pencil, and anchors or screws. These tools ensure secure and accurate installation of your pot rack.
How To Find The Best Spot For Pot Rack Installation?
Choose a location near your cooking area with enough ceiling space. Use a stud finder to locate ceiling joists for secure mounting.
What Weight Can A Kitchen Pot Rack Hold Safely?
Most pot racks hold between 30 to 50 pounds. Always check manufacturer guidelines and secure racks into ceiling joists for maximum support.
How High Should A Pot Rack Be Hung In Kitchen?
Hang the rack 30 to 36 inches above the countertop. This height provides easy access without obstructing your workspace.
Conclusion
Hanging a kitchen pot rack can be easy and rewarding. It saves space and keeps your pots within reach. Remember to measure the area and mark the spots. Use a sturdy drill and secure the hooks properly. Always double-check the stability before adding pots.
This ensures safety and durability. A well-placed pot rack adds style to your kitchen. It’s practical and makes cooking more enjoyable. Follow these steps for a neat and organized kitchen. Enjoy your new, clutter-free cooking space!


