
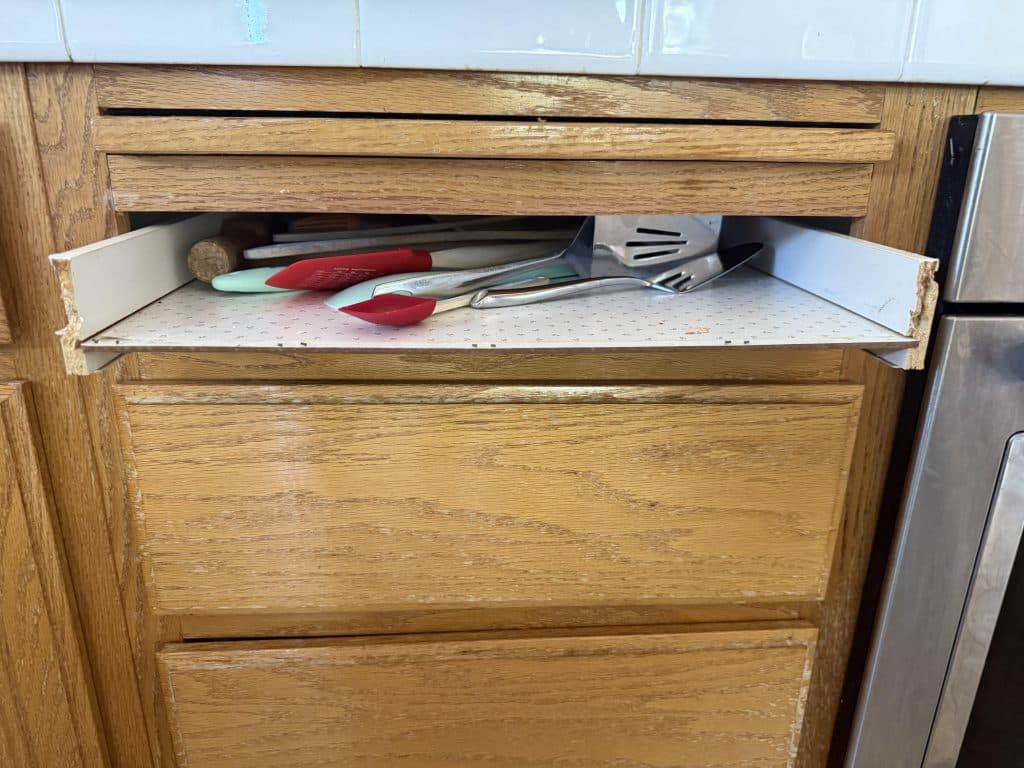
Have you ever pulled open a kitchen drawer only to find it stubbornly jammed or noticeably crooked? You’re not alone.
A warped kitchen drawer is a common household nuisance, turning the simple task of retrieving a fork into a frustrating ordeal. The good news? You don’t have to live with this inconvenience. Fixing a warped drawer is easier than you might think, and you can tackle it yourself without any specialized tools.
Imagine the satisfaction of having smoothly gliding drawers once again. Ready to transform your kitchen experience? Let’s dive in and restore order to your culinary space.

Credit: www.reddit.com
Identify The Warped Drawer
Knowing if your kitchen drawer is warped helps you fix it quickly. Warping can cause problems with opening and closing the drawer.
Look closely at the drawer to spot any signs of bending or twisting. This will guide your repair process.
Signs Of Warping
Warped drawers show clear signs that affect their use and appearance. Watch for these common problems.
- The drawer sticks or gets stuck when opening or closing.
- Gaps appear between the drawer and the cabinet frame.
- The drawer front looks bent or twisted.
- Uneven gaps around the drawer edges.
- Noise or scraping sounds when moving the drawer.
Common Causes
| Cause | Description |
| Moisture | Water exposure causes wood to swell and warp. |
| Heat | High temperatures can dry out wood unevenly. |
| Poor Quality Wood | Low-grade materials warp more easily over time. |
| Heavy Loads | Too much weight can bend the drawer structure. |
| Improper Installation | Misaligned parts lead to uneven stress on drawer. |
Gather Necessary Tools
Fixing a warped kitchen drawer needs the right tools. Gathering these tools first saves time and makes the job easier.
Knowing what to use helps you avoid mistakes. It also protects the drawer from damage.
Basic Tools Needed
These tools are essential for fixing a warped drawer. Make sure you have them ready before starting.
- Screwdriver (flathead and Phillips)
- Clamps to hold the drawer in place
- Measuring tape or ruler
- Wood glue
- Sandpaper (medium and fine grit)
- Hammer or rubber mallet
- Wood filler
Optional Supplies
These supplies can help improve your repair or make the process smoother. Use them if you have them on hand.
| Supply | Use |
| Wood clamps | Hold glued parts firmly while drying |
| Painter’s tape | Protect drawer surfaces from glue |
| Putty knife | Apply wood filler smoothly |
| Heat gun or hair dryer | Help soften wood for reshaping |
| Protective gloves | Keep hands safe from glue and splinters |
Remove The Drawer
Fixing a warped kitchen drawer starts with safely removing it. Taking out the drawer carefully prevents damage.
Prepare your workspace before removal to make the process easier and safer.
Safe Removal Techniques
First, clear out the drawer completely. This reduces weight and helps avoid spills. Then, check the type of drawer slides you have.
- Fully extend the drawer until it stops.
- Look for release levers or tabs on the slides.
- Press or lift the levers to unlock the drawer.
- Gently pull the drawer straight out.
- If stuck, wiggle the drawer slightly to loosen it.
Preparing The Workspace
Clear a flat surface near the cabinet to place the drawer. This keeps your tools and parts organized and easy to reach.
| Item | Purpose |
|---|---|
| Flat surface | Hold the drawer securely |
| Screwdriver | Remove screws if needed |
| Soft cloth | Protect drawer from scratches |
| Flashlight | See inside slides and tracks |
Fix Warping With Moisture
Kitchen drawers can warp due to changes in moisture. Fixing warping with moisture helps restore the drawer’s shape. This method uses water and heat to gently reshape the wood.
Apply moisture carefully to avoid damaging the drawer. Use gentle techniques to make the wood expand and flatten back to its original form.
Using Damp Cloths
Damp cloths add moisture to the warped area. This softens the wood fibers and makes them easier to reshape. Use a clean cloth with just enough water to be damp, not soaking wet.
Place the damp cloth on the warped part of the drawer. Leave it for 30 minutes to let the wood absorb moisture. Check the drawer often to avoid too much water damage.
- Use a cotton or microfiber cloth
- Wring the cloth to remove extra water
- Cover only the warped section
- Do not let water drip inside the drawer
- Repeat if needed after drying
Applying Gentle Heat
Heat helps the wood fibers expand and relax after adding moisture. Use gentle heat to avoid cracking or burning the drawer. A hairdryer works well for this task.
Hold the hairdryer about 6 inches away from the wood. Move it slowly over the damp area for 5 to 10 minutes. This will help the wood return to its flat shape.
- Set hairdryer to low or medium heat
- Keep moving to avoid overheating
- Test heat on a small spot first
- After heating, press the wood flat if possible
- Let the drawer dry completely before use
Straighten With Clamps
A warped kitchen drawer can cause trouble when opening or closing. You can fix it by straightening the wood with clamps. Clamps apply pressure to reshape the drawer slowly and safely.
This process takes time and patience but can restore the drawer’s shape without replacing it. Use the right clamping methods and allow enough drying time for the best results.
Clamping Methods
Start by loosening the drawer and removing it from the cabinet. Find the warped area and place the clamps to apply steady pressure. Use soft pads to avoid damage to the wood.
Try these clamping approaches:
- Use bar clamps across the warped section for even pressure.
- Apply a corner clamp if the drawer front is bent.
- Attach a straight piece of wood as a brace and clamp it to the warped area.
- Adjust clamps gradually to avoid cracking the wood.
Drying Time Tips
Keep the drawer clamped for at least 24 hours. This allows the wood fibers to reset in the new shape. Avoid rushing the process to prevent the warp from returning.
Check the drawer after drying and remove the clamps carefully. If needed, repeat the clamping and drying steps for better results.
- Place the drawer in a dry, warm area during drying.
- Keep humidity low to prevent new warping.
- Do not use the drawer until it is fully dry and straight.
Reinforce Drawer Structure
Fixing a warped kitchen drawer starts with making its structure stronger. This helps the drawer hold its shape and last longer.
Two key ways to reinforce the drawer are adding support pieces and using wood glue correctly. These methods improve stability and reduce warping.
Adding Support Pieces
Support pieces add extra strength to the drawer frame. Place them where the wood is weak or bends easily.
- Cut thin strips of wood to fit inside the drawer corners.
- Attach support strips along the bottom edges to stop sagging.
- Use screws or nails to secure the pieces tightly.
- Make sure support pieces do not block the drawer slides.
Using Wood Glue
Wood glue helps hold joints firmly and prevents movement that causes warping. Apply glue to all contact surfaces before assembly.
| Glue Application Tip | Reason |
|---|---|
| Apply glue evenly on edges and corners | Ensures full bonding and less warping |
| Use clamps to hold parts until dry | Keeps pieces tight during glue curing |
| Remove excess glue before drying | Prevents rough surfaces and staining |
Prevent Future Warping
Warped kitchen drawers can cause problems opening and closing. To avoid this, prevent future warping. Keep your drawers dry and well cared for.
Good care helps your drawers last longer. Use simple steps to stop wood from bending or twisting.
Proper Humidity Control
Wood changes size with moisture in the air. High humidity makes wood swell. Low humidity makes it shrink. Both can warp drawers.
Keep your kitchen’s humidity level steady. Aim for 30% to 50% humidity. Use a dehumidifier or air conditioner if needed.
- Use a hygrometer to check humidity
- Ventilate kitchen to reduce moisture
- Fix leaks and spills quickly
- Avoid placing drawers near heat or water sources
Regular Maintenance
Check your kitchen drawers often for signs of damage. Clean and dry them regularly. This stops moisture build-up that causes warping.
Apply wood oil or wax once or twice a year. This keeps the wood strong and less likely to warp.
- Clean drawer surfaces with a dry cloth
- Lubricate drawer slides for smooth movement
- Repair loose parts or cracks early
- Reapply protective finish to wooden drawers

Credit: www.reddit.com

Credit: www.reddit.com
Frequently Asked Questions
How Do I Know If My Kitchen Drawer Is Warped?
A warped drawer appears uneven or sticks when opening and closing. Check for gaps or misalignment in the drawer front. Warping often causes the drawer to not slide smoothly or close properly.
What Tools Are Needed To Fix A Warped Drawer?
You need sandpaper, clamps, wood glue, a screwdriver, and a damp cloth. These tools help straighten, smooth, and secure the warped parts. Having them ready ensures an efficient repair process.
Can I Fix A Warped Drawer Without Replacing It?
Yes, minor warps can be fixed by sanding, clamping, and gluing. For severe warps, replacement might be necessary. Assess the damage before deciding on repair or replacement.
How Long Does It Take To Fix A Warped Drawer?
Fixing a warped drawer typically takes 30 minutes to a few hours. Drying time for glue may add extra hours. Time varies based on warp severity and repair method.
Conclusion
Fixing a warped kitchen drawer is easier than it seems. Small steps make a big difference. Use the right tools and materials for best results. Take your time to ensure the drawer fits well again. Regular care can keep your drawers working smoothly.
This simple repair saves money and extends drawer life. Give your kitchen a neat, functional look once more. Try these tips and enjoy a better kitchen space.



